Winter prep for any hive is about timing and protection. In Maine, many beekeepers finish cold-season work by Thanksgiving to help colonies survive. Installing a reliable metal screen at the entrance keeps mice and other rodents out while letting bees fly freely.
A good mouse guard is simple to fit and built from sturdy wire mesh. It blocks chewing and prevents intruders from nesting in honey-filled frames. Check that no mice have already moved in before you secure the perimeter.
The installation is a quick step in annual beekeeping routines. Many pros use an entrance reducer or similar add-on and link installation tips from an entrance management guide for best results: entrance management.
For Langstroth users, choosing a durable option matters. See recommended fittings at a reliable source for specific models and fitment ideas: best mouse guard for Langstroth hives.
Key Takeaways
- Install a sturdy mouse guard before winter to protect honey and frames.
- Use metal mesh that lets bees pass while keeping rodents out.
- Finish entrance work by late fall, following local timing like Thanksgiving in Maine.
- Inspect entrances for existing mice prior to fitting guards.
- Combine guards with entrance management for best hive ventilation and safety.
Understanding the Importance of Hive Protection
Protecting hive structure starts long before the first frost arrives. Simple prevention saves comb, frames, and honey that bees build all year. Small invaders cause large losses if entrances remain undefended.
The Impact of Rodents on Comb Integrity
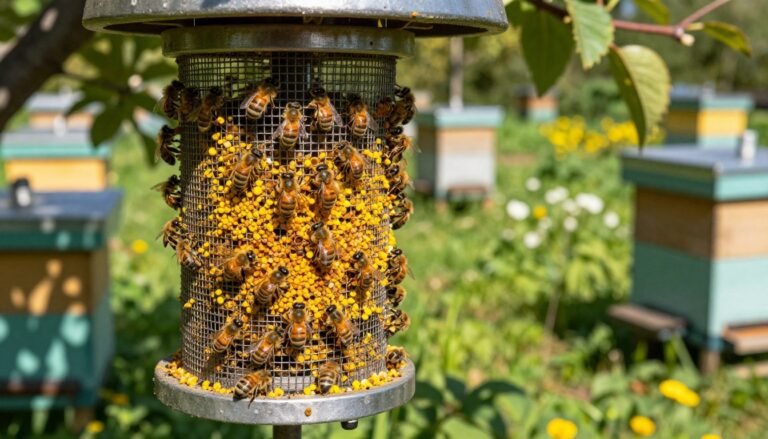
Mice and other rodents chew through wax and wood to make nests. This destroys comb and spoils honey stores. A dedicated beekeeper knows comb is one of the hive’s most valuable assets.
Using durable materials matters. I use 1/2-inch metal mesh from hardware stores because this wire mesh keeps mice out while resisting chewing.
Benefits of Proper Ventilation
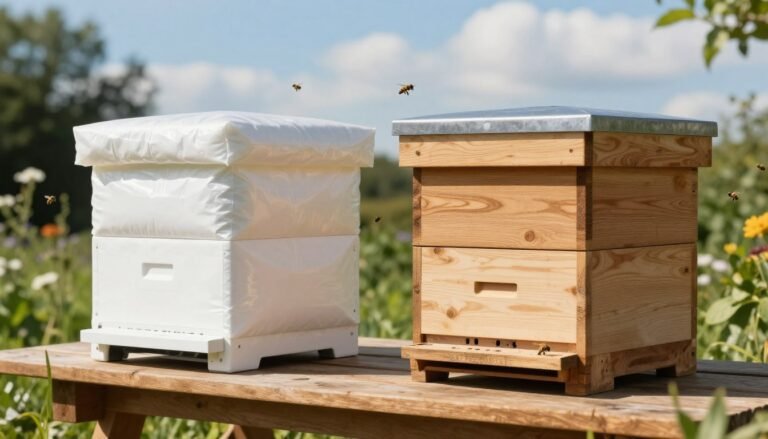
Proper airflow supports colony health. Wire guards let bees breathe and reduce moisture that damages frames. Good vents and quality mouse guards preserve brood and adult populations during cold spells.
Key advantages:
- Prevents rodents from nesting in draft-free boxes.
- Protects comb and honey that bees worked to produce.
- Maintains hive integrity with secure, breathable mesh.
How to Add a Mouse Guard Without Blocking Drones
A narrow, well-aligned slot gives bees needed access and denies mice the warm shelter they seek. Place the screen at hive eye level so workers and drones can enter while small rodents cannot squeeze in.
Make sure the guard entrance sits flush against the box. Small gaps invite mice and defeat the purpose of the mesh. Check alignment on both sides and adjust before fastening.
Practical tips:
- Measure the opening so the slot allows drone wingspan yet blocks rodents from entering.
- Use a sliding plate for seasonal adjustment; it lets beekeepers widen access as needed.
- Confirm airflow remains adequate; good ventilation lowers moisture risk during winter.
Fall is prime time to secure entrances because mice scout for warm hives. For placement ideas and entrance management, see this short guide on hive placement and practical notes at entrance use.

Essential Tools and Materials for Installation
Good preparation shortens installation time and reduces disturbance to the colony. Gather quality parts and basic tools before opening the box.
Selecting Durable Metal Mesh
Choose 1/2-inch hardware cloth for long-lasting protection. This metal wire resists chewing and maintains airflow for bees.
Cut sizes: a standard 10-frame Langstroth needs 28 squares by 10 squares. An 8-frame hive requires 24 squares by 10 squares.
Choosing Between Screws and Nails
Many beekeepers prefer screws because they reduce vibration and disturbance during installation. Screws also allow later removal if adjustments are needed.
Tip: Use stainless or coated screws with a pilot hole to protect the wood and keep the board intact.
Measuring for Your Specific Hive Size
Measure the entrance and bottom board before you cut the mesh. Double-check dimensions; precise fit means full rodent protection and proper access for bees.
| Item | Purpose | Recommended |
|---|---|---|
| Hive tool | Pry bottom board and boxes | Steel hive tool |
| Wire cutters & drill | Trim mesh and fasten screws | Standard wire cutters, cordless drill |
| Hardware cloth (1/2″) | Entrance barrier | Metal mesh, cut per frame size |
| Screws | Secure mesh flush to board | Stainless or coated screws |
Place the finished guard so it sits flush against the bottom board and blocks rodent access while letting bees pass. For placement ideas and layout planning, see this note on entrance use and an apiary planning guide.
Verifying Hive Safety Before Securing the Entrance
A careful internal check prevents surprises when you secure the entrance for winter. Use your hive tool to pry the bottom board slightly and look for signs of nests or droppings.
Make sure you have a second person nearby. A full hive can weigh between 175 and 260 pounds, and tipping the box safely requires help.
Work in short steps. Shine a flashlight under the frames and inspect each cavity. Look for mice or other rodents clinging to comb so you do not trap them during installation.
If you find an intruder, evict it with a stick or wire before you fit the guard. This keeps the bees safe and prevents inhumane trapping under the barrier.
Final checks: confirm clear access to the bottom board and proper clearance around frames. Once the hive is verified clean, proceed to guard the entrance with your chosen metal or plastic barrier.

For practical notes on placement and seasonal use, see this short guide on entrance use and an apiary planning reference for layout tips.
Common Mistakes to Avoid During Setup
Small installation errors at the entrance can turn a simple guard into a long-term hassle. Fixing those issues later often means disturbing the hive and stressing the bees. Follow correct plate placement and spacing for smooth operation.
Improper placement of nail plates is the top culprit. Install plates on the side of the box, never above the opening. That prevents nails from striking the frame and keeps frames removable.
“Follow a ‘z’ pattern for plate layout so the guard slides in and out without binding.”
The next frequent error is spacing plates too close together. If plates are tight, the guard will not slide and you will fail to keep mice out. When plates sit correctly, you are still allowing bees free movement while blocking rodents.
- Do not nail through the box into the frame; it ruins frames and complicates inspections.
- Adjust side plates if the guard feels loose; a snug fit keeps guards secure all year.
- Plan placement so you can open the hive easily and manage frames without extra disturbance.
For practical tips on entrance use and seasonal setup, see this short resource: entrance use.
Final Thoughts on Winterizing Your Apiary
Securing entrances before hard weather arrives gives colonies their best chance. Finish winter prep by Thanksgiving when possible. A sealed entrance helps the hive hold heat and cut drafts.
Install durable metal mesh and check fit once more. A good mouse guard protects honey and comb from hungry rodents. For layout and wind protection ideas, see windbreak strategies.
Take time for one last inspection this year. Proper installation saves hardware work in spring and keeps bees safe. With careful timing, your beehive will enter winter ready for the next season.
FAQ
What is the best way to install a mouse guard and still allow drones to come and go?
Use a metal or heavy-gauge wire mesh with staggered holes sized around 9–10 mm. Attach the mesh at the hive entrance using short screws or stainless-steel staples placed on the side of the box so bees retain full access while rodents are excluded. Leave the bottom area slightly raised as an entrance ramp so drones and worker bees can pass but mice cannot nest in the bottom board.
Why protect the hive from rodents during winter?
Rodents seek warmth and chew comb and frames, which damages honey stores and brood. Proper protection keeps the colony intact through cold months, preserves honey and comb, and lowers stress on bees. A good guard also reduces the need for frame repairs in spring.
How does a guard affect hive ventilation and bee traffic?
A well-designed guard uses mesh or wire that maintains airflow and lets drones and workers pass. By choosing breathable materials like metal mesh and avoiding solid blocks, you retain ventilation benefits while keeping rodents out. Position the guard so it does not sit flush against the entrance board, allowing normal bee orientation and traffic.
What materials should I use for a durable installation?
Pick galvanized or stainless-steel mesh for rust resistance, plus corrosion-resistant screws. Use a hive tool and a measuring tape to ensure precise fit. Avoid flimsy materials like cardboard or thin plastic that degrade and invite pests.
Should I use screws or nails when fitting the guard?
Screws are preferable because they hold mesh securely and allow future removal without splitting wood. Use short, rust-resistant screws placed outside the flight path. Nails can work but often loosen, especially in wooden hive boxes exposed to freeze-thaw cycles.
How do I measure for a guard that fits my hive model?
Measure the entrance width, height, and the outer face of the bottom board. Cut mesh to overlap the opening by at least 1 inch on each side for anchoring. Confirm the mesh hole size matches drone dimensions so drones can access while mice cannot.
What should I check before securing the entrance permanently?
Verify bees can pass through, confirm ventilation is unchanged, and inspect for brood or honey near the entrance. Test during active hours to watch traffic patterns. Use a hive tool to gently open and observe before final fastening.
What common mistakes reduce effectiveness of the guard?
Avoid placing nail plates or mesh too high or too low, which can create gaps rodents exploit. Don’t use mesh with holes that are too large or flimsy materials that sag. Also, don’t block upper ventilation or cover the entrance completely; that harms bee movement and airflow.
Can I retrofit a guard to existing hives and supers?
Yes. Measure each hive and cut mesh to fit individual entrance heights. Use short screws and attach on the side board so you can remove frames or supers with no interference. Retrofitting works for standard Langstroth boxes, nucs, and top-bar hives with minor adjustments.
When is the best time of year to install the guard?
Install before cold weather and before rodent activity peaks, typically in late fall. You can also fit guards year-round after ensuring bee traffic remains normal. For winterizing, secure the guard and check insulation and ventilation at the same time.
How do I maintain the guard and surrounding hardware?
Inspect mesh annually for corrosion or gaps, tighten screws if loose, and replace damaged sections. Clean accumulated debris from the bottom board and check the mesh after storms. Proper maintenance prolongs service life and protects frames and comb.
Will the guard interfere with honey extraction or frame access?
No, if installed on the external entrance or bottom board edge it won’t block internal frames or honey supers. Place fasteners on the side of the box and keep the guard removable so you can perform inspections and extract honey with a hive tool and minimal disturbance.