Spotting an unhealthy brood pattern is one of the first signs that a hive needs attention. During routine inspection, beekeepers often find young stages that look off-color or sit oddly at the bottom of brood cells. These signs can point to sacbrood, European foulbrood, American foulbrood, chalkbrood, or mite-related syndromes.
A healthy colony shows a uniform brood pattern with few gaps. If you see an odd number of affected spots, take a photo and note frames and combs for records. Quick tests, like the ropiness test for AFB, help confirm serious threats that need immediate treatment or inspector involvement.
For a clear overview of common brood conditions and diagnostic tips, refer to this practical guide on brood conditions at the university extension site: brood condition guide.
Key Takeaways
- Inspect hives in early spring and document abnormal brood with photos.
- Look for off-color or oddly positioned young stages at the bottom of the cell.
- Use field tests like the ropiness check to screen for American foulbrood.
- Chalkbrood often forms dry mummies; sacbrood shows a canoe posture.
- Severe mite infestations and viruses can collapse a colony within weeks.
- Keep sanitation and record-keeping to limit spread and plan treatment.
Understanding Brood Development
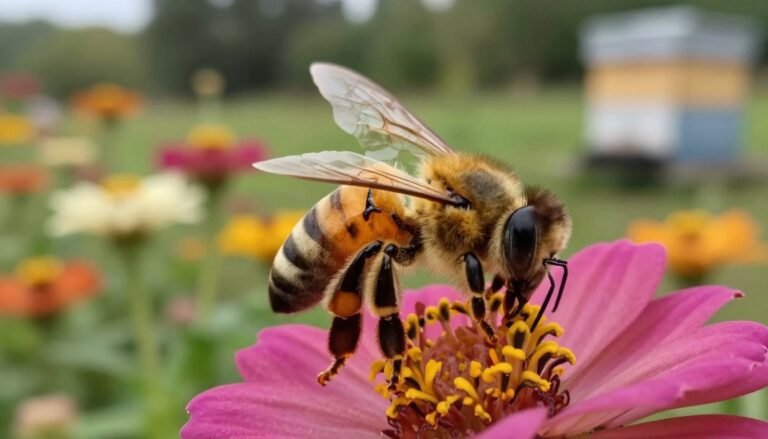
A robust comb area will look densely filled with developing stages and an even pattern across frames. This visual cue tells a beekeeper the queen is laying steadily and the colony is progressing through normal growth.
Healthy Brood Patterns
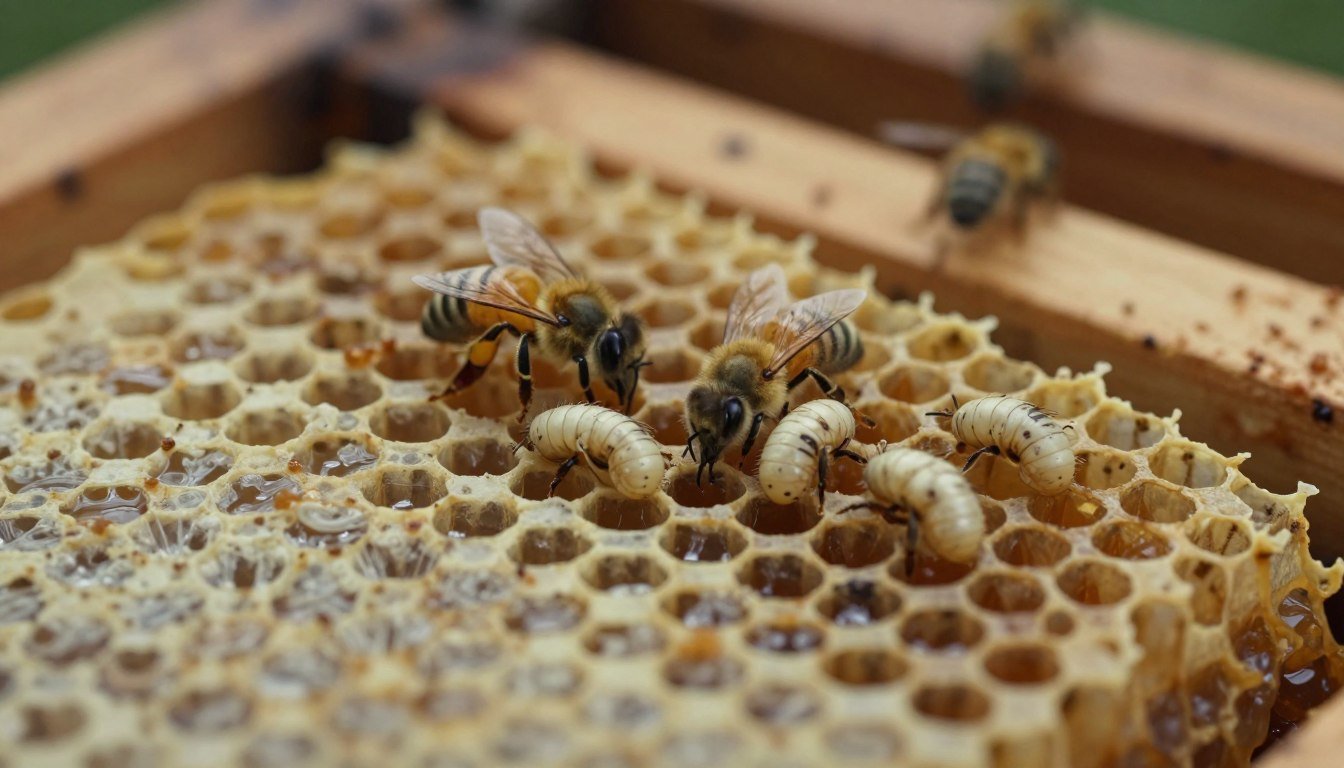
Healthy brood appears as glistening, pearly white young with a visible orange gut line along the back. A good brood pattern has nearly every adjacent cell occupied by developing bees, producing a compact patch on the comb.
Larval Growth Stages
The bee begins life as an egg, then becomes a soft larva that nurses feed until it fills the brood cells and begins to pupate. Pupae are the transition phase when the larva changes gradually into an adult; their color shifts from white to darker tones as eyes and body parts form.
“Monitor frames over several weeks to spot changes early and compare to reference photos.”
| Stage | Appearance | Time (approx.) |
|---|---|---|
| Egg | Small, upright, translucent | 3 days |
| Larva | Pearly white, orange gut line | 6 days |
| Pupa | Color darkens; adult features emerge | 12 days |
For field-level diagnostic guidance, see the field diagnosis of honey bee brood.
Identifying Dead Larvae in Uncapped Cells Causes
Spotting abnormal spots on brood combs lets a beekeeper act before a small problem grows. A careful frame-by-frame inspection helps narrow the likely cause and guides treatment.
Key visual clues include discolored or watery young pulled from a cell, scattered or streaked patches, and odd postures. Sacbrood often yields a baggy, liquid feel with a darker end when removed.
American foulbrood is the most severe and may require extreme measures because the bacterial spores persist for decades. European foulbrood shows up under stress and usually affects very young stages, but it is less lethal.
Mites drive many colony losses by spreading viruses that weaken workers and brood. Record everything: take a clear photo of affected frames and note time of year, hive location, and queen status.

- Confirm before treating: contact your local inspector for diagnosis.
- Break the brood cycle or improve nutrition to manage some infections.
- Sanitation and new foundation reduce repeat problems across hives.
For a practical diagnostic reference and chilled brood comparison, see identifying chilled brood.
American Foulbrood Symptoms
A single frame with irregular, sunken cappings can point to a serious bacterial problem in the colony. Look for perforated lids, a greasy, discolored look to the brood, and a spotty brood pattern that breaks the normal compact patch on frames.
Adult workers spread spores while cleaning, so this disease can move quickly through hives. The bacteria Paenibacillus larvae resists heat and cold, and old woodenware may harbor viable spores for decades.
If you smell a foul odor during a spring inspection or see dark, hard scale stuck to the bottom of a cell, quarantine the apiary and contact your state inspector right away. Many states require infected hives to be destroyed and burned on site to stop spread.
The Ropiness Test
Perform a simple field test: stir a suspect dead larva with a clean toothpick and slowly pull it out. If the tissue strings out up to about 3/4 inch, that ropiness is a strong sign of American foulbrood.
- No antibiotic is a cure; drugs may mask symptoms but not eliminate spores.
- Quarantine and reinspect other hives after any positive finding.
- Never reuse unknown old equipment; spores persist for years.
For further guidance on legal and control steps, see your state apiary resources and this reference on American foulbrood. Also review general brood disease prevention tips at prevent chalkbrood.
European Foulbrood Characteristics
European foulbrood stems from the bacterium Melissococcus plutonius and strikes when a colony is under stress. It often appears during spring buildups after a hard winter, when many older bees and a weakened queen make the hive vulnerable.
Infected young die before capping and may curl or twist low in the cell. These remains do not rope like American foulbrood; workers often pull out the rubbery scale over time.
A spotty brood pattern is a common sign, though early cases can be subtle. Look for off-white, yellow, or brown stages and patchy combs across frames.
Treatment and management favor non-chemical options for many beekeepers. The shook-swarm method breaks the brood cycle, while replacing old brood combs removes a bacterial reservoir.
If medication is needed, a licensed veterinarian must prescribe antibiotics now. Always consult an apiary inspector for confirmation and next steps.

| Sign | What to look for | Action |
|---|---|---|
| Twisted young | Curled appearance before capping | Photograph frames, consult inspector |
| Rubbery scale | Remains removable by workers | Replace combs, consider shook swarm |
| Spotty brood pattern | Patchy or scattered brood | Improve nutrition, monitor weekly |
For detailed guidance and regional protocols, see European Foulbrood resources. Also review how varroa impacts hive resilience at varroa resistance signs.
Sacbrood Virus Indicators
Sacbrood often shows itself when young brood adopt a canoe-like pose with the head angled toward the cell rim. This posture is a quick visual clue during an early spring hive check.
The infected larva contains a granular, bag-like fluid and the head commonly blackens first as decomposition begins. Workers may perforate cappings and remove remains, leaving a patchy brood pattern on frames.
Transmission happens when nurse bees pass contaminated brood food to the young, so hygiene and strong colony management matter most. There is no practical medical cure, so focus on prevention and genetics.
- Immediate steps: cage the queen for two weeks to halt new brood exposure and let the colony recover.
- Longer term: requeening with resistant stock often clears sacbrood over the year.
- Sanitation: clean equipment and monitor adjacent hives to limit spread.
For regional guidance and detailed protocol, consult these sacbrood resources and keep a clear photo record of affected frames for follow-up.
Chalkbrood Fungal Infections
Chalkbrood is a fungal disease caused by Ascosphaera apis that makes young brood turn into hard, chalky mummies.
These mummies may be white, gray, green, or black. You often find them on the bottom board or at the hive entrance. Finding them on the landing board shows housecleaning bees are removing infected brood.

Cool, damp weather in early spring gives the fungus an edge. The fungus competes with larvae for food and grows fluffy mycelia over the dead tissue. Strong colonies with many workers clear infected material faster and limit spread.
Management focuses on colony strength and hygiene. Improve ventilation, raise hives off wet ground, and replace old brood combs. There is no medication, so cleaning woodenware and keeping colonies vigorous over the year is key.
| Sign | When Seen | Recommended Action |
|---|---|---|
| Chalky mummies on board | Early spring, cool damp days | Remove mummies, clean bottom board, raise hive |
| Patchy brood | Several weeks during cool weather | Improve ventilation, boost nutrition |
| Recurring infection | Multiple years or hives affected | Replace combs, sterilize tools, requeen if weak |
Stonebrood and Aspergillus
You may spot stonebrood by a yellow ring near the larva’s head and very firm mummies that resist crushing. This fungal problem is caused by Aspergillus and shows up when soil spores reach a stressed colony.
The hardened remains often appear on the bottom board or by the hive entrance as workers clean out affected brood. Mummies take on a yellow, green, or black film and feel rock-like compared to chalky fungal pieces.
Beekeepers should take care handling infected frames. Fungal spores can irritate the lungs, so wear a mask and dispose of heavily infected comb by burning when advised by an apiary inspector.
- Prevention: keep hives off the ground, improve ventilation, and boost nutrition so the queen and workers stay strong.
- Action: monitor frames regularly and remove or destroy severely infected combs to limit spread.
- Consult: if you suspect an outbreak, contact your state inspector for confirmation and safe treatment guidance.
Black Queen Cell Virus
Queen rearing seasons can reveal a quiet but damaging virus that targets developing queens. Black Queen Cell Virus (BQCV) typically shows during heavy queen production in early spring.
The wax wall around a sealed queen may look dark and oily. This visual cue often signals pupal mortality due to the virus.
BQCV is linked to high nosema levels and thrives when colonies face stress. Nurse bees likely transmit the infection through brood food, so breeder hives must be strong and clean.
Workers and drones can carry the virus without clear signs. Varroa mites have tested positive for BQCV, but mites are not the main vector.

- Monitor: inspect queen cups and look for dark, oily appearance.
- Manage: keep breeder colonies low in nosema and limit queen production spikes in spring.
- Record: photograph affected frames and track success rates to spot patterns over the year.
“Select healthy stock and maintain strong hives to reduce the impact of BQCV.”
Bald Brood and Wax Moths
A telltale sign of wax moth pressure is straight rows of exposed pupae where the wax has been eaten away. This pattern appears when Galleria mellonella tunnels through comb and leaves neat scars across brood patches. Worker bees often remove the moth caterpillars and open affected cells to catch the pests.

Bald brood is not a disease. The young inside exposed pupae usually finish development and emerge as adults. Still, the symptom shows a hive that needs help and tighter defense against opportunists.
- Prevention: keep strong, compact hives and avoid excess empty space that invites moths.
- Routine: inspect frames often and replace old, damaged comb to reduce attraction.
- Action: consolidate weak colonies so bees can guard comb and limit moth spread.
Small patches of bald brood need watchful care, not panic. Take a photo of frames for records, check during spring and winter, and consult local beekeeping resources if damage grows over weeks or the colony weakens.
Hygienic Behavior in Colonies
Hygienic behavior is a genetic trait where bees uncap and remove diseased or mite‑infested pupae from brood cells.
This trait helps a hive manage disease pressure over time. Breeders are selecting queens that produce hygienic offspring to boost resistance across hives.
During an inspection, you may see adult bees chewing down pupae or carrying out odd bits of comb. That activity is usually a good sign — the colony is cleaning itself.
Hygienic bees often uncap at random, unlike the straight‑row pattern left by wax moths. The behavior seems tied to odor cues from affected brood, so workers target sick brood fast.
“Promoting hygienic stock reduces the need for chemical treatment and improves long‑term resilience.”

- Selection: choose queens from colonies that show strong cleaning behavior.
- Support: give adequate honey and space so bees can express the trait.
- Monitor: photograph frames and note activity over weeks to confirm the pattern.
Parasitic Mite Syndrome
Parasitic Mite Syndrome (PMS) appears when heavy mite pressure combines with a high viral load and the colony rapidly declines.
Beekeepers will notice a spotty brood pattern and off-color larvae visible low in some brood cells. Workers may carry sick pupae out and the number of adult bees falls quickly.

Varroa may be seen feeding on young or crawling across sealed brood. Deformed Wing virus often accompanies PMS and produces flightless bees that cannot sustain the hive.
- Act fast: break the brood cycle and apply an effective mite treatment.
- Consolidate frames and reduce space so remaining bees can guard the queen and brood.
- Monitor mite counts through the year to prevent future collapses and check for secondary diseases.
| Sign | What to look for | Immediate action |
|---|---|---|
| Spotty brood | Scattered capped gaps and poor brood pattern | Inspect frames, test mite levels |
| Feeding mites | Varroa on young or sealed brood | Apply approved treatment, isolate if needed |
| Deformed adults | Flightless bees and shrunken wings | Requeen, boost nutrition, treat for mites |
“PMS signals an unsustainable mite population and needs urgent management.”
The Role of Varroa Mites in Hive Collapse
High mite pressure often leaves hives with honey still stored and only a few weak brood patches. Varroa populations climb as the bee population grows, and the mite‑per‑bee ratio can spike in the fall.
Large colonies can support an astronomical number of mites. That load often triggers rapid failure during winter or late season, when bee numbers contract.

Signs of Mite Infestation
Watch for spotty brood, flightless bees, and a thin cluster when there should be strength. Sifting debris from the bottom board often reveals many dead mites.
Postmortem Hive Analysis
After a collapse, inspect comb and entrance for scavengers, note honey left behind, and look for white guanine deposits on brood cell rims.
- Check debris: dead mites on the bottom provide clear evidence of heavy infestation.
- Look at brood: a small remaining patch suggests mites overwhelmed the colony.
- Learn and act: perform regular monitoring and follow up with proven treatment.
For guidance on monitoring after treatment, review post-treatment mite counts to refine your management each year.
Conducting a Field Inspection
Start each hive check with a quiet approach and clear light so you can read the brood pattern without startling the bees.
Timing matters. Inspect in early spring and again in autumn when you prepare hives for winter. These checks reveal how the queen is laying and whether the colony is building strength.
Work calmly and bring the right tools: smoker, hive tool, brush, and a notebook or phone for photos. Hold each frame so sunlight hits the lower wall of cells; this makes off-color or oddly placed young stages easier to spot.
If you find anything unusual, document the frame number, location, and pattern. Inexperienced beekeepers should review safe beekeeping practices before collecting samples or handling bees.

| Check | What to look for | Action |
|---|---|---|
| Brood pattern | Uniform patch, few gaps | Note queen status; photograph frames |
| Unusual stages | Off-color or oddly placed young | Document location; consider lab sample |
| Tools & hygiene | Clean hive tool, sterile gloves | Prevent spread between hives |
- Be familiar with the signs of major brood diseases so you can act fast.
- When unsure, contact local apiary officers or an inspector for guidance.
- Regular, careful inspections are the best way to keep a healthy, productive apiary.
When to Contact an Apiary Inspector
Early consultation with an apiary inspector can prevent a local problem from spreading to nearby hives or farms.
Submit samples to a lab when you suspect a serious brood disease. Inspectors guide proper sampling and can confirm diagnoses that affect how you manage equipment and stock.
If you cannot identify odd signs on comb or notice a rapid decline in a colony, call your local inspector. They explain legal steps, including reporting requirements for regulated threats.

“Reporting a suspected infection is not failure — it is stewardship for your apiary and the wider beekeeping community.”
- Why call: inspectors have lab access and specific experience with bees and hive diseases.
- What to provide: clear photos, frame location, and recent queen history help speed diagnosis.
- Legal guidance: some findings require containment or destruction to protect other hives.
- Support: new keepers benefit from building a relationship with local experts.
Best Practices for Hive Sanitation
Good sanitation is the foundation of long-term hive health and disease prevention. Keep routines simple and consistent so your bees face fewer pathogens and stressors.
Scrape and clean woodenware after inspections and sterilize hive tools between colonies to avoid cross‑contamination. Replace old, dark comb on a regular schedule and fit new foundation when practical to lower buildup of spores and residues.
Keep hives off damp ground and improve ventilation to reduce mold and fungal growth. Treat each hive as an individual unit; do not move frames or tools between boxes without cleaning first. When a colony fails, deep‑clean or retire equipment before reuse.

- Maintain a clean apiary: remove debris and discourage scavengers.
- Sterilize tools between inspections to prevent spread.
- Replace old comb on a schedule to reduce contaminants.
- Elevate and ventilate hives to cut moisture-related problems.
- Track timing: record number of days between checks and note queen changes.
For regional protocols and detailed steps, consult the disease management and guidelines for the honey bee.
Conclusion
A reliable routine of short inspections keeps small issues from growing into losses. Regular checks and basic sanitation protect your hive and help spot trouble early.
Identify suspicious signs quickly and act to preserve colony strength. Watch for mite pressure and any odd patch that points to weakening brood. Note: keep photos and simple records each visit.
If you are unsure about what you see, contact a local apiary inspector for advice. Requeening, good nutrition and timely action over several days will help hives recover and support a healthy queen.
FAQ
Why are there dead larvae in uncapped beehive cells?
If you find dead brood in open cells, the colony may be fighting disease, parasites, or nutritional stress. Check for irregular brood patterns, pests at the comb edges, and the presence of adult bees that appear lethargic. Early spring and post-winter colonies often show problems as workers try to rear new brood. Inspect frames and the hive entrance for signs of mites, wax moths, or foul-smelling combs.
What does a healthy brood pattern look like?
Healthy comb shows compact, even cappings across brood frames with few empty cells. Larvae should be pearly white and positioned on one side of the cell. A queen laying well produces a solid pattern with minimal patchiness. Regular inspections help you track changes over weeks and spot issues before they spread.
How do larval growth stages affect inspections?
Larvae pass from egg to pupa over several days, so timing matters. Newly laid eggs are tiny and upright; larvae fill the cell in their early days and are fed by nurse bees. Missing or shriveled larvae at specific ages can point to particular problems like viruses or mites. Use a brood chart to compare expected stages during your inspection.
What causes brood to show symptoms of American foulbrood (AFB)?
AFB bacteria infect pupae and produce foul-smelling, sunken cappings and a brownish, ropey mass when probed. Colonies often show spotty brood patterns and rapid decline in population. If you suspect AFB, don’t move frames between hives and contact your state apiary inspector immediately for testing and mandatory control steps.
How do I perform the ropiness test for AFB?
Use a sterile matchstick or toothpick to probe a suspicious cell and gently pull the contents. AFB often produces a sticky, rope-like strand. That result warrants lab testing. Handle frames carefully, burn contaminated combs where required, and follow local regulations for treatment or destruction.
What are common signs of European foulbrood (EFB)?
EFB typically causes twisted or displaced larvae with sour odor and yellow to brown discoloration. Cappings may be sunken or perforated. EFB often appears in stressed colonies—young queens, poor nutrition, or cool weather increase risk. Treatment options include antibiotics where legal and management changes to reduce stress.
How does sacbrood virus present in brood?
Sacbrood causes larvae to die in an upright position, forming a sac filled with fluid that later dries into a dark scale. Affected cells often remain uncapped. Colony symptoms vary; some recover with improved nutrition and strong adult populations, while others need requeening and supportive measures.
What are indicators of chalkbrood fungal infections?
Chalkbrood turns larval remains into hard, white to gray mummies that may appear in and near the hive or on bottom boards. Brood pattern becomes patchy as workers remove mummified larvae. Poor broodnest temperature control and damp spring weather favor this fungus. Improve ventilation and avoid excessive humidity in the hive.
What is stonebrood and how does Aspergillus affect colonies?
Aspergillus fungi cause stonebrood, producing dark, brittle larval mummies that resemble small stones. Affected brood often sits under partially opened cappings. Stonebrood is less common but linked to stress and poor hygiene. Clean combs and maintain colony strength to reduce risk.
How does Black Queen Cell Virus (BQCV) show up in colonies?
BQCV targets queen larvae, causing darkened, shriveled queen cells and premature failure of queen rearing. Beekeepers may notice multiple failed queen attempts and reduced colony vigor. Testing and management—like replacing poor queens and improving hygiene—help control spread.
What causes bald brood and damage from wax moths?
Bald brood appears when workers strip cappings to remove diseased or parasitized larvae; this can also expose comb to wax moths. Wax moth activity often follows weak colonies or stored equipment, leaving webbing and tunnels. Maintain strong colonies, store equipment properly, and use traps when needed.
What is hygienic behavior and how does it affect brood survival?
Hygienic bees detect and remove diseased or parasitized brood, leaving spotty, uncapped cells but reducing pathogen spread. Selective breeding for hygienic traits helps colonies control issues like American foulbrood and varroa-transmitted viruses. During inspections, note whether workers actively remove affected brood.
What is Parasitic Mite Syndrome (PMS) and what are its signs?
PMS is a cluster of symptoms from heavy Varroa destructor loads and associated viruses. Look for spotty brood patterns, multiple dead larvae at various stages, and a weak adult population. Varroa often leads to deformed or prematurely killed pupae and higher winter losses. Regular mite monitoring is essential.
How do varroa mites contribute to hive collapse?
Varroa mites feed on pupae and transmit viruses that weaken immune responses. Over time, high mite levels reduce adult longevity and brood viability, causing colony decline. Timely treatments, integrated pest management, and monitoring help prevent collapse.
What are reliable signs of mite infestation during an inspection?
Look for deformed winged adults, spotty brood, mites on adult bees or drone pupae, and high counts on sugar shake or alcohol wash tests. Check bottom boards and brood combs for mites or abnormal brood coloration. Record counts and treat when thresholds are exceeded for your region.
How do you conduct a proper field inspection for brood problems?
Wear protective gear and open the hive on a calm, warm day. Remove frames one at a time, looking at brood pattern, cappings, adult bee behavior, and pests. Take photos and notes for follow-up. Limit time away from the cluster and replace frames gently to avoid chilling brood.
When should I contact an apiary inspector?
Contact your state apiary inspector if you find signs of American foulbrood, unusual mortality, or unknown pathogens. Inspectors can perform lab tests, advise mandatory actions, and help prevent regional spread. Early reporting protects neighboring beekeepers and commercial operations.
What are best practices for hive sanitation to reduce brood issues?
Rotate and replace old combs every few years, clean tools between hives, and sterilize equipment when required. Store supers off the ground, control wax moths in stored equipment, and burn or dispose of contaminated comb per local rules. Maintain strong nutrition and monitor for mites regularly.