Managing a deadout calls for clear steps and solid experience. A careful, practical approach helps protect your apiary investment and keeps the site safe for years.
This short guide outlines best practices for sanitizing equipment used in beekeeping. It focuses on methods that respect the material and avoid damage while reducing pathogen risks.
Simple inspection and gentle treatment extend the life of frames and minimize future issues. Prioritize safety, follow recommended products, and record what worked for future reference.
Clean gear and a planned routine support long-term hive health and make reestablishing colonies easier. With modest effort and good judgment, you can maintain a healthy operation that lasts for many years.
Key Takeaways
- Inspect equipment carefully and remove visible debris first.
- Use gentle, approved methods that match the material.
- Document steps and results for future reference.
- Sanitation protects hive health and your investment.
- Seek experienced advice for persistent contamination.
Understanding the Risks of Colony Loss
A single dead hive can hide threats that spread quickly through an apiary. When a honey bee colony fails, the remaining equipment may carry pathogens that endanger nearby hives.
Identify the cause before deciding if frames and boxes are safe to reuse. American foulbrood (AFB) is especially serious and usually requires euthanizing the affected bees and disposing of all contacted gear.
Research shows old comb is about four times more likely to harbor varroa mites than new comb. These mites move fast and can devastate healthy colonies if they reach other bees.
- Equipment can hide spores and mites that spread between hives.
- Careful assessment of the bees and hive condition helps prevent wider damage.
- When in doubt, consult experienced sources or consider replacement; see repair damaged hive boxes for related guidance.
Assessing Your Equipment for Reuse
A clear, methodical check helps decide which pieces of gear merit repair and which must be removed. Make notes as you work so choices are traceable over the years.

Evaluating Comb Condition
Inspect each frame carefully. Look for dark, sunken patches in comb and any areas with dead brood. Old comb is far more likely to host mites, so consider melting risky comb down for wax rather than reusing it.
If a frame shows limited damage, cut out the affected section. If damage covers most of the comb, discard the frame to protect healthy hives.
Identifying Contagious Diseases
American foulbrood (AFB) requires decisive action: euthanize infected colonies and dispose of all contacted equipment. Never attempt partial salvage when AFB is present.
“When in doubt, remove the frame and protect the apiary.”
- Check wood and plastic surfaces for mold or heavy propolis buildup.
- Ensure the top and side of each box are free from debris that can hide pathogens.
- Learn more ways to encourage safe reuse of old comb at encourage bees to clean old comb.
How to Clean Plastic Foundation After Colony Loss
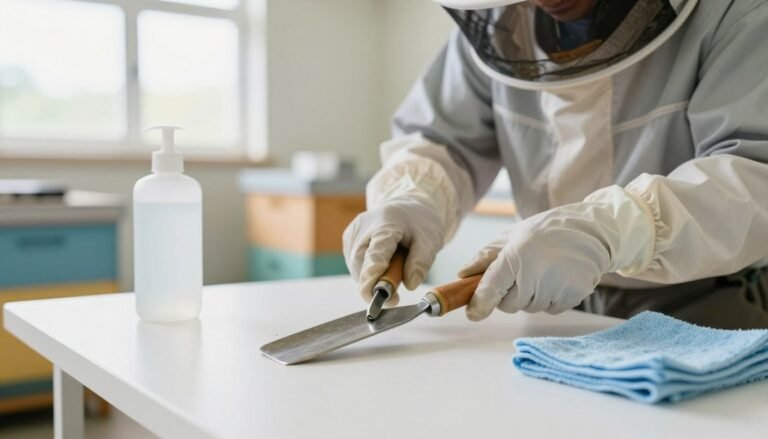
Start by breaking down the hive and removing large chunks of wax and propolis with a sturdy hive tool.
Work methodically. Disassemble boxes and lift each frame. Scrape both sides of the frames to get rid of old comb and sticky honey that can attract pests.
Rinse frames with clean water next. A gentle stream will remove loose debris. You may use a pressure washer as an option for stubborn residues, but keep pressure low to avoid warping the plastic or damaging the frame structure.
Allow adequate time for each piece. Proper sanitation is not fast; it protects future bees and brood and preserves equipment life.
Finally, wipe box interiors and side panels with a mild bleach solution to address any mold. Let everything dry fully before reassembly and storage.
| Step | Tool | Benefit |
|---|---|---|
| Scrape frames | Hive tool | Removes wax and propolis quickly |
| Rinse with water | Hose or bucket | Clears honey and debris |
| Optional pressure wash | Pressure washer | Good for stubborn spots; use caution |
| Sanitize boxes | Mild bleach solution | Controls mold and spores |
Essential Safety Precautions and Protective Gear
Treat every piece of worn equipment as potentially hazardous until proven safe. This mindset protects you and the rest of the apiary.

Personal Protective Equipment Requirements
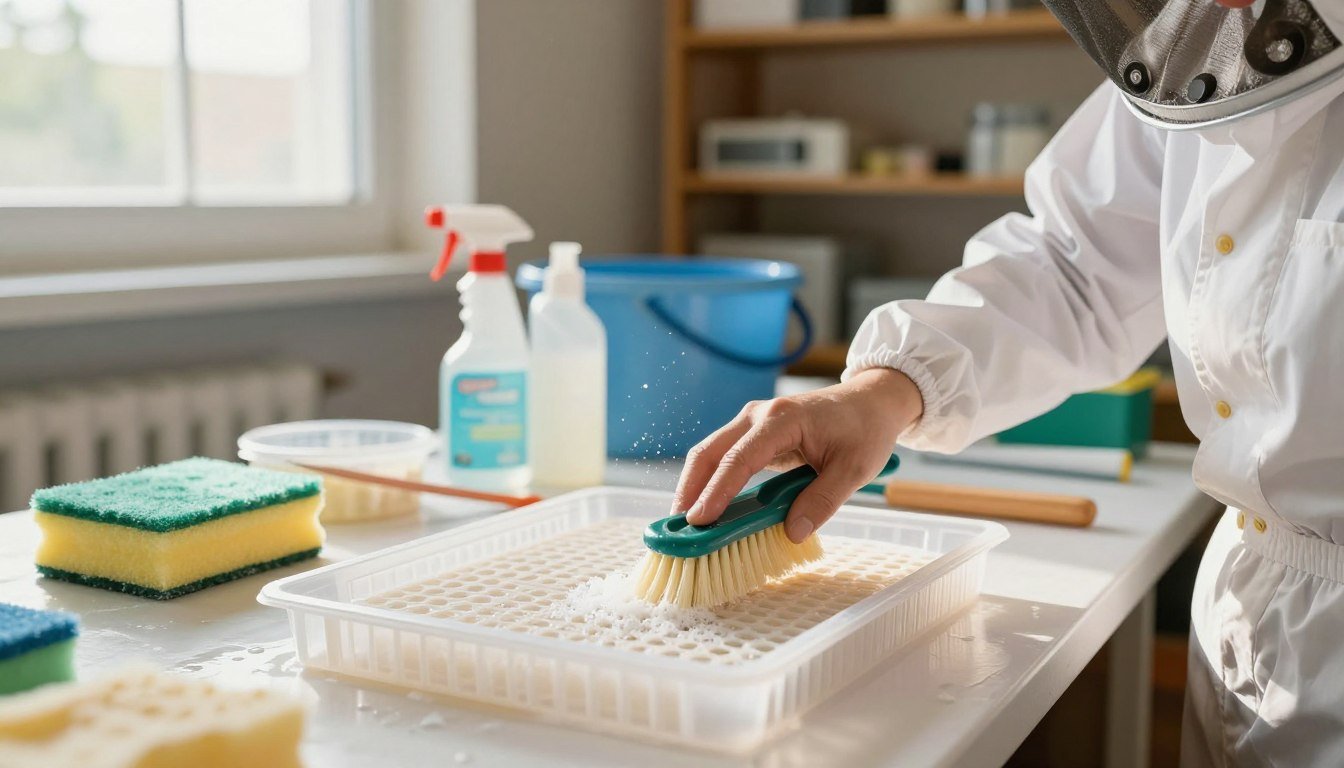
Wear gloves and eye protection whenever you handle chemicals or scrape frames. Use nitrile gloves for chemical work and heavy leather gloves for physical scraping.
Ensure proper respiratory protection if you use bleach or commercial sterilants. Good ventilation prevents inhaling fumes that can harm your health.
- Verify all PPE is intact before starting.
- Keep a first aid kit and eye wash nearby.
- Change disposable gear after contact with suspected disease material.
Plan the workspace so tools and used gear stay separated from clean items. Follow established protocols and consult authoritative guidance like apiary hygiene guidance.
| Item | Recommended PPE | Purpose |
|---|---|---|
| Scraping frames and boxes | Leather gloves, goggles | Protect hands and eyes from debris |
| Applying sterilant | Nitrile gloves, respirator | Block chemical exposure |
| Handling stored equipment | Disposable gloves | Limit transfer of spores |
| Working indoors | Ventilation and mask | Reduce fume inhalation around hives |
Following these steps helps you use equipment safely and keeps your hives healthy for many years while supporting responsible beekeeping.
Initial Debris Removal and Freezing Techniques
Start by removing loose debris from each frame. Sort parts that need treatment or disposal so you can plan the next steps.
Use a hive tool to scrape away wax, propolis, and leftover honey from the plastic foundation before any pest control. Clear the top and side of each box as well; hidden debris can shelter mold and pests.
Freeze frames at 20 °F (−6.7 °C) or lower for at least 24 hours. This kills all stages of wax moths and larvae and prevents reinfestation.
After freezing, rinse all surfaces with clean water to remove loosened organic matter. Allow adequate drying time before moving on.
- Scrape first: remove bulk wax and honey.
- Freeze next: 24 hours at 20 °F or colder.
- Rinse last: wash with water and let dry completely.
For additional guidance on handling frames and foundation safely, see our frames and foundation guide.
Heat Sterilization Methods for Beekeeping Equipment
Applying controlled heat is a practical way to reduce microbes on frames, boxes, and small tools. Use thermal methods with care so wood and plastic parts are not damaged.
Torching Woodenware Safely
Propane torching kills microorganisms on surfaces by brief, intense heat. Pass the flame evenly across the side of wooden boxes and frames until the surface chars lightly.
Avoid long exposure that can warp wood or open gaps that trap wax and propolis. For more detailed sterilizing methods see sterilizing methods.

Boiling Small Tools
Boil metal tools in a mixture of washing soda and water at a 1:5 ratio for 5–10 minutes. This is an effective option for hive tools, nails, and small metal parts.
Note: boiling will not eliminate american foulbrood spores. For severe contamination choose other controls and consider replacement when needed.
- Use torching sparingly and avoid open fires near dry hives or grass.
- Rotate thermal treatment every few years to reduce propolis and wax buildup on frames and equipment.
- For tool maintenance tips, see tools maintenance.
Chemical Sterilization Options
Targeted sterilants offer a reliable path for treating persistent contamination on hive parts.
Use chemicals carefully. For heavy infestations, acetic acid fumigation can reach seams and propolis where rinsing cannot. Place 500 ml of 80% acetic acid in a non-metal dish and seal the hive so fumes penetrate all surfaces.
Household bleach is also effective. A 1:5 bleach solution (about 3% sodium hypochlorite diluted) sanitizes wood boxes and plastic equipment after scraping off propolis.
Safety matters: always ensure good ventilation when using strong agents. Wear appropriate PPE and keep people and animals away during treatment.
- Allow treated pieces to air dry fully in sunlight so no residue remains.
- Chemical sterilization is a powerful way to manage mold on the top and side of hive components.
- Rinse any remaining solution with clean water where practical, then sun dry before storage.
For official guidance and additional protocols, consult the beekeeper research manual.
Managing Wax Moth and Pest Infestations
Natural predators can be a practical tool when gear is overrun by pests. Using chickens offers a direct way to remove larvae that live in old comb and damaged frames.
Chickens eat wax moth larvae and help clear combs that are hard to treat by hand. If a dead hive was heavily infested, allow poultry to forage in a contained area after removing any comb you plan to save.
Keep undamaged comb and honey frames aside before letting birds in. Chickens will break soft wax while they feed, so protect anything you want to reuse.

Using chickens reduces the need for harsh chemicals. This method lowers pest numbers around healthy bees and limits spread between colonies.
| Situation | Action | Benefit |
|---|---|---|
| Heavy wax moths infestation | Let chickens forage in a controlled space | Removes larvae, cleans combs quickly |
| Want to keep comb | Set aside undamaged frames first | Protects usable honey and comb |
| Protect nearby hives | Monitor and isolate treated gear | Reduces spread of pests and mites |
Proper Drying and Inspection Procedures
Let frames and boxes dry fully in a sheltered, dust-free area before any storage or reassembly.
Give each piece enough time. Set frames flat or hung so water evaporates and wax and propolis harden. Keep the site free from flying insects and heavy dust.
Inspect every frame closely for mold, residue, or missed debris. Check comb and old comb areas for weakness and tears. If you spot stubborn residue, repeat the cleaning process until surfaces look sound.

Examine wood boxes and any plastic parts for cracks or warping after years of use. Ensure the top and side of each box are completely dry before reassembly. Moisture left inside will encourage mold growth and damage.
Before returning new bees, sort usable gear from items that need repair or replacement. For a concise inspection checklist, see our inspection guide.
| Task | What to check | When |
|---|---|---|
| Air dry | Frames, boxes, comb | After sterilization; 24–72 hours |
| Visual inspection | Mold, propolis residue, tears | Each frame before reassembly |
| Structural check | Wood cracks, plastic warping | Annually or after heavy use |
Best Practices for Reassembly and Storage
A good storage plan keeps frames safe from wax moths, moisture, and accidental damage for many years. Prepare a clean, dry area before reassembly and work one frame at a time.

Airtight Storage Solutions
Store your cleaned frames in sealed bins or stackable plastic totes with tight lids. Airtight containers block moths and limit dust that can harbor mold on wood and plastic parts.
Monitoring for Pests
Regular checks matter. Inspect stored equipment weekly for signs of wax moths or small moths. Early detection prevents loss of combs and reduces repair needs.
- Keep the storage area dry and ventilated; moisture invites mold.
- If you use water to wash the space, let it fully dry before replacing frames.
- Label bins by year and side so frames are easy to rotate and inspect.
“Proper storage is the final step in protecting your investment.”
For details on winter practices, see our store beekeeping equipment for winter guide.
Conclusion
A tidy hive and steady upkeep are the best defenses against spread of disease among your bees.
Keeping the apiary site well managed prevents problems from moving between colonies. Regular inspection and simple sterilization steps help protect wood frames, combs, and boxes for many years.
Vigilance against pests like the wax moth preserves honey bee resources and limits loss. Consistent cleaning and proper storage mean equipment stays safe for new bees and supports strong, productive colonies.
Final note: a small, steady effort in beekeeping pays off. Protect your site and your investment so each hive thrives season after season.
FAQ
What immediate steps should I take when I find a dead hive with plastic foundation?
Remove frames and separate salvageable honey or wax. Wear gloves and a veil, move items outside, and keep suspect frames isolated. Freeze any combs for 48–72 hours to kill wax moth larvae before further handling.
Can plastic foundation be reused when brood comb looks damaged or old?
Yes, if the plastic base is intact and free of brood disease. Scrape off propolis and wax, inspect for dark staining or foul odors. If only cosmetic residue remains, wash and disinfect; if brood pattern or smell suggests disease, retire the foundation.
How do I identify contagious diseases such as American foulbrood on frames?
Look for sunken, perforated cappings, a foul odor, and ropy larvae. Do a field test using a matchstick for the ropiness. If disease is suspected, follow state regulations—burning or sealing and disposing of affected equipment is often required.
What personal protective equipment is essential when handling dead colonies and frames?
Use a bee suit or jacket with veil, nitrile gloves, and sturdy boots. When using chemicals like bleach or detergents, add eye protection and a respirator rated for chemical fumes.
Is freezing effective against wax moths and their larvae on comb and plastic parts?
Yes. Freezing at 0°F (−18°C) for at least 48 hours kills eggs and larvae. Place frames in sealed bags to prevent condensation during thawing and reduce the risk of re-infestation.
What heat methods are safe for sterilizing plastic foundation without melting it?
Avoid direct flame on plastic. Use hot water (140–170°F) with a non-bleach detergent for cleaning plastic sheets. For woodenware and metal tools, torching or boiling are options; keep plastics away from open flame.
Which chemicals are recommended for treating reusable plastic foundation and equipment?
A 10% sodium hypochlorite (household bleach) solution can disinfect but may damage some plastics over time. Alternatives include hydrogen peroxide cleaners or a 1:10 acetic acid (vinegar) rinse for odor control. Rinse thoroughly and dry completely after any chemical use.
How do I remove excess wax, propolis and honey before sterilizing foundation?
Warm the frames slightly to soften wax, then use a hive tool or heated knife to scrape off residue. Collect salvageable honey separately. For heavy buildup, a coarse brush and warm soapy water help remove remnants from plastic bases.
What are safe practices for boiling small hive tools and metal equipment?
Boil metal tools and small non-plastic parts in water for 5–10 minutes to kill mites and pathogens. Dry them immediately to prevent rust. Do not boil plastic components; instead use hot soapy water and disinfection rinses.
How can I manage wax moth infestations naturally on stored comb and equipment?
Store frames in sealed, airtight containers or chest freezers. Use natural predators like chickens to pick through comb if safe for your operation. Maintain low humidity and inspect stored items regularly for early signs.
What inspection steps should I follow after cleaning and drying foundation and frames?
Check for cracks, warping, remaining wax deposits, and any smells indicating disease. Ensure plastic fits frames correctly and shows no structural damage. Discard or repurpose items that fail inspection.
How should I store cleaned foundation and spare frames to prevent pests and mold?
Use airtight plastic bins or sealed boxes with desiccant packs in a cool, dry place. Elevate storage off the ground and rotate stock. Consider light exposure and rodent-proofing; monitor periodically for moth activity.
If I suspect American foulbrood, can any equipment be saved?
Regulations vary, but AFB spores are highly resilient. Most authorities recommend destroying heavily contaminated brood comb and equipment. Consult your state apiary inspector — sometimes glassing, gamma irradiation, or certified sterilization can salvage certain items.
What tools and supplies are most useful during the cleanup of a dead hive?
Essential items include a hive tool, heated knife, stiff brushes, buckets, heavy-duty gloves, a bee suit, bleach or peroxide-based disinfectant, freezer access or chest, and airtight storage containers.
How long should I wait before introducing new bees to reused foundation or frames?
After thorough cleaning, complete drying, and a final inspection, wait at least a few days to ensure no residual odors or pests. If you used chemical disinfectants, allow full off-gassing and rinse time as recommended before requeening or installing bees.
Can smokers or flame treatments replace chemical disinfection for plastic foundation?
No. Direct flame or smoker soot can damage plastic and leave residues. Use heat or flame only for woodenware; rely on cold treatments, detergents, and approved disinfectants for plastics and foundations.
Where can I get state-specific guidance about diseased hives and disposal requirements?
Contact your state apiary inspector through the USDA National Institute of Food and Agriculture or your state Department of Agriculture. Local beekeeping associations like the American Beekeeping Federation offer region-specific advice and resources.