When a colony dies, swift investigation reveals the cause and protects remaining hives. A structured examination helps you learn whether starvation, pests, disease, moisture, or queen issues led to the loss. Clear observations guide practical steps to reuse equipment or cull affected frames.
The NH Honey Bee Diagnostic Network offers winter diagnostic resources to pinpoint why a hive failed. Research from the Beltsville Bee Lab — known for over 100 years of bee disease and pest work — informs modern practices and testing.
Approach each loss as a learning moment. Use a methodical form to record symptoms, likely causes, and prevention actions. For a practical chart that maps observations to probable causes, see this Hive Autopsy Chart. For broader topic guidance, explore related resources.
Key Takeaways
- Systematic review clarifies the primary cause of a colony death.
- Documenting symptoms helps protect honey stores and remaining bees.
- NH diagnostic tools support winter mortality investigations.
- Beltsville Bee Lab research underpins modern diagnostic steps.
- Use findings to adjust management before the next season.
Immediate Actions Upon Discovering a Dead Hive
Act quickly when you find an inactive hive to limit damage and protect nearby colonies. Fast, simple steps reduce the risk of robbing, pest invasion, and disease transmission. Document what you see before moving frames.
Securing the Entrance
Close the entrance immediately if a hive died to keep other bees from stealing stores. A sealed entrance also slows pests like wax moths that invade weak hives.
On New Years Eve 2020, a beekeeper noticed silence and found a small hive had died. That quiet moment became a vital learning point about winter losses and swift action.
Preventing Disease Spread
Check the area for dead bees to judge whether the loss was sudden or gradual. Inspect frames and the cluster size for signs of varroa or other diseases.
- Seal the entrance to prevent robbing and limit contact with healthy hives.
- Look for varroa signs and note possible cause before handling equipment.
- Use proven practices and review multi-colony routines like time management for multi-hive apiaries to reduce future winter losses.
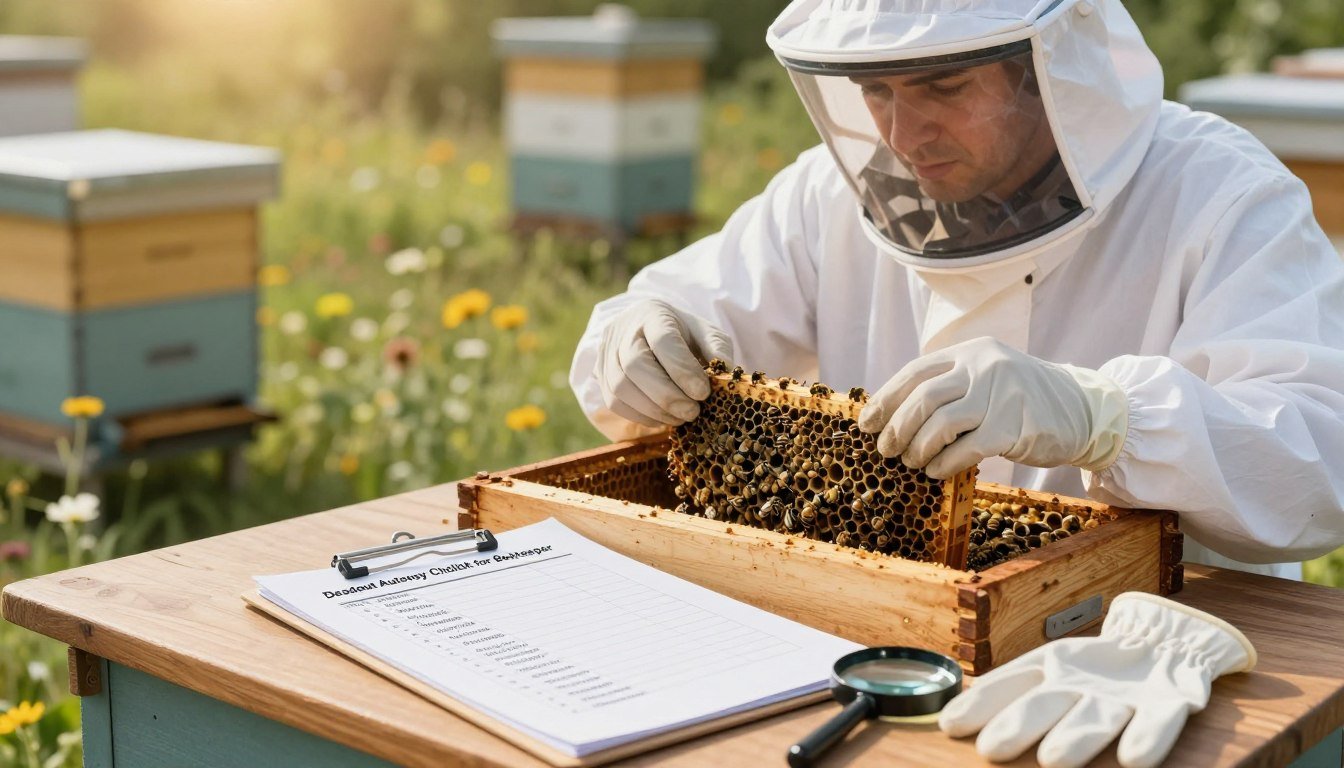
Conducting a Thorough Deadout Autopsy Checklist for Beekeepers
Begin by observing the hive exterior, then move through frames and the bottom board to gather clear evidence. Note activity at the entrance, footprints, pests, or wax debris in the surrounding area. These signs often point to why a colony failed during winter.
Carefully lift each frame to inspect brood pattern, honey stores, and the cluster position. Wally Shaw and Frank Gellatly stress that examining frames and the cluster reveals whether starvation, disease, or pests caused the death.
Check the bottom board for dead bees and wax bits. A heavy scatter of dead bees or wax shredding suggests prolonged weakness or wax moth invasion. Recording these observations helps you decide which frames can be reused.

If foul brood diseases are suspected, close the hive immediately and contact your local inspector. The Maine State Beekeepers Association offers a useful guide that links symptoms to likely causes; consult their chart to match field signs to specific diseases and pests.
- Observe the area around the hive for robbing or animal disturbance.
- Pull frames slowly to assess honey, brood, and signs of disease.
- Document findings to turn this loss into a structured learning step for future hive management.
For detailed procedural steps, see this post-mortem guide, which complements field notes and helps you identify the likely cause of death.
Interpreting Diagnostic Clues and Hive Health Indicators
Interpreting field clues helps you pinpoint what stressed the colony before winter set in. Use clear signs from brood, comb, and the bottom board to separate starvation, moisture damage, and mite-driven problems.
Analyzing Brood and Cluster Patterns
Inspect brood frames for uniform brood and solid patterns. Irregular cells, perforated cappings, or shriveled larvae suggest a serious problem.
Look for: dead brood that is off-color, larvae that are sunken, and small cluster size that could not keep warm through winter.
Identifying Starvation and Moisture Issues
Starvation shows as bees found head-first in cells away from honey stores. A small cluster often indicates the colony could not generate enough heat.
Moisture and mold on comb or the bottom board point to a wet environment. Wet bees lose insulation and fail during winter.
Recognizing Signs of Parasitic Mite Syndrome
Parasitic mite syndrome often shows perforated brood cappings and shriveled larvae. Check cell walls for small white patches—these are varroa feces and signal high varroa levels.
Bees with tongues sticking out and brown stains on the board may indicate dysentery from nosema infections or severe mite impact. If unsure, send samples to the CSI colony postmortem guide or the USDA Bee Research Lab in Maryland for testing.
Tip: Oxalic acid dribble treatment can reduce varroa mites, but confirm diagnosis before treating. Review common errors to avoid by reading about common hive mistakes.
Conclusion and Future Apiary Management
Reviewing what you found in the hive turns loss into practical steps for healthier colonies. Summarize cause clues—cluster small, brood absence, or signs of varroa mites—and plan spring actions to reduce repeat failure.
Clean the bottom board and flame or scrub boxes to remove spores and pests. If queen failure or high varroa levels appear likely, adjust your treatment schedule and requeen early to support weakened bees.
Freeze suspect frames and store wax in airtight containers to block wax moths and other pests. Record notes and use resources like the CSI colony postmortem guide and an apiary productivity review to refine best practices.
Every loss is a learning step. With consistent monitoring, careful hygiene, and targeted treatments you can help your colony survive winter and thrive in spring.
FAQ
What is the first step when you find a hive with no live bees?
Secure the entrance to keep pests out and reduce spread of pathogens. Wear gloves and a respirator, close off the entrance with screening or a temporary cover, and move only in a way that avoids scattering debris. Limit handling until you can inspect frames and the bottom board in a controlled area.
How do I check the bottom board and entrance for clues?
Remove the outer cover and examine the bottom board for dead bees, wax debris, mite-laden bodies, and fecal spots. Look at the entrance for accumulation of dead workers, mites on the threshold, or mouse nesting materials. These signs suggest whether pests, condensation, or varroa-related collapse played a role.
What should I look for when examining frames and comb?
Inspect frames for brood pattern, presence of capped honey, mold, and wax moth tunneling. Check brood comb for scattered or spotty brood, sunken cappings, or sunken brood that indicates disease or varroa pressure. Preserved honey stores with little brood often point to sudden losses like queen failure or pesticide kill.
How can I tell if varroa mites caused the colony loss?
Look for heavy mite loads on dead worker bodies, deformed wings on remains, and spotty brood patterns. Varroa often causes a small, clustered population at collapse, with many phoretic mites on corpses. Combine visual signs with a sticky board or alcohol wash from remaining bees to confirm high mite levels.
What are signs of parasitic mite syndrome (PMS)?
PMS shows brood death in multiple stages, greasy or watery brood, spotty brood pattern, and many mites on pupae or dead adults. You may find deserted nurse bees and scattered sealed brood. PMS often follows high varroa counts and virus load, so test for mites to verify.
How do I distinguish starvation from moisture-related winter loss?
Starvation usually leaves a small tight cluster with empty frames adjacent to the cluster and clean combs where honey was removed. Moisture losses show mold growth, soggy frames, and bees glued to comb edges with signs of dysentery. Examine insulation, ventilation, and honey placement relative to the cluster.
What disease signs should I document during inspection?
Note foul odors, discolored or sunken brood cappings, watery or chalky larvae, and unusual fecal stains on frames or hive walls. These point to American foulbrood, European foulbrood, or Nosema. Collect samples and consult your state apiary inspector for lab testing when disease is suspected.
When should I send samples for lab testing?
Send samples if you find suspicious brood symptoms, unexplained mass die-off, or signs of notifiable diseases like American foulbrood. Include frames or brood comb, dead bees, and photos. Your state apiarist or a veterinary diagnostic lab can confirm bacterial, viral, or fungal causes.
How do pests like wax moths and small hive beetles factor into colony failure?
Wax moths and small hive beetles often infest weakened or dead colonies, accelerating comb destruction and fermentation of honey. Heavy moth webbing, tunnel damage, and beetle larvae suggest the colony collapsed earlier and pests moved in afterward rather than causing the initial die-off.
What biosecurity steps should I take after removing a dead hive?
Clean and disinfect tools, burn or properly dispose of heavily infected frames per local regulations, and isolate or treat nearby colonies if disease or high mite loads were found. Replace or sanitize equipment and rotate comb to reduce pathogen carryover.
How important is record-keeping for understanding losses?
Maintain notes on hive strength, treatments, queen quality, feeding, and weather. Photos and dates of inspections help identify trends like recurring mite problems or spring starvation. Good records make diagnosis and preventive management far more effective.
Can management changes prevent future losses?
Yes. Improve varroa control with integrated pest management: monitor mite levels, rotate treatments, use screened bottom boards, and select hygienic stock. Address nutrition by ensuring adequate winter stores and supplemental feeding in lean periods. Improve ventilation and moisture control to prevent winter condensation.
When should I replace comb or equipment after a colony collapse?
Replace heavily contaminated combs, frames with brood disease, or comb older than three years to reduce pesticide and pathogen load. Deep frames used for brood should be replaced sooner if disease was present; shallow honey frames can be cycled more often to maintain hive hygiene.
What local resources can help with diagnosis and treatment decisions?
Contact your state apiary inspector, local beekeeping association, or extension service for guidance. University extension labs and the USDA Bee Research Programs offer diagnostic services and up-to-date treatment recommendations tailored to regional pest pressures.
How should I handle suspect American foulbrood or other regulated diseases?
Immediately notify your state apiary official if you suspect American foulbrood. Follow mandated protocols, which may include burning infected frames and equipment or other regulated disposal methods. Prompt reporting protects nearby apiaries and reduces spread.