Choosing the right device can change how you manage hive traffic and harvest nutritious granules without harming the colony.
Good equipment fits your setup, directs bees through an entrance, and lets you collect samples while keeping brood and honey production steady.
The Superior Pollen Trap weighs 15.10 lbs and includes a reversible drawer that pairs well with palletized hives. This design helps you mount the unit quickly and keeps collection tidy during peak days of foraging.
When you install a new unit, close other entrances so bees are forced through the screen area. A strong colony with a young queen supports better collection and more comb building, which boosts overall production.
Proper management makes sure colonies stay healthy while you gather fresh granules for home use. Simple checks each day reduce stress on the hive and help you spot issues early.
Key Takeaways
- Match equipment to your hive layout and mounting needs.
- Close alternate entrances to direct traffic through the device.
- A young queen and strong colony improve collection rates.
- Daily checks and proper handling keep bees healthy.
- The Superior model’s reversible drawer aids clean harvests.
Understanding the Benefits of Pollen Collection
Harvesting granules at the hive entrance serves two clear purposes: it creates a revenue stream and supports colony nutrition when forage is thin. A focused approach keeps the hive stable while you take a modest amount of collection material.
Economic incentives
Many beekeepers sell collected pollen to health markets across the United States. Demand among health-conscious buyers can provide steady income during peak months. Using reliable equipment and a proper mount reduces labor and improves the amount gathered each season.
Nutritional value for bees
Worker bees process pollen into bee bread, a fermented mix that supplies protein and enzymes for brood development. Feeding some returned material back to colonies can help during tough blooms and low forage time.
Monitor your hives daily. Excessive collection lowers honey production and strains worker longevity. With careful checks and the right screen or board, a dedicated beekeeper can keep colonies healthy throughout the year.
- Market value supports small-scale sales and local supply.
- Bee bread is essential protein for brood and young bees.
- Balance collection with colony needs to protect production.
How Pollen Traps Work for Hobbyists
When you alter hive traffic at the landing board, returning workers often lose some of their gathered material.
A standard pollen trap partially restricts the entrance so workers must squeeze through small holes or a grid. That movement dislodges granules from their corbiculae while the bee continues into the hive.
Good designs—like Ross Rounds models—let foragers enter without delaying colony activity. Sundance units add exit cones so drones and the queen can leave freely, reducing stress.
Monitor the entrance for a couple of days. If bees find another way inside, collection drops sharply and production can suffer.

“A proper screen removes a portion of returned material while preserving brood feeding and honey flow.”
| Feature | Effect on Bees | What to Watch |
|---|---|---|
| Small holes/grid | Removes some granules | Entrance wear, clogging |
| Exit cones | Allows drones/queen out | Proper alignment |
| Reversible drawer | Clean collection | Empty daily |
Learn set-up tips and safe practices at beekeeping hobby.
Evaluating the Best Pollen Trap for Hobby Beekeepers
Durability and drawer access matter most when you choose a pollen trap. Metal or thick plastic cuts down wear and makes daily emptying faster.
Exit cones are essential. They let drones and the queen pass without delay and reduce stress on the colony during collection.
Fit is important. Sundance pollen traps come in 8- and 10-frame sizes, so check your hive model before you buy.
Watch how bees adapt to new holes. Most will accept a changed entrance within a few days. Observing traffic during that time tells you if the unit needs repositioning.
“A high-quality unit collects clean granules with minimal debris while preserving brood and honey flow.”
- Look for easy-to-remove drawers and solid mounts.
- Confirm exit cones and correct hole sizes to protect the queen and drones.
- Test fit to your hive and monitor activity for several days.
| Feature | Benefit | Check |
|---|---|---|
| Durable materials | Long service, less replacement | No cracks or bending after use |
| Reversible drawer | Clean collection, easy emptying | Removes smoothly and seals |
| Exit cones | Queen and drone safety | Proper alignment and free movement |
Comparing Top and Bottom Mounted Designs
Mount location affects both debris levels in the drawer and the way returning foragers navigate entrances.
Top-mounted units often collect cleaner material with less wax or bee debris. They sit above the brood box and can reduce clutter in the collection drawer.
Advantages of Top Mounting
Using top placement can yield tidier harvests and reduce hive cleaning time.
Be sure the colony already uses the top entrance before you mount pollen collection gear to avoid traffic confusion.

Benefits of Bottom Mounting
Bottom mount units fit the standard bottom board and are the most common choice. They install under the brood chamber and often include a reversible drawer for easy emptying every few days.
- Bottom board fit: simple integration with Langstroth hives.
- Protected drawer: cleaner handling and quick harvests.
- Colony flow: less disruption when holes and cones align properly.
| Mount Type | Debris Level | Installation Note |
|---|---|---|
| Top-mounted | Lower wax debris | Confirm top entrance use before install |
| Bottom-mounted | Moderate debris | Fits bottom board; reversible drawer works well |
| Choice factors | Quality of collection | Depends on hive setup and collector preference |
Decide by checking your hive layout and daily traffic. If you need guidance on hive setup, see how to choose a beehive.
The Role of Front Porch Style Traps
A front-porch model can be an affordable entry point, but it brings unique upkeep needs.
Placement matters. These units sit directly over the entrance and collect material as bees return. That position makes daily checks essential to protect the brood and maintain honey flow.
Front porch designs often cost less and suit small hives with limited space. They hold a smaller volume of collection material, so they fill sooner than drawer-style units.
Maintenance Challenges
Because they sit at the hive mouth, these devices are prone to warping and mold if you do not empty them often. Moisture builds quickly, which can harm the colony and invite contamination.
- Doors can stick; test operation daily so the queen and drones move freely.
- Seal edges well to stop bees finding another way inside the hive.
- Clean frequently to avoid packed material that becomes a contamination source.
“Routine emptying and tight seals keep simple entrance units effective and safe.”
For setup and care tips, see how-to tips.
Selecting the Right Colony for Your Equipment
A strong, active hive with a recently mated queen will adapt faster when you add collection hardware.
Choose robust colonies. Only vigorous units can make up lost material by sending more foragers. That resilience protects brood rearing and honey flow.
Avoid installing pollen traps on weak or shrinking colonies. Stress from a new entrance can reduce brood and slow recovery.
Watch for swarming signs. A colony prone to swarm rarely sustains steady production. Stable populations keep workforce levels steady and reduce risk when you collect.
Monitor each hive for several days after installation. Check that bees use the entrance and do not seek alternate routes. Quick observations reveal if repositioning is needed.
- Pick young-queen colonies. They adapt and rebuild foraging numbers.
- Steer clear of weak or swarming hives.
- Observe daily for a few days. Confirm traffic and adjust as needed.

“Selecting a robust colony upfront reduces stress and preserves production during collection.”
Preparing Your Hive for Trap Installation
Prepare your hive by guiding all traffic through one controlled entry point. Close alternate routes, seal cracks, and repair rotten corners so returning workers do not find side exits.
If you plan a top entrance unit, begin orienting the colony to that entry at least two weeks before adding any collection device. This gives bees time to learn the route.
Avoid very hot days for installation. A dense colony that must squeeze past an altered opening can overheat quickly. Choose an overcast day when bees stay calmer and the hive stays cooler.
Leave the pollen trap in place for at least a month so the colony adjusts to consistent traffic patterns. Proper prep reduces confusion and helps bees keep normal foraging and honey flow during the transition.
| Step | Why it matters | Timing |
|---|---|---|
| Close alternate entrances | Directs traffic to chosen opening | Before install |
| Orient to top entrance | Reduces disruption when device is added | 2 weeks prior |
| Choose cool, overcast day | Prevents overheating and calm bees | Install day |
| Run device 30+ days | Allows colony to adapt | First month |
“Proper preparation ensures the hive remains stable while you add collection gear.”
Managing Bee Adjustment Periods
A new entrance can unsettle hive traffic for a few hours or several days while workers relearn routes. During that time you may see foragers circling and checking former exits before they accept the new path.
Observe calmly. Watch that bees are exiting through the device and returning by the same way. This confirms the unit works both ways and that the colony can access brood and honey stores.
If you are using top entrance equipment, ensure the colony already uses the upper level. Bees unfamiliar with an upper door take longer to adapt and may search the bottom board instead.
- Expect searching flights during the first 24–72 hours.
- Confirm exits as well as entries to be sure traffic flows through the unit.
- Be patient; forcing quick change can raise stress in the colony.
- Once settled, workers often increase foraging to offset lost granules from collection.

| Sign | What to check | Action |
|---|---|---|
| Confused flights | Bees searching old entrance | Close side exits; watch for 1–3 days |
| Lower traffic | Few bees using unit | Reposition or brief open guidance near entrance |
| Normal return rates | Steady exit and entry through unit | Continue routine checks and empty drawer as needed |
“Patience during adjustment preserves colony health and long-term collection success.”
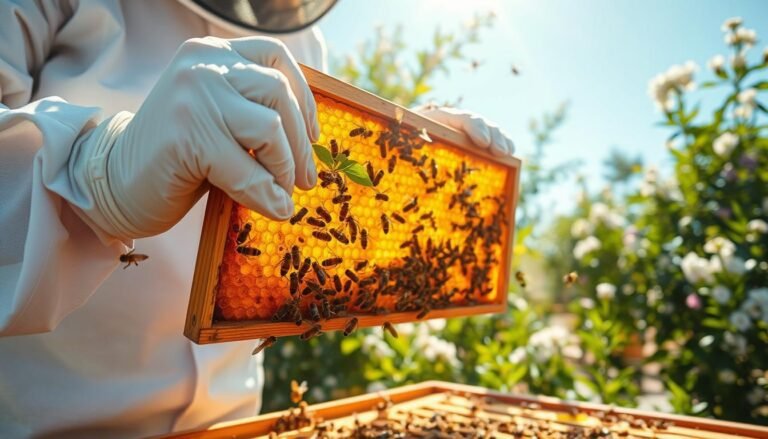
Essential Steps for Harvesting Fresh Pollen
Collecting fresh pellets each day preserves color, aroma and nutrient value. Quick retrieval stops moisture from packing the material and keeps quality high.
Fresh pellets will dissolve into thousands of individual grains when pressed by hand. That shows they are still moist and nutrient-rich. When you leave material in the drawer too long it packs, spoils and can mold.
Empty the pollen trap drawer daily or every other day. Inspect the contents for debris such as wings or small hive beetles. Frequent checks keep the harvest clean and reduce stress on the bees and colony.

- Harvest often to prevent mold and preserve texture.
- Check the entrance and drawer for debris each visit.
- Store fresh material quickly if using pollen in recipes or sale.
| Feature | Why it matters | Frequency |
|---|---|---|
| Daily emptying | Prevents moisture build-up and spoilage | Every 24–48 hours |
| Drawer inspection | Removes beetles, wings, debris that reduce quality | Each harvest |
| Quick storage | Preserves nutrients for honey blends or recipes | Immediately after collection |
“Frequent harvesting ensures the freshest product and the healthiest hive.”
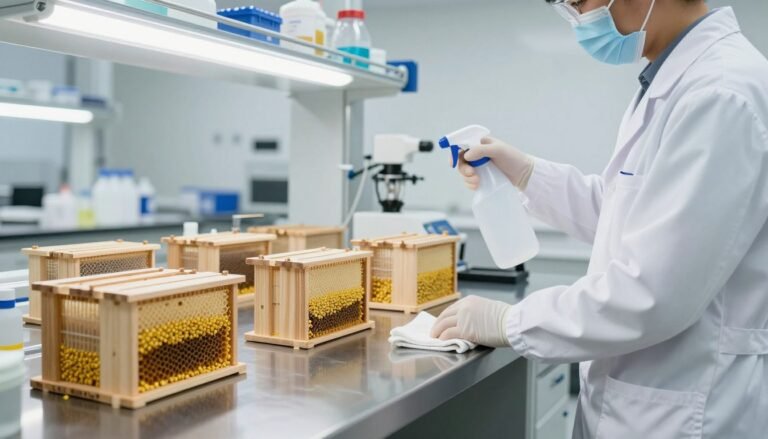
Cleaning and Processing Techniques
After harvest, quick and careful processing keeps quality high. Start with a clean workspace and a shallow screen to sort material. Work promptly so flavor and nutrition remain intact.
Removing Debris
Spread collected material on a fine mesh and pick out visible bits by hand. Use tweezers to remove wings, legs, and wax fragments. Manual sorting reduces contamination and improves shelf life.

Using Fans for Agitation
For larger batches, an agitation system helps separate light debris from heavier granules.
A low-speed fan directed across a screen mimics seed-cleaning methods. Adjust airflow so granules fall while dust and flakes blow away. Process immediately after cleaning to protect aroma and nutrients.
“Proper cleaning protects nutritional integrity and keeps the harvest safe for use.”
- Sort on a screen and remove impurities manually.
- Use fan agitation for large quantities to speed processing.
- Process and store quickly to preserve scent and flavor.
| Step | Tool | Benefit |
|---|---|---|
| Screen spread | Fine mesh | Allows visual sorting and debris removal |
| Manual pick | Tweezers | Removes wings, legs, wax pieces |
| Fan agitation | Low-speed fan | Separates light debris from granules |
| Immediate processing | Drying or cold storage | Preserves flavor and nutrients |
Long Term Storage and Preservation
Proper storage keeps harvested pollen usable and safe long after the season ends. Freeze cleaned granules when you want multi-year preservation; standard freezers hold quality for 1–2 years. Refrigeration works well for up to one year.
Clean, dry handling is essential before packing. Spread the material to finish drying, then transfer to airtight glass jars. Clear containers let you monitor color and moisture without opening the lid.

- Freezing: Best for long-term preservation of nutritional value and aroma.
- Airtight glass jars: Prevent moisture and air from degrading collected pollen.
- Clear jars: Allow quick visual checks to spot spoilage or condensation.
- Packaging: If you sell, use labeled, sealed containers so customers receive a fresh product.
Keep storage notes with the date and hive source. Proper handling at harvest and clean storage help bees and protect honey stores by reducing waste and contamination at the entrance and inside the hive.
“Freeze for long-term quality, refrigerate for short-term use—clean jars and clear labeling preserve value.”
Conclusion
Balance is the key: modest removal, regular inspections, and good storage keep yields high and colonies safe. A strong, healthy colony supports steady production and recovers faster after any collection.
When collecting, follow daily harvest, cleaning, and freezing steps to preserve aroma and nutrients. Match your choice of top or bottom mount unit to the hive layout, and empty drawers often to prevent mold and pests.
Prioritize hive stores of honey and pollen before taking product. For setup, maintenance schedules and expansion guidance see beekeeping expansion tips. With care and consistent routines, any keeper can supply fresh, nutritious pellets to their local community while keeping the colony strong.
FAQ
What are the main benefits of collecting pollen from my hives?
Collecting pollen supplies an additional revenue stream and supports local markets. It also lets you analyze forage diversity, monitor colony nutrition, and produce a natural supplement for humans and livestock. Proper collection helps track seasonal changes in nectar and pollen sources, which informs hive management and placement decisions.
How does installing a collection device affect the colony’s nutrition?
A correctly used device removes only a small fraction of incoming loads, so colonies still receive most of their pollinators’ protein. Monitor brood rearing and food stores for a few weeks after installation. If you see reduced brood or foragers, reduce collection frequency or remove the device until the colony recovers.
What’s the difference between top-mounted and bottom-mounted designs?
Top-mounted devices sit over the upper entrance and usually cause less traffic disruption, making them easier to check. Bottom-mounted units replace or fit under the bottom board and often collect more without changing bee flight patterns. Choose based on hive configuration, ease of access, and how much you plan to harvest.
Are front-porch style units harder to maintain?
Front-porch models give easy access for quick checks and harvesting but can clog with debris and require more frequent cleaning. They may also change guard behavior at the entrance. Regular removal of trapped material and brief inspections reduce stress on the colony and keep the unit functioning.
How long should I leave a collection device on a colony each season?
Use the device during strong nectar and pollen flows—typically a few weeks to a couple of months depending on local forage. Limit continuous use to avoid stressing brood production. Rotate trapping periods with rest periods of at least several days to let stores build up and brood development stabilize.
What hive adjustments are needed before installing a device?
Ensure the colony is healthy, queen-right, and has adequate stores and brood. Clear excessive propolis at the entrance, verify normal foraging activity, and confirm there’s a dedicated landing area. Adjust entrance sizes so traffic flows smoothly and place the unit at a height compatible with your hive bodies.
How do bees react when a collection device is first introduced?
Expect an adjustment period of a few days. Foragers may hesitate or try alternative entrances. Guard bees can be more alert initially. Most colonies adapt quickly; if aggression or reduced foraging persists, remove the device and reintroduce it later or try a different mounting style.
What are the best practices for harvesting fresh material?
Harvest in the morning when loads are drier, check trays daily during peak flow, and avoid harvesting after rain. Use a clean, food-grade container and sieve to remove chaff. Short handling times and quick cooling preserve color, aroma, and nutritional quality.
How should I clean and process collected material to remove debris?
Start with a coarse sieve to separate large bits of comb and wood. Follow with finer screens to remove dust and insect fragments. Work in a dry, shaded area and avoid washing, which can reduce quality. Gentle agitation helps separate particles without crushing pollen pellets.
Can using a fan or agitation improve separation during processing?
Small, low-speed fans or controlled agitation can help remove light debris like chaff and flower parts. Use a calibrated setup so pellets don’t blow away. Mechanical pollen cleaners designed for apiary use are available and make the process more consistent and less labor-intensive.
What storage methods preserve collected material long term?
Dry the harvest to below 6–8% moisture, then store in airtight, opaque containers in a cool, dark place or freeze for extended shelf life. Vacuum sealing and refrigeration slow degradation. Label jars with date and source hive or location for traceability.
How do I choose which colony to equip with a collection device?
Select strong, disease-free colonies with robust foraging populations and steady brood. Avoid newly established colonies or those recovering from stress. Consider rotating equipment among hives to balance collection impact and evaluate individual colony performance.
Will collection reduce honey production or harm the queen?
When used properly, a device removes only a fraction of incoming loads and should not significantly reduce honey stores or harm the queen. Monitor honey supers and queen laying patterns. If honey flow or brood production drops, reduce trapping intensity or suspend use until the colony recovers.
How often should I empty and inspect the device?
During active collection, inspect every 1–3 days to prevent clogging and spoilage. In lighter flows, checks every 3–7 days suffice. Frequent inspections allow early detection of pests, mold, or excessive debris and help maintain product quality.
Are there specific times of year when collection is most productive?
Peak collection aligns with local bloom periods and strong nectar flows—commonly spring and early summer in many regions. Timing varies with climate and available flora. Track local bloom calendars and your hive’s foraging patterns to schedule trapping windows for maximum yield.