This guide offers a clear, season-by-season plan to protect your hives and boost honey yields. It is written from the perspective of a novice improver working in Gloucestershire, South of England, but it fits U.S. beekeeping routines and climates. The goal is to increase colony survival while reducing mite pressure and maximizing honey.
Simple routines make inspections less stressful and help you track brood, the queen, and stores. Pay attention to equipment, supers, and winter preparations to keep nucs and established hives strong.
Over the year, we cover spring feeding, fall syrup management, pollen checks, and timing inspections to avoid swarms. Use this practical schedule to manage time, protect your colonies, and collect more honey with confidence.
Key Takeaways
- Follow a year-round, practical plan to protect hive health and improve survival.
- Track brood, queen status, and stores to reduce pest risk and boost honey.
- Keep equipment and supers checked before peak nectar flows.
- Use spring and fall feeding strategies to support colonies through the seasons.
- Regular, short inspections save time and lower stress for you and your hives.
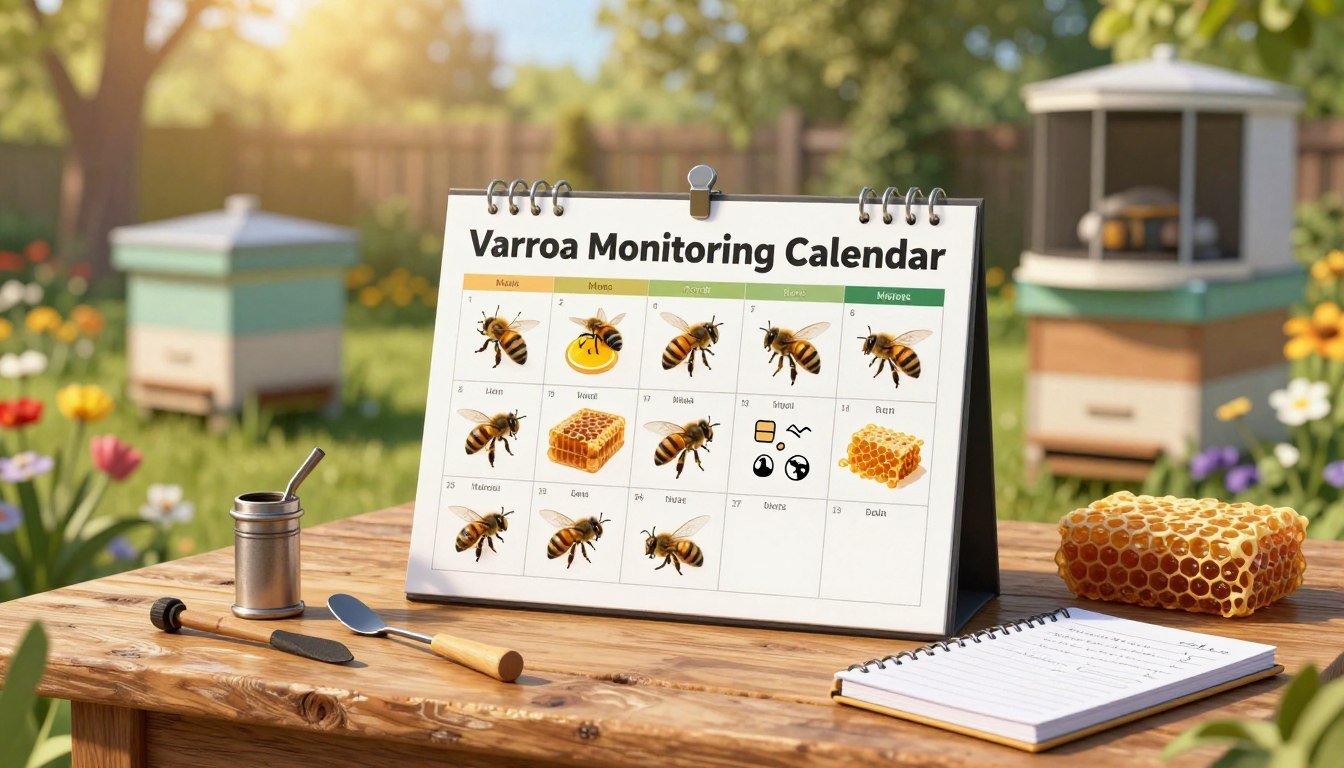
Understanding the Varroa Monitoring Calendar for Backyard Beekeepers
A structured schedule helps turn hive biology into practical tasks you can do on time each season.
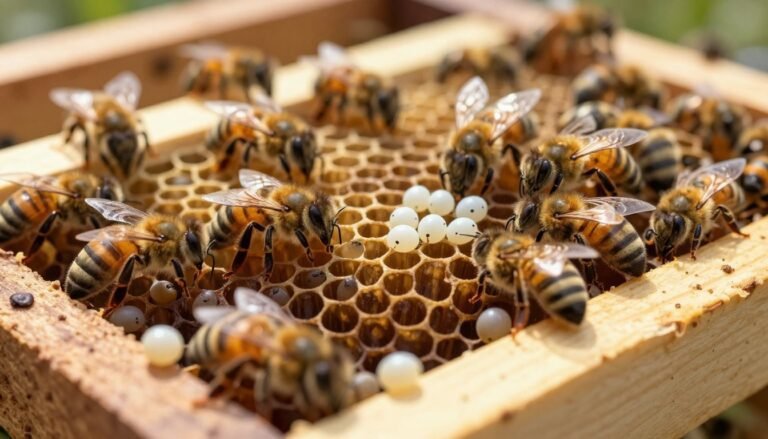
The Lifecycle of Varroa Mites
The parasitic mites reproduce inside capped brood and grow their population as the brood cycle repeats. Small shifts in brood timing can let populations surge unnoticed.
Watch the queen and brood patterns to find the windows when treatments will be most effective. Bill Hesbach, a Master Beekeeper, stresses that keeping a low population year-round is the best defense for healthy colonies.
“Maintaining a consistent schedule is the primary goal to protect overwintered colonies.”
Why Consistent Monitoring Matters
Regular checks reveal how cluster behavior and temperatures affect mite pressure. That informs when to apply a treatment and when to leave supers on for honey.
- Track pollen and fall activity to predict winter strength.
- Compare nucs and strong colonies to adjust actions by time and need.
- Use a year plan to reduce surprises and improve survival.
For a practical yearly schedule and time management tips, see a yearly beekeeping schedule and time management tips.
Early Spring Assessment and Initial Hive Checks
As spring nudges temperatures up, a quick early assessment tells you which hives need attention first.
Check the queen and brood to confirm laying has resumed. Open only as far as needed and count frames of bees. If a colony has fewer than two frames, plan to unite it with a strong colony or a nuc.
Weigh hives in March. In Gloucestershire I use 14×12 brood boxes; they hold more stores but need careful handling compared to standard doubles. Make sure there is enough honey and pollen as brood rearing increases.
Watch the entrance for flight and pollen return. That simple observation shows activity, cluster strength, and early population trends.
- Finish repairs and check frames and equipment before nectar flows.
- If weather or temperatures drop, feed to prevent starvation.
- Keep an eye on mites and plan treatment timing once brood cycles expand.
“A short, timely check in early spring saves weeks of trouble later in the season.”
New to this? See the best time to start for additional seasonal context and planning.
Managing Mite Populations During the Spring Nectar Flow
Spring’s nectar flow raises colony activity and demands focused mite controls during visits. Inspect hives only when the temperature is above 15C to avoid chilling the brood. Short, regular checks keep your queen and frames under observation without stress.
Timing is key: during the nectar flow inspect every 7–9 days to spot swarming signs and assess brood pattern. If bees cover 7 of 10 frames, add honey supers to give space for incoming nectar.

Techniques for Drone Brood Removal
Removing drone brood is an effective, non-chemical way to lower mite populations early in the year.
- Place drone brood frames or foundation before peak drone production.
- After capping, remove and freeze or destroy the frame to remove the mites.
- Repeat every brood cycle during the spring nectar flow to cut the mite population.
| Action | When | Benefit |
|---|---|---|
| Inspect hives | Every 7–9 days in spring | Detect queen issues and swarm prep |
| Add honey supers | When bees cover 7 of 10 frames | Prevent congestion during nectar flow |
| Drone brood removal | Before and during peak drone rearing | Reduce mite population without chemicals |
| Manage sugar syrup | Only when needed; avoid near harvest | Protect honey quality |
“By removing drone brood early, you protect colony health through the busy summer months.”
Summer Strategies for Colony Health
Warm months shift priorities from queen start-up to colony maintenance and resource management.
Keep water available. Dry spells reduce nectar and push bees to seek moisture. Place a clean water source near the entrance and refresh it daily in hot weather.
Watch the queen and brood closely. In summer she can lay large numbers of eggs to sustain a growing population. Short inspections every 7–10 days help you spot pests or congestion without stressing the hive.
Ventilation and shade matter. Ensure proper airflow to prevent overheating and reduce moisture build-up. If you use honey supers, avoid chemical treatment while honey is being stored to protect harvest quality.
- Provide water and pollen sources when nectar flow dips.
- Limit full inspections during a summer dearth; bees may be more defensive.
- Manage supers to give space and prevent swarming pressure.
| Focus | Action | Benefit |
|---|---|---|
| Water | Maintain fresh source near entrance | Reduces robbing and supports brood-rearing |
| Ventilation | Add screened crown or shaded stand | Prevents heat stress and mold |
| Supers | Check health before adding or harvesting | Protects honey and avoids treatment overlap |
“A strong summer colony builds the reserves needed to survive winter.”
Plan time to review long-term tasks. Use a concise seasonal checklist and tips on improving apiary flow to stay efficient during the busy season: apiary productivity.
Late Season Monitoring and Treatment Windows
As the year moves toward autumn, timely checks and correct treatment windows protect colony health and winter stores.
Late season checks are critical. Mite populations often peak in late August or early September, so act before brood decreases and colonies cluster. Confirm equipment and remove honey supers you intend to harvest before starting chemical treatments.

Formic Acid Applications
Formic acid products such as Formic Pro or Mite Away Quick Strips give effective control when labels are followed. Formic Pro commonly runs a 14-day application while Quick Strips can be used in a 7‑day window.
Apply during stable temperatures and follow safety guidance closely. These treatments can penetrate capped brood and reduce mite load quickly.
Thymol-Based Treatment Options
Thymol gels and trays such as Apiguard need sustained warmth to work. Ensure temperatures stay above 15°C for the full four-week treatment period.
Do not use Apiguard if you plan to harvest honey from the supers. Protect harvest quality by removing or managing honey supers before any thymol application.
Managing Honey Supers During Treatment
Plan the end of the nectar flow and confirm your colonies have enough stores for winter. Check frames and equipment so honey supers are clear before treatment begins.
Quick checklist:
- Remove or isolate honey supers meant for harvest.
- Choose treatment based on temperature and brood status.
- Follow label directions and wear PPE when applying chemicals.
| Treatment | Typical Window | Notes |
|---|---|---|
| Formic Pro | 14 days | Effective on capped brood; follow label and temp guidance |
| Mite Away Quick Strips | 7 days | Shorter application; useful in variable weather |
| Apiguard (thymol) | 4 weeks | Requires >15°C throughout; avoid if honey supers remain |
“Treat early in the late season and protect your honey harvest by removing supers before application.”
For a seasonal schedule that helps plan treatment timing and hive tasks, consult a practical seasonal beekeeping calendar.
Preparing Colonies for Winter Success
Before hard frosts arrive, prepare each hive so the colony can maintain warmth and food.
Target stores: Ensure each colony holds at least 18 kg of honey. If you use a Bee Cosy, 15 kg may suffice. Feed thick 2:1 sugar syrup in autumn to build these stores when natural nectar flow slows.
Install mouseguards at the end of October. Without them, nearly half of hives risk rodent invasion during clustering.
Ventilation prevents moisture buildup. If your hive has a solid floor, add top ventilation or a moisture board to keep brood healthy.
By late October, configure roofs, add insulation, and protect exposed wood from woodpeckers with chicken wire. These small steps reduce winter losses and stress on the queen and brood.
“Heft the hive rather than opening it; weight tells you if stores are sufficient without chilling the cluster.”
- Aim for 18 kg stores (15 kg with Bee Cosy).
- Feed 2:1 syrup when needed to top up honey.
- Install mouseguards end of October.
- Ensure top ventilation on solid-floor hives.
- Insulate roofs and shield against woodpeckers.
| Task | Timing | Benefit |
|---|---|---|
| Heft hive | Weekly in October | Monitor stores without opening |
| Feed 2:1 syrup | Late summer to mid-October | Build winter reserves |
| Install mouseguard | End of October | Prevent rodent entry during clustering |
| Top ventilation & insulation | By end of October | Reduce moisture and heat loss |
Essential Tools for Accurate Mite Counting
Consistent sampling gives a clear picture of hive health across the year.
Two simple tools are central to accurate counts: a sticky board and an alcohol wash kit. Both methods have clear strengths and suit different needs.
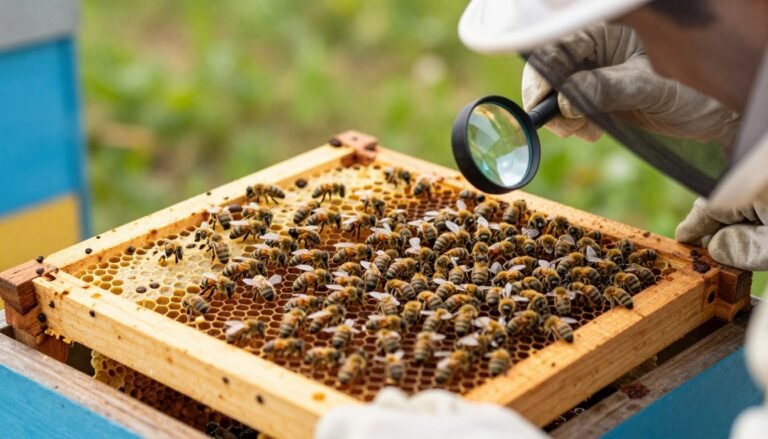
Sticky Board vs Alcohol Wash Methods
Sticky boards offer a non‑invasive snapshot. Place one under the hive for a three‑day drop in early spring to spot colonies with unusually high mite numbers. This method is quick and keeps the queen and brood undisturbed.
Alcohol washes give the most accurate population estimate. They are the best test to check how well a treatment worked after application. Use the wash on a sample of about 300 bees to get reliable data.

“Keep a regular schedule of checks so you respond to trends instead of surprises.”
- Maintain a clean kit and calibrate scales and trays.
- Record counts and compare across the year to guide treatment timing.
- Every beekeeper should keep both tools in their set to protect colonies and honey stores.
| Tool | Best Use | Pros |
|---|---|---|
| Sticky board | Three-day drop in early spring | Non-invasive; easy to deploy |
| Alcohol wash | Post-treatment efficacy and accurate counts | Most accurate; gives percent infestation |
| Record logbook | Year-round tracking | Shows trends by hive and season |
Safety Protocols for Chemical and Organic Treatments
Treatments demand the same careful routine as inspections; safety should lead every application.

Read labels and plan time before you handle any product. Always wear appropriate PPE and keep children and pets well away from the apiary.
Oxalic acid vapor works best when a colony is broodless. The optimal window is about 10–25 December in many temperate areas.
Caution: vaporization generates heat. Polystyrene hives can melt or ignite, so do not vaporize in polystyrene equipment.
“Ensure strong colonies are truly broodless before treatment to reach the highest kill rate.”
Never use hard-spectrum miticides such as Apistan or Checkmite if you intend to protect honey quality long term. These leave residues and harm colony resilience.
- Confirm brood status and queen activity before treatment.
- Choose methods compatible with your hive materials.
- Remove or protect honey supers if a product risks contamination; follow label timing.
| Risk | Action | Benefit |
|---|---|---|
| Heat from vapor | Avoid polystyrene hives; use metal-bodied hives or alternative methods | Prevents hive damage and fire risk |
| Residues in honey | Do not use Apistan/Checkmite; remove supers when needed | Protects honey quality and long-term colony health |
| Operator exposure | Wear PPE and follow label limits | Reduces health risks and contamination |
For more detailed treatment guidance and safety steps, see a government treatment guide and a practical beekeeping overview: honey bee health treatment guide and a backyard beekeeping guide.
Conclusion
A steady routine through the seasons keeps your hive strong and your honey harvest consistent.
Use short, regular checks to watch the queen, brood and cluster. Combine equipment care with timely treatments to limit mite pressure and protect colony health into winter.
Plan your spring and fall actions, manage supers and syrup, and weigh hives when needed. These small steps save time and raise survival rates.
Thank you for tending your bees and for choosing responsible beekeeping. With attention to frames, entrance activity, and weather, you can protect honey production and enjoy a healthier apiary all year.
FAQ
What is the best time of year to start checks on my hives?
Begin checks in early spring as temperatures climb above 50°F and bees become active. Inspect cluster strength, brood patterns, queen presence, and perform your first mite assessments before adding honey supers or during the initial nectar flow. Early action helps maintain strong colonies through peak season.
How often should I test mite levels during the season?
Test every 4–6 weeks during spring and summer, and more frequently during nectar flows or when you notice reduced population or spotty brood. Increased testing in fall helps set up winter treatments. Regular checks let you act before infestations weaken the colony.
Which sampling method gives the most reliable results?
Alcohol wash (or sugar roll where legal) gives the most accurate estimate of mites per 100 bees. Sticky boards detect trends over time but are less precise. Use alcohol wash for treatment decisions, and sticky boards for follow-up monitoring after interventions.
Can I remove drone brood to reduce mite pressure?
Yes. Removing capped drone brood every 21 days can lower mite reproduction because mites preferentially infest drone cells. Cut out and freeze the frames before disposal to kill mites, and replace frames with clean foundation to encourage healthy brood production.
How do I manage honey supers when treatments are needed?
Avoid placing honey supers on hives during chemical treatments unless the product label explicitly allows it. Use treatment options approved for use with honey supers or remove and store supers in a cool, dry place during application to prevent contamination of harvestable honey.
What are safe treatment options as temperatures cool in fall?
Formic acid and thymol-based products often work well in late season since they penetrate sealed brood or work at lower temperatures. Follow manufacturer instructions closely and time treatments to minimize brood disruption and ensure residues do not taint honey.
How should I prepare colonies for winter to reduce mite-related losses?
Reduce mite loads by late summer or early fall, ensure queens are active and laying properly, consolidate weak colonies, and leave adequate stores. Treat if counts exceed thresholds, insulate hives as needed, and maintain ventilation and an entrance for water and temperature control.
What safety protocols should I follow when using treatments?
Always wear gloves, eye protection, and follow label directions. Keep children and pets away, avoid treating on very hot days, and store chemicals securely. Rotate treatment types annually to slow resistance and record applications, dates, and hive responses.
How do weather and nectar flow changes affect monitoring and treatment timing?
Warm spells speed brood cycles and may increase mite reproduction; heavy nectar flows can dilute worker attention to hygiene. Time treatments when brood levels and temperatures optimize treatment efficacy and avoid peak honey flows where possible to protect harvest quality.
What threshold should trigger treatment interventions?
Use established thresholds such as 3 mites per 100 bees (3%) in summer for many operations, but adjust based on colony strength and season. Higher counts in late summer and fall demand prompt action to prevent winter collapse. Confirm with a reliable sampling method before treating.
Can organic options alone keep colonies healthy year-round?
Organic products like thymol, oxalic acid, and formic acid can be effective when used correctly and in rotation, but alone they may not suffice if monitoring is inconsistent. Combine good husbandry, timely interventions, and regular testing to maintain low infestation levels.
How do I track and record mite counts and treatments effectively?
Use a logbook or app to record dates, sample type, mite counts per 100 bees, treatments applied, weather, and hive condition. Consistent records help spot trends, evaluate treatment success, and plan future actions for each colony in your apiary.
What equipment should every hobbyist have for accurate counts?
Essential tools include a reliable alcohol wash kit or sugar roll kit, a sticky board, a small bee brush, labeled sample jars, a queen excluder if used for management, and basic protective gear. Calibrated scales and a thermometer help with broader hive health assessments.