This introduction outlines a clear, small-batch process a beekeeper can follow to turn caps and comb into usable beeswax for candles, skincare, wood finishes, and crafts.
You will learn practical steps, basic science, and simple tools. The guide covers collecting caps from frames, draining honey, and using water separation and a second-stage melt to filter impurities.
Beeswax melts near 145°F and is insoluble in water, which explains why gentle heat and careful filtering matter. Small operations can use a double boiler or solar and electric melters depending on scale.
Prepare a container and workspace before you start. A clean container, a sharp knife for cappings, and basic filtration give safer, higher-quality blocks that store well and remelt predictably.
Key Takeaways
- Repurpose cappings and comb to add value beyond honey.
- Use controlled heat and water separation for cleaner beeswax.
- Small kits and a double boiler work for most hobby hives.
- Filtered blocks perform well in candles, skincare, and wood care.
- Plan workspace, tools, and safety to reduce waste and errors.
What Is Beeswax and Why It Matters Today
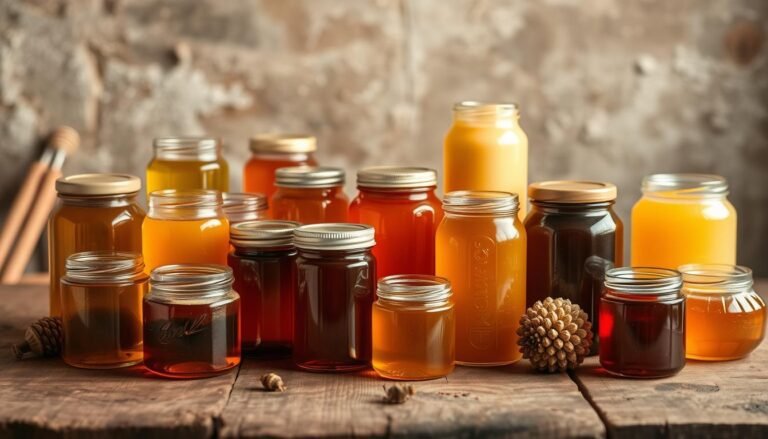
The light, freshly sealed cappings from a hive give hobbyists the cleanest starting material for making usable blocks at home.
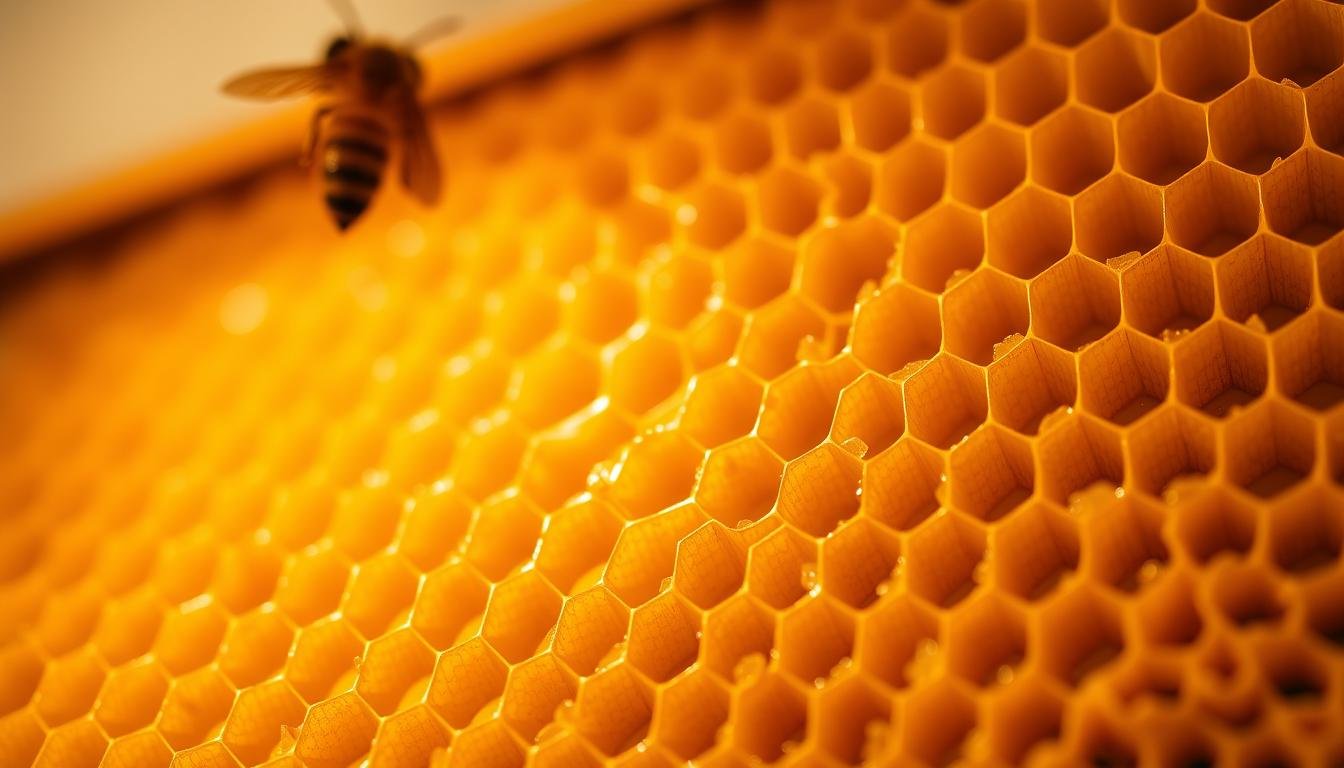
Beeswax is the structural medium insects use to build honeycomb for food storage and brood. Worker bees secrete tiny scales from abdominal glands, soften them with saliva, and shape them into hexagonal comb. Fresh cappings over ripe honey are pale and low in debris, so they make the best input for melting.
The material is chemically complex—more than 250 compounds—and it melts near 63°C (145°F). That melting point makes it stable for candles yet low enough for safe kitchen methods using indirect heat.
Because it is insoluble in water and burns cleanly, this substance floats in water-bath methods and yields low-soot candles and gentle skincare bases. Simple tools like an uncapping knife, a bucket for collection, and a sealed bag for storage keep the harvest tidy.
- Look for light cappings and little propolis for easier filtering.
- Store material dry in a container until processing.
| Property | Typical Value | Why it matters |
|---|---|---|
| Melting point | 63°C / 145°F | Safe for double boilers; stable candles |
| Solubility | Insoluble in water | Enables water-bath separation of debris |
| Composition | 250+ esters & hydrocarbons | Natural profile justifies filtration for purity |
| Common inputs | Cappings, older comb | Fresh cappings need less filtering than old comb |
Essential Tools and Setup for the Process
Setting up the right kit before you start keeps heat manageable and debris out of the final block. A brief prep will speed work and protect quality.
From uncapping knife to double boiler: choosing the right equipment
Core tools include an uncapping knife for frames, a collection bucket or tray for cappings, and a sturdy pot paired with a double boiler setup for melting.
A thermometer helps keep temperature below about 175°F to preserve aroma and color. Dedicate at least one pot and a set of utensils to this use; cooled resinous wax bonds hard to common cookware.

Dedicated pots, mesh, cheesecloth, and safe containers
Fine mesh and cheesecloth act as a basic filter, catching debris while letting melted material pass. For heavy loads, place cappings in a cheesecloth bag and tie it off — solids stay contained and remove in one lift.
- Uncapping knife for frames and clean cuts.
- Bucket or tray at the uncapping station to collect cappings.
- Fine mesh + cheesecloth for multi-stage filtering.
- Dedicated pot and double boiler to avoid scorching.
- Heat-resistant containers or silicone molds for easy release.
| Item | Why it matters | Tip |
|---|---|---|
| Double boiler | Even, indirect heat prevents burning | Use a deep pan and monitor with a thermometer |
| Mesh / cheesecloth | Removes debris for cleaner melt | Layer for best results |
| Silicone molds / containers | Release pucks without damage | Chill rigid molds if needed |
Layout matters: line counters, set a drop cloth, and keep a bucket ready at the uncapping station. A tidy workspace makes the method faster and reduces waste.
Bee wax extraction
Collecting clean cappings during harvest sets the tone for a high-quality final product. Slice caps from frames with a warmed knife and let the cappings fall into a lined bucket or tray to cut sticky handling later.
Collecting wax cappings during harvest: frames, caps, and buckets
Work quickly at the hive and keep a shallow tray beneath each frame. Use a warmed uncapping knife so caps lift cleanly and pieces of comb stay intact. Light, fresh wax cappings need less processing and yield brighter blocks.
Separating honey from wax: gravity drain vs. water flotation
For honey recovery, let cappings drain through a strainer or mesh overnight. Gravity draining reclaims a surprising amount of honey with minimal mess.
Alternatively, use water flotation: the wax floats and honey dissolves below. Both methods work; choose based on available space and how much honey you want back.
Kitchen water-bath method: melt, “wax water,” cool, and lift the cake
Place cappings in a cheesecloth bag, submerge in a pot of simmering water, and heat gently. Avoid boiling; steady heat preserves color and aroma.
When the material melts, remove the bag and let the pot cool fully. A solid cake will form on the surface of the water — the classic “wax water” stage — making lifting easy.
Second melt and filter: double boiler, mesh or coffee filter, clean wax
Run a knife under the cake to lift it, then scrape away any dark underside with debris. Break the cake into pieces and re-melt in a double boiler for even heat.
Pour through a fine mesh or coffee filter into clean molds. This final pass removes fine particles and gives a usable, low-odor beeswax suitable for candles, skincare, or finishes.
Alternative Melting Methods: Solar, Crockpot, and Electric Melters
Passive solar setups, slow crockpot melts, and dedicated electric units all protect quality by avoiding aggressive boiling. These options let you match equipment to climate, batch size, and budget while keeping color and aroma intact.
Solar wax melter setup: build an angled glass top, a perforated tray, and a collection container beneath with a little water. Melted wax drips through the tray and floats on the water while debris stays behind.

Solar melters and energy-smart processing
Solar is an energy-smart choice. Leave the unit in direct sun for passive operation. It requires little oversight when sunlight is reliable and suits sunny regions and small apiaries.
Crockpot control for small batches
Set a crockpot to low (about 155°F / 68°C) with a little water to buffer heat. This method gently melts material overnight and forms a clean top disc after cooling.
Electric melters for scaling up
Electric units accept frames directly and speed throughput for multiple hives. They cost more but centralize draining and capture, making them efficient for higher volume.
- Aim for gentle heat, avoid boiling, and keep lids closed for steady conditions.
- Place a little water in collection pans to separate residual honey and ease cleanup.
- Filter all melted material after collection for best clarity and consistent results.
- Label batches by method and date to compare clarity and yield over time.
Safety note: for complete safety guidance on handling hot melts and setup precautions, see extraction safety recommendations.
Safety First: Heat, Melting Point, and Fire Precautions
Safe handling begins with strict temperature control and a clear plan before any melting takes place. Set up on a stable surface, keep a tidy work area, and stage tools where you can reach them without moving hot pots.
Temperature targets and why they matter
Aim for 140–175°F to liquefy material without degrading color or scent. This temperature range protects finished blocks from darkening or becoming brittle.
Boiling risks and indirect heat
Avoid boiling water (212°F). Boil-over can splatter hot liquid and force temperatures above safe limits, raising the chance of ignition and staining your batch.
Use a double boiler or water bath rather than direct flame. Indirect methods cut the risk of a pan fire and give steady, controllable heat.
Practical precautions for beekeepers
- Never leave a melt unattended; the material can ignite like cooking grease.
- Work in a ventilated area and wear heat-resistant gloves and eye protection.
- Keep a suitable fire extinguisher nearby and know how to smother small pan fires.
- Do not pour cooled scrap down drains—let it solidify and discard with waste to avoid clogs.
- Verify your thermometer before starting and confirm the setup is stable.
Gentle melting preserves quality. Following these steps keeps your process safe and improves final results every time.
Cleaning and Filtering: From Debris to Clean Wax
Start cleaning by rinsing cappings with warm water to remove sticky honey without softening the solids. This prevents trapped residues that can make later filtering harder.
Dry cappings completely after the rinse. Even a little moisture can cause off-odors or fermentation during storage or when you heat the material again.
Cheesecloth bag technique: trapping debris while wax melts
Place dried cappings in a layered cheesecloth bag and tie it closed. Submerge the bag in simmering water and heat gently so the wax melts out while debris stays in the bag.
As the melted material rises, contaminants either remain in the bag or settle beneath the cooled disc. Lift the top disc and scrape away dark bits before the re-melt.
Rinsing, drying time, and re-melt cycles for purity
“A slow, patient method with at least one re-melt yields noticeably cleaner results.”
After the first lift, re-melt in a double boiler and filter through fine cheesecloth, a paper coffee filter, or a purpose-made filter. Use mesh as a secondary barrier for fine pollen and propolis.
- Rinse with warm water first to avoid premature melting.
- Allow thorough drying to prevent fermentation.
- Use layered cheesecloth bags and follow with mesh for small particles.
- Plan for one or two re-melt and filter cycles for premium clarity.
Label jars by cycle count and clarity to track improvements. For a practical guide to step-by-step filtering, see this short tutorial on filtering beeswax.
Molding, Storage, and Quality Considerations
Choosing the right mold and storage routine saves time and keeps finished material clean and ready for use.
Pucks and blocks: best molds and alternatives
Flexible silicone muffin tins work best. They pop pucks out easily, give uniform size, and reduce sticking so pucks remelt predictably.
Metal pans or small cartons also work. Chill rigid molds briefly for a clean release and neat edges.
Storing finished pieces
Wrap blocks in unbleached paper or muslin cloth to keep dust and odors away while letting air pass. Store in a cool, dry container out of direct light and far from spice cabinets or solvents.
Keep a few working pucks at hand and reserve the rest in a labeled box with production date and hive source to track quality over time.
Quality: caps, cappings, and comb
Cappings from honey supers produce brighter, cleaner beeswax and need less processing than brood comb, which can hold propolis and cocoons. Even solar wax melter outputs benefit from a final filter before molding.
- Standardize puck size to simplify recipe scaling.
- Note aroma and color over time — well-stored beeswax stays stable for years.
Top Uses: Beeswax Candles, Cosmetics, and More
A small batch of clean, filtered material transforms easily into long-burning candles and nourishing balms.
Choosing wick size and pour technique for reliable candles
Select a cotton wick sized to your container diameter so the flame heats the surface evenly. Melt the material gently and pour at a steady temperature to avoid sinkholes and rough tops.
Preheat containers and center the wick before the pour. Test one candle at a time and record wick size and pour temp for repeatable results.
Cosmetics: simple recipes for balms and creams
Beeswax adds structure and a moisture-locking barrier to lip balms and creams without synthetic thickeners. A typical blend pairs softened oil, a measured amount of beeswax, and a light essential oil.
Use the gentle melt wax approach and strain before cooling to keep texture smooth. Label each batch with ratios so you can refine firmness and scent.
Food wraps, wood care, and creative projects
Mix beeswax with jojoba oil and a bit of resin to coat fabric for reusable food wraps. For wood, a beeswax-based polish nourishes grain and adds water resistance.
Encaustic painting and small crafts benefit from the material’s workability and low-soot burn when used in candles. Keep batches clean—clean wax means brighter flames and less soot.
- Practical tip: test fragrance loads; the natural honey note pairs well with subtle scents.
- Labeling: record wick size and pour temperature to dial in consistent candle performance.
- Repeatable way: start small, document steps, and scale once you have reliable results.
For step-by-step processing and DIY guidance, see this short guide on DIY methods.
Troubleshooting and Pro Tips for Beekeepers
When a block turns dark, brittle, or soft, the fix is often a simple re-melt and a finer filter. Discoloration usually means impurities or excessive heat. Re-melt with clean water and run the batch through a finer mesh to remove remaining debris.
Brittle results often point to overheating. Keep temperatures below about 175°F and avoid prolonged high heat. If pieces feel hard, check your thermometer and shorten the melt time.
Soft or tacky pucks commonly hold residual honey or moisture. Repeat the water-bath separation so dissolved sugars and water migrate away. Cut large cakes into smaller pieces before reheating for faster, even heat and easier pouring.
Beginner tips to save time and frustration: start with small batches and use dedicated cookware. A drop cloth catches flecks and makes cleanup quick. Log each method, temperature, and filter used so you can recreate what works.
- For dark or cloudy blocks: re-run the process — re-melt with clean water and filter through finer media.
- Address brittle outcomes by reviewing heat control and shortening melt time.
- Fix soft textures by repeating the water-bath separation; ensure full drying before storage.
- If pours slow, replace clogged filter media to keep a steady flow and prevent premature setting.
One clear way to improve consistency is patience: allow full cool-down before lifting discs and schedule enough time for thorough filtering. These small steps help the beekeeper get repeatable, clean beeswax ready for candles, balms, and finishes.
Conclusion
Collect caps cleanly during your harvest honey routine by using a warmed knife and dropping cappings into a lined bucket at the hive. This simple habit helps you reclaim honey and prepares cleaner material for processing.
To extract beeswax, drain or float cappings to separate honey, then use a water bath and finish in a double-boiler with fine filtering. Store molded pucks wrapped in paper inside a labeled container to track hive, date, and method.
Choose fresh wax cappings over old comb for brighter blocks. Keep temperatures steady, allow patient cooling, and document temps and filters — small records help beekeepers improve yield and consistency season after season.
FAQ
What is beeswax and why does it matter for modern makers?
Beeswax is a natural lipid produced by honey-producing insects to build comb and cappings in the hive. It matters because it has a high melting point, resists water, burns cleanly, and serves in candles, cosmetics, food wraps, and wood care. These properties make it a durable, versatile material for small-scale producers and crafters.
What key properties should I look for when choosing raw beeswax?
Look for a neutral odor, consistent color, and few impurities. Important technical traits include melting point range, clean burn for candles, and visible resistance to moisture. Higher-quality pieces will have minimal debris and a firm texture when cooled.
How do bees form comb and cappings inside the hive?
Worker insects secrete thin flakes of wax from abdominal glands and shape them into hexagonal cells. As honey is stored and ripened, bees cap the cells with a thin layer of wax, called cappings, which beekeepers remove during harvest for processing into blocks or pucks.
Which tools are essential for small-scale processing?
Core items include an uncapping knife or heated fork, a double boiler or dedicated pot, cheesecloth or fine mesh for filtering, sturdy containers or buckets, a heat-resistant mold like silicone tins, and a thermometer to monitor temperature. Use separate pots for food-grade batches to avoid contamination.
Should I use a double boiler or a direct-heat pot to melt wax?
Use a double boiler or water-bath method to control heat and avoid scorching. Maintaining gentle, even temperatures keeps volatile honey residues from burning and reduces fire risk. Direct heat increases the chance of overheating and odor development.
How do I collect cappings during a honey harvest?
Remove frames and uncap with a heated knife or uncapping fork over a tray or bucket. Let the honey drain, collect the caps separately, and store them in a sealed container until you process. Clean caps produce better, cleaner finished pieces after melting and filtering.
What are the main methods to separate honey from the comb pieces?
Two common approaches are gravity drain and water flotation. Gravity drain lets honey drip from uncapped combs into a collector over time. Water flotation or a hot-water bath loosens honey and allows cap removal, but requires careful filtering and drying to prevent fermentation.
How does the kitchen water-bath melt-and-cool method work?
Place cappings in a mesh bag or cheesecloth inside a pot of warm water. Heat gently until wax melts and floats to the surface. Turn off heat, let it cool to solidify the wax cake, then lift the cake from the water for rinsing and re-melting. This is practical for hobbyists with a few frames.
What filtering steps produce the cleanest finished product?
Perform a two-stage filter: first strain melted material through a coarse mesh to remove large debris, then pour through cheesecloth or a paper coffee filter while still warm. A second melt-and-filter cycle further refines color and removes residual particles for top-quality blocks or pucks.
Can I use a solar wax melter, crockpot, or electric melter instead of a stovetop?
Yes. Solar melters use low, passive heat and work well in sunny climates for energy-efficient processing. Crockpots provide steady low heat for small batches. Electric melters scale better for multiple hives but require temperature control and fire-safe placement.
What temperature should I maintain when melting to avoid problems?
Aim for a gentle range around 140–175°F. This is hot enough to liquefy material without boiling water or charring residues. Keep a thermometer handy and avoid sudden high heat to reduce odor and preserve quality.
What fire and safety precautions should be followed during melting?
Work in a well-ventilated area, never leave heating unattended, keep flammable items away, and use sturdy heatproof containers. Maintain low, controlled temperatures and have a fire extinguisher nearby. Avoid open flames when vapors may be present.
How do I use a cheesecloth bag to trap debris while melting?
Place caps or comb pieces into a double-layered cheesecloth or muslin bag and suspend it in warm water or a double boiler. As the solids soften, fine particles stay contained. Remove the bag and squeeze while warm, then filter the pooled liquid through finer cloth or paper before molding.
What’s the best way to dry and re-melt caps for higher purity?
After initial melting, allow the recovered cake to cool, then rinse lightly and let it air dry in a shaded, ventilated area. Re-melt using a double boiler and pass through finer filters. Repeat one or two more times for cosmetic-grade clarity and odor reduction.
Which molds and storage approaches produce durable pucks or blocks?
Use silicone muffin tins, metal loaf pans, or clean plastic cartons for consistent shapes. Pour warm filtered material into molds, cool fully, and unmold before wrapping. Store blocks in a cool, dry place in airtight paper or cloth to control odor and prevent moisture uptake.
How do I choose between cappings and brood comb for quality projects?
Cappings generally yield cleaner, lighter material since they come from honey storage areas. Brood comb may contain residues, darker color, or impurities from larvae and requires more filtration and re-melting. Reserve brood comb for non-cosmetic uses or extra refining cycles.
What are the top practical uses for refined material?
Common applications include candles (match wick size to container), lip balms and skincare formulations, food wraps, and wood or leather conditioning. Adjust melt-and-pour technique, blend with carrier oils for cosmetics, and test wicks to ensure a clean, stable burn.
How do I fix discolored, brittle, or soft finished blocks?
Re-melt and filter the pieces to remove trapped debris and moisture. For brittleness, ensure full dryness before molding and avoid overheating. Softness often indicates high residual honey or oil; additional melting and gentle washing can improve firmness and shelf stability.
Any pro tips for beginners processing small batches?
Start small, use dedicated pots and filters, label batches, and be patient with temperature control. Keep separate equipment for cosmetic-grade projects. Practice proper draining and multiple filtering passes rather than rushing a single high-heat melt.