Managing mite populations is vital to healthy honey bee colonies all year. The National Bee Unit emphasizes active management as part of a continuous integrated pest management approach. This method helps beekeepers reduce pest pressure while limiting chemical treatments.
When used correctly, this targeted technique can remove nearly half of reproducing mites from a colony. Per official guidance, it works best when timed in spring and early summer and repeated as part of an overall management plan.
Beekeepers seeking practical steps and timing can consult the detailed fact sheet available from the National Bee Unit via this practical guidance document. For direct advice, contact the National Bee Unit at 0300 303 0094.
Key Takeaways
- Active management protects honey bee colonies throughout the year.
- This targeted method is part of integrated pest management strategies.
- Proper timing can remove roughly 40–50% of reproducing mites.
- Repeat cycles and combine techniques for best results.
- National Bee Unit guidance offers step-by-step instructions and support.
Understanding the Biology of Varroa Mites
The biology of these parasitic mites explains why some comb areas attract higher infestations. Knowing how attraction and reproduction link to the life cycle of the host helps beekeepers plan targeted actions. Below we outline key behaviors that make certain cells a magnet for mites.
Mite Attraction to Drone Cells
Mites strongly prefer larger male brood cells. These cells have a longer post-capping period, which lets more offspring mature. Research by Al Toufailia et al. (2018) found that these cells attract about eight times more mites than worker brood.
Open drone cells act as lures. Mites enter while larvae are exposed and then become sealed in when workers cap the cells. That early access is a major reason infestations cluster in specific comb areas.
The Reproductive Cycle
Reproduction happens inside sealed honey bee brood cells. The mite’s cycle aligns with the development of Apis mellifera males, giving the parasite extra time to mature multiple offspring.
Because the reproductive timing matches the host, removing or isolating targeted frames can remove a high share of reproducing mites. For detailed procedural guidance consult the official fact sheet and a practical review of methods in this management methods review.
The Principles Behind Drone Brood Removal for Varroa Control
A simple, timed cycle of inserting and culling dedicated comb helps cut mite numbers significantly. This method takes advantage of the parasite’s preference for larger male cells and the longer development of drones.

When used twice in a season, drone brood removal can reduce mite populations by about 40–50%. Calis et al. (1999) modelled trapping honey bee brood and showed how targeted frames lower infestation rates.
Destroying the selected comb before adult drones emerge stops both the parent mite and its offspring from returning to the colony. That interruption buys time and often delays other chemical treatment while honey supers are on the hive.
“Trapping and culling targeted comb is a practical way to reduce reproductive mites without immediate chemicals.”
- Reduces reproducing mites by around 40–50% when done twice.
- Delays need for other treatments during summer honey flow.
- May require additional measures later in the season depending on population levels.
For a comparison of later treatment options, see this treatment comparison.
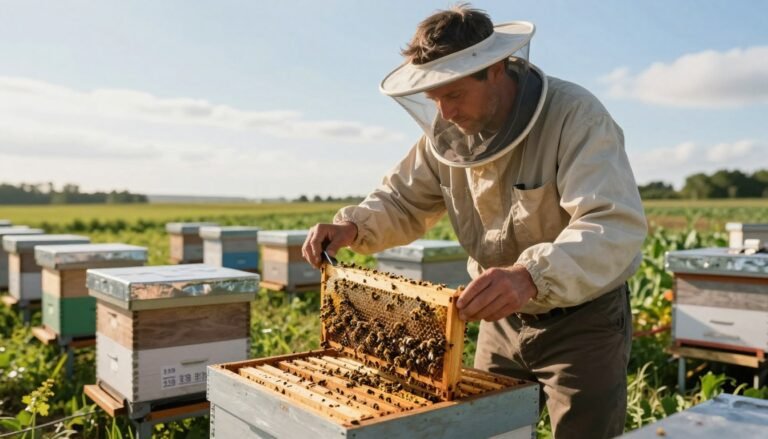
Essential Tools for the Beekeeper
The right frames and hand tools speed up work and reduce stress to honey bees. A dedicated frame of drone foundation—either a super frame or a brood frame—is the base item every keeper should have ready.
During inspections a sturdy hive tool is essential. It helps the beekeeper cut and lift excess drone comb cleanly from super frames. Proper cutting prevents damage to nearby worker comb and protects the colony.
- Frame of drone foundation: super or brood frame to attract larger cells.
- Hive tool: for precise cutting and lifting of capped comb.
- Protective kit: gloves and veil to keep work calm and safe for bees.
| Tool | Purpose | Practical Tip |
|---|---|---|
| Drone frame | Encourages targeted male comb | Place at colony edge in spring |
| Hive tool | Cut and lift capped comb | Keep blade sharp and clean |
| Protective gear | Reduce disturbance | Use light-colored clothing |
Good equipment makes inspections faster and helps keep mite levels lower. For detailed methods and timing see a practical varroa management guide or a hands-on harvesting method overview.
Preparing Your Hive for Mite Management
Start hive preparation early in spring. Give the colony a clear side space so the queen can use a new foundation frame.

Selecting the Right Frame Position
Remove one empty brood comb at the edge of the brood nest to make room. Insert a frame fitted with drone foundation beside the existing brood.
The queen is likely to lay male eggs in that new comb as the nest expands. Bees usually draw larger cells at the nest edge, which makes this the optimal spot.
Preparing the colony this way ensures Apis mellifera is ready for the harvesting cycle without undue stress to worker areas.
- Clear side space by removing a spare brood comb.
- Place a foundation frame next to active brood to encourage drone comb construction.
- Monitor the frame; the queen should begin laying within a few days.
Practical resources: consult a concise varroa management guide and a review of natural remedies to align timing and tactics.
“Proper frame placement at the brood edge makes targeted trapping far more effective.”
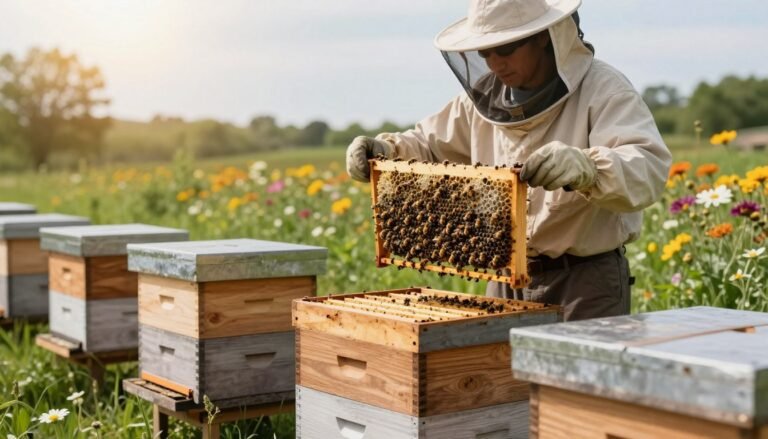
Step by Step Guide to Inserting Drone Frames
Insert a targeted frame beside active brood so the queen will lay male eggs in the new comb.
Check the frame around day 18 to confirm cells are sealed. This is the stage when mites enter and begin to reproduce.
Do not wait past day 24. Drones start to emerge at about 24 days. If you miss that window, mites and their offspring return to the colony.
- Make space at the brood nest edge and fit a frame with larger foundation.
- Allow the queen to lay; monitor sealing at day 18.
- Harvest or cull the frame before day 24 using a hive tool or knife.
Using a tool speeds the job and reduces damage to nearby worker comb. Timed action concentrates mites in the targeted comb and lowers overall mite population in the colonies.
“Timely checks and clean cuts make this method effective while keeping honey production intact.”
Monitoring Mite Levels During Development
Monitoring during sealed development gives the clearest picture of mite pressure. Inspecting capped cells at the right stage helps you make timely decisions about targeted comb management.

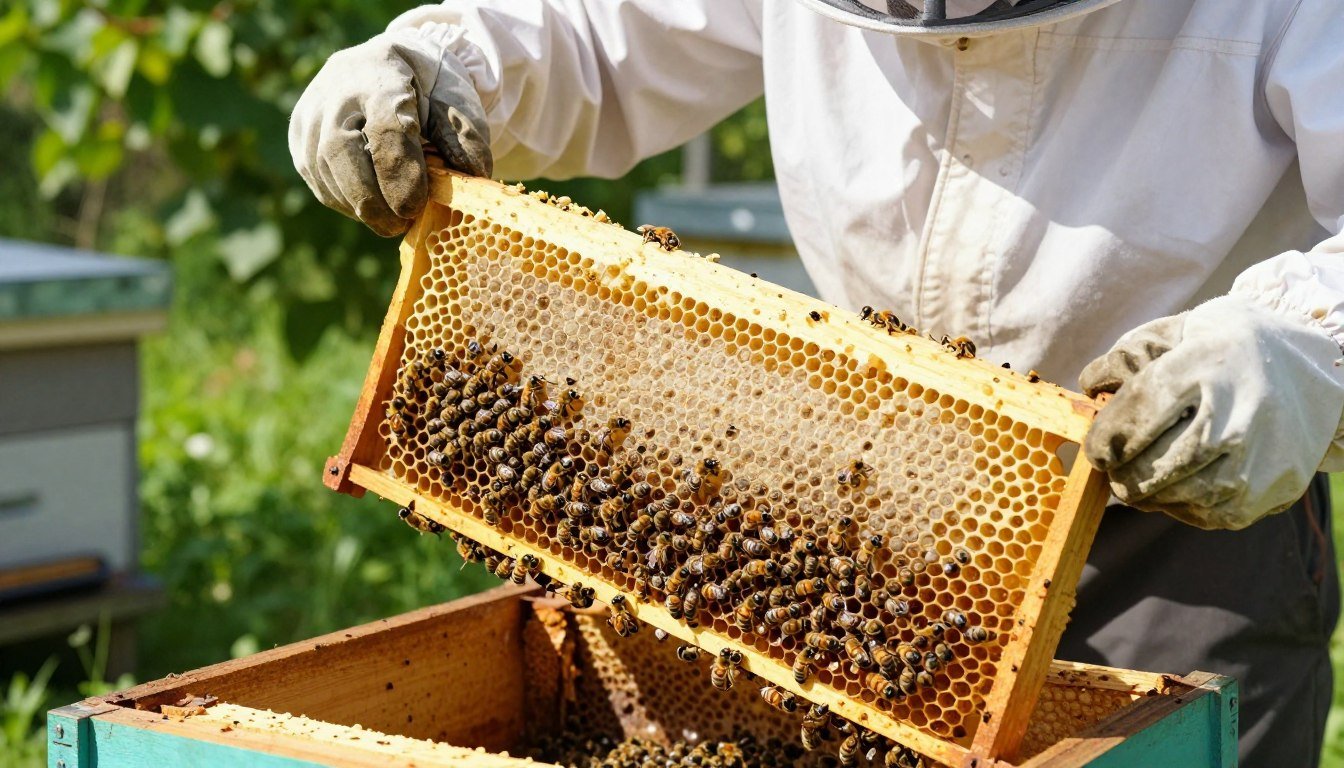
Checking Sealed Cells
Open a few capped cells and count mites on pupae and cell walls. This direct check is more reliable than surface counts alone.
If counts are low, consider letting favored colonies hatch their drones; if high, plan to cull or isolate the affected frames.
Assessing Mite Load
Record mite numbers per inspected cells and compare across frames and times. Use consistent sampling so trends are clear.
- Check sealed cells at the mid-seal stage for accurate counts.
- Compare counts between targeted comb and worker areas to estimate population pressure.
- Combine findings with an alcohol wash or sugar shake; see the alcohol wash method for guidance.
Regular monitoring ensures the technique stays effective for Apis mellifera colonies and helps avoid unnecessary interventions during honey flow.
Culling and Disposing of Drone Brood
A consistent, safe disposal routine prevents pest spread and protects neighboring colonies.
Once cells are fully sealed, cut the targeted comb from the frame. Destroy it by burning or freezing to stop mites and offspring from returning to the hive.
If you want to reuse the frame, leave a narrow strip of midrib so workers can clean and rebuild the foundation. For super frames, trim excess comb with a hive tool or a knife.
- Cut sealed comb and destroy by fire or deep freeze.
- Leave a midrib strip to return the frame for reuse when appropriate.
- Trim excess comb on supers to protect nearby worker comb.
Avoid leaving harvested comb uncovered on the ground. Exposed sections invite robbing and may spread disease between colonies.
“Proper disposal is critical to ensure the technique does not harm the Apis mellifera colony.”
Keep records of counts and outcomes and consult post-harvest testing such as post-treatment mite counts to track effectiveness over the season.
Optimal Timing for Maximum Effectiveness
Plan inspections around the colony’s peak drone production to get the greatest population drop. The best window is between May and July, with June and July giving the highest return on effort.
Why timing matters: mite counts in targeted frames rise from April through July. Acting at the summer peak captures the most reproducing mites before adults emerge.
Repeat when needed. If your hive continues to produce male comb later in summer, you can run additional cycles. Each timely harvest reduces overall mite levels and helps protect winter health.

- Check frames around mid-June; confirm cells are sealed but not yet emerging.
- Harvest before day 24 of development to stop mites leaving with newly emerged bees.
- Record outcomes and repeat during ongoing production to maintain low population levels.
“Working in June and July gives the best chance to cut mite population growth and protect honey production.”
For a short guide on best dates and frame introduction, see this timing reference.
Integrating Drone Removal with Other Pest Management Techniques
Combining targeted frame harvesting with timed brood breaks gives beekeepers a powerful option to cut mite pressure. Using two tactics together often outperforms a single method and helps protect honey production during peak flow.

Creating Broodless Periods
Broodless windows amplify the effect of targeted comb removal. When a colony lacks sealed cells, mites live on adult bees and become easier to trap.
A frame added during a broodless period can drop mite numbers dramatically. Research shows a single targeted frame in these conditions can reduce the population by about 90%. A timely follow-up frame can push that reduction toward 99% (Wantuch & Tarpy, 2009).
Practical ways to create a broodless state include artificial swarms, shook swarms, or temporarily caging the queen. Each method has trade-offs in labor and short-term productivity, so choose what fits your operation and season.
- Combine mechanical steps with a broodless interval to boost effectiveness.
- Monitor adult bee mite loads during the pause — mites persist on adults for weeks.
- Record outcomes and pair this approach with your regular testing and treatment plan.
“A combined, timed approach can greatly reduce mite pressure while limiting chemical use.”
For an integrated plan and practical protocols see the detailed Methods to Control Varroa Mites guidance.
Addressing Common Challenges in the Apiary
Common setbacks in the apiary often stem from colony size, nectar flow, or timing rather than beekeeper skill.
Occasionally, bees do not draw out the frame or fill it with drone brood as expected. This happens when a colony is too small or when no nectar flow stimulates brood rearing.

Read the colony life cycle to improve success. Watch queen laying patterns, nectar stores, and worker activity. Those cues tell you the right time to introduce a frame.
Practical tip: try again during a strong flow or wait until the nest expands. Smaller colonies often need extra weeks before they will build larger cells.
- Repeat cycles: this method may be performed up to three times in a season to manage mite levels.
- Correlation: the amount of drone brood present often matches the number of mites in a colony.
- Record keeping: note dates, colony strength, and outcomes to refine timing next year.
“Learning to read seasonal cues in the hive is the most reliable way to make targeted comb techniques work.”
Evaluating the Impact on Colony Health
Measuring changes in hive weight and adult numbers after a harvesting cycle shows practical impact on colony performance. A published study reported no adverse effects on colony strength, weight, or population when using targeted comb culling.

The first cycle of the season is the most important. It draws the largest share of mites into target frames and gives the best reduction in reproductive numbers. Early action also raises the chance that later drones are healthier and less damaged by parasites.
Any male comb left intact because counts were low still benefits the nest. Those individuals support the queen and worker workforce while keeping overall pest levels lower.
- A study found no adverse effects on colony strength, weight, or population when using this technique.
- The first cycle captures the largest population of mites and improves subsequent drone health.
- Managed harvesting supports a healthier drone population while balancing treatment needs and worker production.
“Targeted, timely action improves colony health without harming productivity.”
Conclusion
A well-timed harvesting cycle can markedly lower mite numbers while keeping honey yields steady.
This non-chemical method uses bees’ natural habits to concentrate pests in targeted comb. Proper placement, timely checks, and consistent monitoring are the keys to success.
Integrate these steps with brief broodless periods and other measures to boost percent reductions and delay heavier interventions. With practice, beekeepers keep colonies healthier and improve long-term apiary resilience.
Use records, simple tests, and seasonal cues to refine timing each year. Small, repeatable actions give big gains in population management and hive health.
FAQ
What is the basic idea behind drone brood removal as a mite management method?
Drone comb with developing male bees attracts higher numbers of parasitic mites because the longer capped period gives mites more time to reproduce. Beekeepers insert or encourage drone comb, then remove and destroy the capped cells before mites emerge. This reduces overall mite population while minimizing chemical use.
Why do mites prefer drone cells over worker cells?
Mites target larger cells that remain capped longer. Male brood stays sealed about three days longer than worker brood, which gives mites extra reproductive cycles. That higher reproductive success concentrates mites in male brood, making it an effective trap when managed.
When should I place drone frames in the colony?
Install drone comb frames in spring to early summer when the queen increases drone production. Timing depends on local nectar flow and colony strength. Aim for periods when the queen is actively laying and the colony can support extra male brood.
How often do I need to remove and dispose of the capped cells?
Check frames every 7–10 days once capping begins. Remove and destroy frames roughly 18–21 days after eggs are laid, before young mites can emerge with new drones. Regular intervals throughout the season yield the best reduction.
What tools and supplies make this method easier?
Useful items include foundation or frames designed for larger cells, a frame holder, smoker, hive tool, gloves, and a secure disposal container. A timing calendar and notes help track insertion and removal dates.
How do I check sealed cells for mite load without causing too much disturbance?
Gently lift the frame to examine capped cells. Use a magnifier or uncapping fork to inspect a small sample of sealed cells. Count mites visible on developing brood or on cell walls to estimate pressure, then reseal or remove as needed.
Can this technique be used alone, or should it be part of an integrated pest management plan?
Use it as one component of integrated pest management. Combine mechanical removal with monitoring, good apiary hygiene, genetic selection, and targeted treatments only when thresholds are exceeded. Relying solely on removal may not keep mite levels below damaging thresholds in all regions.
Will removing male brood harm my colony’s productivity or genetics?
If done moderately and timed properly, removing some male brood has minimal long-term impact on colony productivity. Avoid excessive removal in small or weak colonies and rotate frames to preserve genetic diversity and drone availability during mating season.
How do I dispose of removed frames to prevent mites from reentering other colonies?
Burn or freeze frames, or leave them sealed and place them in a sealed plastic bag for several days in a freezer. Do not discard in open areas where other colonies can access them. Proper disposal prevents mites from returning to the apiary.
What signs show the technique is working and mites are reduced?
Look for lower mite counts on sticky boards, fewer mites on sampled brood, and improved colony vigor. Track numbers over the season; consistent decline after removals indicates success. Continue monitoring to confirm lasting effects.
Is this method effective across different seasons and climates?
Effectiveness depends on local brood cycles and climate. It works best in active brood-rearing seasons. In regions with continuous brood, pair removals with other strategies. Adapt timing to local phenology for best results.
How does creating short broodless periods complement brood extractions?
Inducing brief broodless windows—through methods like queen confinement or timed treatments—exposes phoretic mites on adults to miticides or natural mortality. Combining brood interruption with drone brood trapping increases overall mite reduction.
How frequently should I monitor mite levels during the season?
Monitor at least every two to four weeks during active months, using sticky boards, alcohol washes, or powdered sugar tests. Increase frequency if you detect rising counts or after significant management actions to assess impact quickly.
What common challenges should be expected when implementing this practice?
Challenges include incorrect timing, queen reluctance to lay in provided frames, excessive removal harming colony population, and re-infestation from nearby colonies. Careful planning and regular monitoring reduce these risks.
Can small-scale hobbyists apply this method successfully?
Yes. Hobbyists can implement drone comb trapping with minimal equipment and basic timing. Start conservatively, keep records, and learn local timing. Joining a local beekeeping association helps with region-specific advice.