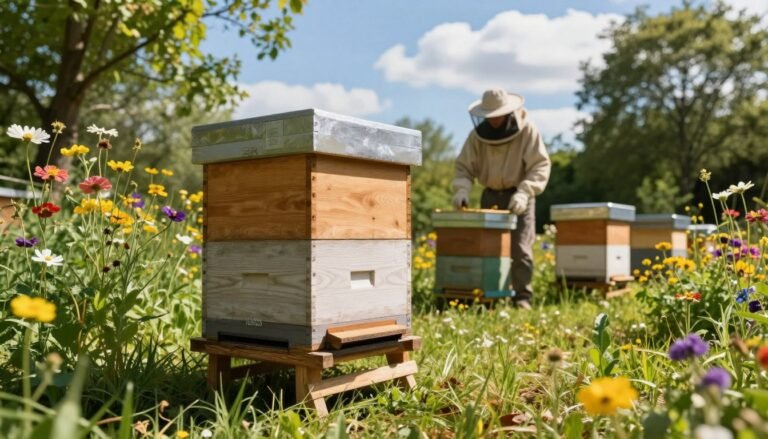
Choosing the right propolis collector can lift yields while keeping your hive healthy. Small shifts in equipment design — like ventilation channels or food-grade plastic — make a big difference for colony welfare.
Modern models such as the Happyyami collector double as an inner cover and save time during inspections. Many designs use stainless steel or BPA-free plastic and include rounded edges for safety.
Average harvests range from about 50–100 grams per hive per season, so selecting a compatible tool matters for efficient collection and honey production. Proper handling with a hive tool improves results without stressing bees.
For comparisons and buying guidance, review a practical roundup of top collectors and fitting choices at
best propolis trap guide and explore entrance reducer alternatives at
hive entrance reducer options.
Key Takeaways
- Pick equipment with ventilation and food-grade materials.
- Dual-function collectors can serve as an inner cover and save space.
- Expect roughly 50–100 grams per hive each season.
- Use a proper hive tool for gentle, efficient collection.
- Prioritize colony health when increasing yield.
Understanding Propolis Trap Types and When to Use Them
A smart collector choice blends hive biology with durable, easy-care equipment. Successful harvesting starts by recognizing that bees seal gaps as a survival instinct. A standard collector often mimics a narrow queen-excluding surface so worker bees fill small holes with resin.
The Role of Propolis in the Hive
Propolis helps waterproof the hive and block drafts. It also lowers infection risk and reduces entrance sizes.
Identifying Your Collection Goals
Decide if you manage a top bar hive or a Langstroth box. That choice guides whether an inner cover-style insert or a top-hive plate fits best.
- Material matters: many beekeepers choose plastic or stainless steel for cleanability and durability.
- Queen safety: fit the device so the queen cannot be trapped or stressed during inspections.
- Plan timing: set goals early in the season so collection does not interfere with honey flow.
View the hive as a living system. With clear goals and the right equipment, you can boost yield while protecting colony health and honey production.
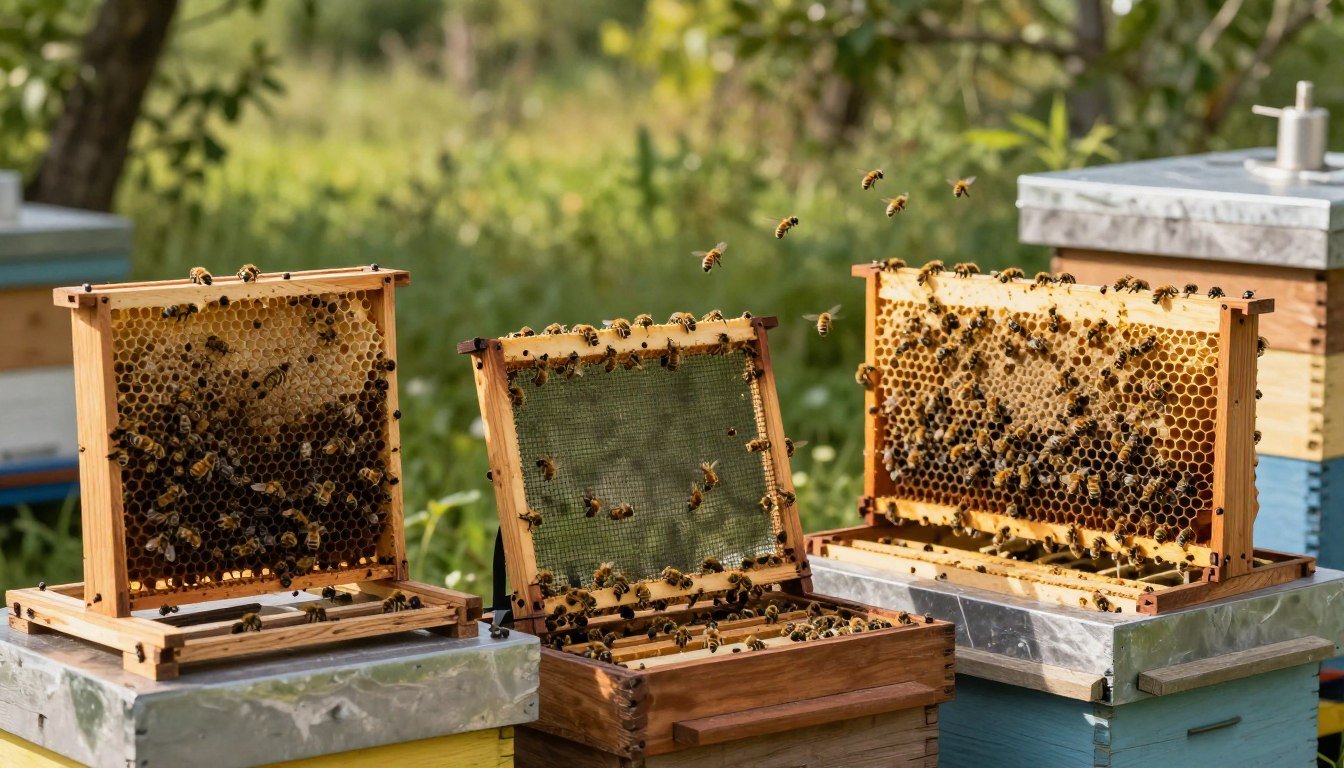
The Biological Mechanics of Resin Collection
Resin collection starts with a simple drive: bees work to keep their hive dark and draft-free. Light or airflow makes workers see a breach. They respond by filling gaps with sticky resin.

This behavior protects the colony. The sticky seal acts as an antimicrobial barrier. It reduces pathogen entry and helps stabilize temperature and humidity for brood and honey.
- Placing a small insert at the top of a box mimics a crack and triggers sealing.
- Top bar hive colonies will seal openings just as aggressively as those in Langstroth hives.
- Using a plastic or stainless steel grid lets you harvest cleanly once the bees fill the gaps.
“View the device as a simulated crack; patience lets the colony complete the job without stress.”
Manage the inner cover and other components so the queen and brood stay safe. Allow enough time during peak season for full resin collection. For design details and purity benefits, see collection grids, and for boosting yields review tips on how to increase production.
Essential Features for High-Quality Traps
Good ventilation can be the difference between a thriving colony and one stressed by damp air. Proper air channels prevent moisture buildup and help bees regulate temperature during hot periods.
Ventilation and Airflow Requirements
Design matters. High-quality plastic propolis traps must include vents to stop mold and excess humidity. The Happyyami model is a clear example, with integrated channels that balance moisture and warmth while aiding resin collection.
Choose equipment that fits your frames snugly. A poor fit creates gaps that confuse the queen and workers and reduces honey and collection efficiency.
- Materials: food-grade plastic or stainless steel resists wear and protects the hive.
- Form factor: an inner cover that doubles as a collector saves space and time.
- Size note: the Fence Generic 2PCS measures 50 x 40 x 2 cm and suits many box styles.
For a quick primer on practical products, see what is a propolis trap.
Selecting Durable Materials for Long-Term Use
Long-term performance relies on selecting materials that resist weather, chemical wear, and hive activity.

Choose food-grade plastic or stainless steel for lasting collectors. These materials stand up to moisture and handling. High-quality plastic propolis collectors often last 3–5 years with regular cleaning.
Wood can warp or rot, which harms fit and invites pests. A stable inner cover made from non-reactive material protects frames and the queen during collection cycles.
- Durability: stainless steel resists cracking and chemical leaching.
- Cleanability: food-grade plastic cleans easily and keeps honey pure.
- Value: the Raguso Plastic Propolis Collector has a non-toxic finish and costs about $25.
| Material | Longevity | Maintenance |
|---|---|---|
| Food-grade plastic | 3–5 years | Regular washing, avoid harsh solvents |
| Stainless steel | 5+ years | Rinse and dry after collection |
| Wood | 1–3 years | Seasonal inspection; can warp or rot |
Investing in robust equipment saves time and reduces replacements. Prioritize certified, non-toxic options so the colony and honey remain safe while boosting long-term collection results.
Proper Installation for Maximum Yield
Install the device so it sits flush and creates a clear stimulus for worker activity. Proper positioning matters more than fancy features. A correct fit encourages steady sealing without upsetting the colony.
Primary Placement Strategies
Replace the inner cover with the collector and make sure it sits level at the hive top. A snug fit across the frames prevents unwanted gaps that confuse the queen or workers.
The Cutler Supply trap fits 10 frames and earns praise for reliable installation and a 4.7-star rating. You can also place a collector at the entrance or on the bottom board if access stays clear.
Creating the Light Stimulus
To trigger sealing, prop the outer lid slightly with a small stick or wedge. That tiny strip of light prompts bees to fill the opening and increases harvest during warm months.
Keep the stimulus minimal so bees react without panic. This method works with food-grade plastic and stainless steel collectors alike.
Avoiding Common Placement Pitfalls
Never position a collector between brood frames. Doing so can isolate the queen and disrupt honey flow and brood care.
Also confirm plastic tools sit level and do not snag legs or wings during collection. Check placement after a few days and adjust if air gaps form.
“View installation as a strategic setup; correct placement helps bees work efficiently without disrupting hive harmony.”
For step-by-step handling guidance, read how a collector is used. For related gear ideas, see the best pollen trap roundup.
Managing Hive Health During Collection
Keep a close eye on colony behavior after installing a collector; subtle signs warn of stress.
Perform short, regular inspections so the queen and workers retain full movement. Check the inner cover and lid alignment. A misaligned insert can isolate the queen or block traffic.

Monitor temperature and humidity near brood frames. Excess moisture harms brood and reduces honey quality. If you see damp buildup, improve ventilation or remove the device.
- Watch the hive entrance and bottom board for clear access and debris.
- Prefer food-grade plastic or stainless steel equipment—these reduce mold risks.
- If colonies turn defensive, remove the collector; aggression signals stress.
View collection as a partnership with the bees. Gentle handling and quality gear preserve colony health and maintain steady honey flow.
“Frequent checks prevent small problems from affecting the whole hive.”
For a reliable inspection tool, consider the best hive tool to keep checks quick and safe.
Cleaning and Maintenance Best Practices
Treat cleaning as part of seasonal care so your equipment lasts and bees stay calm.
Regular upkeep keeps resin from building up and reduces inspection time. Clean gear also protects honey quality and hive health.
Techniques for Removing Sticky Residue
Freeze, then flex. Place the propolis trap inside a sealed plastic bag and leave it in the freezer until the resin hardens.
Once brittle, twist the plastic trap or tap it on a solid surface to release chunks of pure resin. This is the simplest, low-risk method.
For final cleaning, soak the piece in warm water. Use gentle brushes and avoid harsh chemicals so the collected resin stays pure.
- Clean regularly to prevent debris buildup and keep bees filling gaps.
- Protect equipment—inner cover, hive entrance tools, and any stainless steel pieces need routine care.
- Keep easy access to traps if you manage multiple hives; quick handling saves time and reduces disturbance.
“Maintain cleaning control with warm water and gentle brushes to protect resin integrity.”
View maintenance as an investment: simple steps extend the life of plastic and stainless steel gear and keep the queen and colony undisturbed on the bottom board or near the hive entrance.
Processing Your Harvested Propolis
Handle the fresh harvest gently: cold methods protect beneficial compounds and preserve potency.

Start by rinsing resin in a bowl of cold water to remove dirt and hive debris. Use a clean bucket and a fine-mesh strainer for faster separation.
Large clumps freeze well. While solid, break them into smaller pieces with a hammer or mallet. This saves time and keeps the product pure.
Lay cleaned pieces on parchment paper in a cool, shaded area to dry. Avoid direct sun and heat; high temperatures will soften resin and reduce quality.
- Storage: keep dried pieces in airtight containers or the freezer for long-term control of texture and potency.
- Tools: a clean bucket, fine-mesh strainer, and simple hammer work best for efficient processing.
- Applications: properly processed resin is ready for tinctures, ointments, or other beekeeping projects and honey production supplements.
“Control temperature at every step; heat damages active compounds.”
Creative Applications for Your Propolis Yield
A modest cleaned yield can become a line of extracts and salves that boost honey sales.

Formulating tinctures is simple. Combine 1 part resin with 9 parts high-proof grain alcohol, such as 75-proof vodka, and steep for several weeks. Shake periodically, then strain and bottle for a stable, extract product that pairs well with jars of honey.
Formulating Propolis Tinctures
Measure ingredients on a kitchen scale for consistent strength. Store tinctures in dark glass. Label with concentration and harvest date for clear inventory control.
Creating Topical Ointments and Creams
Make infused oil by warming resin with carrier oil in a double boiler. Keep temperature below 122 °F to protect active compounds. Blend the oil into beeswax for salves that treat minor cuts, scrapes, and dry skin.
- Low heat preservation: maintains natural benefits.
- Product value: many beekeepers find these items enhance honey production revenue.
- Quality control: use a kitchen scale for repeatable batches.
| Product | Key Ratio / Temp | Primary Use |
|---|---|---|
| Tincture | 1:9 resin:alcohol | Stable extract for supplements |
| Infused oil | Base for salves and creams | |
| Topical salve | Oil + beeswax (by weight) | Skin applications and wound care |
“View your harvest as a versatile resource; careful handling turns it into high-value products.”
For collection background and market tips, review practices for collecting from beehives and explore insights on bee propolis collection.
Conclusion
Successful apiaries blend smart equipment choice with gentle hive practice. A well-fitted inner cover and a reliable propolis trap help nudge worker behavior while keeping queen movement clear.
Choose durable collectors and install them with care; good placement boosts yields and keeps the colony calm. Proper vents, snug fit, and light stimulus encourage steady sealing without stressing bees.
Regular maintenance and careful processing turn a clean harvest into valuable products. For field-tested wall approaches, see this wall treatments comparison. For colony support ideas consult natural supplements for bee health.
Final thought: Mastery of these simple steps can raise honey yields, support hive health, and make your beekeeping practice more productive and sustainable.
FAQ
What are the main styles of resin-collection devices for honeybee colonies?
Beekeepers commonly choose wooden frames with slotted inserts, food-grade plastic panels with textured surfaces, and stainless-steel screens designed for easy harvest. Each option balances durability, ease of cleaning, and bee acceptance. Wooden inserts blend into traditional hives, while plastic and stainless designs favor fast removal and sanitation.
How do I decide which device fits my collection goals?
First identify whether you want small personal batches or larger commercial yields. For limited home use, simple inner-cover panels or short-term inserts work well. For consistent, long-term harvesting, opt for heavy-duty stainless or robust plastic systems that withstand repeated cycles and frequent handling.
Why do bees deposit resin inside the colony?
Worker bees gather plant resins and apply them around cracks, seams, and entrance points to strengthen comb and reduce drafts. This natural behavior supports colony hygiene and structural stability. Devices mimic narrow crevices to encourage targeted deposition without disrupting brood areas.
Where should I place a collection device in a Langstroth hive?
Position the panel under the inner cover or replace a center spacer to create a modest gap that invites bees to seal it. Avoid placing inserts directly over brood frames. For top-bar hives, mount a shallow collection board near the apex where bees commonly reinforce edges.
Can I install a device without disturbing the queen or brood?
Yes. Use non-invasive placement like swapping an inner cover or sliding a removable panel into a shallow frame slot during a routine inspection. Limit handling time to reduce stress and avoid moving brood frames during the install.
How long should I leave a panel in the colony before harvesting?
Typical residence ranges from two to six weeks, depending on colony strength, season, and local resin sources. Check progress every one to two weeks and remove panels once a solid layer forms to avoid forcing bees to over-encapsulate or block hive traffic.
What ventilation or airflow features matter for good yields?
Devices should allow modest air circulation to prevent humidity buildup and ensure normal hive temperature. Perforated designs or small vents around insert edges help. Avoid fully sealed panels that trap moisture, which can reduce deposition and encourage mold.
How do I encourage bees to use a new panel quickly?
Create a light stimulus by exposing a narrow gap or adding a slightly raised center ridge that mimics natural crevices. Gentle scent cues, like a dab of propolis tincture or natural resin, can prompt attention but use sparingly to avoid contamination of harvest.
What common placement mistakes should I avoid?
Do not block the main entrance, place panels over brood, or install deep gaps that alter hive ventilation. Avoid sharp edges or overly sticky surfaces that trap and injure bees. Also, placing devices where they interfere with inspections invites removal or damage.
Will collecting resin harm overall colony health?
When done correctly, resin collection is low-risk. Keep harvests moderate and avoid removing material during cold snaps or when colony populations are low. Monitor bees for increased defensive behavior and pause collection if you detect stress or reduced brood production.
How do I remove sticky material from devices without damaging them?
Freeze removable panels to harden residue, then flex or pry off sheets gently. For stainless-steel and plastic, use isopropyl alcohol or food-safe vegetable oil to soften remaining bits. Avoid harsh scraping on wooden inserts to preserve surface texture that encourages reuse.
What cleaning routine prolongs equipment life?
After harvest, soak plastic and stainless parts in warm, soapy water, rinse, then air dry in sunlight when possible. Light sanding and recoating wooden inserts with beeswax can refresh surfaces. Store panels in a dry, ventilated area between seasons to prevent mold and warping.
How should I process raw resin for tinctures?
Break or grind the frozen resin into small pieces and soak in high-proof neutral spirit at a ratio suited to your recipe, typically 1:5 to 1:10 by weight. Agitate for one to two weeks, filter through fine mesh, and store in amber bottles. Label with concentration and source hive.
What steps convert harvested material into topical ointments?
Dissolve cleaned resin into warm oil such as olive or coconut, strain, then combine with beeswax to reach a salve consistency. Add carrier oils and essential oils as desired. Test small batches for skin sensitivity before wider use, and follow local cosmetic regulations for sale.
Are there durable materials that work best for long-term use?
Stainless steel and food-grade polymers resist degradation and sanitization cycles. Quality hardwoods treated with food-safe wax offer excellent bee acceptance but require more maintenance. Choose materials that match your workload and cleaning preferences.
Can I retrofit existing inner covers or frames for collection?
Many beekeepers adapt standard inner covers by adding thin removable inserts or drilling small, evenly spaced slots. Retrofit options let you test methods without buying new equipment and minimize disturbance during trials.