Choosing the right beehive insulation is a key choice for beekeepers facing cold seasons. Proper insulation helps keep internal temperatures steady and protects colonies from harsh winter weather.
Foam board offers strong thermal resistance and can cut honey consumption. Textile and reflective options provide varied breathability and moisture control. Scott Derrick noted on March 31, 2025, that good insulation reduces moisture buildup that can cause mold.
Ventilation matters: any material must allow moisture to escape, since wet conditions can harm a colony more than cold alone. Consider your regional climate when selecting materials so bees can conserve energy and sustain brood temperatures.
For practical comparisons and regional tips, see this guide on winter protection for beekeepers: the ultimate guide to beehive winter.
Key Takeaways
- Thermal stability preserves colony health and reduces honey use.
- Foam board keeps heat well; breathable covers manage moisture better.
- Proper ventilation prevents harmful moisture buildup and mold.
- Match materials to your local climate for best results.
- Right insulation supports winter survival and honey production.
The Importance of Thermal Regulation for Bee Colonies
When temperatures drop, bees form a tight cluster to generate and conserve heat.
Winter clustering is the colony’s primary defense. The cluster maintains roughly 93°F (34°C) at its core. Bees vibrate their wing muscles to make warmth, which uses a lot of energy.
Stored honey is the fuel for this heat. Without good insulation, the colony must burn more honey to stay warm. That extra consumption raises the risk of starvation before spring arrives.
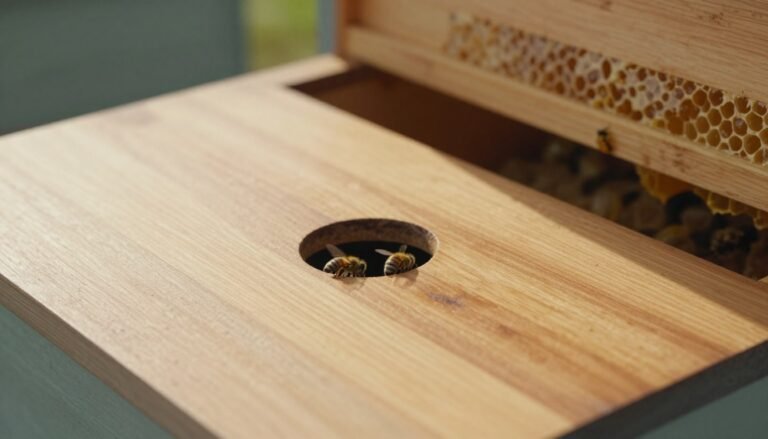
Ventilation and moisture control matter as much as warmth. Proper airflow prevents moist air from condensing and freezing inside the hive. Excess moisture can harm brood and promote mold.
- Bees cluster and generate heat by muscle activity.
- Insulation helps colonies conserve honey and energy.
- Poor protection lets cold air force bees to work harder and lowers survival rates.
- Good ventilation stops moisture buildup that can freeze or rot comb.
- Beekeepers who manage temperature and airflow typically see stronger colonies in spring and better honey production.
Understanding Insulated Hive Wraps vs Foam Board Wraps
How you shield a hive affects internal temperatures and the colony’s ability to ride out long freezes.

Two common approaches give beekeepers different trade-offs. Commercial covers are easy to fit and often use dark fabrics to capture sun warmth. Rigid panels offer higher R-values and a firmer barrier against wind.
Both serve as a practical solution for managing the internal environment. Each requires specific ventilation to stop moisture from condensing on comb and causing mold.
- Durability: some commercial covers are reusable; panels may need yearly replacement.
- Installation: proper placement shields walls and reduces heat loss to wind.
- Maintenance: breathable options help control moisture; solid panels favor temperature stability.
| Feature | Commercial Cover | Rigid Panel | Best Use |
|---|---|---|---|
| R-value | Moderate | High | Severe winter sites |
| Ventilation needs | Lower, breathable designs | Higher, add vents | Humid vs dry regions |
| Durability | Reusable | May need annual replace | Long-term vs temporary |
| Installation | Quick fit | Custom cut | Ease vs precision |
Compare options and build a plan that protects bees, conserves energy, and helps colonies keep honey through winter. For product ideas and fitting tips see a guide to insulation for beehives and practical hive painting tips for better insulation.
Benefits of Using Foam Board Insulation
Rigid panels made from EPS or XPS let beekeepers shape protection to match any hive layout.
Customization and Fit
Rigid sheets cut cleanly with a utility knife, so you can fit them snugly around the hive body and entrance.
Trimmed edges reduce gaps in the walls that let cold air sneak in. A tight fit helps bees conserve energy and preserve honey stores.
An upper entrance or small vent must be added to keep air moving and limit moisture buildup.
These materials are lightweight and affordable, making them a good choice for beekeepers with several hives.
Because panels are reusable and easy to replace, they lower seasonal expense while offering strong warmth for winter months.
- Easy to customize: cut to size for different hives and setups.
- Thermal barrier: rigid sheets reduce heat loss through walls.
- Low weight: simple to handle when installing or removing.
- Ventilation required: add an upper entrance to avoid moisture buildup.
| Feature | Benefit | Notes |
|---|---|---|
| Material | EPS or XPS | High R-value per inch; easy to cut |
| Fit | Customizable | Trim to sit flush around the entrance and walls |
| Cost | Low to moderate | Reusable across seasons |
| Ventilation need | Mandatory | Upper vents prevent condensation |
For practical installation tips and advantages, see this guide on foam boards for beehive insulation and a comparison of winter coverings at best hive wrap for cold climates.
Advantages of Commercial Hive Wraps
Commercial covers give beekeepers a quick, durable way to protect colonies through cold months.
These purpose-built products balance warmth with airflow. They are made to let moisture escape so damp conditions do not harm a bee colony.
Breathability and Durability
Many commercial covers use breathable fabrics or specialized materials. This design reduces condensation and helps keep temperatures steady inside the hive.
Dark outer colors also absorb sunlight, adding passive warmth during short winter days. That extra heat can lower the colony’s energy needs and help conserve honey.
“Purpose-made covers offer consistent protection and are easier to fit than custom-cut panels.”
- Easy installation: quick to fit, ideal for beekeepers who manage multiple hives.
- Reusable: durable materials stand up to wind and weather season after season.
- Moisture control: breathable layers reduce damp and mold risk.

| Feature | Benefit | Why it matters |
|---|---|---|
| Breathable fabric | Moisture escapes | Prevents damp that can harm brood |
| Weather-resistant shell | Long-term durability | Protects walls and comb from wind and rain |
| Dark outer color | Passive solar gain | Reduces colony energy use on sunny winter days |
| Quick fit design | Fast seasonal prep | Good for beekeepers with many hives |
For guidance on products and fitting, see this practical guide to insulation for beehives and the overview of insulated beehives.
Climate Considerations for Your Apiary
Regional temperatures and humidity levels determine the best balance of warmth and airflow for your apiary.
The climate of your area guides insulation choices. In northern zones, heavy protection reduces heat loss and helps colonies conserve honey during long winter stretches.
In humid coastal regions, select breathable materials to manage moisture and lower disease risk. Good ventilation is essential to prevent condensation that can stress bees.
Where weather swings are common, a mixed approach works well. Combine a thermal layer with a breathable outer cover so temperatures and moisture stay in balance.
- Match materials to local climate for the right protection and ventilation.
- Shield hives from prevailing wind to cut colony stress and honey use.
- Assess site-specific risks and adjust strategies seasonally.
For tips on managing damp conditions, see guidance to reduce moisture inside winter hives.
Managing Moisture and Ventilation Requirements
Airflow strategy determines whether a hive stays dry or suffers from condensation damage. Managing moisture is the most critical aspect of winter beekeeping. Condensation inside a colony can be fatal if left unchecked.

Preventing Condensation
Keep frames and walls dry. Check for damp comb or frost on the inner cover. If moisture collects, bees must work harder to maintain temperature and use more honey.
When using low-breathability insulation, add an upper entrance or small vent. That opening lets warm, moist air from the winter cluster escape and reduces moisture buildup inside hive boxes.
The Role of Screened Bottom Boards
Screened bottom boards provide year-round ventilation and help pull damp air away from comb. They are especially useful with heavy insulation because they keep cold air moving through the stand while letting moisture drain out.
- Screened floors cut risk of mold and disease by improving airflow.
- Monitor the entrance and vents to ensure insulation does not trap dampness.
- Combine screened boards with an upper escape point when using foam board panels.
| Problem | Simple Fix | Why it matters |
|---|---|---|
| Condensation on frames | Upper vent or small entrance | Prevents rot and brood loss |
| Stagnant damp air | Screened bottom board | Maintains dry interior and healthy bees |
| Trapped warm air | Adjust insulation and vents | Allows colony to focus on temperature, not moisture |
Essential Tools for Installation
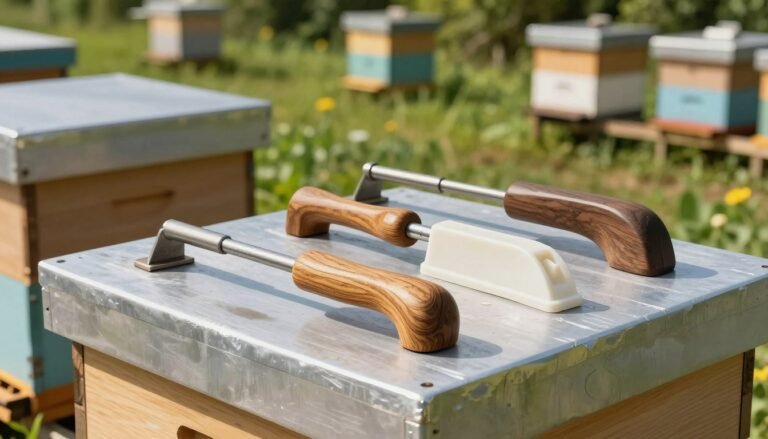
Good tool choices cut installation time and protect bees by ensuring a tight, even fit around the hive.
Start with precise measuring. A tape measure and carpenter’s square help size materials to sit flush around the boxes. A utility knife or sharp cutter trims panels and wrap materials cleanly.
Use a hot glue gun or weather-rated adhesive to secure edges so wind cannot lift coverings. Keep safety gear — gloves and goggles — on hand when cutting or gluing.
- Protect the entrance: leave the opening clear for air, flight checks, and cleansing flights.
- Plan for ventilation: position vents or an upper escape to limit moisture buildup inside.
- Gather materials first: having everything ready speeds installation before the first frost.
“A careful install using the right tools keeps the colony warm, dry, and ready for spring.”
Proper installation of insulation materials reduces honey use during winter and shields bees from cold air and wind. The right tools make that work efficient and repeatable for all your hives.
Seasonal Maintenance and Monitoring
A brief, regular check routine keeps colonies healthy through cold months.
Track temperatures and humidity weekly. Aim for an internal hive temperature near 90°F–95°F (32°C–35°C). Cameras or a simple sensor log help you spot trends without opening frames.
Wrap preparations should be completed between late October and early November. Inspect coverings for damage and secure any loose materials before the first hard freeze.

Temperature and Humidity Checks
Listen to the winter cluster rather than disturbing it. A steady buzz and occasional activity at the entrance signal normal behavior.
Watch for signs of moisture on the inner cover and frost on frames. If hive temperature or humidity swings outside the ideal range, adjust ventilation or insulation to reduce stress on the bee colony.
“Regular monitoring lets beekeepers address drafts and damp spots early, protecting winter survival and future honey production.”
- Check entrance clearance from snow and debris.
- Log temperatures to maintain stable conditions.
- Repair torn materials and reseat loose panels or covers.
For step-by-step suggestions on protection and timing, see a practical guide to insulation for beehives and tips on winterizing beehives in northern states.
Common Mistakes to Avoid
A common error is sealing a hive so tightly that warm, moist air cannot escape. Over-sealing cuts ventilation and causes dangerous moisture buildup. That wet air can condense on the walls and rot comb.
Clear the entrance. Snow, debris, or a blocked opening traps bees and limits airflow. A small, steady entrance is vital for cleansing flights and waste removal during cold weather.
Avoid non-breathable plastic covers unless you add vents. Plastic without airflow creates condensation and invites mold. Also, do not wait until the last minute to add insulation; install materials before the first hard freeze.

“Proper ventilation beats extra layers when it comes to preventing moisture buildup and keeping bees healthy.”
Check seals on any foam board or rigid panel. Poorly sealed panels let cold air leak in and stress the colony. Inspect covers each season and repair gaps promptly.
| Mistake | Effect | Fix |
|---|---|---|
| Over-sealing | Condensation on walls | Add upper vent or screened board |
| Blocked entrance | Trapped bees, limited airflow | Clear snow and debris weekly |
| Late installation | Colony stress, higher honey use | Install before first frost |
For detailed timing and product ideas, see this practical winter protection guide.
Conclusion
A clear winter plan gives beekeepers the best chance to protect colonies and preserve honey stores.
Invest in proper beehive insulation and choose materials that match your climate. Whether you favor rigid panels or a commercial cover, the goal is the same: steady temperature, reduced energy use, and healthy bees.
Monitor moisture and keep the entrance and vents working. Good ventilation matters as much as the insulation itself to prevent condensation and comb damage.
Regular checks and timely maintenance help spot problems early. With the right solution and consistent care, beekeepers can boost honey production and return to stronger colonies in spring.
FAQ
What are the main differences between insulated hive wraps and foam board wraps for winter protection?
Insulated wraps that commercial beekeepers buy often combine a breathable outer layer with thermal batting to reduce drafts while allowing vapor to escape. Foam board panels are rigid pieces placed around the boxes or inside the outer cover; they provide a strong thermal barrier but can trap moisture if not paired with ventilation. Choose based on climate: breathable wraps work well in damp, mild winters; foam panels suit consistently cold, dry conditions.
Will adding external insulation help my colony maintain the winter cluster?
Yes. Any reduction in cold air infiltration and steadying of internal temperatures reduces the cluster’s energy demand. Proper insulation helps bees conserve honey stores and lowers stress on the colony. Ensure insulation does not block essential airflow or restrict the bees’ ability to move between boxes in early spring.
How do I prevent moisture buildup when using rigid panels around my hives?
Provide upward and front ventilation to allow warm, moisture-laden air to escape. Install a small top vent or use a telescoping cover with a gap, and keep an entrance reducer in place to encourage air exchange without letting cold drafts in. Using vapor-permeable materials near the cluster also helps prevent condensation on frames and comb.
Can insulation increase honey production in spring?
Indirectly. Insulation that reduces winter stress helps colonies emerge stronger and earlier, which can lead to more foraging and higher honey yields. However, nutrition, forage availability, and disease management remain the primary drivers of production.
Should insulation be installed around the outside or inside the brood boxes?
Most beekeepers place panels or wraps around the exterior to keep the interior air volume unchanged. Interior insulation can reduce usable space and complicate inspections. If using internal foam sheets, leave a clear gap for brood movement and avoid covering frames directly to prevent condensation and mold.
How does insulation affect ventilation needs and screened bottom boards?
Insulation reduces heat loss, so you must still manage ventilation to control moisture. Screened bottom boards improve airflow and can help dry the hive, but in very cold weather some beekeepers add a removable solid board or reducer to limit excessive drafts while keeping an upper vent for moisture escape.
Are insulated covers or panels easy to customize for different box sizes and climates?
Yes. Rigid panels cut to size and wrap materials that fasten with straps or Velcro allow a tailored fit for Langstroth, Warre, or top-bar colonies. Customization helps eliminate gaps and improves thermal performance. Measure carefully and test fit before the cold season.
What common mistakes should be avoided when insulating hives?
Avoid sealing hives completely without ventilation, placing insulation directly against comb, and using materials that retain moisture. Don’t rely on insulation alone to fix weak colonies—ensure adequate stores, treat pests, and perform fall inspections so bees enter winter healthy.
How often should I check temperature and humidity during winter after installing insulation?
Check periodically rather than daily to avoid disturbing the cluster. A mid-winter visual at the entrance and a temperature/humidity sensor inside the top box can provide useful trend data. Aim for preventative checks and only open frames late winter or early spring when necessary.
Is one solution better across all climates, or should beekeepers adapt by region?
Adapt by region. In wet, temperate climates, breathable fabric-style systems that shed water and allow vapor flow perform best. In very cold, dry regions, rigid panels or multi-layer insulation reduce heat loss more effectively. Combine insulation strategy with local ventilation practices and apiary placement.