Reclaiming cappings turns a leftover hive resource into useful beeswax bars and candles. Alex Mulholland showed that even small batches of cappings can become fragrant, clean blocks using simple kitchen gear.
Start by separating honey from the comb and saving drained cappings in a labeled container. Use a large pot and indirect heat—such as a double boiler or slow cooker—so the melting point of beeswax (145°F) is respected and quality stays high.
Filter in stages: coarse cloth, fine mesh, then coffee paper for clear filtered wax. Keep temperature well below the flash point of beeswax (400°F) and work in a ventilated kitchen for safety.
For detailed steps and source sorting, consult a practical guide on beeswax processing, and see an easy home candle reference at beeswax candle making.
Key Takeaways
- Save and label cappings; they yield the lightest, cleanest beeswax.
- Use indirect heat and monitor temperature closely (145°F target).
- Filter in multiple passes for clear, honey-scented filtered wax.
- Work in a well-ventilated area and never exceed safe temperatures.
- Small batches can produce high-quality beeswax candles with basic equipment.
Understanding the Value of Raw Beeswax
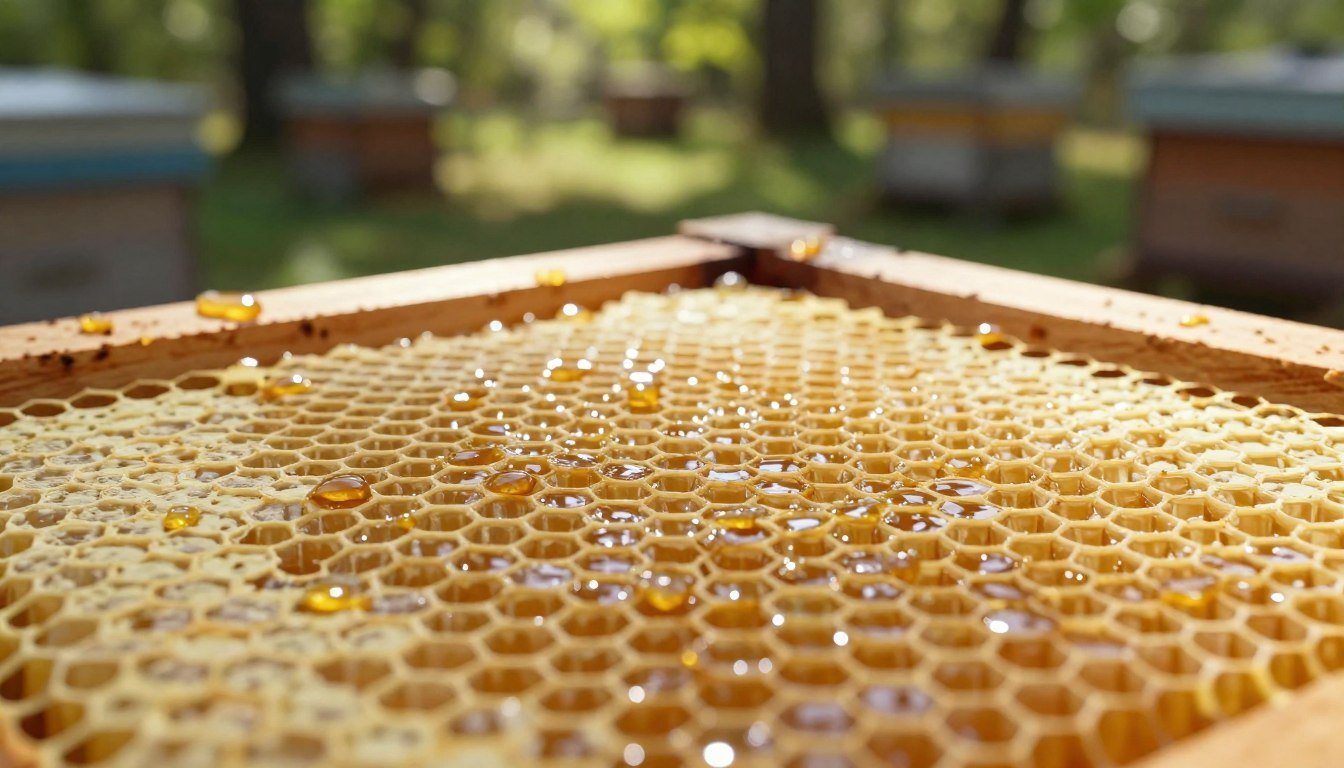
Worker bees secrete a natural substance that becomes the hive’s building material and a valuable product for beekeepers. Fresh cappings yield the lightest, purest beeswax and command higher prices than older comb.
Efficiency matters. For many beekeepers, collecting clean cappings raises the market value of hive outputs. Research shows about 1–2 pounds of beeswax are produced per 100 pounds of honey harvested during a season.
Economic importance is high: beeswax is often second only to honey in value. Valuing this byproduct adds income and supports a sustainable operation.
“Good cappings mean better beeswax and better returns for the beekeeper.”
- Fresh cappings = purer beeswax and lighter color.
- Recovering comb efficiently improves total revenue.
- Understanding bee biology explains comb quality differences.
| Metric | Typical Yield | Source |
|---|---|---|
| Beeswax per 100 lb honey | 1–2 lb | Field data |
| Primary source for pure wax | Fresh cappings | Comb sealing layer |
| Economic rank | 2nd after honey | Market studies |
For practical guidance on refining and equipment, see a detailed beeswax processing guide and trusted extraction equipment resources.
How to Process Wax Scraps from Apiary Work
Safety first. Set up a clear, ventilated station and gather tools before any heating begins. A calm area reduces spills and keeps the product clean.

Safety Precautions for Melting
Always use a dedicated double boiler or a slow cooker so the temperature stays steady and materials do not scorch. Keep equipment away from open flames and monitor heat closely.
Keep a bucket of water nearby for spills and unexpected heat spikes. Wear gloves and eye protection when handling hot containers.
Essential Equipment for Beekeepers
Store drained cappings in labeled 5-gallon buckets; this helps manage a large lot and keeps comb pieces organized.
Use a sturdy pot with layers of filtering. Start with coarse cloth, then cheesecloth, and finish with paper filters for clear beeswax. Expect the melt time to be about 30–40 minutes for full extraction, leaving debris trapped in the filter.
Tip: After cooling, break the blocks into pieces for secondary refinement or storage. For expanded guidance on small-batch handling and tools, see a simple small-scale processing guide and extraction equipment notes at Bee Wax Extraction.
Preparing Raw Cappings for Extraction
Drain residual honey first. Let gravity pull liquid from cappings by placing raw comb in a perforated container or a vented bucket overnight. This simple step lowers sugar content and makes later filtering easier.
Remove surface debris carefully. Rinse with cool water to dislodge pollen and loose propolis, but avoid high pressure that strips small bits of wax. Propolis, pollen, and cocoon fragments often settle at the bottom of the bucket and should be discarded.
Use a double-bucket drain system when possible. Stack a perforated container inside a clean bucket so honey drips clear. If processing is delayed, freeze drained cappings in an airtight container to prevent fermentation and kill wax moth eggs.
- Allow overnight draining for best yield and cleaner beeswax.
- Rinse gently, then let excess water settle before melting.
- Clean comb and remove debris that will otherwise sink during melting.
| Preparation Step | Why It Matters | Tip |
|---|---|---|
| Overnight drain | Removes most honey | Use a vented bucket |
| Cool water rinse | Clears surface debris | Rinse gently, avoid pressure |
| Freeze if delayed | Prevents fermentation | Seal in airtight container |
| Separate settled impurities | Improves final color and scent | Discard bottom residue |
For expanded notes on collecting and refining, see an in-depth guide on collecting and processing methods. For tips on sanitation while handling cappings, review capping sanitation between batches.
Traditional Melting and Filtering Techniques
Gentle heating and staged filtering have long given the cleanest blocks of beeswax. These traditional methods focus on separating light material from settled debris without rushing the task.

The Hot Water Bath Method
Place cappings in a porous bag and submerge in warm water. Melted material rises to the top and solidifies while heavier debris sinks to the bottom.
Double Boiler Setup
Using a double boiler keeps temperature steady and prevents scorching. Set a smaller bowl over a large pot of gently heated water and never let the water boil; boiling stirs dirt into the mix, causing discoloration.
Steam Distillation Process
Steam distillation keeps comb out of direct contact with water and yields clean wax pieces that float free of sediment. Lift cooled pieces from the top and scrape any remaining grit for the best filtered wax products.
- Filter through cheesecloth, then a coffee paper for fine debris.
- Repeat melting and filtering for higher purity.
- Large pot setups need patience; time often improves clarity.
| Method | Contact with Water | Key Benefit |
|---|---|---|
| Hot water bath | Indirect (bag) | Simple, floats clean pieces |
| Double boiler | Indirect (bowl over pot) | Prevents scorching, steady temperature |
| Steam distillation | No direct contact | Cleaner final product, less sediment |
For a step-by-step guide on refining and filtering beeswax, check a helpful filtering beeswax reference. For foundation-making notes after you have clean blocks, see a guide on creating wax foundation.
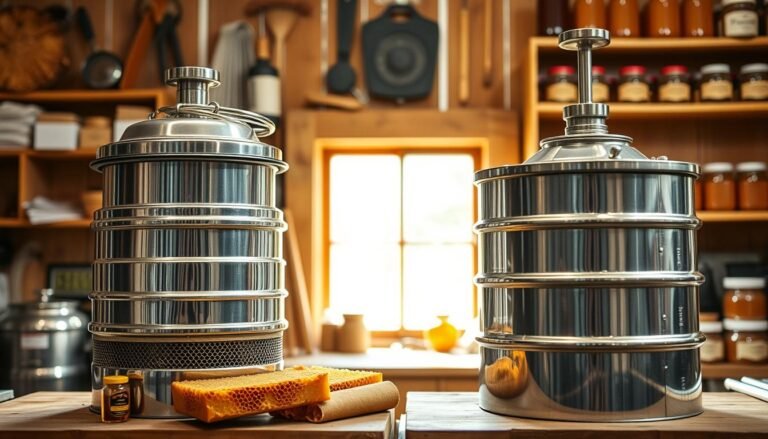
Modern Approaches to Wax Processing
A well-oriented solar extractor can raise internal temperature above the beeswax melting point and let gravity separate clear material from heavier debris.
Solar extraction uses a slanted metal tray inside an insulated box with a glass lid. The black interior absorbs heat and the melted material drips into a collection bucket at the bottom.
Benefits: This technique needs no electricity and works very well in tropical and subtropical regions such as India, Southeast Asia, and Africa.
- Sun-driven heat easily exceeds 145°F, the beeswax melting point noted by University of Florida IFAS.
- Large batches of comb or wax cappings can be handled with minimal labor.
- The purest material melts first, so the product often contains less debris than some heated baths.
| Feature | Why it matters | Practical note |
|---|---|---|
| Black interior | Maximizes heat absorption | Paint or dark metal finish |
| Glass top | Traps solar heat | Keep it clean for best results |
| Collection bucket | Simple catchment | Rotate batches toward sun each step |
Weather-dependent limits throughput, but for many beekeepers this sustainable method cuts fuel use and yields clean beeswax ready for candles and further processing. Learn simple construction plans and tips at solar extractor DIY methods.
Removing Impurities for Premium Quality
Good clarity begins when melted material is passed through layered cloth and left to settle slowly.
Common impurities include honey residue, propolis, pollen grains, and cocoon fragments. Remove sticky bits early by skimming after melting and before the pour.
Use a double boiler for steady heat and minimal scorching. Strain through coarse cheesecloth first, then a finer layer. A final pass with a coffee filter gives the clearest finish for beeswax candles.

Pour the warm material into a clean container and cool slowly. As it sets, dirt and heavy debris sink to the bottom. Carefully scrape the bottom before breaking the block into usable pieces.
- Repeat melting and filtering two or three times for premium results.
- Sun bleaching can lighten color for cosmetic-grade products without chemicals.
- For notes on cleaning foundations after colony loss, consult a clean plastic foundation guide.
Creative Uses for Your Filtered Beeswax
A small pile of clean, cooled blocks can become a steady supply of household goods and gifts.
https://www.youtube.com/watch?v=UWiq9uylkp0
Making natural candles offers a simple start. Melt a measured portion in a double boiler and pour into a clean container with a centered wick. Be patient with cooling time; candles need a full melt pool on first burn to avoid tunneling.
Making Natural Beeswax Candles
Tips: Use a pot over gentle heat and a cotton wick. A slow cool gives a smooth top and better scent throw. Remember that candles retain a burn memory—light wide enough the first time.
Crafting Skincare and Household Products
Beeswax is a natural humectant and blends well with oils and butters. Melt 3 ounces of beeswax with shea and coconut oil in a pot over low heat for a simple lotion bar.
Reusable food wraps are another low-tech product. Brush a mix of beeswax, pine resin, and jojoba onto 100% cotton in your kitchen, then cool flat in a container or on parchment.
- Make furniture polish or leather conditioner with beeswax and oil.
- Create lip balm by combining melted beeswax, coconut oil, and a bit of honey.
- Experiment with proportions to suit texture and scent preferences.
| Product | Basic Ratio | Key Note |
|---|---|---|
| Candle | 100% filtered beeswax | Slow melt; full first burn |
| Lotion bar | 3 oz beeswax : 2 oz shea : 1 oz coconut | Melt gently in double boiler |
| Food wrap | Beeswax : resin : jojoba (approx 8:1:1) | Use 100% cotton fabric |
| Polish | Beeswax : oil (1:3) | Apply thin, buff well |
For a practical note on rendered cappings method and further reference, see the rendered cappings method.
Conclusion
,Turning leftover comb into clean blocks rewards both your shelf and your pocket.
Processing raw material with steady heat and layered filtering yields high-quality beeswax suitable for candles and skincare. Keep a clean area and cool small batches slowly for the best color and scent.
Remove excess honey before melting, wear gloves, and watch temperatures closely. One careful step at a time improves clarity and preserves value.
Want a quick reference on separating melted product? See a practical guide that explains how to separate wax and honey for clear, usable blocks: separate wax and honey.
With practice and patience you will make cleaner beeswax and better products while adding real value to your honey harvest.
FAQ
What safety steps should be taken when melting beeswax?
Wear heat-resistant gloves and eye protection, work in a well-ventilated area, and keep a fire extinguisher rated for grease/chemical fires nearby. Never leave heating wax unattended, and avoid open flames under a container of melting material. Use an accurate thermometer and keep temperatures below around 175°F (80°C) to reduce smoke and avoid degrading natural oils and honey residues.
Which tools are essential for extracting clean beeswax?
A large stainless steel pot or double boiler, a fine mesh filter or several layers of cheesecloth, heatproof buckets or molds, a candy or infrared thermometer, and a skimming spoon. For larger batches, use a melter or solar extractor and a stainless collection tray. Coffee filters or nylon stocking can polish the final pour for clearer blocks.
How should I prepare cappings and old comb before melting?
Trim excess honey and brood, chop comb into small pieces, and let the material drain in a mesh bucket for several hours to remove residual honey. Freezing comb first makes cutting easier. Removing large debris like propolis chunks and dead bees improves final clarity and reduces boiling over.
What is the hot water bath method for rendering beeswax?
Place chopped comb in a perforated bucket or colander inside a larger pot of simmering water. Keep water at low boil so wax melts and floats. Skim off floating wax, then pour melted wax through cheesecloth into molds. This gentle method separates most impurities and preserves natural scent.
Why use a double boiler setup instead of direct heat?
A double boiler gives even, indirect heat that prevents scorching and sudden overheating. It lowers fire risk and protects delicate components like essential oils. It also helps control temperature more precisely, producing a cleaner, higher-quality block for candle making and skincare uses.
What is steam distillation and when is it useful?
Steam distillation uses steam to melt wax and separate volatiles such as honey aroma and minor contaminants. It’s useful for high-quality cosmetic-grade wax and when you want to remove strong odors. The setup requires a steam source and condenser and is more complex but yields purer wax and recovered honey traces.
Can solar wax extraction work for small-scale beekeepers?
Yes. Solar extractors use sunlight to heat a black collection tray beneath a clear top, melting wax that runs into a trough. It’s energy-efficient and gentle on wax, though it depends on sunny conditions and takes longer than heated methods. It’s ideal for siting when fuel access is limited.
How do I remove propolis, dirt, and color from raw beeswax?
After the first melt, let wax cool and harden; remove the darker bottom layer that traps dirt and heavy residues. Re-melt the cleaner wax and filter through fine mesh and multiple cheesecloth layers. Repeat bleaching with minimal heat or use activated carbon sparingly if a lighter color is required, keeping natural properties intact.
What temperature is best for melting and filtering beeswax?
Aim for 140–175°F (60–80°C) for most rendering and filtering. This range melts wax without burning it or degrading beneficial compounds. Use a reliable thermometer and avoid exceeding 185°F (85°C), which risks discoloration and off-odors.
How can filtered beeswax be used in candles and products?
Poured beeswax makes long-burning, aromatic candles and beeswax tealights. Filtered blocks are excellent for lip balms, salves, ointments, furniture polish, leather conditioner, and lip-smacking wraps. Combine with coconut oil or jojoba for skincare blends and with wooden wicks for artisanal candles.
What should I do with the leftover honey and slumgum?
Recoverable honey can be returned to the hive or strained and used in food-grade ways. Slumgum—the dark residue—contains pollen, propolis, and burnt bits. It’s useful as garden mulch, compost, or as a feed additive for livestock in small amounts. Avoid applying slumgum to products without further refining.
How can I keep my kitchen safe when rendering beeswax at home?
Use a dedicated pot and utensils that won’t be used for food afterward. Work on a heat-resistant surface and keep children and pets away. Clean oil and wax spills immediately to avoid slips and remove residual wax with hot water and dish soap once cooled. Consider doing large melts outdoors or in a garage for ventilation.
How many filtration steps are recommended for cosmetic-grade wax?
Two to three filtration passes are typical: coarse filtering through a strainer, then finer filtering through several layers of cheesecloth, and a final polish with a coffee filter or fine nylon mesh. Re-melting and settling between passes yields the clearest product suitable for balms and creams.
Can I mix cappings from multiple hives and still get consistent quality?
Yes, but blending introduces variability in color and scent. Keep records of source hives and run small test melts to assess final aroma and appearance. Sorting out heavily propolized or dark comb improves consistency before bulk melting for candles or cosmetic batches.