Dearth poses a real test for every beekeeper who cares for a hive. This article offers clear steps to keep a colony healthy when nectar sources shrink. Knowledge of the local environment helps a beekeeper spot early warning signs and act in good time.
Managing the queen is central to hive survival. Small interventions early prevent large losses later. Inspect hives with care and note brood patterns, stores of honey, and bee behavior.
Good beekeeping balances observation and timely action. This short guide explains how to protect honey bee colonies, keep hives productive, and maintain long-term viability when nectar is scarce.
Key Takeaways
- Recognize signs of scarcity early to protect the hive.
- Prioritize queen health for lasting colony stability.
- Inspect hives regularly and note honey and brood patterns.
- Take measured steps at the right time to prevent losses.
- Follow proven beekeeping practices to support bees year-round.
Understanding the Challenges of a Nectar Dearth
A lack of nectar reshapes colony priorities and alters daily bee behavior. This shift affects a hive’s stores, brood care, and the queen’s laying rhythm. Beekeepers must spot these changes to protect fragile colonies.
Defining Dearth
Dearth is a period when floral sources fall short and the environment offers little nectar. Summer shortages often run from July to September in temperate zones. Winter scarcity is predictable as plants go dormant, while drought-induced gaps may occur at any time of the growing season.
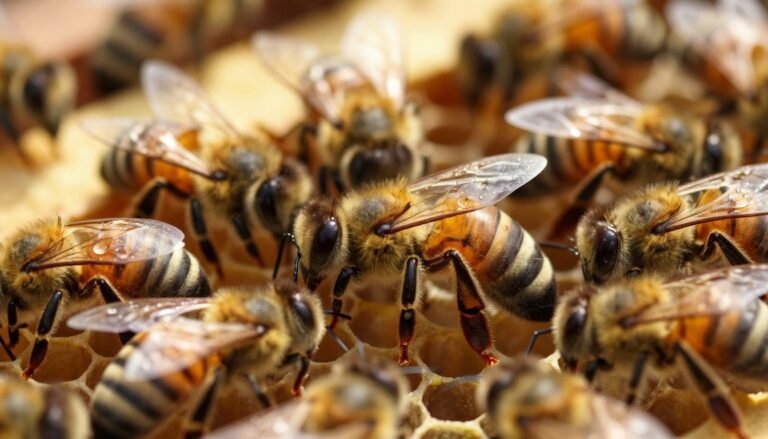
Behavioral Changes in Bees
Bees grow more defensive and may show robbing at the hive entrance. The colony conserves energy and stops drawing new wax comb.
The queen often reduces egg laying to match limited honey and pollen. These behavior shifts help a colony survive short periods but raise risks for long-term health.
| Type | Timing | Common Effects |
|---|---|---|
| Summer | July–September | Reduced nectar flows, defensive bees, lower brood rearing |
| Winter | Cold months | Predictable low source availability, conservation of honey |
| Drought | Any growing period | Unpredictable shortages, close monitoring needed by beekeeper |
Understanding these nectar flows helps plan spring and summer management. This article next addresses safe queen introduction when supplies are tight.
Can You Requeen During Dearth Safely
Introducing a new queen in a time of scarce blooms requires steady hands and careful planning.
Yes, a queen can be introduced when nectar is low, but success rests on minimizing stress to the hive and its bees. Work slowly. Avoid wide, noisy inspections. Keep smoke light and movement deliberate.
Focus on these steps before any queen transfer:
- Confirm the colony has modest honey reserves and is not already weakened.
- Use indirect introduction cages to let bees acclimate to the new queen’s pheromones.
- Limit frame disturbance to reduce agitation and robbing risk.
Emergency changes are sometimes necessary, yet many experienced beekeepers prefer to wait for better time windows. If an immediate swap is required, monitor the hive closely after placement.

For ethical handling and long‑term colony health, review best practices on ethical beekeeping.
Identifying the Need for a New Queen
Watch brood patterns and egg distribution closely; these are the clearest signals of a failing queen. Regular inspections help assess whether the queen still lays consistently and sustains the brood.
Key signs of aging or loss include reduced honey production, spotty brood, and fewer foragers. A queen’s output often declines after three years, which lowers overall hive production over the year.
Signs of an Aging or Missing Queen
If the queen is absent, the colony may build queen-cups or full queen cells to raise a replacement. Low production or poor genetics also show as thin brood patterns and reduced worker numbers.
| Sign | Likely Impact | Immediate Action |
|---|---|---|
| Poor brood pattern | Weaker future workforce | Inspect frames; confirm egg presence |
| Queen-cups/cells | Colony attempting replacement | Decide whether to allow or introduce a vetted queen |
| Drop in honey | Lower production | Monitor stores and consider genetic review |
“A queen’s productivity often declines after three years,”
Track hive metrics through the season and consult resources such as requeening guides and signs of swarm preparation at how to tell if a hive will.
Assessing Colony Health Before Intervention
A focused assessment of frames and stores guides the next steps for a weak colony.
Check brood coverage first. Look for continuous brood on frames. Spotty brood signals a poor queen or low worker numbers. Note brood levels and mark frames that lack brood for consolidation.
Verify food reserves next. A hive needs enough honey and pollen to support the queen and developing brood through a short nectar gap. If food is marginal, delay major changes or feed emergency stores.
Limit inspections to essential checks to avoid stress. Each inspection breaks the colony’s structure and raises robbing risk. Move frames gently and keep visits brief.

| Check | What to look for | Action |
|---|---|---|
| Brood | Continuous pattern on multiple frames | Keep queen in place if pattern is strong |
| Food stores | Honey and pollen covering needed frames | Supplement or delay intervention if low |
| Frame consolidation | Empty frames that spread the cluster | Combine empty frames to improve defense |
| Colony strength | Number of foragers and nurse bees | Consider combining weak colonies |
For expansion strategies and case studies, see the beekeeping expansion guide for best practices.
Optimal Timing for Queen Introduction
Timing a queen introduction around strong nectar flows boosts acceptance and hive stability. The best window is when local nectar flows are active, most often in early spring or early fall.
Spring introduction offers a clear advantage: reduced swarming and a faster buildup of brood and worker force. A healthy queen placed in spring helps hives expand and focus on honey production that same year.
Fall introduction readies the colony for next spring. A new queen established in fall lays brood before cold weather, giving colonies a head start in the following production period.
Weather patterns and local nectar flows should guide beekeepers on exact dates. Monitor bloom maps and local fields to pick the precise time for a new queen.
“Introduce a new queen when nectar is available to improve acceptance and long-term performance,”
For practical steps and timing cues, consult this concise requeening guide.
Preparing the Hive for a New Queen
Start hive preparations with a clear check of brood, food, and frame condition to set the new queen up for success.
Confirm colony health first. Inspect brood patterns and wax comb for damage. Note whether frames show continuous brood and healthy larvae.
Remove the old queen before introduction when possible. Place the queen cage beside an active frame of brood so bees can sense her pheromones and adapt slowly.

Use a sugar candy plug. A candy plug lets bees release the new queen at their own pace. This reduces conflict and improves acceptance.
- Ensure the hive has enough food and avoid adding extra supers that stretch defense during scarce nectar flows.
- Keep inspections brief and gentle to limit stress on the bees and brood.
- Confirm frames and wax comb are in good condition to support new egg laying and production.
For a concise checklist on introduction steps and colony readiness, consult this practical queen introduction checklist.
The Process of Removing the Old Queen
Removing a long-serving queen requires a calm plan and careful hands at the hive. A smooth removal reduces stress on brood and preserves honey and food stores.
Humane Removal Methods
Choose a method that is quick and minimizes distress for the bees. Many beekeepers use a vial of Everclear or ethanol for instant euthanasia of the queen.
Alternatively, placing the queen in a sealed bag and using a freezer slows metabolism until expiration. A very small number prefer a precise head pinch for immediate results.
Handle frames gently and avoid wide inspection to keep the colony calm after removal.
Handling Pheromones
Old-queen pheromones remain valuable. Save pheromone-treated materials to bait new hives or lure swarms.
After removal, bees at the entrance may show confusion. Limit further inspection and let the colony settle into a queen-less state to improve acceptance of a new queen.
- Keep disturbance minimal around brood and stores of honey.
- Store pheromone sources for future baiting or transfer work.
- Monitor entrance activity for signs of stress in the first 24–48 hours.
“Removing the old queen is necessary; handle the process humanely and with clear intent.”
For step-by-step guidance on timing and acceptance, consult a practical colony boost guide or a detailed requeening reference.
Installing the New Queen Using Indirect Methods
Place the queen cage where nurse bees encounter her scent but cannot reach her immediately. This indirect method gives the hive time to accept pheromones and lowers conflict.
Secure the cage between frames of brood. Positioning the queen beside active brood helps workers sense her and feed through the mesh. A protected placement also shields the cage from robbers and keeps the queen near the hive’s heart.
If the cage lacks a sugar candy plug, use a small marshmallow as a substitute. The candy plug delays release and lets bees chew through at their own pace. This slow release is the safest way to introduce a new queen for a beginner beekeeper.

Murdochs.com is a trusted source for Italian and Carniolan strains if sourcing a reliable queen. Choose a strain suited to local nectar and climate for the best fit with brood and foraging behavior.
- Indirect introduction reduces fights and improves acceptance.
- Secure the cage between frames so bees access the sugar plug.
- Marshmallow works well if a candy plug is missing.
| Step | Reason | Tip |
|---|---|---|
| Place cage between brood frames | Bees meet queen pheromones near larvae | Use minimal disturbance |
| Use sugar candy or marshmallow | Controlled release timing | Check after 5–7 days |
| Source reliable queen | Better genetics, higher acceptance | Murdochs.com offers common strains |
“A calm, gradual introduction is the most reliable way to win a hive’s trust.”
Monitoring Acceptance and Hive Behavior
Acceptance unfolds slowly; allow the colony several quiet days before a full check. After installing the new queen, wait at least one week before an inspection. This gives the hive the required period to free her from the cage and to adjust to new pheromones.

Keep disturbances to a minimum in the first seven days. Light, brief visits only. Excess handling raises stress and may prompt rejection.
Look for clear signs of success: fresh eggs and small larvae are the best indicators that the queen is laying and the brood pattern is forming. Spotting new brood during the first proper visit signals acceptance of the new queen.
- Wait one week after placement before a full frame check.
- During that week, avoid wide inspections or heavy frame movement.
- New eggs or very young brood confirm the queen is active.
- If the queen cannot be found at the entrance or on frames, wait a few more days.
- If no evidence of the queen appears after an extended wait, repeat the introduction process as needed.
Monitor overall hive behavior as well. Calm activity at the entrance, steady forager return with pollen or honey, and normal brood care are positive signs. If unrest, persistent fighting, or abandoned cells occur, intervene cautiously.
“Patience and low-stress checks are the best defenses when a new queen integrates into a colony.”
For a concise reference on accepted methods, consult a thorough requeening guide. For related feeding notes if stores are low, read about syrup acceptance issues.
Avoiding Common Mistakes During Scarcity

Small errors magnify risk when floral sources are low. Keep the apiary tidy and limit any attractants that draw foragers from other colonies.
Never leave frames, honey jars, or used equipment outside. Foreign scents trigger robbing and alarm at the entrance. Clean tools promptly and store gear in sealed containers.
- Avoid over-feeding with sugar syrup; excess sugar ferments and harms bees.
- Do not add empty supers in a scarcity; extra space forces the hive to stretch defenses.
- Limit inspections; frequent checks stress the colony and may lead the queen to be rejected.
- Keep strong colonies through spring and winter to support recovery and future honey production.
| Mistake | Immediate Risk | Practical Fix |
|---|---|---|
| Leaving honey or gear outside | Robbing and fighting at the entrance | Store gear airtight; remove spills promptly |
| Over-feeding sugar | Fermentation, reduced bee health | Feed small amounts; monitor stores |
| Adding empty supers | Spread defenses, lower production | Wait for strong nectar flows before adding space |
| Excessive inspections | Stress, reduced brood care | Keep checks brief and infrequent |
Focus on prevention and minimal disturbance. Healthy management now helps colonies survive lean months and supports long-term queen and hive performance.
Conclusion
Requeening is a vital skill that gives a clear advantage to a diligent beekeeper. This article ties practical steps to seasonal timing and shows how patience improves success in spring and across the year. strong,
Observe local nectar flows and keep inspections calm. Brief checks in spring and summer help protect brood, stores, and overall hive health. Practical habits suit the environment and times when resources are low.
Every hive and its bees are unique. Apply these steps with steady hands and keep records over months and years. With steady practice, honey production and colony strength will improve across hives and colonies.