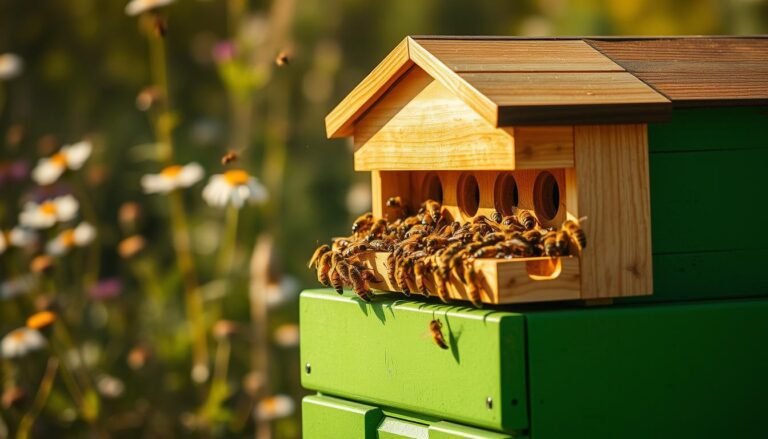
This apiary hygiene checklist for inspectors sets a clear path to protect colonies and guide professional evaluations. Hannah Neil, Beekeeping Coordinator at NOD Apiary Products Ltd in Trenton, Ontario, stresses that centralizing management ideas is vital to a successful season.
Inspectors and beekeepers should focus on the queen’s health, brood condition, and signs of disease during each inspection. Simple, consistent record keeping helps a beekeeper track eggs, honey stores, and long-term colony trends.
Prioritizing frames, pest checks, and proper handling reduces the spread of threats and keeps operations productive. For practical step-by-step guidance, see a basic inspection guide at how to inspect a beehive and an introductory log example at your first bee inspection checklist.
Key Takeaways
- Centralize management: coordinated plans improve season outcomes.
- Prioritize queen and brood checks to prevent disease spread.
- Keep clear records of eggs, honey, and inspections to spot trends.
- Inspect frames and look for pests like Varroa and small hive beetles.
- Choose warm, calm days for inspections and use proper protective gear.
Understanding the Importance of Apiary Hygiene
Anticipation beats reaction. A beekeeper who watches trends and acts early keeps each hive healthier. Long-term management of hives reduces emergency fixes and boosts honey yields.
Maintaining a clean hive helps the bees resist pests and disease. Regular hive inspections give the time needed to check the queen and confirm brood growth.
When you manage a lot of hives, consistent record keeping becomes the backbone of sound decision-making. A simple notebook lets beekeepers track strength, stores, and treatments over seasons.
“The best beekeepers anticipate what the bees need rather than just reacting to them.”
- Prevent buildup: clear debris to keep frames usable.
- Observe often: short, regular checks beat rare long inspections.
- Note everything: date entries help with trend analysis.
| Task | Frequency | Benefit |
|---|---|---|
| Remove debris | Monthly | Reduces pests and improves airflow |
| Quick inspection | Every 7–14 days | Check queen and brood status |
| Record update | After each visit | Builds reliable hive inspections history |
Essential Apiary Hygiene Checklist for Inspectors
Start each visit with a clear plan: know which hives to open, which frames to sample, and what signs you will check.
Pre-Inspection Preparation
Gather your hive tool, smoker, and protective gear before you approach the first hive. A short printed list helps you move quickly and reduces disturbance to the bees.
Make sure records are accessible so you can note queen status, brood patterns, and honey stores as you work.

On-Site Sanitation Protocols
Keep a clean top lid and dedicated tools per lot of hives to limit cross-contamination. Wipe tools and gloves between colonies when practical.
Verify the condition of frames and look for unusual spots or odors that signal disease.
- Check queen presence and egg patterns quickly but thoroughly.
- Use a simple task list to manage time when you have a lot of hives to visit.
- Record keeping during the inspection ensures you track honey and long-term trends.
“Working from a simple checklist helps keep your inspection organized and ensures you remember to check for eggs and queen status.”
| Task | When | Why |
|---|---|---|
| Tool prep | Before visit | Reduces hive disturbance |
| Top lid sanitation | Between colonies | Prevents cross-contamination |
| Record update | After inspection | Tracks honey, brood, and queen status |
Seasonal Considerations for Hive Management
Seasonal shifts demand targeted actions so each hive moves from winter stores into spring growth smoothly.
Make sure a healthy double Langstroth hive weighs at least 32 kg (70 lb) in early spring. Hannah Neil from NOD Apiary Products Ltd highlights this as key to avoiding starvation during the nectar flow.
During the spring summer transition, prioritize timely mite treatment to protect the colony. Apply the correct mite treatments at scheduled intervals to keep the queen productive and brood healthy.
Beekeepers managing a lot of hives should perform regular checks at the entrance. These checks confirm airflow and give space for new comb and incoming nectar.
| Action | When | Benefit |
|---|---|---|
| Weigh hive | Early spring | Confirms stores to prevent starvation |
| Mite treatment | Spring/summer transition | Reduces Varroa pressure, protects brood |
| Rotate frames | Pre-season and mid-season | Removes old comb, encourages healthy brood |
| Entrance checks | Weekly during flow | Ensures airflow and space for comb build |
“Plan spring work so hives enter the nectar flow with enough stores and a productive queen.”
For a seasonal schedule template and timing tips, see the beekeeping calendar. Use it to align mite treatments, frame rotations, and routine inspection windows.
Monitoring for Pests and Disease
A short, focused monitoring routine helps beekeepers catch Varroa and brood issues before they spread.
Varroa Mite Thresholds
Monitoring the level of varroa mites inside hive structures is critical to good hive management. In Ontario spring, the threshold is 2% on an alcohol wash — about 6 mites in 300 bees.
Keep records of mite counts and schedule a mite treatment when levels approach that number. Use drone timing (6–16 days to maturity) to plan treatments around brood cycles.
Identifying Brood Diseases
When you inspect brood frames, look closely for eggs and uniform brood patterns to confirm queen status. Misshapen or sunken cappings and foul odors point to disease such as American Foulbrood.
Document unusual signs and consult treatment protocols before moving comb or frames between hives. Good inspection records help with long-term decisions; see inspection records.
Small Hive Beetle Management
A diligent beekeeper checks the top of the frames and the lid for beetles and larvae that threaten honey stores. Also watch the entrance and comb edges for small hive beetle activity.

| Threat | Action | When |
|---|---|---|
| Varroa mites | Alcohol wash, apply mite treatments | Spring / as needed |
| Brood disease | Quarantine frames, test, replace comb | On detection |
| Small hive beetle | Trap, clean top, secure lid | Weekly checks |
“Maintain low mite levels so colonies move through the nectar flow strong and productive.”
For tips on raising gentle colonies while you manage pests, consult raising gentle colonies.
Best Practices for Record Keeping
A durable, well-organized notebook turns routine hive visits into useful data for future decisions.
Use a waterproof notebook like Rite In The Rain to keep entries legible after rain or syrup spills. Write the date, hive ID, and a one-line note about the queen and brood frames after each inspection.
Keep the entry short. Note honey levels, unusual odors, and the condition of the hive tool. These simple notes save you time the next time you visit.
Make a concise list of actions: treatments needed, frames to rotate, and tasks for spring summer work. A tidy record makes trend spotting easy and supports good management.
- Record mite counts and brood observations during hive inspections.
- Use the same abbreviations so entries stay fast and clear.
- Share formatted field notes when contributing to surveys or cooperative projects.
“Consistent record keeping is the hallmark of a professional beekeeper.”
For practical templates and field tips, see field notes for serious beekeepers.
Low-Tech Methods for Tracking Hive Health
A weatherproof dial fixed to the hive helps you track queen events and next actions at a glance.

The Queen Rite Dial was developed by Brian Koper and Jason Crook to simplify record keeping on the box. It lets beekeepers mark queen status, brood stages, and what the hive needs without a notebook.
Use the dial to make notes directly on the hive. That saves time during each inspection and reduces handling. You can see which hives need visit attention on any day.
Why it works
- Quick reference: view queen and brood status at a glance.
- Durable: built to withstand rain and sun through the season.
- Saves time: cuts down on writing and speeds up hive inspections.
“Track queen and brood development right on the box to plan the next visit.”
Utilizing Digital Tools for Modern Inspections
Using a smartphone to log an inspection speeds follow-up and keeps notes accurate across your hives.
Apps like HiveTracks, BeePlus, and Apiary Book let beekeepers store inspection data in the cloud so records never get lost. You can log varroa mites and the condition of frames while you work, then review the record later.
These tools save time during a busy spring summer season. They help you mark which hive needs visit attention and which boxes need a frame swap or mite treatment.
Many apps integrate with sensors such as BroodMinder to show temperature and humidity inside hive structures. That live data helps you spot issues before you open the box.
- Keep a searchable history of hive inspections instead of a paper notebook.
- Make notes in-app and assign tasks for the next time you visit.
- Use digital logs to plan hive management and improve record keeping.
“Digital records bring consistency and clarity to field work.”
For a ready-made inspection form use a beehive inspection log template. To learn how others document field work, read documenting your beekeeping journey.
Evaluating Queen Status and Brood Patterns
A focused glance at brood frames often reveals the clearest signal of a colony’s health. During a quick inspection, look for eggs in brood frames. Hannah Neil notes that visible eggs are a strong sign the colony is queenright and laying well.

Visual Identification of Eggs
Eggs are tiny, white, and upright in the cell base. Spotting many eggs across several frames means the queen is active and recent.
If eggs appear patchy or absent, make notes and plan to check again the next time you visit. Patchy laying may mean queen failure or stress.
Assessing Population Strength
Watch entrance activity. A busy entrance with foragers returning with nectar is a positive sign of strength.
Track population levels over several days to see growth trends. If activity drops or varroa mites are high inside hive structures, schedule a mite treatment.
- Note queen cells: record and prepare for a possible swarm event.
- Compare counts: check brood frames across visits to decide if additional mite treatments are needed.
Maintaining Equipment and Biosecurity
A routine that includes tool sanitation and lid scraping protects hives from common threats.

Keep a dedicated, clean hive tool and disinfect it between colonies to reduce the risk of disease spread.
Scrape the top bars and the lid regularly to remove built-up wax and debris. This simple action improves airflow and makes frames easier to inspect.
Make sure all beekeeping products are registered and used per local rules to protect the environment and the queen’s laying success.
- Sanitize tools: wipe or flame-treat as your method allows.
- Clean tops and lids: remove comb scraps and propolis after heavy use.
- Store products safely: label and follow legal directions.
If you find worrying signs of disease, contact the San Diego County Apiary Program at (858) 614-7738 for guidance on inspections and compliance. For a formal reference on field biosecurity, consult this biosecurity checklist and review recommendations when choosing beekeeping equipment.
“Proper management of your equipment ensures readiness and better outcomes across every hive.”
Conclusion
A steady inspection rhythm and clear records turn small actions into big results. Keep each visit focused: verify the queen, note brood patterns, and check pest levels. Short, goal-driven checks prevent small issues from becoming crises.
Use simple tools like the Queen Rite Dial or a digital app to mark tasks and log counts. Maintain biosecurity and integrated pest management as Hannah Neil recommends to protect colony health.
Keep detailed notes and share useful data with research programs. For practical cleaning and management guidance, consult the Thriving Hives guidance. Strong routines pay off with healthier colonies and steadier yields.