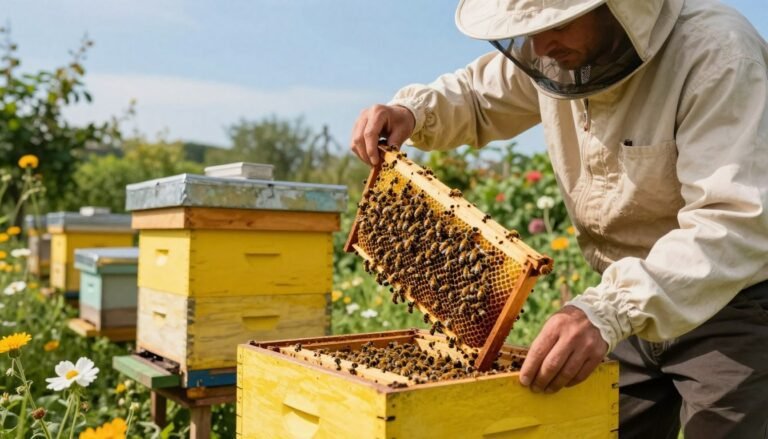
Getting a new colony off to a healthy start begins with careful staging and temperature control. Keep ambient temps above 65°F before moving bees into a new hive and avoid overheating the wooden box; sustained heat above 100°F can kill the entire colony.
A standard package contains about 12,000 live adult workers and one queen. Chill below 55°F may spare workers but it can ruin the queen’s stored sperm and trigger early failure. Rest a fresh package in a cool, dark spot for a few hours and mist lightly with sugar syrup to calm and feed the workers.
Stage protective gear, a veil, a smoker, and a hive tool before opening the box. Handle the queen cage gently: confirm the queen is alive, keep the candy end up, and remove the cork at the right time. For a practical guide to proper hive setup, consult a detailed beehive resource at beehive installation tips.
Key Takeaways
- Maintain ambient temperatures above 65°F before transfer.
- Avoid overheating the wooden box; temps over 100°F are lethal.
- Keep the package in shade and rest it; mist with sugar syrup.
- Wear a veil and have a smoker plus a hive tool at hand.
- Protect the queen: handle the queen cage and candy end carefully.
- Standard packages hold ~12,000 workers plus one queen.
Understanding Package Bee Components
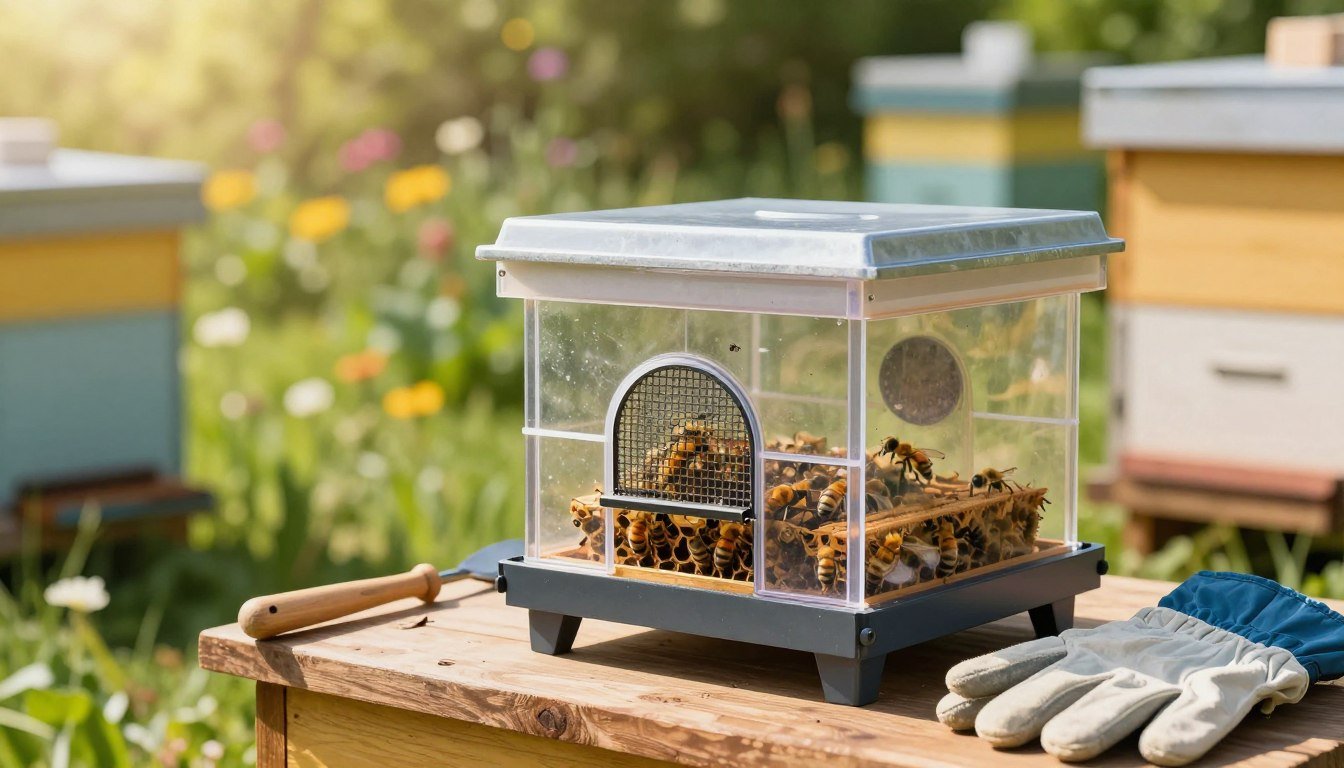
A well-packed shipment includes a ventilated wooden box, an inverted sugar can, and a protected queen cage. Inspect the box on arrival. Look for tears in the screen and about an inch of dead bees on the floor; both are common signs after transit.
The Anatomy of a Bee Package
Construction: Most shipments use a wooden frame with wire-screen sides to provide airflow. Inside sits a tin can feeder of sugar water that sustains the workers during travel.
Bee counts: Expect roughly 3,000–5,000 bees per pound. Typical shipments weigh two to five pounds, so plan how many frames the new hive will receive when added to the brood box.
Queen Cage Basics
The queen cage keeps the queen separate while workers learn her scent. Handle the queen cage with care. Confirm the queen is alive and keep the candy end intact until ready to introduce her to the colony.
“A calm, inspected package sets the stage for successful acceptance and healthy hive growth.”
- Check screens for damage before moving the box.
- Keep the feeder until hive transfer to maintain sugar and water supply.
- Inspect the queen cage to ensure workers are not attacking through the mesh.
For a practical guide to handling a shipment and introducing a queen, see obtaining and installing a package of and a review of best queen cages.
Essential Equipment You Need for Package Bee Installation
Gather a focused kit before opening the box. Start with a protective suit, gloves, a smoker, and a reliable hive tool. Set the hive on a stand with a screened bottom and a single deep hive body fitted with 10 wooden frames.
Feed and calm the colony. Mix warm water with granulated sugar at a 1:1 ratio to make sugar syrup. Keep a spray bottle of sugar water handy to mist the workers during transfer, as recommended by Dadant & Sons.
Keep the package on the ground in shade while preparing the new hive. Have an entrance reducer ready and a wood screw to remove the cork from the queen cage so the candy can be eaten on schedule.
- Key tools: smoker, hive tool, wood screw.
- Setup: screened bottom, entrance reducer, 10 frames in a deep box.
- Feeding: 1:1 sugar syrup; spray bottle to mist bees.
“A short checklist and steady hands make the first hours easier on the new colony.”
| Item | Purpose | Quick Tip |
|---|---|---|
| Smoker | Calms workers | Use minimal, cool puffs |
| Hive tool | Open panels, lift frames | Carry it in your pocket |
| Spray bottle (sugar water) | Mist and feed | Mix 1:1 warm water to sugar |

For a complete gear list, consult Dadant’s guide and a regional buying guide at Beekeepers Realm.
Preparing Your Hive and Apiary Site
Set the brood chamber on a level stand well before the bees arrive. A stable base keeps the hive secure and helps frames sit squarely. Place the stand in a sunny, sheltered area with good drainage.
Assemble the hive with the cover removed so interior access is quick. Remove three or four frames from the center of the box to create the space needed to shake the colony into the brood chamber.
Setting Up the Brood Chamber
Install an entrance reducer to help the colony defend their home from robbers. Keep the queen cage shaded and nearby while final checks are made.
Use a hive tool to adjust frames and confirm spacing. Periodically spray the workers with sugar syrup to keep them calm until transfer is ready.
“Having all gear staged at the apiary is the best way to ensure a smooth, stress-free transfer.”
- Stand and level the hive before bees arrive.
- Remove 3–4 central frames to make room in the brood box.
- Fit the entrance reducer and keep the queen cage safe and shaded.
- Use the hive tool and smoker gently; mist with sugar water as needed.
For regional siting and setup guidance, see placing a hive. For quarantine and prep tips, consult quarantine new bees.
Inspecting and Resting Your New Colony
Allow the shipment to rest in a cool, dark spot for several hours so the colony can recover from transit stress.
Keep conditions calm: avoid direct sun, loud noise, extreme temperatures, and vibration while the box sits.

Periodically mist the workers with a 1:1 sugar water syrup to keep them hydrated and calm until transfer time. A gentle spray every hour or two is usually sufficient.
Open the top briefly to inspect the cluster. Finding about an inch of dead bees on the floor is common and not alarming. If the count is much higher, contact the supplier promptly — excessive mortality may indicate overheating during shipping.
- Rest the box in shade for several hours before moving to the hive.
- Mist with syrup periodically to sustain energy and calm behavior.
- Protect the queen cage from noise and vibration while resting.
“Careful inspection and gentle rest give the colony the best start toward building comb and brood.”
For a detailed step guide on timing and transfer, see how to install a package of honey.
Installing the Queen and Worker Bees
C start the transfer by calming the cluster and preparing the open brood box. Begin with a firm knock so the workers drop to the bottom of the box.
Invert the box above the hive cavity and vigorously shake the workers into the space created when central frames were removed. Shake until most workers have landed in the new home. Wait a few minutes to let stragglers move in.
Shaking the Bees into the Hive
Tip: Keep movements steady and confident. Once the majority have moved, gently return frames to position while avoiding crushing any workers.
Releasing the Queen
Use the hive tool to remove the cork from the queen cage and expose the white candy plug. Place the queen cage candy-side up between two center frames so workers can access the screen.
Feed bees immediately with a small feeder of sugar syrup or sugar water to give energy for comb building and acceptance. The workers will eat through the candy and free the queen in one to two days, which reduces rejection risk.
| Step | Action | Quick Tip |
|---|---|---|
| Knock box | Settle workers to bottom | One firm tap on ground |
| Shake in | Invert and shake into frames gap | Use steady, quick motions |
| Queen cage | Remove cork; place candy-side up | Between two center frames |
| Feed | Provide sugar syrup | Start immediately after transfer |
For a step-by-step walkthrough on how to install a package of bees, see install a package of bees.
Troubleshooting Common Installation Challenges
Spotting early problems helps save a new colony. Check brood cells for odd shapes; drone brood looks larger and bulges from the comb.
If the queen is not accepted, unite the hive to an established one using a sheet of newspaper with a few small holes. This slow method lets odors blend and reduces fighting.
If bees avoid building wax comb, feed constant sugar syrup. Sweet stores stimulate wax glands and speed comb construction.
Confirm the queen cage release. If the candy plug still blocks access, remove the cork with a small tool and set the cage candy-side up between central frames.
If the queen is missing or dead, order a replacement from a commercial vendor. A failing queen that lays only drone brood must be replaced to preserve honey production and long-term survival.
For added monitoring of stores and robbing risk, see the best pollen trap for hobby beekeepers.
| Issue | Sign | Quick Fix |
|---|---|---|
| Queen rejection | Workers act hostile; queen cage untouched | Newspaper unite; check cage release |
| Poor comb drawing | Few wax cells; slow comb growth | Feed 1:1 syrup; add frames with foundation |
| Failing queen | Predominant drone brood; sparse worker brood | Replace queen from supplier |

Conclusion
Early attention to feeding and shelter sets the tone for a thriving hive. Keep checks regular, provide 1:1 syrup as needed, and protect the brood chamber from extremes.
Installing package colonies is a rewarding step in any beekeeping journey. Follow the steps in this guide, and patience will pay off with steady growth and healthy comb building.
For expert help, call Dadant & Sons at 888.922.1293. Tap local groups to share tips and learn from the wider beekeeping community. Practical starter advice is also available in our starter kit guide.
FAQ
What are the must-have tools listed in the "Essential Equipment for Package Bee Installation" brief?
The brief highlights a smoker, hive tool, bee brush, protective veil or suit, gloves, entrance reducer, and frames. It also recommends a feeder for sugar syrup, a queen cage or candy plug, and a cork or stopper for securing the queen during transport. Choose commercial brands like Victor or Master Gardener for feeders and J.H. Metcalf-style hive tools for durability.
Can you summarize "Understanding Package Bee Components" and the anatomy of a bee package?
A typical package contains worker bees, a mated queen housed in a vented cage with candy or a cork plug, and a small mesh-screened box. The box includes a fondant or candy plug to delay queen release. The workers cluster around the feeder can and queen cage. Inspect the package for live activity, no foul odor, and manufacturer labels such as Mann Lake, Betterbee, or Brushy Mountain.
How does the "Queen Cage Basics" section recommend protecting the queen during installation?
Keep the queen in her vented cage until you secure her inside the hive using the candy plug or cork method. Place the cage between two frames near emerging brood so workers can access and gradually chew through the candy. Avoid direct handling; use a queen clip or tweezers. Ensure the cage faces upward and is sheltered from drafts.
What repeats from "Essential Equipment You Need for Package Bee Installation" that newcomers must remember?
Along with protective gear, a quality hive with assembled frames, a feeder, sugar syrup, and a smoker are key. Also include a bee escape if you need to clear boxes, a ribbon or marker to tag the queen, and a sturdy bottom board. Mark reputable suppliers and check that frames contain foundation or drawn comb depending on your plan.
How should I prepare the hive and choose the apiary site according to "Preparing Your Hive and Apiary Site"?
Select a well-drained, sunny spot with morning sun and afternoon shade, sheltered from strong winds. Position the hive entrance facing southeast if possible. Level the hive stand, fit an entrance reducer, and assemble the brood chamber with frames spaced correctly. Provide nearby water and keep the area clear of dense vegetation for easy inspections.
What steps are in "Setting Up the Brood Chamber" before introducing a new colony?
Install frames with foundation or drawn comb, center frames for brood production, and leave room for honey stores. Ensure frames are square and evenly spaced. Place one or two frames of emerging brood, if available, to encourage nurse bee behavior. Keep a clean inner cover and place a feeder access point above the brood chamber.
After arrival, how long should I let the bees rest according to "Inspecting and Resting Your New Colony"?
Let the package rest in a dark, quiet location for several hours to overnight. This allows bees to calm and warm up. Check the colony the next morning for activity, syrup consumption, and queen cage condition. Avoid full inspections during the first 48 hours unless an emergency demands intervention.
What is the recommended process for "Installing the Queen and Worker Bees"?
Open the package near the hive, gently pour or shake the workers into the brood chamber between frames, then position the queen cage where workers can reach her. Feed a light sugar syrup to settle the colony. Keep the entrance reduced for the first few days and watch for bees exiting to orientation flights.
How should I perform "Shaking the Bees into the Hive" safely and effectively?
Hold the package over the open brood chamber, gently shake or pour small handfuls of bees into the center, avoiding crushing. Place the queen cage on a central frame or wedged between frames. Replace the inner cover with a feeder above the hive to provide immediate syrup stores and reduce drifting to neighboring colonies.
What is the best practice for "Releasing the Queen" after installation?
Allow workers to accept the queen through the candy release method, typically two to three days. If the queen remains unaccepted or in distress after 72 hours, consult a local extension agent or supplier. When removing the cage, do so gently and inspect the queen only if necessary. Tag the queen after confirmation for easier identification.
Which common issues are covered in "Troubleshooting Common Installation Challenges"?
Typical problems include low syrup consumption, queen rejection, excessive drifting, robbing by other colonies, or cold stress. Solutions include warming the hive, using entrance reducers, feeding fondant or thicker syrup, and relocating weak packages slightly to encourage site fidelity. Maintain sanitation and timely inspections to prevent disease spread.
How long should I expect the colony to stabilize after setup?
Most colonies begin establishing brood and stores within two to four weeks. Full stabilization with a laying queen and growing population typically occurs within six to eight weeks. Continue supplemental feeding until natural nectar flow increases and monitor for brood pattern, honey stores, and queen presence.