Managing Varroa mite populations is a top priority for healthy hives. The National Bee Unit notes that targeted brood removal can cut mite levels by roughly 40–50% when done twice each season. This guide explains the timing and practical steps for using drone brood as an effective bait.
Research shows drone cells attract about eight times more mites than worker cells. Beekeepers can trap mites before they emerge as adults by removing the bait frame at the right moment in the cycle. That approach preserves future generations of drones and reduces reliance on synthetic chemical treatments.
Clear timing and careful handling make the method sustainable for U.S. apiaries. This introduction sets up practical, evidence-based guidance for planning removals with minimal colony stress.
Key Takeaways
- Drone brood removal can reduce Varroa loads by 40–50% when applied twice a season.
- Drone cells attract about eight times more mites than worker cells.
- Use bait frames and remove them before mites emerge as adults.
- Proper timing protects future drone generations and hive strength.
- This method lowers dependence on synthetic treatments for sustainable management.
Understanding the Biological Rationale for Drone Brood Removal
Varroa exploit longer development times in drone brood. The extended post-capping period inside these cells gives female mites more time to rear larger broods. This leads to higher mite survival and faster population growth.
The Mite Preference for Drone Cells
Research and expert observations show mites reproduce more successfully in drone brood than in worker brood. Studies report averages of about 1.3–1.4 offspring per mite in worker cells versus 2.2–2.6 in drone cells.
Impact on Colony Health
The National Bee Unit estimates drone brood attracts roughly eight times more mites than worker brood. Removing that concentrated reservoir removes a large share of the parasite population without harming workers.
- Higher reproduction: more mite offspring per capped drone cell.
- Targeted removal: destroying capped drone comb before adult emergence kills mites inside the cells.
- Colony resilience: studies show this method avoids loss of hive strength or adult bee numbers.
| Host Type | Avg Offspring per Mite | Relative Mite Attraction | Management Benefit |
|---|---|---|---|
| Worker brood | 1.3–1.4 | Baseline | Low removal impact |
| Drone brood | 2.2–2.6 | ~8× higher | High-impact removal |
| Capped drone cells | 2.2–2.6 | Concentrated mites | Kills mites and offspring |
| Colony outcome | — | — | Reduced mite population, preserved bees |
For practical steps and an effective protocol, consider combining physical removal with freezing as part of an integrated plan. See this guide on drone brood removal and freezing for a proven approach.
When to Cut Out Drone Comb for Maximum Mite Control
Peak drone production in early summer creates the best window for trapping the highest number of Varroa mites.
The National Bee Unit recommends scheduling removals between May and July, with June and July giving the strongest effect. Monitor your colony through spring so you know when bait frames contain capped brood.
Randy Oliver notes that initial spring brood often has almost no mites, so avoid early removal that yields little benefit.

Wilkinson and Smith modeled that trimming drone brood from 4% to 3.2% can slow mite population growth by about 25%.
- Best months: June–July for highest mites per frame.
- Monitor: check for capped cells before removing a frame.
- Repeat: perform the method multiple times while the colony rears males that season.
For practical protocols and rotating methods, see a detailed guide on drone comb timing and an overview of control options at Varroa mite control.
Essential Equipment for Your Apiary
Good gear makes targeted brood trapping practical and repeatable. Select equipment that guides where the colony builds and that lets you remove bait frames quickly with minimal disturbance.
Selecting the Right Frames
Use frames designed for the task. The National Bee Unit recommends a frame of drone brood foundation or a super frame to encourage larger cells. Hobbyist suppliers also sell molded plastic frames that speed setup and removal.
Randy Oliver’s trap frame uses an extra top bar and a strip of worker foundation. This design lets you handle the frame in the field and replace it fast. Many beekeepers run two frames per colony so one frame is always trapping mites while another is being processed.
| Frame Type | Best Use | Box Size | Key Benefit |
|---|---|---|---|
| Drone brood foundation | Targeted mite trapping | Deep or medium | High mite capture |
| Plastic comb frame | Quick setup for hobbyists | Medium or shallow | Durable, reusable |
| Randy Oliver trap frame | Field-ready removal | Deep with extra top bar | Easy cutting and handling |
| Standard frames | General brood and honey | All boxes | Versatile, supports honey storage |
Tip: Carry a sturdy hive tool and gloves. Good equipment keeps bees calm and helps you maintain hive hygiene while managing brood frames.
Preparing Your Hive for Drone Brood Trapping
Making room inside the nest helps guide bees toward building targeted cells for mite trapping.
Start by removing a single empty brood frame at the edge of the brood nest. This creates the space the colony needs and places the new frame where the queen can reach it quickly.
Insert the bait frame directly beside existing brood. The queen will often lay eggs in the larger cells as the nest expands. A nearby laying area speeds cell occupation and concentrates mites in one place.
Colony strength matters. The National Bee Unit advises only using this method in colonies large enough to draw and provision extra brood. Small hives may not build the larger cells needed for effective trapping.
Randy Oliver notes that a strong nectar flow encourages bees to draw out new comb. Check the colony lifecycle and foraging conditions before inserting the frame.

- Place the frame at the brood edge so the queen has immediate access.
- Confirm colony is large enough to raise male brood that season.
- Time insertion with good nectar flow when possible.
- Monitor capped cells; filled cells become the main target for mites and reduce overall mite population.
| Action | Why it matters | Quick tip |
|---|---|---|
| Remove empty brood frame | Creates edge space for new cells | Pull a frame from the nest edge |
| Place bait frame beside brood | Ensures queen access and rapid laying | Position next to open brood areas |
| Check colony size | Only strong colonies will draw extra cells | Use this method on robust hives |
| Match foraging conditions | Nectar flow speeds comb construction | Insert during active nectar periods |
For practical protocols on integrating this step with other tactics, see a guide on brood trapping methods and notes on proper frame care at frame storage tips.
How to Perform Drone Brood Removal Effectively
Precise timing and simple tools let beekeepers remove sealed male cells before mites escape. A clear routine keeps colonies strong and cuts parasite load with low disturbance.
Inserting the Foundation
Place a sheet of larger cell foundation beside open brood so the queen accepts eggs quickly. Use frames that match your box and leave room for the nest to expand.
Monitoring Development Cycles
Mark the day you see eggs. Check sealed brood around day 18 with an uncapping fork to assess mite levels. The National Bee Unit requires that frames be checked by day 24; destroy any sealed male brood before emergence.
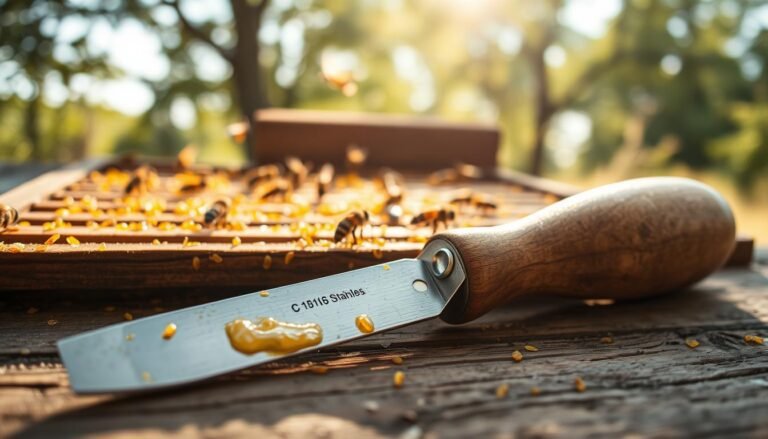
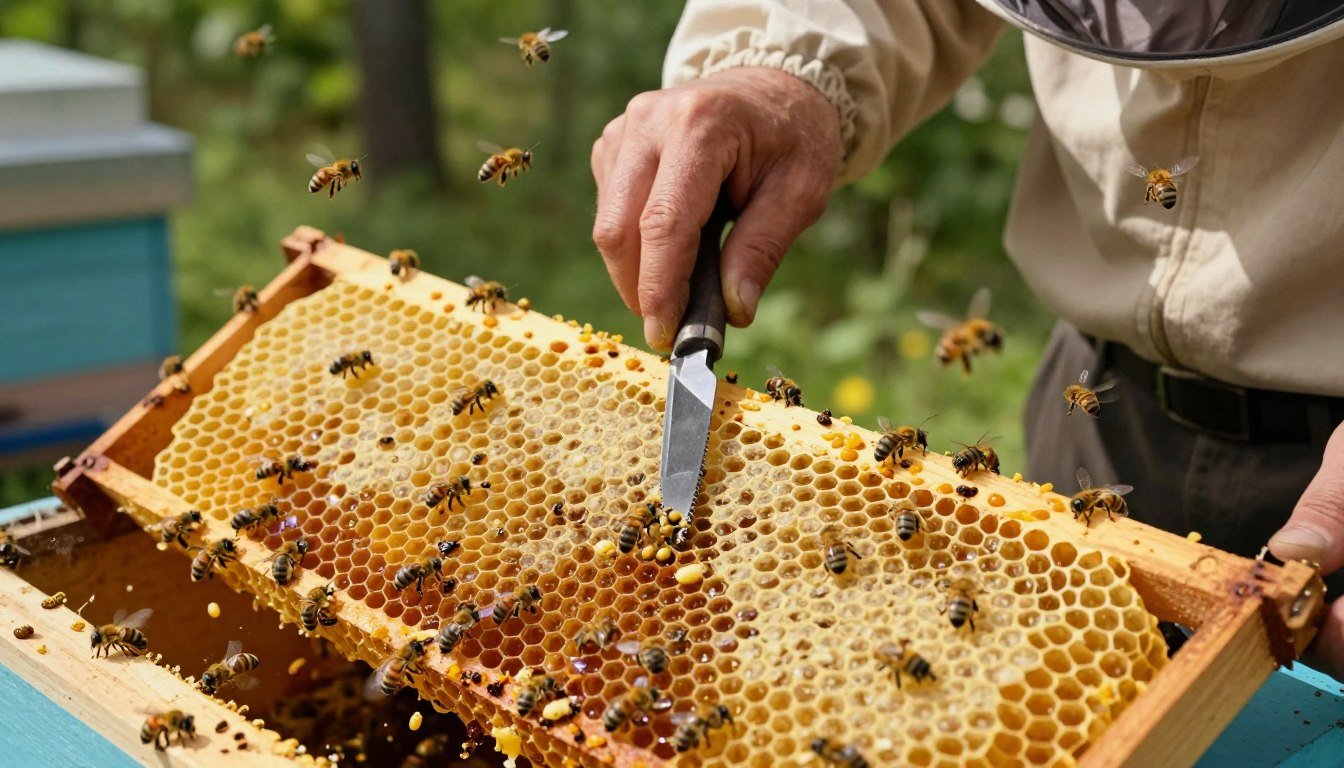
Using the Uncapping Fork
Gently lift cappings to inspect brood cells. If mite numbers are high, remove the affected frame and destroy it by freezing or burning. Leave a narrow strip of midrib on the frame for quick rebuilding.
- Quick check: efficient handling can take as little as 15 seconds per frame, if done with skill.
- Dispose safely: prevent robbing and disease spread in the apiary.
- Further reading: follow a tested drone brood removal protocol.
Managing the Removal Process Throughout the Season
A steady schedule for frame checks keeps mite numbers low while preserving colony productivity.

Follow the National Bee Unit guidance: you may perform drone brood removal up to three times each season. Plan checks spaced across spring and summer so each cycle traps a new cohort of mites.
Rotate bait frames between colonies and boxes to maintain continuous trapping without harming honey flows. This rotation also discourages bees from building volunteer cells in other nest areas.
Randy Oliver recommends moving a trap frame to the outer cluster late in the year. That practice can yield comb honey while freeing inner frames for normal brood rearing.
Keep records of dates, frame location, and numbers of sealed cells. A simple log helps you compare mite population trends and verify that repeated removals don’t weaken the colony.
| Action | Frequency | Benefit |
|---|---|---|
| Frame check and cull | Every 18–24 days, up to 3 times/season | Removes concentrated mites before emergence |
| Rotate bait frames | Continuous through honey season | Maintains trapping while supporting honey production |
| Move frame to cluster edge | Late season | Produces comb honey, preserves inner brood |
Research shows no significant loss of colony strength when this method is used correctly. For scheduling tips and timing details, see a practical guide on drone comb timing and signs of brood changes at hive swarm preparation.
Handling Dead Brood and Mite Disposal
Safe handling of culled brood is the final step that preserves hive health and blocks mite spread. Proper disposal prevents re‑infestation of nearby colonies and limits disease transfer in the apiary.
Sanitary Disposal Practices
The National Bee Unit advises burning or freezing removed frames so all mites are destroyed. Many keepers freeze capped frames for one to two days before removing the brood.
Randy Oliver suggests extracting wax first, then composting the protein or feeding it to chickens. Avoid leaving brood on the ground; that can trigger robbing and spread mites and pathogens.
- Destroy by burning or freezing: ensures trapped mites are killed.
- Wax removal then compost: a safe reuse path recommended by some experts.
- Never leave frames exposed: prevents robbing and cross‑infestation.
- Use two frames: keep one active in the hive while another rests in the freezer for continuous control.
Have a clear plan for handling culled brood after each session. For timing and scheduling advice on drone comb timing, see this practical guide: drone comb timing.
Potential Challenges and Troubleshooting
Small or weak colonies may ignore a bait frame for weeks. Check colony size first. If the hive lacks nurses or food reserves, bees avoid drawing new cells.
Lack of nectar flow also stops comb building. During a poor forage period, bees focus on survival rather than brood expansion. Wait for better weather or move the frame when foraging picks up.
If the queen is not in a high‑laying phase, the frame may remain empty. Watch egg patterns and brood age. Shift the frame beside active brood so the queen finds it more easily.

Observe bee behavior and adjust placement. Place the frame at the brood edge and avoid distant positions that the queen cannot reach. Keep records of placement, dates, and outcomes to refine timing next season.
| Common Issue | Typical Sign | Quick Fix | Notes |
|---|---|---|---|
| Undrawn bait frame | Empty foundation after 10–14 days | Move beside strong brood, wait for nectar flow | Often a colony strength problem |
| Queen not laying | Few or no eggs on frame | Place frame next to recent brood; check queen health | Replace frame in active laying zone |
| Poor nectar flow | Minimal forager return, slow comb draw | Delay insertion or supplement feed briefly | Natural forage improves success |
| Repeated failure | Frames unused across checks | Try a stronger colony or consult the National Bee Unit guide | Experience helps refine placement and timing |
Practice and observation are essential. Keep sessions short, note outcomes, and adapt plans. Over time you will read colony cues and integrate this method reliably into routine apiary care.
Integrating Drone Removal with Other Pest Management Strategies
Layering biotechnical steps can turn a modest removal effort into a near‑complete population knockdown.
The National Bee Unit reports that pairing drone brood removal with a short broodless period greatly boosts results. Creating a broodless window through an artificial swarm, shook swarm, or by caging the queen can lift efficacy into the 90–99% range against mites.
Randy Oliver recommends using bait frames alongside light, nonchemical treatments like powdered sugar dusting for a “one‑two punch.” That mix lowers mite population while leaving worker brood and honey flows intact.

- Schedule a broodless interval after removing capped brood and treat the colony with a gentle dusting or monitoring.
- Rotate frames and keep records of frames, days, and mite counts so you track population trends.
- Use these methods as part of continuous integrated pest management to avoid reliance on synthetic miticides and protect colony strength year‑round.
For handling cross-frame issues and practical tips on frame care, see this guide on cross-comb handling.
Conclusion
Consistent checks and careful handling make a simple frame a high‑impact mite control tool.
Drone brood removal is an effective, nonchemical approach for managing Varroa in U.S. apiaries. Understanding mite preference for male brood lets beekeepers trap parasites with minimal harm to workers.
Success rests on proper timing, the right equipment, and safe disposal. Combine this method with brief broodless periods and light supportive measures for larger reductions in mite levels.
Monitor colonies regularly, keep clear records, and adjust practices based on hive strength and forage. Implementing these sustainable steps supports healthier bees and more productive hives across the country.
FAQ
What is the right time for trimming drone comb in a beehive?
Trim drone comb during peak drone rearing periods in spring and early summer, when colonies build significant drone cells. Aim for removal about two to three weeks after eggs are laid, before drones emerge. This timing reduces varroa mite buildup while minimizing stress on colony population and honey stores.
Why does removing drone brood help reduce mite populations?
Varroa destructor shows a strong preference for larger drone brood cells because mites reproduce more successfully there. Removing those brood frames interrupts the mite reproductive cycle, lowering overall infestation levels and protecting worker brood and the queen from heavy mite pressure.
How does drone brood removal affect colony health?
Properly done, removal lowers mite loads and improves long‑term colony vigor. It reduces disease transmission and boosts winter survival. Avoid excessive removal of brood or worker brood, and maintain adequate nest space so the colony remains productive and balanced.
What is the best time frame for cutting out drone brood for mite control?
Schedule removal during active brood cycles, typically every 21–28 days in spring and summer. That interval aligns with the drone development period, capturing mites before they complete reproduction. Regular checks and timely removal maximize effectiveness.
What equipment should I have before removing drone brood?
Essential gear includes protective clothing, a smoker, hive tool, uncapping fork or knife, quality frames with removable foundation, and a sturdy box or container for removed comb. Have a plan for sanitary disposal of infested brood and materials.
How do I select the right frames for drone brood trapping?
Use frames with foundation sized for drone cells or frames with a few combs left unmanipulated so bees build larger cells. Wired frames resist damage during removal. Ensure frames fit your hive system—Langstroth frames are common in the U.S.
How should I prepare the hive prior to trapping drone brood?
Reduce competing brood space by centralizing the brood nest and placing drone‑sized frames at the brood nest edge. Increase space if the colony is crowded. Lightly smoke and inspect the hive to identify frames with substantial drone brood before insertion or removal.
What are the steps for effective drone brood removal?
Identify frames with drone brood, remove them on the correct schedule, and either freeze or destroy capped brood with high mite loads. Replace frames with fresh foundation or a new frame to encourage clean comb production. Repeat on a cycle timed to drone development.
How should foundation be inserted when managing drone brood?
Place drone‑sized foundation or empty frames where drone rearing is most likely—often at the edge of the brood nest. Secure foundation so bees can draw comb cleanly. Monitor and adjust placement based on brood patterns and colony behavior.
How do I monitor development cycles after inserting trap frames?
Mark insertion dates and inspect every 7–10 days. Track egg, larval, and capped stages to predict when mites will be concentrated in capped drone cells. Remove frames before adult drones emerge to capture reproducing mites.
When is an uncapping fork useful during removal?
Use an uncapping fork to open capped drone cells quickly and expose mite‑laden brood for removal. This tool speeds up processing and helps you assess mite loads visually, enabling targeted disposal or freezing of infested comb.
How should I manage removal across the season?
Maintain a regular schedule aligned with local brood cycles, increasing frequency during heavy reproduction months. Balance removal with colony needs—avoid excessive disturbance during nectar flows and ensure adequate worker brood remains for colony growth.
What is the proper way to handle dead brood and dispose of mite‑laden material?
Remove dead brood and comb promptly. Sanitary options include freezing frames for 24–48 hours, burning heavily infested material where legal and safe, or sealing and disposing of debris per local regulations. Clean tools and sanitize equipment to prevent spread.
What sanitary practices reduce risks after removal?
Wear gloves, wash tools with hot soapy water or a mild bleach solution, and dry thoroughly. Rotate or replace foundation periodically. Avoid moving contaminated comb between colonies. Keep records of treatments and disposal for hive health tracking.
What common challenges occur with brood removal, and how can I troubleshoot them?
Challenges include queen rejection of altered frames, workers repairing removed comb, or missing the optimal removal window. Troubleshoot by adjusting frame placement, reducing disturbance, and refining inspection timing. If mite loads remain high, combine removal with additional integrated pest management steps.
How can drone brood removal be integrated with other pest management methods?
Combine brood removal with screened bottom boards, organic acids or essential oil treatments when appropriate, and regular monitoring with alcohol washes or sticky boards. Use an integrated approach to limit chemical reliance and maintain sustainable mite control across colonies.