Preparing hives for spring contracts demands clear planning and steady execution. Commercial beekeepers lose roughly 3% of their queens each time colonies travel long distances. For one round-trip to pollinate a crop and return, losses can reach 6% or higher.
Understanding the biology of the colony and the needs of the reproductive female is the first step. Proper handling, timely inspections, and secure transport cut risk and protect productivity.
This short guide highlights actionable steps to reduce losses and keep colonies strong during intensive pollination work. It also links to practical expansion and yard-prep advice in case you scale operations: beekeeping expansion tips.
Key Takeaways
- Plan hive prep to lower transport stress and avoid avoidable losses.
- Inspect reproductive stock early to confirm health and laying patterns.
- Secure frames and feed as needed to sustain worker populations.
- Train staff on gentle handling and loading routines for safer trips.
- Document trips and outcomes to improve future preparation and success.
Understanding the Challenges of Commercial Pollination
Long-distance moves and intense crop work push colonies into high-risk conditions. Commercial operations must balance tight schedules with the biology of each colony. Stress from travel, crowding, and shifting forage quickly affects bees and hive strength.
Industry data show that moving hives can cost about 3% in reproductive losses per trip. For a round trip to service a crop and return, losses often reach 6% or higher. Those numbers translate into real colony losses and lower yield for the year.
“When colonies move between regions, the risk of spreading mites and disease rises, and long-term survival drops without better care.”
- Beekeepers face higher costs when bees arrive weakened and honey production falls.
- Moving bee colonies increases the chance of transferring mites and pathogens between hives.
- Successful crop service depends on keeping each colony in peak condition to protect production.
Understanding the reason for losses helps prioritize inspections, timely treatments, and careful loading. Simple changes in handling and health checks can reduce risk and support stronger honey bees throughout the season.
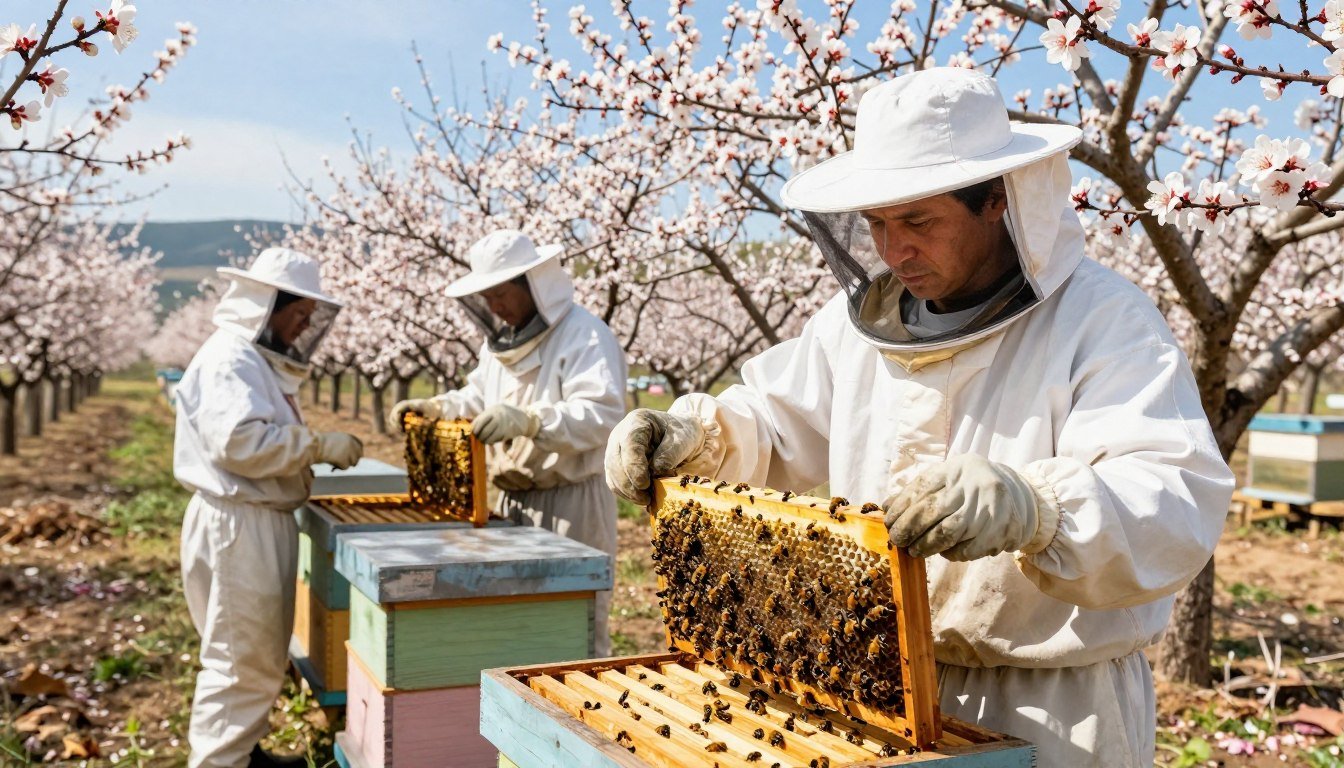
Queen Management Before Almond Pollination
A healthy laying pattern is the single best predictor of whether a hive will endure transport and stress.

The Importance of Queen Health
Check brood on every frame to confirm steady, concentric brood patterns. A solid pattern shows the queen is laying well and the colony has enough young workers for tasks.
Research shows supplemental forage improves colony survival and helps sustain queen pheromone signaling. That boost aids colony cohesion and reduces winter losses.
Strategies for Colony Longevity
Proactive inspections reduce surprises. Look for spot checks of brood, signs of disease, and even distribution of workers across frames.
Feed and forage planning can shore up reserves and support honey production later in the year. Provide supplemental forage or feed when natural sources are scarce.
- Monitor brood pattern per frame weekly in late winter.
- Use supplemental forage to improve survival and pheromone strength.
- Replace failing reproductive stock early to avoid mid-season losses.
| Action | Indicator | Timeframe |
|---|---|---|
| Frame-by-frame brood check | Consistent laying pattern | Late winter — early spring |
| Supplemental forage | Improved survival rates | Fall through pre-bloom |
| Early replacement | Reduced mid-season losses | At first sign of poor laying |
| Health treatments | Lower mite and disease pressure | Before moves and after returns |
For planning details on forage practices, see this supplemental forage guide. For seasonal mite checks and calendars, refer to the varroa monitoring calendar.
Assessing Colony Health and Strength
Measuring brood and worker distribution across frames gives a clear picture of colony readiness for long moves.
Start with a calm, frame-by-frame review of each hive. Note brood coverage, stored pollen, and worker density.
Use photo analysis where possible; total comb areas can be estimated with ImageJ to track changes. Periodic checks in the study showed phoretic mite levels stayed under 5%.
“Regular, quantitative inspections reduce surprises and support timely decisions on replacements and treatments.”
Document brood area to follow the queen’s laying trend. A high worker-to-brood ratio signals vigor and resilience.
- Inspect every frame to confirm steady laying and brood distribution.
- Record comb areas and pollen stores to monitor bee health over time.
- Use notes and photos to guide seasonal decisions and adjust management.
| Action | Measure | Frequency |
|---|---|---|
| Frame-by-frame inspection | Brood coverage (%) | Weekly in late winter |
| Photograph analysis | Comb area occupied (cm²) | Monthly pre-bloom |
| Mite screen check | Phoretic mite % | Before moves and after returns |
For chemical-free approaches to support colony strength, see chemical-free beekeeping tips.
The Impact of Transport on Bee Clusters
Long-distance moves place intense stress on clustered bees, especially when vibration and temperature swing.
When a cluster breaks from vibration, heat escapes rapidly. That loss of warmth can chill brood and interrupt development.
Beekeepers must plan routes and timing to reduce shaking and sudden temperature shifts. Night loading often increases vibration risk and can cause clusters to fall apart.
Managing Vibration and Temperature Stress
Protecting the hive box and frames with padding and secure bracing limits movement. Prepare colonies so the workers can regain a stable cluster quickly after a trip.
- Use soft packing between boxes and tie down supers to cut vibration.
- Allow sufficient time on arrival for bees to re-establish foraging patterns for nectar, pollen, and water.
- Monitor brood and the amount of activity in the first 24–48 hours to spot thermoregulation issues.
“Transport disruption compromises a colony’s ability to thermoregulate, raising colony losses if left unchecked.”

| Risk | Sign | Mitigation | Timeframe |
|---|---|---|---|
| Vibration | Broken cluster, chilled brood | Packing, secure frames, avoid rough roads | During transit |
| Temperature swing | High mortality in young brood | Temperature buffering, shaded parking | Loading/unloading |
| Drift from other hives | Strays, increased mite transfer | Strong hive entrances, inspect for robbing | First days on site |
| Reduced foraging | Low nectar/pollen intake | Allow adjustment time, provide water | 24–72 hours after arrival |
For guidance on transporting colonies safely, review this detailed transporting colonies safely. Proper steps reduce stress on the queen, protect brood, and cut the risk of colony losses.
Mitigating Risks from Pesticides and Fungicides
Stored pollen analysis from holding yards reveals hidden chemical risks to hive health. Recent samples showed 1790 ppb thymol and mixed agrochemical residues. That level can affect brood development and worker behavior.
Mitigating the risks from pesticides and fungicides is essential for protecting honey bee signals and productivity. Talk with growers and set spray windows so foraging bees avoid treated trees during the pollination window.
Protect colonies by limiting exposure, rotating placement when residues appear, and providing clean forage and water. Monitor stored pollen and honey stores for contamination. Replace or supplement contaminated stores when needed.
“Even trace fungicides can build up and harm brood; proactive steps reduce long-term losses.”
- Communicate spray timing with growers and request buffer periods.
- Inspect colony stores and remove highly contaminated frames.
- Provide alternative forage and clean water to dilute residues.
| Risk | Impact on bees | Practical step |
|---|---|---|
| Fungicide residues | Brood and adult decline | Set spray buffer; rotate yards |
| Insecticide drift | Worker loss, reduced foraging | Notify applicators; avoid active foraging times |
| Contaminated pollen | Reduced brood rearing | Remove frames; feed clean supplements |
| Chronic low-dose exposure | Weakened colony resilience | Regular testing and record-keeping |
Managing Mite Infestations in Intensive Environments
When many hives share a site, stray and drifting workers often carry mites from one colony to another. This risk climbs when colonies reorient after moves and when weaker colonies get robbed by stronger neighbors.
Regular checks on every colony cut the chance of a fast outbreak. Monitor phoretic mite levels and spot-check brood frames weekly during high-density placements.

Ensure colonies are strong enough to resist robbing. If workers from others’ hives enter your stacks, mites and disease can spread quickly and threaten productivity.
- Perform routine mite counts and log results for each colony.
- Isolate and treat high-count hives promptly to limit drift transmission.
- Use entrance management to reduce robberies and drifting.
| Action | Goal | Indicator | Timing |
|---|---|---|---|
| Weekly mite check | Early detection | Phoretic % over threshold | During high-density placement |
| Entrance control | Reduce drifting | Fewer stray workers | On arrival and first 72 hours |
| Prompt treatment | Limit spread | Lower colony mite counts | At first high reading |
| Documentation | Track trends | Inspection logs | Ongoing season-wide |
For detailed varroa protocols, consult the varroa monitoring guide. To reduce avoidable errors that raise disease risk, see common beginner mistakes.
Nutritional Support for Overwintering Colonies
Strong winter nutrition gives colonies the reserves they need to finish cold months and launch into spring work.
Benefits of Supplemental Forage
Providing supplemental pollen and nectar in mid-winter improves worker nutrition and boosts colony survival. Research shows boosted immunity and better resistance to Nosema in supplemented stacks.
Key gains include stronger brood development, steadier worker populations, and higher overall honey production in spring.
Impact on Pheromone Release
Supplemented queens released higher levels of key QMP and QRP compounds—including 4-hydroxy-3-methoxyphenylethanol, methyl oleate, and 1-hexadecanol. That chemical signal encourages better care from workers.
“Improved pheromone signaling from the reproductive female supports more cohesive care and colony stability.”
- Mid-winter feeding raises host immunity and worker condition.
- Better pheromone output helps workers tend brood and stores.
- Nutrition planning reduces avoidable colony losses in spring.
| Supplement | Primary Benefit | Recommended Time |
|---|---|---|
| Pollen substitute | Worker protein, brood support | Mid-winter to pre-spring |
| Sugar syrup or nectar supplement | Energy for thermoregulation | Late winter |
| Clean forage blocks | Reduce contaminated stores | When local pollen is scarce |
Raising High-Quality Queens for Your Apiary
Select the youngest larvae possible for grafting. Aim for larvae the size of an egg and just starting to curl. That age gives the best chance to rear a strong reproductive female and steady brood on each frame.

Use a strong, queenless starter. A robust starter colony can rear up to 50 cells, even in poor weather. With a simple cell builder you can produce 10 or more units for other colonies in the yard.
Watch for drones as a sign the season is right. Their presence shows bees are ready to mate and supports higher mating success for the cells you raise.
- Choose survivor lines: select bloodlines that ran two or more years with minimal mite treatments.
- Scale sensibly: use multiple builders to increase production and spread risk across hives.
“Raising high-quality queens is the best way to keep hives resilient and boost honey production year after year.”
For beekeepers, the process yields better colony health and long-term gains in honey bee reliability. Start small, track results, and expand as your beekeeper skills grow.
Essential Tools for Successful Grafting
A clear workspace and proper magnification dramatically raise your grafting success. Set up a dedicated table in a dim room so the larvae show up against a darker background. This reduces eye strain and speeds the transfer into cell cups.
Selecting the Right Grafting Tool
Choose a reliable Chinese grafting tool for steady, precise lifts. Pair it with clean JZ’s BZ’s plastic cell cups to avoid contaminated wax and improve acceptance rates.
Using Magnification for Precision
If you are over 40, use a lighted magnifying headband to see tiny larvae and fine brood details. Good magnification shortens the time you spend handling each larva and lowers accidental damage.
Maintaining Larval Moisture
Keep grafted larvae from drying out by placing plastic cell cups face down on a damp towel. Always have a moist towel nearby while you work to protect delicate larvae and maintain the right humidity.

“Practice and consistent setup are the two fastest paths to higher cell acceptance.”
- Set a dark table: it helps visibility when grafting into cells.
- Protect moisture: damp towel under cups prevents desiccation.
- Watch age: pick the youngest larvae to maximize future queen quality.
| Tool | Benefit | Tip |
|---|---|---|
| Chinese grafting tool | Precise transfer | Use steady hand and magnification |
| JZ’s BZ’s plastic cell cups | Reduced contamination | Place face down on damp surface |
| Lighted headband | Better visibility | Helpful for those over 40 |
Monitoring Queen Pheromone Signaling
Measuring pheromone output gives practical, early insight into a hive’s internal health. The reproductive female emits queen mandibular pheromone (QMP) and queen retinue pheromone (QRP) to keep workers focused on brood care and maintenance.
Pheromone levels affect worker behavior even when inspectors cannot see a problem yet. Workers drawn to the reproductive female form the retinue and perform nursing, feeding, and guarding tasks that sustain brood and honey stores.
Field studies and lab research show that steady QMP and QRP release correlates with colony cohesion. Tests do not always separate workers that touched the reproductive female from those that did not, but overall worker response still maps signal strength.
Practical steps:
- Watch retinue size and feeding rates as a quick proxy for signaling.
- Record changes in worker attention over weeks to flag declines early.
- Combine behavioral checks with brood pattern reviews to confirm issues.

“Regular pheromone monitoring helps identify problems before a colony resorts to replacement.”
Best Practices for Mating Nucleus Colonies
Successful mating nucs begin with careful timing and the right mix of frames and bees.
Create queenless mating nucleus colonies on Day 9 after grafting. I use 4 frames inside a 5-frame nuc box. This gives the new reproductive room to emerge and the workers enough brood and stores to accept her.

Let the nuc sit one to two days before inserting a ripe cell. That short interval improves acceptance and reduces cell loss during the stressful first hours.
Check for mate out after about two weeks. Look for steady laying across each frame and consistent brood coverage. If laying is spotty, replace the cell or re-evaluate drone availability.
- Use frames from dink colonies to bolster a weak nuc and conserve resources.
- Plan nuc setups for periods of good flight weather and abundant drones in the area.
- Document outcomes so you refine timing and frame selection next year.
“Good timing, solid frames, and healthy drones make mating nucs predictable and productive.”
| Step | Key Detail | Timing |
|---|---|---|
| Make nuc | 4 frames in 5-frame box, queenless | Day 9 after grafting |
| Wait to insert cell | Allow nuc to settle 1–2 days | Immediately pre-insert |
| Mate out check | Confirm even laying and brood on all frames | ~2 weeks after cell insertion |
| Bolster nucs | Use frames from dink colonies as needed | As season progress requires |
For detailed rearing and handling techniques consult this practical guide on rearing and handling techniques and review ethical beekeeping practices to keep colonies healthy and productive.
Conclusion
Strong brood patterns and steady pheromone signals make the difference between hives that thrive through long moves and those that falter.
Keep inspections regular, act quickly on mite readings, and feed when pollen is scarce. These steps reduce colony losses and support honey production in spring.
Raise and place high-quality cells, select well-mated queens, and document outcomes to refine your process each year. Good selections make your bee colonies more resilient.
For practical tips on rearing and care, see this queen guidance, and learn to boost colony population naturally to keep hives strong.
Prioritize bee health, plan your moves, and the season’s production will follow.
FAQ
What are the most important factors to check in a hive heading into commercial almond bloom?
Inspect brood pattern, presence of laying worker or multiple laying females, frame coverage with bees, stores of pollen and nectar, and signs of disease or Varroa. Verify queen age and laying rate, replace failing queens at least 6–8 weeks before bloom to allow colony buildup. Ensure adequate drone availability for mating and monitor mite levels to reduce overwinter losses.
How can transport to pollination sites affect colony health?
Long hauls cause vibration, temperature shifts, and cramped clusters that stress bees. Stress reduces foraging after placement and can lower brood care. Use well-ventilated trucks, secure supers to limit movement, and schedule transport during cooler hours. Check colonies immediately on arrival for cluster tightness and signs of stress.
What steps reduce pesticide and fungicide risk around pollination contracts?
Communicate with growers about spray schedules and request use of bee-safe labels and timing (evening or night). Provide maps of hive placement to avoid drift, and work with agronomists to choose lower-risk products. Train staff to recognize acute toxicity and have contingency plans for relocation if necessary.
When should beekeepers treat for Varroa in intensive pollination systems?
Monitor mite counts using alcohol or sugar roll and treat proactively if thresholds exceed recommended levels (commonly ~3 mites/100 bees, but adjust by method and season). Treat well before pollination to avoid sublethal effects on queens and brood. Rotate miticide classes and integrate oxalic or formic treatments in fall or spring when brood levels allow.
How does supplemental feeding help colonies before bloom?
Supplemental pollen patties or high-protein mixes improve brood rearing and queen pheromone output, supporting stronger spring buildup. Provide carbohydrate (syrup) if nectar flow is weak to prevent starvation. Time feeds so colonies consume stores and reduce robbing risk prior to almond placement.
What signs indicate a queen needs replacement before pollination season?
Patchy brood, capped drone cells in worker areas, irregular laying pattern, low brood volume, and aggressive supersedure behavior signal a failing queen. Queens older than one year often show reduced productivity; plan to introduce a tested, young breeder 6–8 weeks before bloom for best results.
How do mating nucleus practices improve queen quality for large operations?
Use well-managed nucs with adequate workers and drone source, place nucs in diverse forage areas, and space mating yards to reduce drift. Monitor queens for successful mating flights and early laying. Good nuc management reduces queen failure rates and improves colony uniformity for pollination contracts.
What grafting tools and techniques yield higher acceptance rates?
Select a fine, consistent grafting tool (plastic or metal blade) that suits your skill, use proper magnification to handle tiny larvae, and maintain larval moisture by avoiding drafts and overhanding. Work quickly but gently, and transfer larvae from
How does queen pheromone signaling relate to colony strength and behavior?
Strong pheromone profiles promote cohesive brood care, reduce swarming impulses, and regulate worker behavior. Poor nutrition, high mite loads, or a weak queen lower pheromone output, causing erratic brood patterns and increased supersedure. Supporting queen health with nutrition and low parasite pressure maintains signaling.
What on-site checks should be done within the first week after placing hives in an orchard?
Confirm hive orientation and placement, check entrances for congestion or robbing, assess foragers returning with pollen, inspect a frame for brood and queen presence, and measure temperature and humidity stress if possible. Address queens that are absent or poor layers promptly to meet pollination commitments.
How can beekeepers limit disease and parasite spread when moving many colonies for pollination?
Maintain strict hygiene: replace old frames, avoid mixing comb from different operations, and isolate new or sick colonies. Implement pre-move health audits, treat Varroa as needed, and reduce drifting by spacing and aligning hive entrances. Record keeping helps track outbreaks and management outcomes.
What are best practices for overwinter nutrition to improve spring performance?
Build adequate stores of pollen and honey during fall, supplement with protein patties if natural forage is scarce, and ensure dry, well-ventilated wintering sites. Strong winter nutrition supports brood rearing early in spring, enhances queen pheromone release, and reduces early-season colony losses.
How do growers and commercial beekeepers coordinate to maximize pollination success?
Establish clear contracts outlining placement timing, hive numbers, and handling protocols. Share spray schedules, emergency contacts, and contingency plans for weather or toxic events. Regular communication during bloom helps adjust hive density and ensures compliance with best practices for bee health.