Buying a nucleus colony is a key moment for any beekeeper. Follow the National Bee Unit Best practice guideline No. 8 (November 2025) as your first step. That guidance sets clear standards for the sale and transfer of nucleus colonies and helps protect existing apiaries.
A healthy nuc should offer five to six brood frames, a laying queen, and ample stores. When your box arrives, check the number of frames, the condition of comb, and the presence of a strong adult bee population. These quick checks save time and guard against problems in your hive.
Confirm source information for queens and colonies, and use practical inspections to spot any early signs of trouble. For background on buying packaged bees and nucleus boxes in the United States, see this short guide at buying packaged bees and nucs.
Key Takeaways
- Use the National Bee Unit Best practice guideline No. 8 as your foundation.
- A standard nucleus has five to six brood frames and a laying queen.
- Verify frames, comb health, and sufficient stores on arrival.
- Source information for queens and colonies must be transparent.
- Early inspections protect your apiary and save time later.
Understanding the Importance of Nuc Inspections
Early checks after bringing home a nucleus colony set the stage for steady growth in the coming months. Regular attention gives you a clear view of brood, stores, and adult bees. It also saves time by preventing problems from taking hold.
BeeBase is a free service from the National Bee Unit that helps beekeepers stay aware of local outbreaks. Use it as part of routine care and planning.
Regular hive inspections are critical for long-term success. They let a beekeeper track changes in population and honey stores over several months. Early checks help identify issues before they affect neighboring colonies or wild pollinators.
- Monitor growth: confirm frames, comb condition, and food.
- Stay informed: consult BeeBase for regional notices.
- Invest time: short, frequent visits pay off in healthy colonies.
Taking a methodical approach protects your investment and supports responsible beekeeping in the United States.
How to Inspect Purchased Nucs for Disease Risk
A calm arrival and clear checklist make the first visit safer for both the queen and the colony.
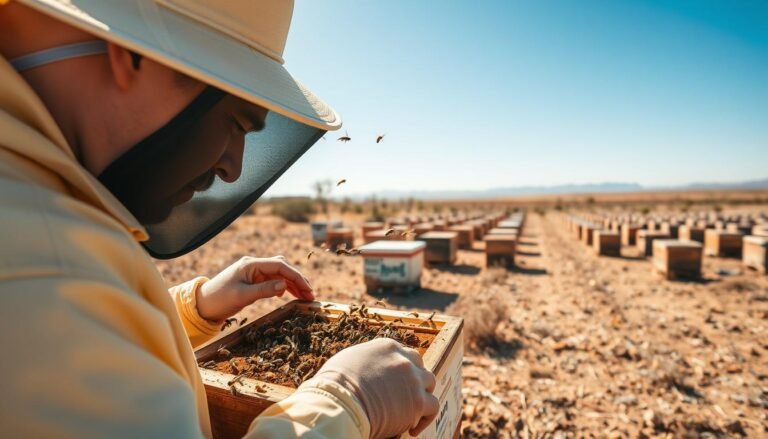
Preparation matters. Gather your hive tool, protective gear, and records about the box before you approach. Keep movement slow to reduce stress bees and avoid sudden noise.
Preparation for Inspection
Wait 5–7 days after placing the nuc in its new place. This gives the colony time to settle and for the queen to orient.
Confirm supplier information and any treatments applied. Carry a notebook or digital record so you have all information at hand during hive inspections.
Environmental Considerations
Check the weather; cold or wet conditions make bees defensive and can harm brood. Choose a warm, calm day and late morning when bees are active, as noted in the best time of day for hive.
Ensure there is enough space in your hive boxes for incoming frames and comb. This prevents crushed bees and preserves comb integrity.
- Bring: hive tool, smoker (if used), gloves, and records.
- Plan: quick checks, minimal disturbance, note brood and stores.
- Record: any treatments from supplier and visible signs that need follow-up.
| Step | Purpose | When | Notes |
|---|---|---|---|
| Gear & records | Reduce handling time | Before approach | Include supplier treatment details; link to Best practice guideline No. 8 |
| Timing | Protect brood and calm bees | 5–7 days after placement | Prefer warm, dry late morning |
| Space check | Prevent crushing | At first visit | Ensure boxes accept frames without compression |
| Quick assessment | Spot urgent issues | First short inspection | Note queen presence, brood pattern, and comb condition |
Final thing: a short, calm approach preserves colony health and gives the beekeeper clear baseline information for future hive inspections.

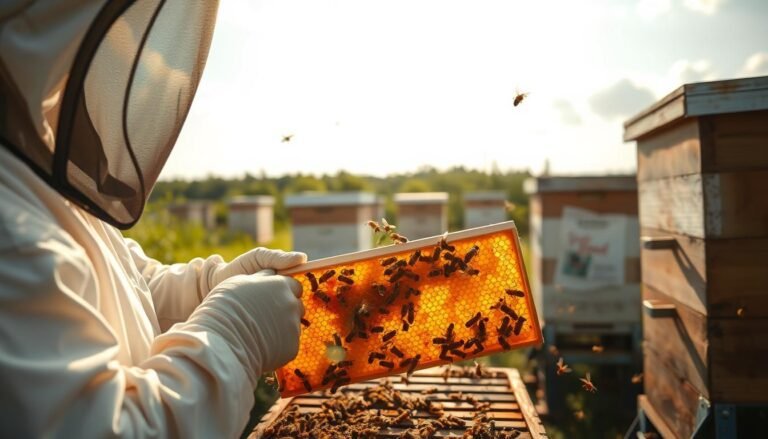
Evaluating Frame and Comb Quality
A careful look at frames and comb reveals much about colony health and future productivity.
Start with the comb. Combs should be recently drawn and light in color. Avoid dark or black wax, which can hide pathogens and old brood residue.
Check each frame for secure attachment and full draw. Frames that are well-drawn give the queen space for brood and help bees store honey and pollen.
Assess stores on arrival. A high-quality nuc will have frames with honey and pollen to support the colony in the first weeks.
- Confirm frames sit squarely in the box and are not loose or broken.
- Look for clean comb and no excessive brace comb that makes removal hard.
- Note any dark wax or damaged comb for replacement later.
Take the time to record findings. Good comb quality helps bees raise brood and save winter honey. For a checklist of specific indicators, see this short guide on specific indicators.
Assessing Queen Health and Brood Patterns
A clear view of the queen and brood pattern gives immediate insight into colony vigor.
Begin with a calm, focused pass through the box. Verify the queen is present and laying. A productive queen will lay eggs that progress through eggs, larvae, and sealed cells within predictable days. A queen emerges about 16 days after the egg stage starts.
Verifying Queen Presence
Scan frames for the queen or consistent fresh eggs. If eggs appear in a steady pattern across frames, the queen is active even if she is unseen.
Analyzing Brood Stages
Look for at least 30% sealed brood across comb area and keep drone brood under 15%.
Detecting Laying Workers
If you spot multiple eggs in single cells, this suggests laying workers. That requires prompt action.

| Check | Desired | Warning |
|---|---|---|
| Sealed brood | ≥30% comb area | <15% sealed brood |
| Drone brood | ≤15% total brood | Excess drone cells |
| Brood stages | Eggs, larvae, sealed cells visible | Gaps, spotty pattern |
| Queen cells | Few, middle cells = supersedure | Many at bottom = swarm preparation |
Record your findings and use brief notes for future inspections. For a short checklist and further reading, see this guide on inspection essentials and a seasonal checklist at spring beekeeping checklist.
Identifying Signs of Bee Disease and Pests
Noticing subtle changes in brood pattern or bee behavior can save weeks of trouble. Make sure you scan frames and brood for telltale signs such as a foul odor that may indicate American Foulbrood.
Look for visible problems at the entrance and inside the hive: dead bees piled at the door can point to pesticide exposure or an emerging health issue. CBPV often produces dark, greasy, trembling bees, while Nosema may show as dysentery on outer frames.
Check brood pattern for consistency; patchy or spotty areas suggest an underlying problem in the colony. Watch for abnormal or empty queen cells and investigate promptly.
- Confirm there are no Varroa mites on adult bees and no wax moth larvae in comb.
- Note any unusual honey or brood appearance and record findings for follow-up.
- Stay vigilant; early action keeps colonies productive and protects nearby colonies.
For a deeper overview of common issues, see a short guide on common honey bee diseases and this hive pests reference.
Monitoring Hive Population and Temperament
A calm cluster of workers on several frames usually means the queen is present and the colony is stable. A full-strength colony can hold about 60,000 bees, so watch how many frames carry living bees during quick checks.

Regular, brief visits give the best information. Note whether bees cover frames or leave large gaps. Check brood coverage and nearby stores for signs of steady growth.
Interpreting Defensive Behavior
Temperament offers clear cues. A queenright colony is usually calm. If bees act unusually aggressive, the queen may be lost or stressed.
- Observe the entrance and note flight patterns during the day and weather changes.
- Confirm steady pollen and honey delivery on frames as evidence of good foraging.
- Track population trends; growing coverage across frames indicates success in beekeeping.
Keep records of behavior and counts. For organized guidance on hive inspections and recordkeeping, see hive inspections and recordkeeping. That information helps beekeepers act quickly when temperament shifts.
Checking Food Stores and Feeding Requirements
A quick weight check and frame scan reveals whether the colony has the reserves it needs.
A six-frame nucleus typically needs two to three combs of honey and a full frame of pollen to thrive. Check each frame in the box for visible honey and pollen before any major handling.
Bees may consume between 40 and 60 pounds of honey through winter. If the hive is light, plan supplemental feeding so the queen can keep brood production steady.
“Supplemental feeding early is often the difference between a growing colony and one that struggles through the season.”
- Weigh the box during inspections to estimate remaining honey.
- If stores are low, offer sugar syrup so bees can draw new comb and store resources.
- Provide a frame of pollen or pollen substitute when brood rearing is active.
- Keep records of feeding events and monitor changes in hive weight and brood coverage.
Maintain consistent checks at set intervals. Proper stores support the queen, protect brood, and keep the nucleus ready for transfer into a full-sized hive. For beginner guidance on managing a new colony, see this beginner beekeeping FAQ.
Best Practices for New Colony Management
Moving frames with care ensures the queen and brood settle quickly in new space. Make transfers short and methodical, and keep disturbance low so stress bees recover fast.

Transferring into a Full-Sized Hive
Use your hive tool to lift frames gently and place them in order. Keep the same orientation so worker bees can return to familiar comb and maintain the brood pattern.
Allow room for expansion. Give space for honey and pollen and avoid compressing frames inside the boxes.
Record Keeping for Success
Keep clear notes of each visit: date, presence of a laying queen, brood pattern, feeding events, and any visible pest or disease signs.
If you suspect a statutory issue, contact the National Bee Unit at 0300 303 0094 immediately.
“Good records save time and protect other colonies.”
- Log treatments applied to wax or boxes and note weather and hive inspections.
- Feed sugar syrup when stores are low and monitor hive weight over months.
- Always be gentle when moving frames to avoid dead bees and queen loss.
For practical guidance on preparing a nucleus for sale or transfer, see prepare a honey bee nucleus for. Following these steps helps your new colony grow into a healthy, productive hive.
Conclusion
A steady routine of quick visits builds a clear picture of colony health and progress.
Inspecting a purchased nuc is a vital step that protects your investment. Use simple checks to confirm the queen, brood pattern, and stores so your bees settle well and begin steady growth.
Keep short, dated records after each hive visit. Regular notes help you spot trends in population and temperament and save time when decisions are needed. If you suspect pests or any statutory problem, contact the National Bee Unit for expert guidance.
With careful attention and consistent care, your new colony will thrive and reward you with strong spring buildup and honey. For practical next steps, visit start here for simple resources and plan making.
FAQ
What should I check first when receiving a new nucleus colony?
Start with calm handling and a brief visual sweep. Confirm the queen is present and active, look for clustered bees, check for obvious dead bees or foul odors, and note stores of honey and pollen. Handle one frame at a time and keep inspections short to reduce stress on the colony.
How can I verify the queen is laying and healthy?
Look for a consistent brood pattern with eggs, larvae, and capped brood across several adjacent cells. A healthy queen produces a mostly solid, compact patch of brood. Spot-check for the queen herself; she’s often larger with a longer abdomen and a smooth, even walking pattern.
What does a good brood pattern look like?
A strong brood pattern shows few empty cells among developing brood, uniform cell cappings, and brood at different stages. Irregular gaps, sunken or perforated cappings, or spotty distribution can signal problems that need follow-up.
How do I tell if laying workers are present?
Laying workers create many drone-sized cells with multiple eggs per cell and scattered brood patterns. You’ll see eggs at odd angles and often no fresh worker brood. If multiple eggs appear per cell or only drone brood exists, consider requeening promptly.
Which signs indicate common diseases or pests?
Look for perforated or sunken brood cappings, foul or sour hive odors, discolored or sticky brood, and excessive dead bees. Check for visible Varroa mites on adults or inside brood cells, small hive beetle activity, and chalkbrood or foulbrood symptoms. Any suspect signs warrant lab testing or advice from a local apiary inspector.
How should I examine frames and comb for quality?
Inspect frames for clean, intact comb without excessive burr comb or pollen cakes. Older, dark comb can be fine but check for brood pattern clarity and wax integrity. Broken comb, brood in odd cell shapes, or heavy wax moth damage are red flags.
What environmental conditions affect a safe inspection?
Choose a warm, calm day with minimal wind and good light. Avoid rainy, cold, or very windy conditions that stress bees. Early afternoon often works best when many foragers are out, reducing population density in the box.
How much time should a single inspection take?
Keep checks brief—typically 5–10 minutes for a quick health scan; up to 20 minutes for a full evaluation. Prolonged disturbance increases disease spread and stress. Plan focused tasks: queen check, brood assessment, pest look, and store check.
What are acceptable food stores in a nuc on arrival?
A nuc should have visible honey and pollen in adjacent frames to support the colony through the first weeks. If stores look low or weather limits foraging, feed thin sugar syrup or pollen substitute until the colony builds reserves.
How do I monitor hive temperament and why does it matter?
Note how bees react to lid removal and frame handling. Calm, focused bees indicate good temperament and lower stress. Aggressiveness, frantic movement, or increased stinging may reflect disease, queen problems, or poor genetics and influence management choices.
When should I transfer a nuc into a full-sized hive?
Move a nucleus to a full hive once it has several frames of brood, a laying queen, and enough worker population to defend a larger box—generally within 2–6 weeks. Make the transfer on a warm, calm day and preserve frame orientation to reduce disruption.
What records should I keep after buying a nucleus colony?
Track queen source and marking, arrival date, weather at transfer, brood pattern notes, mite counts, feed given, treatments applied, and any unusual observations. Good records help diagnose problems and improve colony success over months and seasons.
When is professional testing or lab analysis necessary?
Seek lab testing if you find suspicious brood symptoms, unexplained die-off, foul odors, or persistent mite infestations. Local extension services, university labs, or state apiary inspectors can help confirm American foulbrood, European foulbrood, or other pathogens.
What immediate steps reduce disease spread if I find a problem?
Isolate the affected colony from others, minimize frame exchanges, avoid feeding from contaminated equipment, and contact a local apiary inspector. Consider temporary quarantine, targeted treatments, or removal of heavily infected comb per local regulations.
How often should I recheck a newly acquired colony in the first months?
Inspect every 7–10 days during active buildup to monitor queen performance, mite levels, and stores. Adjust feeding and interventions quickly. After two strong inspections showing healthy brood and low pests, you can extend intervals.
Which tools and supplies are essential for safe checks?
Bring a hive tool, smoker, protective veil or suit, brush, sample vials for mite tests, sugar or syrup for feeding, and a notebook or phone for records. Clean tools between hives to limit cross-contamination.
How do weather and season affect disease risk and management?
Cold, wet weather limits foraging and can weaken colonies, raising disease vulnerability. Spring buildup often increases Varroa pressure. Tailor inspections and treatments to seasonal dynamics and local climate to reduce stress and infection risk.