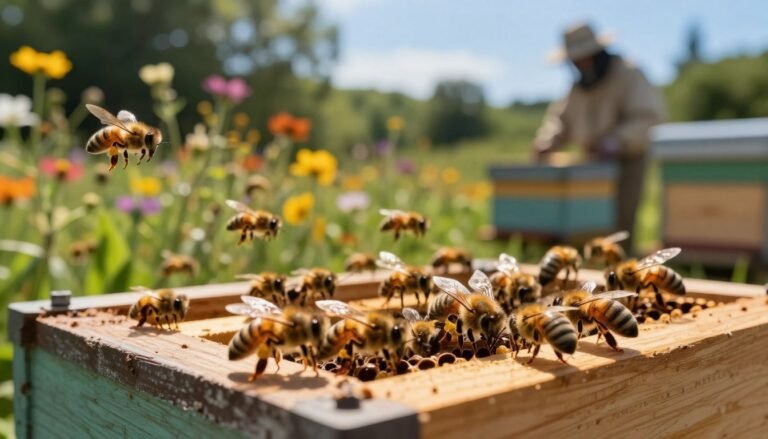
Starting a new colony on a summer day demands care and timing. Overheating above 100°F can kill the entire colony and the queen, so temperature control is the top priority. A standard shipment holds about 12,000 live adult workers plus one newly mated queen.
Stage the crate in shade and mist the screen lightly while you ready the hive. Rest the shipment for an hour or two at a cool, secure spot and confirm there is only about an inch of dead workers in the bottom of the box on arrival.
Prepare frames, feeders, and sugar water (1:1) ahead of time so you can transfer the cluster quickly. Always install only when outdoor temps are above 65°F and avoid handling during extreme heat. If you see excess dead bees, contact your supplier right away.
Key Takeaways
- Protect the colony: avoid temperatures above 100°F.
- Stage the shipment in shade and mist the screen to reduce stress.
- Check for ~1 inch of dead workers; excessive losses require contacting the supplier.
- Have sugar water ready (1:1) to support the new hive during hot days.
- Only transfer to the hive when temps are comfortably above 65°F.
- Prepare gear and test smoker the day before to save time on arrival.
- For detailed steps, consult a practical guide on best practices for package transfer or general beehive installation.
Essential Preparation for Your New Colony
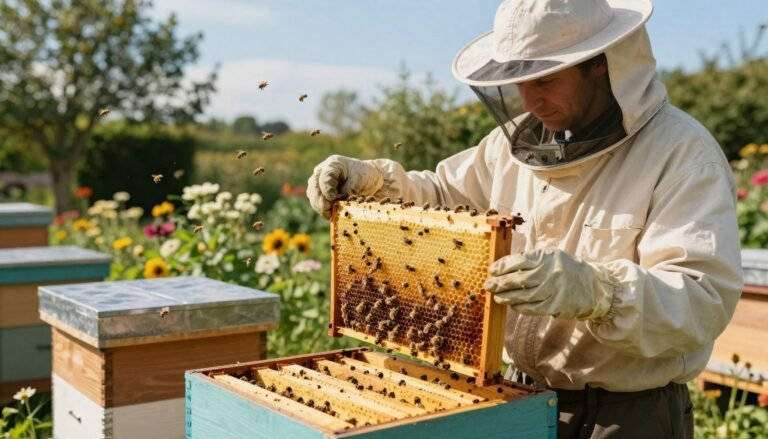
Confirm your hive equipment is assembled and staged so the transfer is fast and calm. Have the inner cover and outer cover ready to place immediately after moving the cluster.
Keep the shipment cool — store the box in a dark spot at about 50°F to 70°F until you are set to proceed. Place package in shade and check the screen for tears.
Remove three or four frames from the center of the brood chamber to create space for the colony to cluster. This makes room for comb building and reduces crushing risk.
Equipment Readiness
- Assemble frames, feeder, hive tool, and veil before handling the colony.
- Inspect the box for any dead bees and confirm the screen is intact.
- Have sugar syrup (mix warm water and granulated sugar at 1:1) available to feed the hive.
Temperature Control
Monitor temperature during the operation and avoid sudden exposure above 100°F. Wear protective clothing and tuck pant legs to prevent workers from crawling up during placement.
“A calm, prepared setup reduces stress and improves queen acceptance.”
For procedural details on how to place the colony and minimize losses, see a practical transfer guide and quarantine advice: how to install a package of honey and how to quarantine new bees.
Best Practices for Installing Package Bees in Hot Weather
Aim for a late afternoon transfer. Work after peak sun to lower stress and let returning foragers help the move. This gives you time to finish before nightfall and reduces heat exposure.
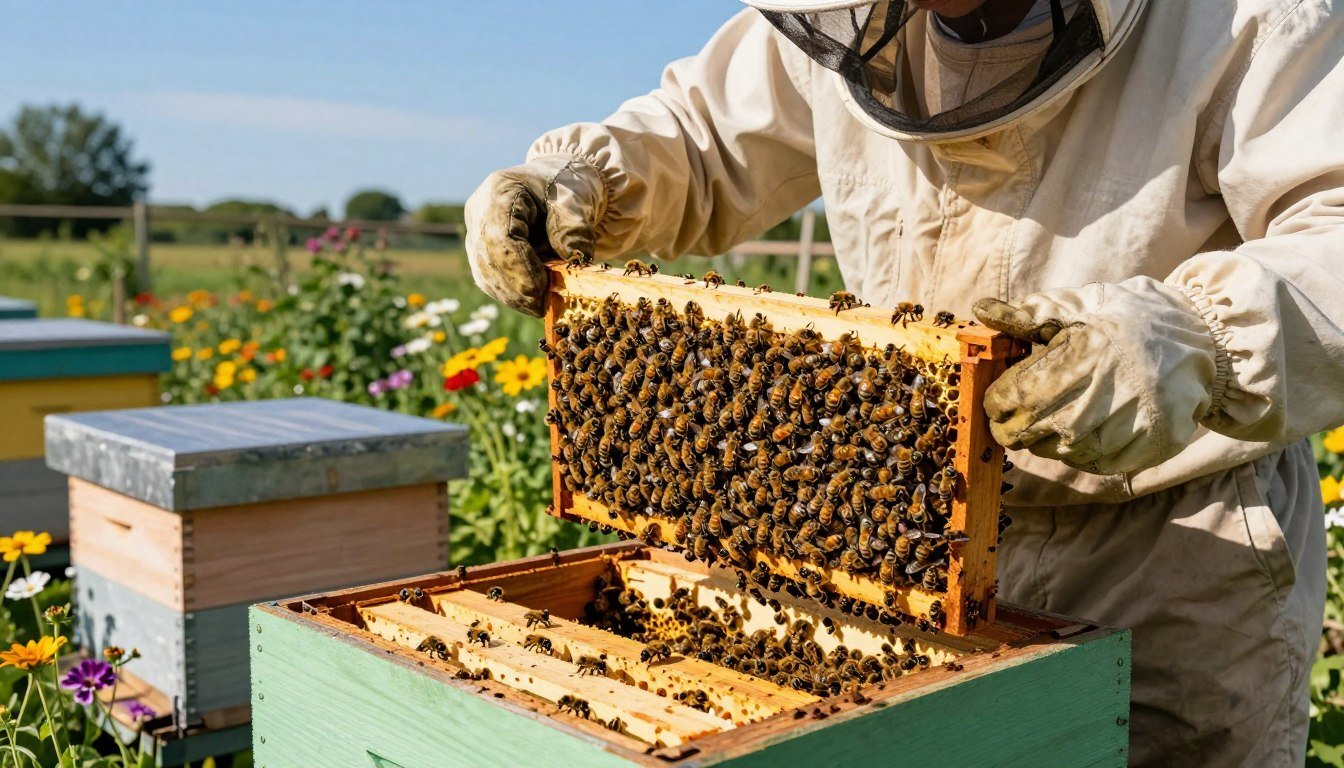
Firmly and quickly shake the colony into the cleared space between frames. Be vigorous so workers exit the box and start exploring the hive.
Prop the box at the entrance so remaining workers can walk inside on their own. Keep the reducer on the smallest opening for at least a week to help the new group defend and settle.
Spray the workers with sugar syrup generously but gently. Wetting them calms activity and supplies energy without drowning them.

- Choose gear that improves ventilation so bees can fan and cool the hive.
- Work fast to limit time outside the box and lower mortality chances.
- Watch the entrance and the box for the first hours to confirm the colony is moving in.
“A quick, cool transfer and a tight entrance make queen acceptance and build-up more likely.”
| Step | Timing | Why it matters |
|---|---|---|
| Begin late afternoon | After peak heat | Reduces stress and returns foragers |
| Shake into frames | Immediate | Encourages full transfer and brood placement |
| Prop box at entrance + reducer | First week | Allows stragglers to enter and protects colony |
| Syrup spray | During transfer | Calms workers and provides energy |
For placement and microclimate tips, consult a guide on climate-based hive placement and best cooling practices at how to keep a hive cool.
Managing the Queen and Worker Bee Integration
Place the queen cage candy side up between two center frames so workers can access the candy feed and work through it naturally.
Before you shake workers, remove the tin feeder and the top queen cage from the shipment hole. This prevents the queen or feeder from falling to the bottom during transfer.
Queen Cage Placement
Secure the queen cage firmly between frames so it cannot slip down. The candy plug will be eaten in one to two days and allow the queen to emerge slowly.
Preventing Cross Comb
Orient the cage correctly and give it space so the bees do not build comb across it. Use a support or a small wedge to keep frames aligned and clear of extra comb formation.
Monitoring Acceptance
Make sure the cage screen is open to worker contact so pheromones circulate. After a few days, inspect to confirm the queen has been released and is moving among the workers.
- Tip: Watch the entrance; fanning often signals that workers are locating and advertising the queen.
- If you need a reference for safe transfer or cage types, see a guide to best queen cages for introduction or check proper nuc handling at nuc placement advice.
“Patience during the first days improves acceptance and long-term colony stability.”
Post-Installation Care and Monitoring
Give the new group five days, then open the hive and verify the queen has been released from her queen cage. This early check confirms the queen is alive and allows you to spot eggs or missing signs before problems escalate.
Feeding is critical during the first weeks. Keep a steady supply of sugar syrup in an in-hive feeder so the colony can draw comb and feed larvae regardless of outside conditions.
- Inspect at five days to make sure the queen is released; if not, use a hive tool to open the candy end carefully.
- Look for eggs—tiny grains of rice standing upright in cell centers—to confirm the queen is laying.
- Continue syrup feeding until the hive stores enough honey to sustain brood rearing.

“A timely inspection and steady syrup supply set the colony up for a strong start.”
| Action | When | Why it matters |
|---|---|---|
| Five-day inspection | Day 5 | Confirm queen released and check for eggs |
| Continuous syrup feeding | First 2–4 weeks | Supports comb building and brood development |
| Manual release | If queen still caged at day 5 | Prevents delayed laying and colony stress |
| Supplier contact | Within 14 days if queen missing | Obtain replacement queen promptly |
Make sure you monitor the inner cover and hive body for signs of overcrowding or heat stress. Regular, short checks are better than long inspections that disrupt the colony.
For seasonal follow-up and routines, consult resources on late-summer care and general seasonal tasks.
Final Thoughts on Successful Hive Establishment
Finish by checking queen cage placement and keeping the entrance tight for the first days. Short, regular checks of frames and feeder syrup tell you if the queen released and the colony is drawing comb.
Keep sugar water available and watch the candy end of the cage. Inspect the box bottom for excessive dead bees and confirm activity at the entrance before longer inspections.
Careful preparation of hive equipment and timely action give your queen and workers the best chance to build stores and produce honey. For a concise how-to on installing package bees, consult this guide and act quickly on any signs of trouble.