Marking the queen is a simple practice that helps a beekeeper spot the colony leader during routine inspections.
Careful handling and the right tools protect her thorax, wings, and legs while you apply a small, non-toxic dot. A calm hive, a steady hand, and a quality marking pen make the process quick and low stress.
This guide covers identifying the queen, preparing equipment, and using gentle methods that limit disruption. We stress water-based inks, minimal contact, and steady placement on the thorax only.
Key Takeaways
- Use a beekeeping-grade pen and non-toxic ink for clear, safe marks.
- Focus the dot on the thorax; avoid wings and legs.
- Work calmly, over a soft surface, and on a mild day to reduce stress.
- Record color and date in hive logs for easy queen tracking.
- Practice gentle capture with a soft holder and test ink flow first.
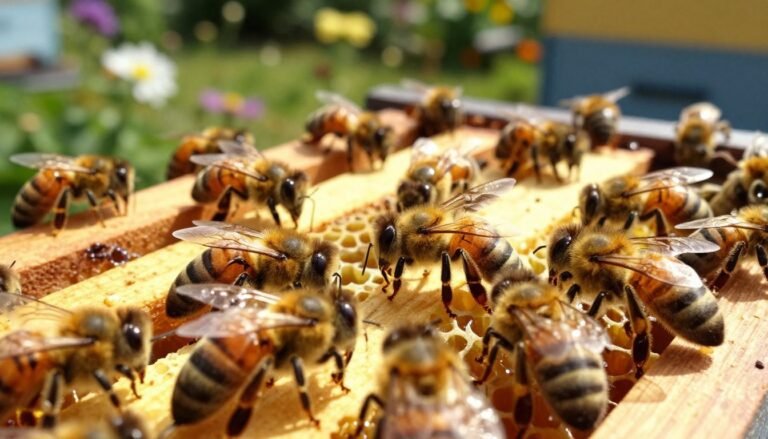
Why Beekeepers Mark Their Queens
A small, visible dot on the thorax turns an elusive queen into a quick, clear sighting during checks.
Benefits for identification
Experienced beekeepers mark queen bees so they can spot the leader on a busy frame without long searches. This reduces disturbance in the hive and shortens inspection time.
Identifying the queen quickly helps monitor her health and egg-laying. A marked queen makes it simple to confirm fresh eggs and assess brood patterns.
Tracking hive events
Marking queens makes tracking age and replacement events clear. If an unmarked queen appears in a marked queen hive, it signals supercedure or a new queen after swarming.
| Benefit | What it shows | Inspection advantage |
|---|---|---|
| Quick ID | Marked queen visible on frames | Faster, lower-stress checks |
| Age tracking | Mark color and date record | Informed replacement decisions |
| Event detection | New vs. original queen | Detects swarming or supercedure |
For more on the practice and practical tips, see this guide on queen marking.
Understanding the International Color Code
A universal five-color code removes guesswork about a queen’s age during checks.
The system uses a five-year cycle. Each color maps to specific years ending, so any beekeeper can read age at a glance.
- White: years ending in 1 and 6
- Yellow: years ending in 2 and 7
- Red: years ending in 3 and 8
- Green: years ending in 4 and 9
- Blue: years ending in 0 and 5
Consistent color marking helps manage every colony and keeps hive records simple. During inspections, a quick glance at the dot tells which year the queen bee was born and whether replacement is needed.
Using the same palette across your apiary means any visiting beekeeper can understand your records. For reference on color choices, see this guide on queen marking colors.

For tools that pair well with the code, consider the best queen marking tube when preparing your equipment.
Essential Tools for the Job
A compact kit of reliable tools makes the marking process faster and gentler for the colony. The right gear reduces handling time and keeps the thorax clear for a precise dot.
Selecting the Right Marking Pen
Choose pigment first. The POSCA 5M paint pen is the go-to option for many beekeepers because its water-based, non-toxic ink lays down a vivid, quick-dry dot.
Prime the pen before use so you avoid pressing on the queen. A steady, single touch is all you need for a lasting color that records the year.
Using a Queen Marking Cage
A queen marking cage holds the queen gently against a screen or comb. This restraint keeps wings and legs safe while you apply the dot on the thorax.
Practice placement with an empty frame first. A calm handling routine saves time and stress during inspections.
Benefits of a Marking Tube
A marking tube isolates the queen without harming her. It offers clear visibility and allows precise target placement, which is essential when marking queens quickly.
Many experienced beekeepers keep a dedicated kit: a non-toxic paint pen, a reliable cage or tube, and a soft holder. For a list of high-precision tools, see this resource on high-precision queen marking tools.
- Time saved: Proper tools shorten inspections.
- Reduced risk: Secure holding avoids accidental contact with wings or abdomen.
- Clear records: A vivid dot makes the marked queen easy to find on the frame.
How to Mark a Queen Bee Safely
Begin by locating the queen on the frame and planning a calm, brief handling routine.
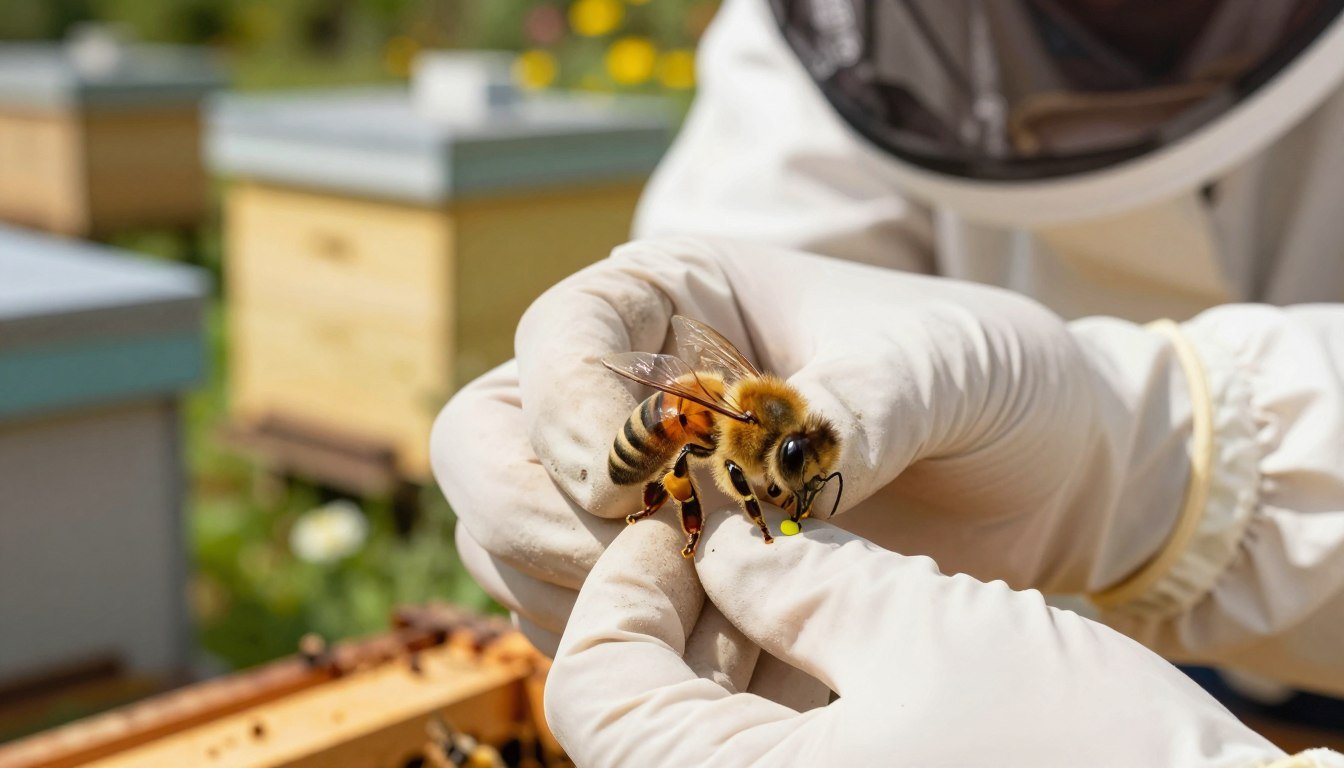
Gently isolate her using a queen marking cage or tube. Hold only long enough to apply a single, small dot on the thorax—the bald spot behind the head.
Never place paint on wings, legs, or the abdomen. That can hamper movement or egg laying and stress the colony.

Use a non-toxic paint pen and apply minimal pressure in the cage. Allow the paint a minute to dry before release so it won’t transfer to frames or wings.
“The goal is quick identification with no harm: brief, steady contact and a precise dot.”
- Practice on drones first to build steady hands and timing.
- Keep inspections short; this limits disturbance and helps the hive remain calm.
- Record color and year immediately in hive notes for future checks.
| Step | Action | Why it matters |
|---|---|---|
| Find | Locate queen on the frame | Reduces search time and colony stress |
| Isolate | Use cage or tube with minimal pressure | Protects wings and legs during the process |
| Apply | One small dot on thorax with non-toxic pen | Lasts through checks without harming eggs or movement |
For extra guidance on materials and timing, see our detailed queen marking resource.
Preparing Your Workspace and Equipment
A calm, organized bench saves time and keeps the colony less stressed during inspections.
Set up nearby tools before opening the hive. Lay out your marking pen, paint pen, a prepared cage or tube, soft holder, and a clean card for testing. Keep a notebook handy for color and year notes.
Prime the paint pen by shaking until the mixing ball is heard. Press the nib gently on a hard surface until ink flows. Test one dot on cardboard to check for smooth flow and no dripping.
Organize items so you can grab the cage and pen without fumbling. Check gloves, smoker, and replacement pens before lifting the lid. This reduces delays that could stress queens and workers.
- Clean work area and soft mat for brief handling.
- Confirm pen priming and test ink on cardboard.
- Keep the cage or tube within easy reach.
Tip: A properly primed pen lets you apply the color to the thorax with a single, gentle touch. For related setup guidance, see the hive setup guide.
Step by Step Marking Techniques
Begin each session by scanning frames at the brood nest for the most active queen.

Locate the queen where she lays eggs. Focus on central brood frames and look for steady movement and a longer abdomen.
Isolate her gently. Use a queen marking cage or a soft holder to keep wings clear. If you are an experienced beekeeper, holding by the wings with steady fingers is an option, but it requires care.
- Capture with minimal pressure and place the queen in the cage against comb.
- Use a primed paint pen and apply one small dot on the thorax only. Avoid wings and legs.
- Hold the queen in the cage for at least one minute so the paint can dry and not smear.
- Release her carefully back onto the frame and return the frame to the hive without rolling her.
Practice first on drones to build steady hands and timing. This limits colony stress and saves inspection time.
“A brief, calm process protects the queen and keeps the colony working as normal.”
For stepwise visuals and extra tips, see this detailed guide on how-to mark a queen.
Common Mistakes to Avoid
Common errors during marking often come from rushed hands and unprepared gear.
Too much pressure when using a queen marking cage can crush legs or wings. Hold with minimal force and use a soft holder when uncertain.
Wrong color choice defeats the point of tracking years. Double-check the international color code for the current year before applying the dot.
A smear or paint on wings, antennae, or abdomen can restrict movement and disrupt pheromone signals. Let paint dry fully in the cage before release to avoid transfer.
- Never press harder because the pen skips; prime pens first and test on card.
- Avoid marking during high colony stress or extreme weather; workers may react poorly.
- New beekeepers should practice on drones and use a queen marking cage until confident.
“Slow, steady handling and correct color choice protect the queen and preserve your records.”
| Mistake | Risk | Fix |
|---|---|---|
| Excess pressure | Injury to thorax, wings, legs | Use soft holder; minimal grip; practice on drones |
| Wrong color | Lost age tracking; record errors | Confirm year color before marking; log color and date |
| Wet paint | Smear on frames or wings; colony stress | Allow full drying time in cage; test pen flow |
| Rushed timing | Hive agitation; queen rejection risk | Work calmly on mild days; keep checks brief |
For more practical tips on gear and technique, see this plain guide on queen marking and basic apiary setup at beekeeping basics.
Conclusion
,Clear, consistent markings make routine inspections faster and give you reliable colony records. Use the correct color that matches the calendar and note the year in your log for quick age checks.
Choose non-toxic pens and handle the insect with calm, steady hands. Practice with your cage or tube until your technique stays quick and smooth.
Queen tracking pays off: marked queens shorten searches, reveal replacement events sooner, and support healthy hive decisions. With the right tools and a little practice, you’ll save time and gain confidence at every inspection.
FAQ
Why do beekeepers identify the reigning queen?
Marking helps quickly spot the reproductive female during inspections. It aids brood assessments, swarm prevention, and record-keeping across seasons without disrupting the colony.
What color code indicates the queen’s year?
The international color code cycles every five years: white, yellow, red, green, blue. Use the matching color for the queen’s birth or introduction year to track age easily.
Which marking pens work best for queens?
Choose low-odor, quick-dry enamel or purpose-made marking pens from brands like Uni or Posca. They adhere to the thorax and resist hive conditions when applied correctly.
Should I use a queen marking cage or tube?
A simple marking tube or specialized queen cage offers controlled handling. Tubes immobilize gently for painting, while cages secure the queen during transport or sale.
When is the best moment during an inspection to label the queen?
Mark when the colony is calm—mid-morning on warm days works well. Avoid windy, cold, or overly active times to reduce stress on the queen and workers.
Where on the body do you place the dot?
Apply a small dot on the thorax, between the wings. This area provides a flat surface for adhesion and avoids interference with abdominal egg-laying or wing movement.
How much paint should I use and how long does it take to dry?
Use a tiny drop—just enough for a visible dot. Quick-dry marker formulas usually set in seconds to a minute; liquid paints may take a few minutes. Keep the queen in the tube until the mark is dry.
Can marking harm the queen or colony?
When done correctly, marking causes minimal risk. Gentle handling, proper immobilization, and using safe paints prevent injury and reduce disturbance to the colony.
What common errors should be avoided during labeling?
Avoid overhandling, large paint blobs, placing paint on the abdomen, and marking on windy or cold days. These mistakes increase stress or reduce paint durability.
How often should queens be re-marked or checked?
Inspect the mark during routine checks. Re-mark only when the dot fades or the queen is replaced. Track replacement and performance in hive records rather than re-marking frequently.
Are there alternatives to paint pens for identification?
Yes—numbered tags, colored clips, or micro-tags exist. However, paint pens remain popular for simplicity and minimal interference with bee behavior.
Will marking affect the queen’s pheromones or worker acceptance?
Properly applied small marks do not significantly alter pheromone profiles. Workers generally accept a marked queen if handling is gentle and the mark is small and dry.
What should I include in my records after marking a queen?
Note the color, date, hive ID, and any observations about brood pattern or queen condition. Accurate records help with seasonal management and breeder decisions.
Can inexperienced beekeepers perform the task safely?
Yes—start with calm hives, use a marking tube, and practice on nonqueens or dummy subjects. Consider mentoring from experienced beekeepers or local clubs before marking your first queen.
Which protective gear and tools improve success?
Basic protection like a veil, gloves, a smoker, a marking pen, and a queen tube or cage are essential. Keep a frame to block the queen if needed and a small tray for tools.