Maintaining apiary health starts with clear, decisive action when an infection appears. American foulbrood (AFB) poses a severe threat; the only proven response in many cases is euthanizing the infected colony and destroying material that had contact with it.
Effective sterilization removes bacterial spores, viruses, and fungi that can linger on gear and frames. This process takes time and care, from disassembly and freezing to scrubbing, heat, or chemical treatment, and it pays off by reducing the risk of widespread losses.
Inspect old brood frames regularly and follow professional guidance to protect your bees. For step-by-step cleaning and proven methods, consult resources like the cleaning and sterilizing guide, and for repair options see a practical guide to restoring boxes at how to repair damaged hive boxes.
Key Takeaways
- AFB requires decisive action: affected colonies and contacted materials often must be destroyed.
- Sterilization targets spores, viruses, bacteria, and fungi to protect long-term health.
- Thorough cleaning takes time—plan and use PPE and proper ventilation.
- Old brood frames can harbor pests and infections; inspect and replace as needed.
- Follow trusted guides and local regulations to ensure safe, legal handling.
Understanding the Importance of Hive Hygiene
A tidy apiary gives bees a safer workspace and boosts overall productivity. Clean tools and regular cleaning let your colonies spend energy on brood and honey rather than coping with pests or pathogens.
Dirty gear becomes a breeding ground for problems. Wax buildup and grime speed rot and invite wax moths and small hive beetles. Regular maintenance helps pest control and extends the life of your beekeeping gear.
Cross-contamination between hives is a real threat. By cleaning frames and boxes between inspections, you protect the whole apiary and keep individual colonies strong.
Set a routine. Simple, consistent practices—scraping, brief washes, and scheduled inspections—pay off in healthier bees and better harvests. For step-by-step guidance on safe cleaning and repair, see this practical guide: how to clean, scrape and sterilise beekeeping.
| Benefit | What to do | Result |
|---|---|---|
| Health | Regular cleaning of frames and tools | Fewer infections and stronger colonies |
| Longevity | Remove wax and grime, store dry | Longer lifespan for beekeeping equipment |
| Pest control | Inspect, clean, and rotate comb | Reduced wax moths and beetle infestations |
Distinguishing Between Cleaning and Sterilization
A clear split exists between removing mess and removing microbes; treat each step separately.
Physical cleaning removes visible wax, propolis, honey and dirt from your hive and tools. Start by scraping loose wax and scraping frames. Hot water helps loosen sticky honey and makes cleaning faster. Light washes remove surface grime but do not kill spores or viruses.

Physical Cleaning vs. Microbial Eradication
Cleaning is necessary before any sterilization method. It prepares surfaces so a chemical or heat solution can reach microbes.
Sterilization goes further. It targets bacteria, viruses and hardy spores on wood and plastic boxes and combs. Methods vary by material and risk level. For step-by-step protocols, consult a practical guide to beekeeping tools maintenance and the detailed hive cleaning and sterilisation guide.
The Role of Propolis and Wax
Wax and propolis trap contaminants and shield spores. Propolis binds tightly to metal and wood, so metal scrapers and targeted cleaning solutions often work best.
- Remove built-up wax and comb before sterilizing.
- Use hot water and a mild solution to degrease frames and surfaces.
- Recognize that cleaning alone does not guarantee removal of all pathogens.
When to Perform Disinfecting Wooden Hive Equipment After Disease
Clean, prompt action after any colony loss cuts the chance that spores spread across your apiary.
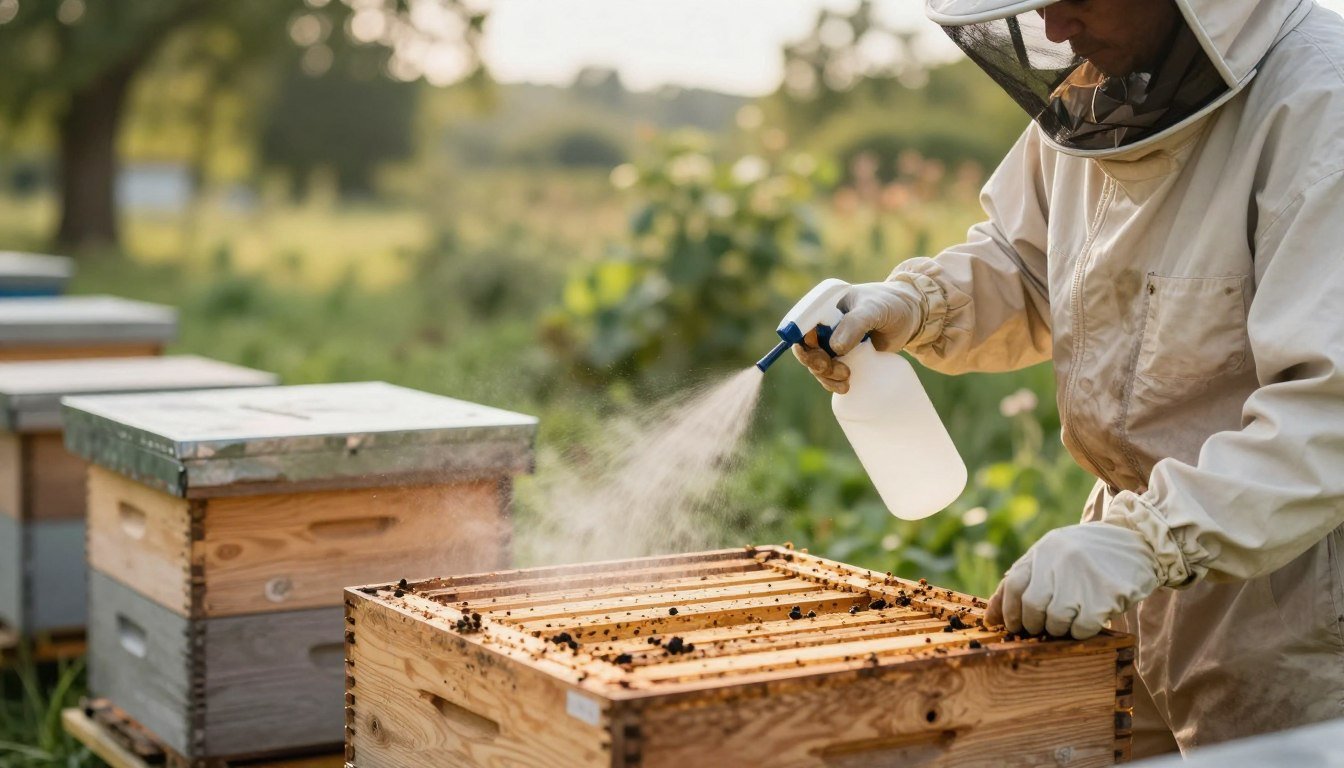
Always perform a full cleaning of your hive tools and gloves after every use. Regular washing in a 10% bleach solution provides a reliable baseline to prevent transmission of parasites and diseases.
If you buy second-hand beekeeping equipment, treat it as potentially contaminated. Sterilize boxes, frames, and all other components before introducing them to your hives.
When a colony dies, act immediately. Even without visible signs, assume contact with pathogens and run a complete sterilization routine. This protects neighboring bees and keeps brood healthy.
- Daily inspections: wipe hive tools in a 10% bleach solution between colonies.
- New or used gear: sterilize before first use in your apiary.
- Post-mortem care: treat all boxes and frames as contaminated and clean thoroughly.
Being proactive about when you clean reduces the risk of spreading brood diseases and keeps your bee colonies strong. For more on the necessity and timing, see the necessity of disinfecting wooden hive.
Essential Safety Precautions and Protective Gear
Before you begin any cleaning routine, protect yourself with proper PPE.
OSHA stresses using certified personal protective equipment when handling hazardous materials to protect your health. Follow guidelines for eye, skin, and respiratory protection.

Personal Protective Equipment Requirements
Gather everything first. Having gloves, goggles, and a respirator on hand reduces exposure and speeds the job.
- Use chemical-resistant gloves and eye protection when working with strong cleaners.
- Wear a mask or respirator if fumes are possible; never work in a confined space without ventilation.
- Keep all tools and protective items organized so you can move quickly and safely.
- Follow safe handling methods for bleach or acids and heed label instructions.
- For more on gear and maintenance, see this essential safety and maintenance equipment guide.
Protecting yourself is as important as protecting your bees. Work in a ventilated area and treat all boxes and frames as potentially hazardous. Safe habits keep your apiary, your team, and your own health secure.
Initial Preparation and Debris Removal
Start with thorough disassembly so every crevice is reachable for scraping and washing. Take apart boxes and remove frames to expose hidden wax and honey.
Freezing is a simple, effective step. Place materials at 20°F or lower for at least 24 hours to kill wax moths and other pests before you handle them.
Use a hive tool to remove stuck wax, propolis, and honey. Scrape gently to avoid damaging wood surfaces, then collect debris for disposal.
Rinse all parts with plenty of water. A hose or pressure washer removes stubborn grime that can shelter spores and pests. Boiling water is useful for melting heavy residue and loosening stuck comb.
“Proper initial preparation makes subsequent cleaning methods far more effective.”
- Disassemble completely to reach nooks.
- Freeze for 24 hours at 20°F or colder.
- Scrape with hive tools, then wash with water.
- Use boiling water for sticky residues.
Heat Sterilization Methods for Woodenware
Careful application of flame, boiling baths, or steam gives beekeepers proven options to sanitize gear.
Torching Techniques
Torching uses a propane flame to sweep surfaces and scorch away wax and propolis. Keep the flame moving to avoid charring the wood into charcoal.
Heat metal parts until red-hot to kill spores on fasteners and tools. Work outdoors with a fire extinguisher and wear full PPE.
Boiling with Washing Soda
For boiling, mix washing soda at a 1:5 ratio to water. Fully submerge frames, boxes, or plastic parts for 5–10 minutes.
This method softens debris and neutralizes many bacteria, spores, and viruses on surfaces. Rinse in clean water and dry fully.
Steam Cleaning Benefits
High-temperature steam penetrates cracks and joints where debris and pathogens hide. It uses water vapor to reach crevices that boiling cannot.
Steam is fast, chemical-free, and excellent for boxes, combs, and frames when used with protective gear.
“Heat methods save time and restore useful boxes and frames—yet they are not a cure for American foulbrood.”

| Method | What it kills | Typical time |
|---|---|---|
| Torching | Spores, viruses on surfaces; burns wax | Seconds per surface, keep moving |
| Boiling (1:5 soda) | Bacteria, many spores, residue | 5–10 minutes submerged |
| Steam cleaning | Pathogens in cracks and seams | Minutes per section; thorough pass |
For step-by-step prep and a seasonal plan, consult the spring beekeeping checklist.
Chemical Sterilization Techniques
Some chemical sterilants penetrate pores and seams that steaming or boiling may miss. Chemical methods add a reliable layer of sanitation for stored boxes, comb, and tools when used correctly.
Acetic acid fumigation requires an 80% solution and a fully sealed space for at least one week. Seal seams with plastic wrap or tape to keep fumes contained.
For soak methods, mix 1 part bleach with 5 parts water and submerge pieces for 10 minutes. Rinse and dry thoroughly to avoid corrosion of metal fasteners and parts.
- Always wear rubber gloves, goggles, and a respirator; acids and oxidizers can harm skin and lungs.
- Keep in mind these methods sanitize many bacteria and viruses on surfaces, but they will not kill American foulbrood spores.
- Use washing soda or steady rinses with clean water after chemical treatments to neutralize residues.
Follow labeled instructions and local rules—chemical sterilization is powerful but demands strict safety and time controls.
Managing Frames and Comb Health
Regularly inspecting drawn comb helps you spot hidden problems before they spread through your apiary.
Assessing old brood comb
Research shows old brood comb is about four times more likely to carry varroa mites than new comb (Piccirillo & De Jong). That makes routine checks essential for long-term colony health.
If you keep drawn comb, favor honey frames over brood frames. Honey comb is less likely to shelter pests and can be reused with lower risk.
Hidden wax and stored honey trap spores and insects. It is much harder to remove contaminants once they live deep in comb, so be selective about reuse.
When you clean frames, remove all debris and use a proven method — hot water rinses, steam, or a chemical solution per label directions — to lower bacteria and spores on surfaces.
“If a frame smells wrong or looks suspicious, destroy it rather than risking your entire apiary.”
Follow consistent inspection notes and cull questionable frames to protect other boxes and future colonies. Good comb management improves productivity and reduces the chance of outbreaks.

Proper Drying and Storage Practices
Air flow and time are the final sterilizers—never rush the drying step for boxes and combs.
After cleaning and any chemical or heat method, allow all parts to air dry completely in a clean, well-ventilated area.
Why it matters: trapped water and damp wax can promote mold and bacteria. Fans speed drying in humid weather and reduce the chance that spores or viruses re-establish.
Store clean hives, frames, and boxes in airtight bins or a dry, ventilated room. Seal honey-tight containers and keep combs flat to avoid warping.
“Proper storage is the final step that protects months of work and keeps gear ready for the next season.”
- Use fans to cut drying time and remove moisture.
- Inspect stored items periodically for wax moths or debris.
- If using fumigation or acetic methods, ensure full airing before storage.

| Storage Type | Best Use | Risk |
|---|---|---|
| Airtight container | Protects from dust and pests | Requires dry items to avoid mold |
| Ventilated dry room | Good for wood and frames | Requires pest checks |
| Sealed with fumigant | Short-term moth control | Must air out before use |
For tips on handling second-hand boxes or to prevent brood problems like chalkbrood, see prevent chalkbrood.
Handling Second Hand Equipment Safely
Buying pre-owned beekeeping items saves money, but it raises real risks for your apiary’s health.
Treat every used box, frame, or tool as potentially contaminated until you fully scrape, scorch, and verify it is clean. Hidden wax and grime can shelter spores and pests that spread quickly through colonies.
Whenever possible, buy from sellers you know or from association sales where the history is clear. If you cannot verify origin, opt for new kit to reduce risk.
Wear protective gloves and follow a proven method such as acetic acid fumigation or heat treatment to neutralize threats. If a box or frame feels wrong or smells off, destroy it rather than risk your apiary.
“Careful handling of second-hand items protects your bees and saves time and losses later.”
- Inspect and scrape every surface before treatment.
- Prefer trusted sources or certified sales for used gear.
- Use acetic acid or heat protocols and always rinse and dry thoroughly.
- When in doubt, replace boxes or frames—burning suspect parts is sometimes the safest option.

| Risk | Action | Result |
|---|---|---|
| Unknown origin | Buy from trusted sellers or choose new | Lower chance of introducing pathogens |
| Visible wax or grime | Scrape, scorch, then fumigate or steam | Removes hidden spores and pests |
| Suspect smell or damage | Discard or burn frames/boxes | Protects existing colonies from spread |
For a practical checklist on safe purchases and handling, see second-hand beekeeping equipment precautions.
When to Destroy Contaminated Materials
Decisive action—removal and destruction—can prevent a single sick colony from becoming an apiary-wide catastrophe.
If American foulbrood (AFB) is confirmed, all brood combs, frames, and affected woodenware must be destroyed under the supervision of a bee inspector. Do not attempt to clean or reuse boxes or frames that had direct contact with AFB.
European foulbrood (EFB) is sometimes manageable. Still, any decision to salvage frames or other items should be made with your local inspector present.

- Do not cross the line: if AFB is present, destroy affected materials immediately.
- If you are unsure, get a second opinion before you start cleaning or reusing parts.
- Losing a box or set of frames is far cheaper than facing an outbreak across several hives.
“By knowing when to destroy contaminated materials, you take a responsible step in protecting the regional bee population.”
For official guidance on safe handling and approved protocols, review the recommended cleaning and sterilisation guidance. Follow inspector instructions and use an approved method or solution when disposing of or treating wax and other equipment.
Establishing a Regular Maintenance Schedule
A written schedule turns ad-hoc cleaning into reliable prevention across every apiary site.
Set monthly and seasonal checkpoints so work becomes routine, not reactive. A plan saves time and keeps frames, boxes, and combs ready for the bees.

Record Keeping for Apiary Health
Log every action. Note the date, method used, and parts treated — hive, frames, hive tools, or boxes.
Why this matters: records reveal patterns of spores, bacteria, or viruses and guide future choices of washing soda, acetic acid, or heat methods.
Seasonal Cleaning Cycles
Plan heavier work in fall and early spring. Scrape, scorch if needed, and wash with a tested solution during major comb changes.
- Wash gloves and tools after inspections to avoid cross-contamination.
- Rotate old wax and remove weak combs before winter storage.
| Season | Key Task | Expected Result |
|---|---|---|
| Spring | Inspect frames, wash with water/soda solution | Ready hives for build-up |
| Summer | Spot-clean, check for pests | Maintain honey flow |
| Fall | Deep clean, dry, store boxes | Lower pathogen risk |
“Consistent records and seasonal checks protect colonies and extend the life of your beekeeping equipment.”
Conclusion
Routine care and correct methods cut the chance that pathogens spread between colonies. Good beekeeping relies on clear cleaning steps, sensible choices, and steady attention to signs of disease.
Use proven techniques such as torching, boiling with washing soda, or approved fumigation to reduce bacteria and spores. Rinse with clean water and let parts dry fully before storage.
Save time by keeping a maintenance log and following a seasonal plan. Consistent cleaning protects your honey harvest and supports strong bee colonies over the long term.
Act decisively. When risks are high, removal often beats salvage. Investing the necessary effort now delivers healthier bees, better honey, and a more resilient apiary.
FAQ
What is the safest way to remove debris and propolis from wooden hive parts?
Start by scraping loose propolis and wax with a hive tool, then brush away debris outdoors to avoid spreading spores. Use warm water with washing soda (sodium carbonate) for a scrub—this helps cut wax and removes surface residues. Rinse thoroughly and let pieces dry in full sun to reduce microbial load before further treatment.
When should I apply more aggressive sterilization versus simple cleaning?
Use thorough microbial control if you have confirmed American foulbrood, European foulbrood, foulbrood-like symptoms, or persistent fungal infections. Routine sanitation after honey harvest or before putting equipment into storage usually requires cleaning and light heat or steam treatment. Escalate to stronger measures when colonies show brood disease or lab-confirmed pathogens.
Can heat methods like torching or steam harm wooden boxes and frames?
Yes—direct torching can scorch or weaken thin wood if done improperly. Controlled methods such as steam cleaning or brief exposure to dry heat are gentler and effective at killing many pathogens without compromising structure. Always test a small area first and avoid charring joints or nails.
How effective is boiling frames in washing soda against spores and viruses?
Boiling in water with washing soda is effective at removing wax, honey, and many bacteria. However, bacterial spores, notably Paenibacillus larvae (American foulbrood), resist brief boiling. Boiling can still reduce surface contamination but combine with other measures—incineration or prolonged dry heat—for confirmed spore threats.
Are chemical washes like acetic acid or bleach safe for wooden components?
Strong acids and bleach can damage wood, strip protective coatings, and leave residues harmful to bees. Dilute acetic acid solutions may help surface cleaning but have limited sporicidal power. When using any chemical, follow label instructions, rinse thoroughly, and allow complete drying before reuse. Prefer physical or heat-based methods for structural wood.
What should I do with old brood comb suspected of carrying pathogens?
Remove and evaluate suspect brood comb. If lab tests or symptoms indicate serious disease, destroy heavily contaminated comb by incineration or deep burial where permitted. For marginal cases, consider freeze-thaw cycles combined with replacement—older comb often accumulates pesticides, pathogens, and should be rotated out every few years.
How long must treated wooden pieces dry before reuse to ensure safety for bees?
Allow complete drying in sun and air for several days, typically 48–72 hours, depending on humidity and temperature. Wood must be odor-free and fully dry to prevent mold and avoid chemical residues that could repel bees. Use a ventilated, elevated rack to speed drying and discourage pests.
What personal protective equipment should be used during cleaning and sterilization?
Wear sturdy gloves, eye protection, and a respirator if you use chemicals or generate smoke from torching. Use a beekeeping veil and jacket when working near active colonies. For chemical handling, consult SDS sheets and use rubber or chemical-resistant gloves and a face shield as needed.
How can I safely handle and inspect second-hand boxes and frames before bringing them into my apiary?
Quarantine second-hand items away from your colonies. Visually inspect for brood disease signs, test with simple field checks, and clean with washing soda wash followed by heat or steam treatment. When in doubt, replace comb and treat boxes thoroughly. Prefer buying from reputable suppliers like Mann Lake or Kelley Beekeeping when possible.
When is destruction of contaminated material the recommended option?
Destroy materials when inspection or lab results confirm persistent spore-forming pathogens, severe wax moth infestation that cannot be salvaged, or when combs are heavily soiled with pesticides. Local regulations often require burning of equipment infected with American foulbrood—check state apiculture rules before disposal.
What record-keeping helps maintain apiary health over time?
Keep dated records of treatments, disease findings, equipment sources, and cleaning cycles. Note which hives received treated or replacement comb, and log lab results if you submit samples. Clear records make it easier to trace outbreaks and prove compliance with regulations.
How often should I schedule maintenance and deep-cleaning for my apiary?
Perform light cleaning after each honey extraction and inspect brood comb annually. Do deep cleaning, steam treatment, or heat cycles at least once per year—ideally in late fall or early spring. Increase frequency after disease incidents or when adding used equipment to the yard.
Are there safe alternatives to harsh chemicals for controlling wax moths and small hive beetles in stored boxes?
Freezing frames for 48–72 hours, deep sun drying, and using tightly sealed storage with desiccants can reduce pest survival. Beneficial traps and sanitation reduce populations. Chemical fumigants exist but require careful handling and legal compliance; prefer physical controls for wood and comb.
Can I use common household vinegar to clean and disinfect surfaces?
Household vinegar (acetic acid) helps remove light residues and some microbes but does not reliably kill spores. It’s useful for routine cleaning of noncritical surfaces but should not replace heat or approved disinfectants when dealing with serious brood diseases.
Does painting or treating exterior boxes help long-term sanitation?
Painting or staining exterior surfaces with breathable, bee-safe finishes extends box life and reduces rot, which indirectly supports hygiene. Avoid sealing joints where moisture can trap or using finishes with toxic additives. Maintain painted exteriors but keep interior surfaces uncoated or only lightly treated with food-safe wax if needed.