Getting started in beekeeping can bring quick rewards and small surprises. Karen bought a nuc from local beekeepers and met a common hurdle: no eggs on first inspection. This is normal and often short lived.
When bees move into a nuc box, the colony may pause as it adjusts to new equipment. In spring the queen may rest her cycle for a few days or weeks. Give the hive time while you confirm food and shelter.
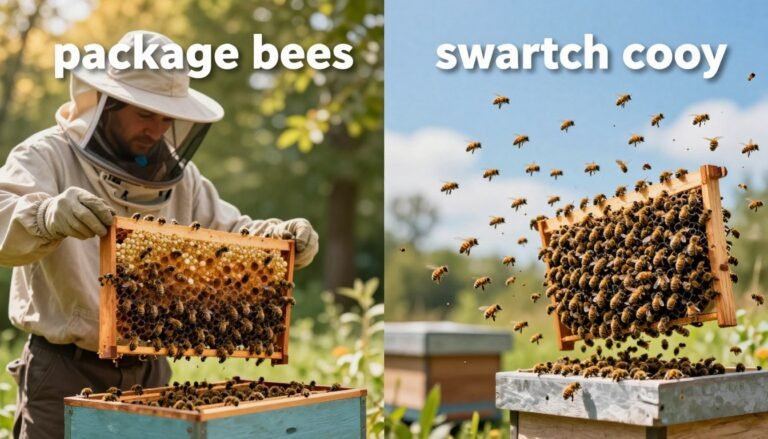
Look for pollen stores, brood pattern and signs of a healthy queen bee. If posts online make you anxious about missing larvae, remember that many colonies need a couple of weeks to settle. For tips on buying and what to expect on arrival, see this guide on buying packaged bees and nucs.
Key Takeaways
- Initial delays in laying are common after transfer.
- Check for pollen, brood and a healthy queen bee.
- Give the colony days to weeks to find its rhythm.
- Winter supplies and steady food help settle the nest.
- Use trusted resources and community support when unsure.
Understanding the Initial Inspection
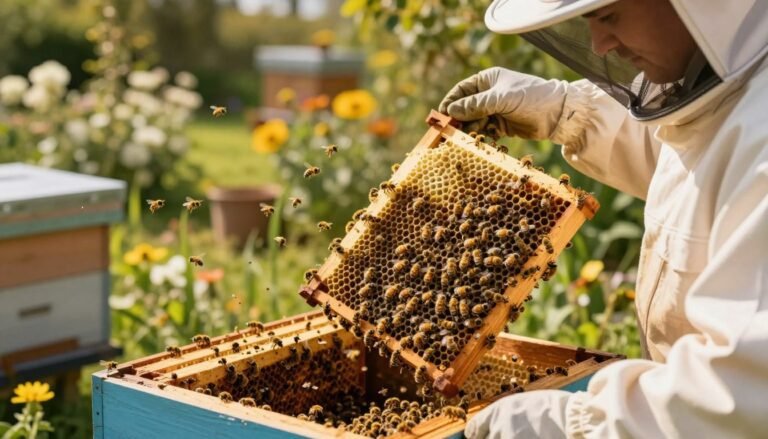
Start your first inspection with calm hands and clear tools to avoid damaging frames or startling the colony.
Bring proper equipment so you can lift each frame without crushing bees. An 8-frame box often leaves about 1cm of side space, which helps when removing a frame from the brood box.
Check brood pattern and look for pollen stores. Pollen helps the colony survive winter and supports brood build-up in spring.
Keep frames organized and follow a standard layout. This makes it easier to track how bees fill each frame with brood and food.
- Move slowly and inspect one frame at a time.
- Verify the queen or signs of her presence without prolonged disturbance.
- Note frame arrangement, pollen, and brood distribution for future records.
Thanks to advice from experienced members, you can learn to identify a healthy queen and a productive colony. For detailed inspection steps and recordkeeping, see hive inspections & recordkeeping. For disease-risk checks on purchased nucs consult inspection guidance for purchased nucs.
| Focus | What to look for | Action |
|---|---|---|
| Frames | Clean comb, even brood, stored pollen | Keep layout, replace broken frames |
| Brood | Consistent pattern, few empty cells | Monitor weekly in spring |
| Queen | Seen or indicated by eggs/larvae | Record presence; avoid requeening unless needed |
| Pollen | Amount in side frames | Feed if stores look low for winter |
Why a New Nuc Has No Eggs
Relocation can pause laying. A freshly moved hive may suspend brood production while workers reorganize frames and settle into the box. The colony often focuses on orientation, storing honey and pollen before restarting normal rhythm.

The Impact of Queen Stress
Transport and handling stress can make the queen stop laying for several days. Workers may cluster to protect her, limiting movement across frames.
Watch for reduced activity, lack of eggs, or formation of queen cells if bees suspect queen failure. These signs do not always mean requeening is needed.
Normal Laying Cycles
Queens have natural pauses in their cycle. In spring or before winter she may rest, then resume laying once the hive conditions improve.
Inspect frames for brood and larvae to confirm queen activity. Patience and weekly checks will reveal trends in egg pattern and colony health.
“Give the colony time to adjust; brief pauses in laying are often part of a healthy recovery.”
- Check frames for brood before altering the hive.
- Monitor bee traffic and stores of honey and pollen.
- Look for queen cells if behavior changes rapidly.
| Sign | Typical timeline | What to check | Recommended action |
|---|---|---|---|
| Stopped laying | 2–7 days | Frames for eggs, brood | Wait and re-inspect weekly |
| Orientation focus | 1–14 days | Foragers, honey/pollen stores | Ensure food; avoid heavy disturbance |
| Queen cells forming | 7–21 days | Cells, larvae presence | Assess queen status; consider resources |
| Healthy brood pattern | Ongoing | Even brood across frames | Record and support colony |
For tips on boosting population naturally while you wait, see boost colony population naturally.
Assessing Queen Status and Brood Patterns
Begin inspections focused on central frames where brood and eggs usually appear. Move slowly and scan each frame for tiny white eggs or small larvae.
Peter48 advises you must make sure there is an actual queen before deciding to remove any queen cells. Look for consistent brood patterns on central frames; this shows a healthy queen at work.
If you cannot see eggs after one week, the queen might have been lost during transfer. Check for queen cells at the bottom of frames — these often mean bees plan to replace their queen.
“Always try to find queen activity before you decide to remove any queen cells.”
- Scan central frames for eggs or larvae.
- Note brood pattern and counts of open cells.
- Inspect honey and pollen stores to make sure food is adequate for winter.
| Check | What it shows | Next step |
|---|---|---|
| Eggs or larvae | Queen present and laying | Record date; re-check weekly |
| Patchy brood | Queen stressed or aging | Monitor pattern; consult local expert |
| Queen cell on frame bottom | Possible replacement or emergency rearing | Inspect surrounding frames; do not rush to remove |
For guidance on confirming queen status or quarantine steps before adding bees, see the queenless help guide and this quarantine procedures resource.
The Role of Environmental Stress and Transport
A tight box with poor airflow can turn an ordinary transfer into a life-or-death event for the queen.
Heat, motion and cramped frames raise temperature inside the hive fast. Workers may cluster, stop normal duties and fail to tend brood.

Managing Hive Temperature
Ventilation matters. Use suitable equipment that gives a little side space so bees can move and cool the brood box.
“Even a small bit of extra space can save a queen and keep larvae healthy.”
- Avoid moving frames on the hottest day; cool transport reduces stress.
- Check for heavy traffic at the entrance — often a sign of overheating.
- Swap frames into the brood box gently and keep handling time short.
| Risk | Sign | Quick action |
|---|---|---|
| Tight nuc box | Clustered bees, queen missing | Move to larger box; add ventilation |
| High temps | Bees at entrance, stopped foraging | Transport early morning; shade hive |
| Rough handling | Damaged frame or larvae | Calm transfer; check frames immediately |
Identifying Queen Cells and Potential Swarming
If you find elongated cells hanging from the bottom of a frame, take note and slow your inspection.
Distinguishing play cups from true queen cells matters in spring. Play cups are shallow, random and often empty. Real queen cells are larger, peanut-shaped and usually hang from the frame bottom. Redlinexx noted swarm cells about three weeks after purchase, which fits this pattern.
Distinguishing Play Cups from Queen Cells
Look closely. If workers cap the cell or you see larvae, treat it as a functional queen cell. If cups are scattered on comb surfaces with no larvae, they are likely play cups.
The Risks of Emergency Requeening
Emergency requeening can save a colony but carries risk. A replacement queen must emerge, mate and begin laying in time for winter. Poor timing or failed mating can weaken brood development and reduce honey and pollen buildup.
Timing of Queen Development
Keep timeframes in mind. Semaphore explains it takes 16 days for a queen to develop from egg to emergence. That makes a couple of weeks of careful observation essential before intervening.
“Check cells, brood and hive activity; a lot of movement today may be normal or a prelude to a swarm.”
- Watch cells on the bottom of frames for signs of capping.
- Note brood pattern and stores of honey and pollen.
- If unsure, give the colony a couple of weeks before drastic action.
| Indicator | What it suggests | Recommended action |
|---|---|---|
| Play cups | Low risk; experimental rearing | Monitor; no immediate action |
| Hanging, capped cells | Active queen rearing or swarm prep | Inspect frames; consider swarm control |
| Multiple swarm cells (week 3) | Colony likely preparing to split | Assess space in box; prepare to manage swarm |
| New queen emerging (≈16 days) | Replacement in progress | Minimize disturbance; re-check after mating period |
For more on controlled queen rearing and timing, see queen rearing basics.
Managing Your Colony After the Transfer
Start with a light entrance check and wait seven days before opening the brood box. This gives the hive time to orient and keeps stress low. Plan a full inspection one week after transfer to check for eggs and brood.

Make sure you find queen activity during that first full check. Scan central frames for eggs or larvae, then note brood pattern. If you cannot find queen signs, record your findings and re-check in a few days.
Manage frames so bees can build honey and pollen stores for winter. Add more frames at the side of the box when space gets tight. Proper frame placement helps the colony expand its nest without crowding.
- Make sure to inspect brood box after one week.
- If you see queen cells, decide whether to split or allow requeening.
- Observe bee traffic in spring without disturbing brood.
- Watch queen cell development to gauge swarm risk.
“A calm routine and clear notes will help you track recovery over weeks.”
| Action | When | Why |
|---|---|---|
| Entrance check | Days 1–3 | Assess orientation, ventilation |
| Full brood box inspection | Day 7 | Find queen activity; check brood |
| Add frames to side | As needed | Allow nest expansion and honey storage |
When to Seek Professional Beekeeping Advice
When colony behavior falls outside normal patterns, professional beekeeping advice can save your hive. Early contact with an experienced keeper helps prevent small problems from becoming fatal.
If you notice strange activity at the entrance or sudden comb changes, reach out. JeffH reports cases where Tetragonula Hockingsi take over Carbonaria nests — a complex issue that often needs expert hands.
Do not delay when equipment fails or you cannot locate the queen. A local mentor can inspect frames, confirm brood status, and recommend fixes for damaged equipment.
- Seek help if other species appear in your hives or if bee behavior is abnormal.
- Contact an expert to protect your supply of bees before winter.
- Trusted guidance reduces mistakes; thanks to local pros, many beginners keep strong colonies.
“Professional advice is invaluable when you are starting out and want to keep hives productive and safe.”
For signs that suggest queen loss or urgent intervention, consult this guide on signs your colony is queenless.
Conclusion
, A steady inspection routine helps you spot changes in queen activity early.
Monitor brood and larvae on central frames, and record honey stores. Small, regular checks reduce stress and give clearer trends than one long inspection.
Watch for queen cells and shifting brood patterns. If the queen resumes laying, eggs and larvae will appear within days; if not, note timing before acting.
Thanks to community notes and shared reports—see the queen present report—you can learn expected timelines and common fixes.
Be patient, stay observant, and support your bees with steady care to encourage a healthy, productive colony.
FAQ
What should I look for during the first inspection?
Check for the queen, brood, pollen stores, and adult population. Open frames slowly, look along comb edges, and focus on brood patterns and capped cells. Wear protective gear and inspect midday when foragers are active.
How can queen stress affect laying?
Queens experience stress from handling and transport. Stress can pause egg-laying for several days while she recovers and orients to the new box. Give the colony calm conditions, steady temperature, and limited inspections for the first week.
What are normal laying cycles I should expect?
A healthy queen typically lays eggs every day, with visible brood within a few days. After a move or introduction, expect a lag of three to seven days before consistent brood appears. Weather and nectar flow also influence output.
How can I assess queen status and brood patterns?
Look for eggs, tiny larvae, and brood capped in a solid pattern. Spotty or scattered brood suggests poor queen age or fertility issues. Marked queens, if present, help locate her quickly during inspection.
Could transport or cold temperatures stop laying?
Yes. Temperature swings and long transport can chill brood and suppress the queen. Keep nucs warm during transit, avoid long delays, and acclimate colonies gradually at the apiary.
How should I manage hive temperature after placement?
Place the box in a sheltered spot with morning sun and afternoon shade. Ensure adequate ventilation to prevent condensation. In cooler weather, reduce large entrances and avoid extra insulation that traps moisture.
How do I spot queen cells versus play cups?
Play cups are small, shallow, and scattered. True queen cells hang vertically and are larger, often sealed at the bottom. Inspect bases and openings carefully to distinguish them.
What are the risks of emergency requeening from the hive?
Emergency requeening can provoke conflict between introducing workers and the new queen. It may disrupt brood care and reduce colony strength if poorly timed. Use approved introduction cages and monitor for acceptance.
How long does a queen take to develop from cell to laying?
A queen emerges about 16 days after the egg is laid and needs several days to mate and orient. From cell construction to steady laying can take two to three weeks, depending on weather and drone availability.
What steps should I take to manage the colony after transferring frames?
Limit inspections for the first week, ensure food and water access, check for adequate space, and monitor for robbing. Feed sugar syrup if stores are low and add drawn comb if available to reduce stress on brood care.
When should I contact a professional beekeeper or inspector?
Seek help if the queen is missing after two weeks, brood patterns decline rapidly, or pests and disease appear. Experienced beekeepers and local extension agents can diagnose issues and suggest requeening or treatment.