Starting your first apiary is exciting, but simple errors can cost time, honey, and colony health.
This guide highlights typical issues such as over- or under-inspecting, missed queen checks, poor hive placement, and feeding at the wrong times.
We recommend practical gear — smoker, hive tool, feeders, stands, supers, queen excluder, and mouse guard — and efficient inspection rhythms every 7–10 days.
Follow clear practices: use Langstroth boxes for easy equipment sourcing and mentorship in the United States, keep bee space correct, strap hives down, and orient entrances away from prevailing winds.
You’ll also find advice on feeding syrup during summer dearths, winter water access, and practical varroa control. For expansion and setup tips, see our guide on beekeeping expansion.
Key Takeaways
- Inspect efficiently every 7–10 days and check queen status without over-handling the colony.
- Start with Langstroth hives for easier support and equipment access.
- Feed little and often (1:1 in summer, 2:1 late season) and ensure winter water access.
- Place and strap hives properly; observe bee space to prevent wild comb.
- Equip yourself with a smoker, hive tool, feeders, stands, and pest controls to protect honey and bees.
Why beginners stumble: realistic expectations and the cost of common hive mistakes
New hive owners often expect steady progress, but realistic goals smooth the path to long-term success. Accept that losses happen even with careful care: a realistic survival target is roughly 70%. Framing outcomes this way reduces stress and helps you budget time and resources.
Every hive behaves differently. Two colonies in the same yard can react in distinct ways to weather, forage, or handling. Avoid treating them as identical; one plan rarely fits all.
Over-inspecting and skipping checks both lead to problems. Aim for efficient inspections every 7–10 days. Doing less at the wrong time can be as harmful as doing too much.
See swarming as natural reproduction, not personal failure. Gather answers from trusted sources, pick a simple plan you can repeat, and track your own results over years. Patience with unique colony behavior is one of the most important skills you will develop.
- Budget for setbacks so one issue doesn’t cascade.
- Balance scheduled checks and avoid impulsive visits.
- Commit to tested routines instead of chasing every new idea.
Set up for success: equipment, hive choice, and bee space fundamentals
Picking the right hive and kit makes routine care faster and cuts surprise problems. Start with a Langstroth hive to ensure parts fit, local mentors can help, and stores stock common components.
Assemble a full kit before you need it. Include a full bee suit, smoker, hive tool, feeders, stands, supers, a queen excluder, and a mouse guard. Keep spare equipment ready so you can act quickly during swarms, dearths, or flows.
Respect bee space at roughly 3/8 inch to prevent burr comb and make inspections easier. Proper space keeps comb inside frames and reduces propolis buildup.

Plan extraction and storage
Have extra frames and supers before nectar comes. Decide on an extractor or a crush-and-strain workflow, and collect strainers, food-grade buckets, jars, and labels for home processing.
| Need | Why it matters | Quick tip |
|---|---|---|
| Langstroth hive | Parts and mentorship are widely available | Standardize on common sizes |
| Frames & supers | Provide space for stores and reduce swarming | Add before heavy flows |
| Stands & mouse guard | Reduce dampness and rodent entry | Keep hives off ground |
- Stage extraction in a clean, temperature-controlled area at home.
- Keep spare feeders and sugar for dearth periods.
- Standard gear saves money and simplifies repairs.
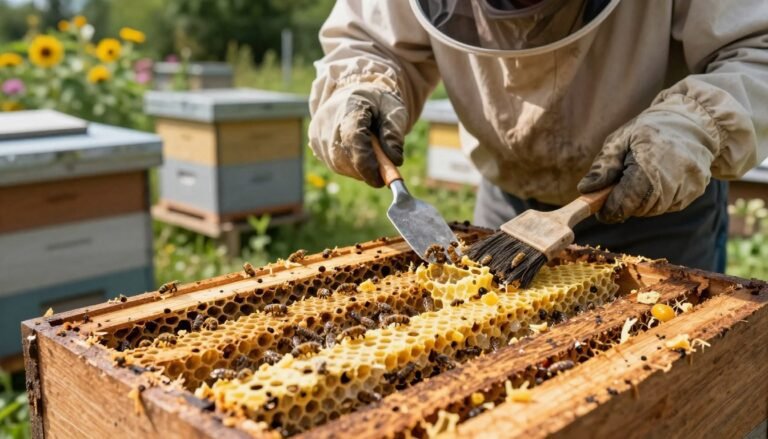
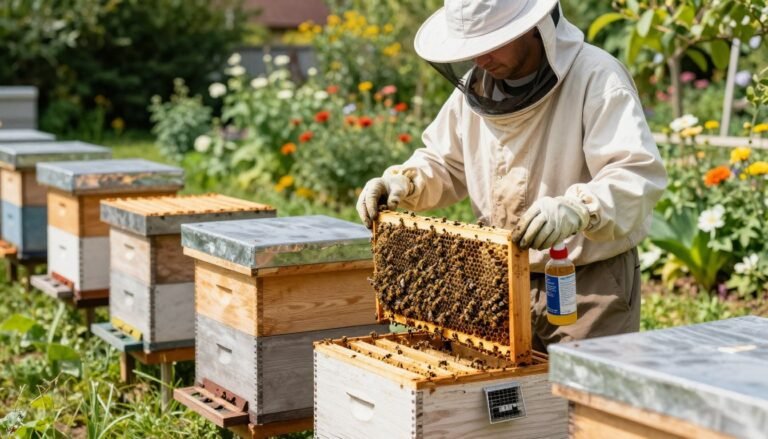
Inspections done right: timing, technique, and queen status
Well-timed checks let you spot problems early without overstressing the bees.
Set a cadence of one efficient inspection every 7–10 days. Limit full inspections to this window to avoid chilling brood and to keep colonies calm. Prepare a short checklist before the day so you move quickly and with purpose.
Aim for speed and focus
Scan each frame side in about five seconds before flipping. Use light smoke at the hive entrance, then pause so it settles. Work methodically and keep frames vertical while handling.
Find the queen and read brood
Train your eye to spot the queen, but if you don’t see her look for eggs and a solid brood pattern as proof of queenrightness. Multiple eggs in a cell can be normal for a new queen; widespread multiples may indicate laying workers.
Protect developing queens
Never invert queen cells. Turning them upside down can kill or imperil the developing queen. Always handle frames gently and over the box, return frames to their original positions, and close deliberately.
- Document each inspection day—track eggs, brood, stores, and behavior.
- Heft boxes to check stores and reduce unnecessary frame handling.
- For a deeper dive on queen issues and performance, see queen performance problems and seasonal tips at seasonal beekeeping tasks.
Feeding, honey, and stores: avoid dearth disasters and space mistakes
Feeding decisions made during a dearth shape colony strength for weeks to come. Address stores early so the colony keeps brood and eggs moving through the season. Thoughtful feeding protects future growth and winter survival.
Feed during dearth with appropriate syrup and cadence
Start 1:1 syrup at the first sign of a summer dearth. Give small amounts little and often so bees get energy without backfilling the brood nest.
Stop feeding as soon as a natural nectar flow returns. Leftover syrup can ferment or be stored where brood needs space.
Don’t overfeed or overharvest—protect brood space and winter stores
Late-season top-ups should use 2:1 syrup so the colony stores food with less drying needed. Overfeeding can fill cells that should hold eggs and brood.
Harvest conservatively. Leave enough honey so the colony can survive cold snaps and extended winter periods.
Provide water and mind winter needs, including crystallized stores
Keep a reliable water source near the apiary. Bees need water to metabolize honey, especially when some honey pollen or nectar crystallizes.
Heft boxes between inspections to check stores without opening the hive. Use entrance reducers during low times to cut robbing and conserve energy.
- Watch pollen coming in; thin pollen signals protein stress.
- Pause feeding if syrup shows up in core brood frames; protect brood space.
- Check eggs weekly during dearth to confirm the queen is laying.
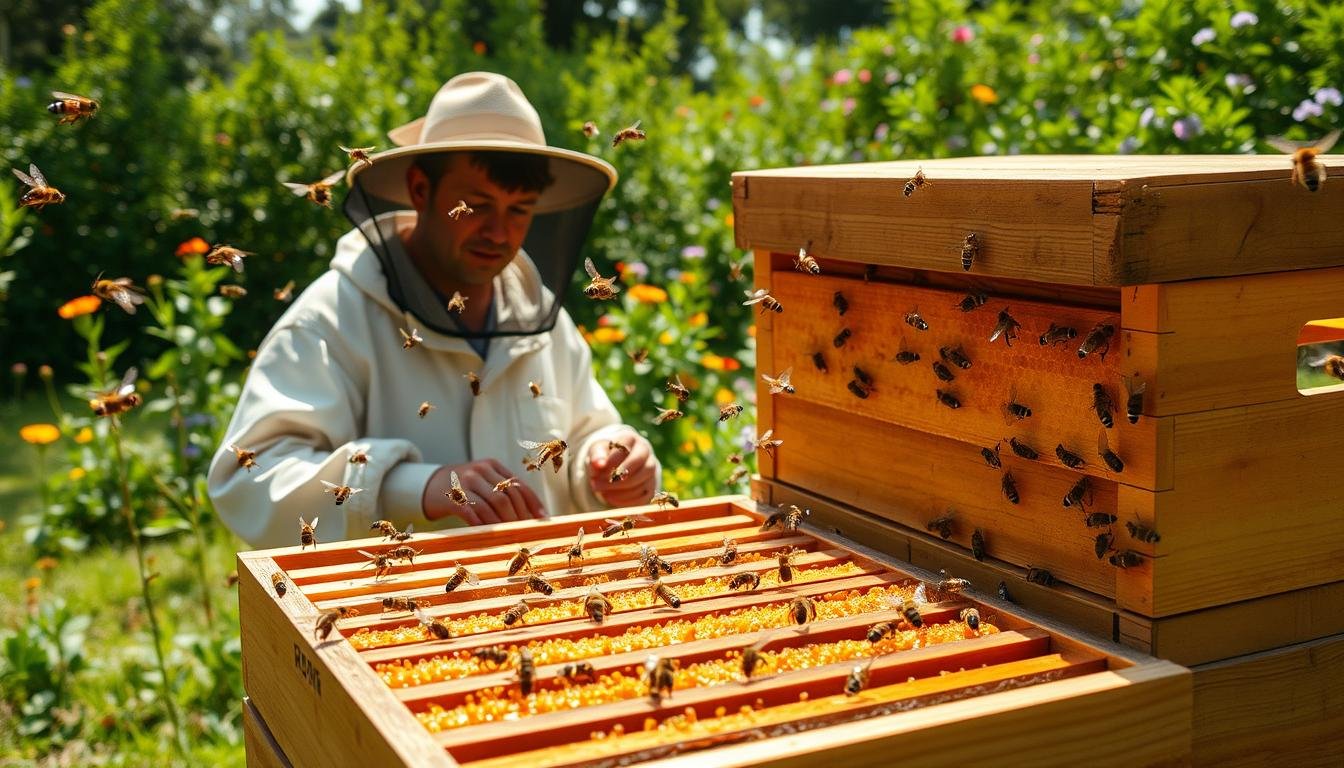
35. beginner beekeeper mistakes USA: location, access, and safe hive handling
Prioritize locations that balance diverse forage with low chemical risk and easy access. Choose an area with water, varied flowers, and a safe path to your home workspace. Avoid fields that receive sprays and windy ridges that stress bees and reduce foraging.

Set hives on sturdy stands to lift boxes off wet ground, improve airflow, and make lifting full supers safer for the beekeeper. Keep the hive level with a slight forward tilt so condensation drains away from comb and brood.
Face entrances away from prevailing winds—often southeast—to help orientation flights and reduce wind pressure. Strap and secure hives to prevent blowovers during storms.
Always use a smoker when opening hive boxes. Practice lighting it on calm days, keep fuel smoldering, and be careful in dry conditions to avoid fire. Install mouse guards before late fall and use entrance reducers to control traffic and robbing.
| Issue | Why it matters | Quick action |
|---|---|---|
| Sprayed fields nearby | Chemical exposure kills foragers | Move hives or request spray schedules |
| Poor access | Missed inspections and unsafe lifting | Choose level paths and avoid mud |
| Blocked entrances | Trapped bees and moisture buildup | Clear vegetation and tilt hive forward |
For practical setup steps and local regulations, consult a short beginning beekeeping guide.
Health threats and genetics: varroa, pests, and resilient colonies
Quick, scheduled health reviews identify threats before they spread. Make varroa monitoring a fixed part of your inspection routine. Untreated mite loads reduce brood viability and shorten worker lifespan, leaving the colony weak before peak foraging.
Recognize and control varroa
Monitor, don’t guess. Use alcohol or sugar rolls and sticky boards to measure mites during each check. Treat based on counts and local thresholds, rotating methods to prevent resistance.
Read queen health beyond stores
Do not assume a heavy honey or pollen flow means the queen is healthy. Look for eggs and a uniform brood pattern as real signs of a laying queen. If eggs are absent, act quickly to requeen or unite frames.
Select for resilience
Favor colonies with low mite counts, steady buildup, and good foraging. Keep records by hive so you can compare performance over years. Requeen from strains that show hardiness and lower treatment needs.
- Log mite counts, temperament, and honey yields after each inspection.
- Use integrated pest management and follow label directions for treatments.
- Consult experienced beekeepers for local timing and thresholds.
Prioritize queen health, mite control, and nutrition. These three pillars stabilize most issues and reduce intervention over time. For setup and early-care guidance, see our beehive guide.
Swarming, introductions, and calm management
When a colony prepares to swarm, calm planning beats panic — have a simple split or a nuc ready so you can act quickly. Treat a swarm as a natural reproductive event. In rural settings it is often a sign of vigor; in towns it may need faster containment to avoid nuisance calls.
Don’t panic about swarms—manage splits and urban concerns
Prepare equipment before season. Keep spare boxes, frames, and a nuc on hand so you can create space or split a hive on the spot. Timely supering or dividing reduces pressure and keeps bees focused on foraging.
Be cautious when introducing queens; check acceptance before release
When adding a new queen, many beekeepers prefer to assess acceptance at the cage rather than assume candy-only introductions will work. Leave the cork or cage in place for a few days and observe worker behavior before full release.
- Limit unnecessary opening hive events; weekly checks are usually enough.
- Keep a lit smoker ready to calm bees without overhandling frames.
- Share timing and local answers with nearby beekeepers and consult my advice for new beekeepers for practical tips.
Conclusion
Organize your time and tools so every hive visit has a clear purpose and repeatable outcome. Keep inspections to a steady 7–10 day rhythm, respect bee space on frames, and use standard Langstroth equipment where parts and help are available.
Protect brood and stores by feeding by season, leaving enough honey for winter, and keeping a reliable water source nearby. Monitor mites and confirm queen status by eggs and brood, not just stores.
Document what you do each year. Simple routines, tidy gear, and calm choices at the hive prevent most common problems. With clear plans and steady care, your colonies will reward the time and attention you give them.
FAQ
What are the most common early errors new beekeepers make with hive selection and equipment?
Many novices pick the wrong hive style or buy incomplete gear. In the United States, Langstroth hives offer wide support, replacement parts, and local mentorship. Make sure you have a smoker, hive tool, protective suit, feeders, hive stands, supers, a queen excluder, mouse guards, and spare frames before you start inspections or honey extraction.
How often should I inspect a colony without stressing the bees?
Aim for efficient checks roughly every 7–10 days during active season. Short, focused inspections prevent chilling brood and reduce agitation. Avoid over-inspecting; limit frame handling and close the hive promptly once you’ve checked brood, stores, and queen status.
How do I tell if the queen is healthy and laying well?
Look for a solid brood pattern with few empty cells in the center, regular eggs or young larvae, and a balanced mix of brood stages. The queen herself may be hard to spot; practice locating her by following nurse bees and examining frames systematically. Distorted or spotty brood patterns can signal problems.
When is feeding necessary and what should I use?
Feed during dearths, after late-season extractions, or when colonies lack winter stores. Use a 1:1 sugar syrup for spring stimulation and 2:1 for fall storage. Provide protein patties or pollen substitute when forage is scarce. Don’t overfeed—excess can reduce brood space or cause robbing.
How do I prevent wild comb and maintain correct bee space?
Respect the 3/8-inch bee space between frames and boxes. Use properly sized foundation or plastic frames and avoid forcing frames into tight positions. Good bee space prevents burr comb, makes inspections faster, and keeps comb aligned with frames for safe extraction.
What’s the right approach to honey extraction and storage planning?
Plan extraction timing to leave adequate winter stores. Have extractor capacity, uncapping tools, frames, jars, and labels ready. Harvest when frames are at least 80% capped. Sanitize equipment, filter gently, and store jars in a cool, dry place to prevent fermentation or recrystallization.
How should I site hives to reduce problems with neighbors and pests?
Choose a location with abundant forage, water nearby, and some shelter from strong wind. Avoid areas exposed to frequent pesticide drift or heavy traffic. Face entrances to a flight path away from walkways, use stands to reduce predators and moisture, and ensure easy, safe access for regular checks.
What safety practices should I follow when opening a hive?
Always wear appropriate protection and carry a functioning smoker. Light and maintain the smoker safely, use the hive tool correctly, and work calmly to avoid crushing bees. Time inspections for warm, sunny days when forager activity is high to reduce disturbance.
How do I manage entrances to prevent mice and robbing?
Install mouse guards before cold weather and reduce entrance size during winter. Use entrance reducers in early spring and fall to help defensibility and temperature control. Monitor for signs of robbing and respond with sugar syrup feeding or temporarily reducing entrances.
What are reliable ways to monitor and control varroa mites?
Regular mite checks—sugar roll, alcohol wash, or sticky boards—give actionable counts. Treat when thresholds are exceeded using vetted methods: oxalic acid, formic acid, or approved miticides per label instructions. Rotate treatments and combine cultural controls like drone brood removal for better long-term results.
How can I spot queenlessness early and what should I do?
Signs include laying workers, patchy brood, and increasing numbers of emergency queen cells. If you confirm queenlessness, consider requeening with a mated queen or introducing a frame with young brood and larvae to encourage emergency rearing. Use newspaper or a queen cage when combining colonies to ease acceptance.
What genetic traits should I prioritize when choosing stock?
Select stock known for hygienic behavior, varroa tolerance, low defensiveness, and consistent foraging. Local-adapted queens often perform best. Work with reputable suppliers—local breeders, research programs, or established brands—to source stock suited to your region’s climate and pest pressures.
How do I handle swarming prevention and what steps follow if a swarm occurs?
Prevent swarms by managing space—add supers, perform nucleus splits, and remove queen cells when appropriate. If a swarm occurs, stay calm: offer a temporary nuc box, call a local bee club or commercial remover, or follow safe capture procedures. Swarming is natural and often indicates a strong colony.
What’s the correct way to introduce a new queen to a hive?
Use a queen cage or release kit and place it between frames in the brood area. Leave the cage in place for several days so workers can familiarize with her pheromones. Monitor for acceptance; if aggressive behavior or lack of care appears, be prepared to try another method or source.
How much honey should I leave for winter and how do I estimate stores?
Aim to leave 60–90 pounds of stores depending on region and colony size. Estimate by counting frames of capped honey: each deep frame can hold roughly 6–8 pounds. Supplement with fondant or winter feed if natural stores are inadequate, and shelter hives against harsh weather.
What signs indicate pests other than varroa, and how should I respond?
Look for wax moth webbing in weak colonies, small hive beetle larvae in frames or honey, and abnormal bee behavior. Strengthen colonies through requeening, timely inspections, and removing infested comb. Use traps or approved treatments for specific pests and follow integrated pest management practices.
How do I avoid overharvesting and protect brood space?
Never remove frames with significant brood. Harvest from fully capped honey frames and leave central brood frames intact. Rotate supers and check colony strength before taking honey—maintain a balance between your yield and the colony’s survival needs.
What practical tools speed up inspections and improve accuracy?
A good smoker, hive tool, Bee brush or soft brush, frame grip, magnifying lens, and a simple notebook or app for records are essential. A portable scale helps monitor hive weight and stores. Use gloves for early confidence, and rely on experience to phase them out if you prefer greater sensitivity.
How can I prevent and manage crystallized honey in frames?
Store extracted honey at stable, moderate temperatures and avoid agitation. If frames crystallize in the hive, it can limit bee access—monitor and reframe or provide liquid feed during shortages. In jars, gently warm to re-liquefy without overheating to preserve quality.
Where can I find reliable local advice, equipment, and swarm help?
Contact state beekeeping associations, county extension offices, university extension programs like Penn State or Cornell, and local bee clubs. Many hardware and agricultural stores carry supplies, and reputable brands like Mann Lake or Dadant provide gear and educational materials. Local mentors offer invaluable, site-specific guidance.