Get your first colony off to a strong start with clear, practical steps that focus on hive health, safe handling, and timely planning. This short guide prepares a new beekeeper to move a colony into its new home with confidence.
Plan your installation around pickup dates — upcoming sessions include Friday, May 16 and May 30 at 6672 S 6000 W in Lake Shore, UT, and Friday, June 6 at 300 N 600 E in Spring City, UT. All pickups run 6–9 PM.
We cover colony basics, hive setup decisions, timing for inspections, and common early problems. Use professional resources and step-by-step guidance to keep bees healthy and productive in their new hive. If you need a starting resource, visit starter resources to learn about hive types, inspections, and seasonal care.
Key Takeaways
- Plan pickups and installation times ahead to prepare equipment and site.
- Understand colony needs and basic bee biology before moving a colony.
- Choose the right hive and learn inspection timing to avoid common errors.
- Use trusted resources to keep bees healthy and productive.
- Start with simple steps and build skills as the season progresses.
Understanding the Components of a Nucleus Colony
Knowing what lives inside a compact colony helps you manage your hive with confidence.
Defining the Unit
A nucleus colony, often called a nuc hive, is a small, working unit that mirrors a full hive. It contains a mated queen and the frames needed to grow a strong population.
Benefits of Starting Small
Beginning with a compact colony speeds colony development because bees accept the queen and keep brood patterns steady. This setup gives a beekeeper better control of brood health and feeding stores.
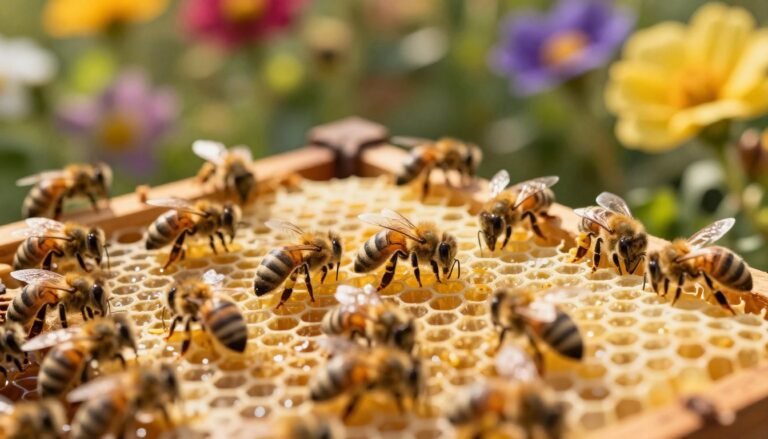
- Includes five frames of bees, brood, honey, pollen, and comb.
- Queen is already mated and laying, which boosts growth.
- Smaller size makes inspections and early management easier.
| Frame Type | Role in Colony | Typical Content |
|---|---|---|
| Brood | New workers and future strength | Eggs, larvae, capped brood |
| Honey | Energy reserve | Stored nectar, capped honey |
| Pollen | Protein for brood | Fresh pollen mixed with nectar |
| Comb | Structure and storage | Built wax comb |
For practical steps on obtaining and placing a nucleus colony, see obtaining and installing a nucleus colony.
Essential Gear for Your Nuc Transfer Checklist for Beginners
Gathering the right kit before you open a box makes the day faster and safer.
Core hive equipment includes a deep hive box, a bottom board, and an inner cover ready to host the colony and its frames. Have five quality frames in place and two spare empty frames available for comb or honey.
Wear protective clothing each time you handle bees. A snug veil and gloves reduce sting risk and keep you calm during inspections.

Tools and calming aids: a reliable hive tool is essential to pry apart sticky frames and the box. A smoker loaded with burlap or similar fuel helps settle the bees and protects brood during work.
Organize all equipment at the site: frames nuc items, an extra cover, spare tools, and a clean bottom board. This reduces delays and helps protect the queen and brood when you move frames.
- Deep hive box, inner cover, and bottom board ready.
- Hive tool, spare frame(s), and protective veil and gloves.
- Smoker with quality fuel and a spare cover to close the hive.
Extra guidance: review best practices on safe handling and disease inspection before you begin. See this helpful guide on organized installations and a resource on inspecting purchased nucs for disease risk: installation checklist and disease inspection tips.
Safe Transportation and Storage Practices
Safe movement and short-term storage keep bees calm and protect brood during the trip home.
Securing the Box
Secure the box with straps or strong tape to stop the entrance from opening in transit. Do this before loading the hive into the vehicle.
Move the colony after dusk, around 8:30–9:00 PM, so foragers are inside the box. This timing reduces escapes and stress.
Managing Temperature
Keep vehicle temperature moderate. Bees suffer in extreme heat, so avoid direct sun on the box and hot trunks.
If using a truck bed, allow steady airflow and cover the equipment with a breathable cloth or light cover to shield from sun while keeping ventilation.
- Park in shade at the apiary and rest the box 15 minutes before installing.
- Check the entrance is clear but secure before lifting to the new home.
- Follow safety guidance on long moves; see safety rules on storage and transport for applicable handling principles.
Quick tip: calm, cool conditions and a secured box reduce stress and improve success during installing nuc into its permanent hive.
Preparing the Permanent Hive Location
Choosing the right spot for your hive shapes colony health and long-term success.

Selecting the Ideal Site
Pick a level, well-drained location to keep the box stable and dry. Level ground helps bees maintain brood temperatures and reduces stress on the queen.
Face the entrance toward morning sun when possible. Morning light encourages foragers to start early and can cut down on afternoon pests.
- Choose a spot protected from strong winds to stabilize internal hive temperature.
- Place the hive where it receives several hours of sun but has afternoon shade in hot climates.
- Assemble inner cover and bottom board at the site to reduce handling time during installation.
Do not open a hive when the temperature is below 60°F (15°C). Cold air can chill brood and harm the colony during setup.
| Factor | Recommendation | Why it matters |
|---|---|---|
| Level ground | Use a solid, flat base or stand | Prevents water pooling and keeps frames straight |
| Sun exposure | Morning sun; afternoon shade ideal | Helps bees warm the brood and reduces pests |
| Wind protection | Shelter with hedges or a windbreak | Maintains steady internal hive temperature |
| Entrance orientation | Face away from prevailing wind, toward open flight path | Improves forager navigation and reduces drift |
Plan your installation on a warm, sunny day so bees can forage soon after setup. For more setup tips and basic beekeeping advice, see beekeeping for beginners.
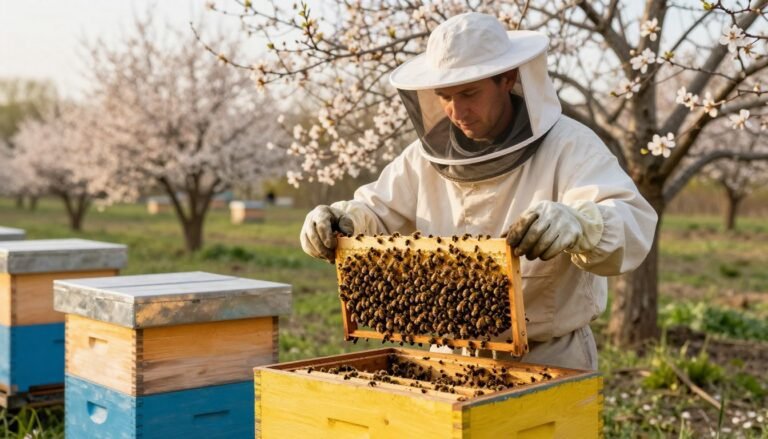
Step by Step Frame Transfer Process
Start the frame-moving step with a calm, steady plan to protect bees and brood.
Smoking the Colony
Light the smoker and give a few gentle puffs at the entrance. Wait a minute so the bees quiet down.
Use your hive tool to pry the lid off. Work steadily and keep movements slow to avoid alarming the bees.
Moving Frames
Lift frames one at a time. Keep the same order and orientation as they were in the box.
Hold each frame level and set it into the new hive in the same spot. This preserves brood pattern and honey stores.
Integrating Loose Bees
Tap the empty box upside down over the new hive to drop remaining bees inside. Shake or brush any clinging bees gently.
After all five frames are placed, add empty frames to fill gaps and fit the inner cover. Install an entrance reducer to protect the colony while it settles.
- Begin by calming the bees with your smoker, then use a hive tool to open the lid.
- Transfer frames slowly, keeping order and protecting the queen and brood.
- Shake remaining bees from the box into the new hive and close with an inner cover.
Post-Installation Monitoring and Care
Initial days in the new hive are critical; steady care helps the colony settle and grow. Check the colony every 7–10 days to confirm the queen is accepted and laying consistent brood. Short, calm inspections protect the bees and the honey stores.

Feed and support: offer sugar water and pollen patties to boost energy while comb is built. Place feeders so bees can access food without crowding the entrance. Use a gentle smoker only if needed to calm activity.
- Inspect frames in order with your hive tool and keep the same frame orientation to protect brood patterns.
- Watch the entrance for normal foraging and ensure the entrance reducer gives adequate protection.
- If you see no eggs, extreme aggression, or many dead bees, act quickly to diagnose the problem.
Record observations each visit: note queen signs, frame condition, honey and pollen levels, and any pests. For more detailed post-installation steps, see this installation checklist and review beekeeping basics to build confident routines.
Conclusion
Completing the installation marks the moment your bees claim their new hive and begin settling. Take pride in the work you did placing frames, securing the box, and setting the entrance to face the best location.
Patience and regular checks are the top tools of a good beekeeper. Visit the colony on a set schedule, watch honey and brood levels, and give space or feeders as needed while the new hive gains strength.
Use trusted resources to deepen skills and handle problems early. See a detailed guide on how to install a nuc and explore practical beekeeping topics to keep equipment and routines sharp.
Enjoy the season and the steady rewards of caring for your colony in its new home.
FAQ
What tools and equipment should I bring when moving a nucleus colony into a full hive?
Bring a hive tool, smoker, bee brush, protective veil, gloves, an inner cover, a bottom board, and a clean brood box with frames. Include an entrance reducer and a lid to control access and weather. Have spare empty frames and foundation ready in case you need to fill gaps during installation.
When is the best time of day to install frames and bees into a new hive?
Late morning or early afternoon on a warm, calm day works best. Most foragers will be out, reducing crowding at the entrance. Avoid rainy, cold, or windy days because bees become defensive and temperature control becomes harder during the process.
How do I secure the colony box during transport to protect the brood and queen?
Use a ventilated, well-fastened box and restrict excess movement with packing material that doesn’t crush frames. Keep the box level in the vehicle and avoid sudden stops. Ensure airflow to prevent overheating and check that the queen cage is stable to avoid injury.
What is the proper way to smoke the colony before opening the box?
Use cool, steady puffs at the entrance and under the inner cover to calm bees. Don’t over-smoke; light, intermittent puffs reduce agitation and help you work more efficiently. Wait a minute after initial smoking before removing frames.
How should I arrange frames when installing into the new hive to keep the colony together?
Place frames with brood and the queen centered in the brood box, surrounded by frames of honey or pollen. Maintain the original order when possible to keep brood temperature even and reduce drifting. Fill remaining slots with empty frames or foundation as needed.
What steps help integrate loose bees during the move?
Gently shake or brush remaining bees from the box into the new hive entrance or directly onto frames. Place the donor box near the hive entrance so stragglers can find their way in. Use light smoke if bees become defensive, and close up the hive once most bees are inside.
How long should I monitor the colony after installing frames into the permanent hive?
Check the colony within 24–48 hours to ensure the queen is present and laying, and again at one week to assess brood pattern and food stores. Continue regular inspections every 7–10 days during active season to watch for pests, disease, and adequate space.
What entrance and temperature considerations help a new hive succeed?
Use an entrance reducer during the first days to limit hive traffic and predator access. Ensure the hive sits facing southeast or south in a sunny, sheltered spot to warm morning activity. Provide shade and ventilation during heat waves to avoid brood overheating, and insulation in cold climates.
How do I handle a weak or queenless colony after installation?
If you suspect the queen is missing or not laying, inspect for eggs and young brood. If the queen is absent, introduce a mated queen in her cage or combine with another strong colony using newspaper method. Feed syrup and pollen substitute while the colony builds up strength.
Are there legal or local considerations when moving bees to a new home location?
Check local ordinances, HOA rules, and state regulations for hive registration, placement setbacks, and swarm prevention requirements. Inform neighbors and place the hive where flight paths won’t cross common areas. Registering your apiary with state programs can help with disease monitoring and support.
What supplies should I have on hand for post-installation care and emergency needs?
Keep sugar syrup, pollen patties, a spare queen cage, a couple extra frames, hive straps, and varroa monitoring tools. Have contact info for local beekeeping clubs and extension services like the USDA or state apiarist for advice and resources.