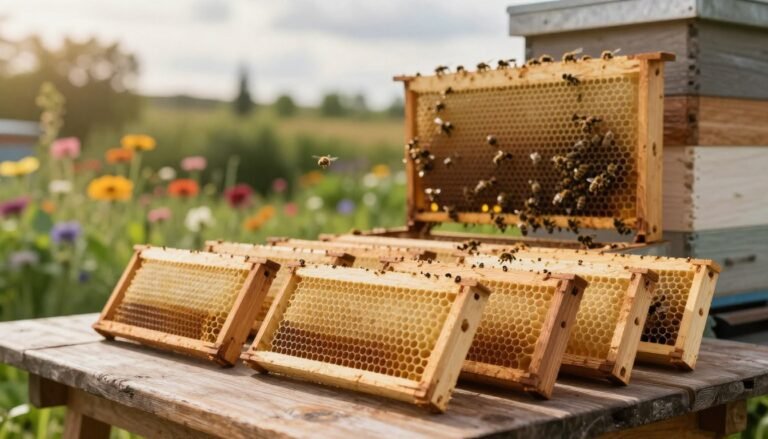
Beekeepers must plan how they handle honey supers after harvest. Proper care of frames and wax saves the hive time and energy in spring. This simple act protects your investment in equipment and helps colonies start the new year strong.
Good storage keeps comb intact, guards against moths and mice, and limits damage from pests. Choose a dry, cool box that blocks light and offers air movement. Stack boxes so they do not crush brood or deform frames.
When you prepare for winter, consider spacing, method, and timing. Protect honey, frames, and the hive so bees can focus on brood and foraging when nectar returns. This practical work pays off in healthier colonies and less rebuild time.
Key Takeaways
- Handle honey supers and frames carefully to preserve wax and honey for spring use.
- Store equipment in cool, dry boxes that keep out moths, mice, and pests.
- Stack and space boxes to allow air and prevent damage to frames and brood.
- Plan storage as part of yearly beekeeping to save time and support colony health.
- Good methods reduce rebuild needs and help bees start the season productive.
Why Proper Storage Matters
Neglect in the off-season invites mold and pests, which cost beekeepers real time and money. Poor care lets wax moths and mice damage frames and wood. That leads to extra labor and equipment replacement in spring.
Protecting honey and frames now ensures your colony has less to rebuild next year. Clean, dry spaces that block light and allow air reduce mildew and insect problems. A simple method saves hours of repair when bees ramp up.
Good practice preserves brood boxes and hives so bees can focus on forage and growth. Taking the time to check each item prevents small problems from becoming major damage.
- Prevents mold and pest infestations that ruin wax and honey.
- Saves time and expense by reducing replacements next spring.
- Maintains usable equipment so colonies start the year strong.
For a practical guide to protect frames and avoid pests, see how to store frames to prevent.
Preparing Equipment for Storage
Clean, dry gear cuts pest risk and keeps frames ready for spring use. After your harvest is complete, tackle equipment while debris is fresh. In upstate South Carolina, many beekeepers begin this work after the Sourwood Bloom in June–July.
Cleaning and Drying
Remove excess wax, propolis, and honey using a soft brush and mild soap. This removes residues that attract moths and mice.
Rinse and then allow each piece to air dry completely. Dry gear prevents mold and mildew during winter and lowers the chance of damage.

Labeling and Organization
Disassemble stands and extractors so parts fit compactly into boxes. Label each box with contents and the date to save time next year.
Organize by type—frames, brood boxes, and spare equipment—so you can find what you need quickly in spring. For more tips on timing and hive care that boost yield, see increase honey production.
- Tip: Keep air flow in storage areas and block light to deter pests.
Understanding the Risks to Your Equipment
Equipment left unchecked can suffer major losses from insects and rodents during the off-season. Wax moths are a top threat in beekeeping because their eggs hatch into larvae that eat through frames.
The larvae tunnel in search of pollen and bee cocoons, leaving a sticky, webby mess that is hard to clean. This kind of damage can ruin wax and honey reserves and force costly repairs or replacements.
Mice also pose a real problem. In winter they seek warm space inside stacked boxes and leave droppings and torn wood. Small hive beetles can cause harm too, but they do less damage if frames stay dry and free of leftover honey.
“Preventive checks and good environmental control cut pest damage and save time in spring.”
- Inspect gear before long-term storage and keep items dry and dark.
- Stack and position boxes to allow air but block light where pests prefer to hide.
- Know the signs of larvae, mice activity, and broken frames so you can act fast.
Storing Supers with Drawn Comb Between Flows
Treat stacked bee boxes as living inventory: protect frames now so colonies waste less time later. Handle each frame gently to keep wax intact and honey reserves usable for the spring season.
Decide how to stack. You can place bee boxes directly on top of one another or offset them to boost air and allow a little light. Offset stacking often cuts humidity and reduces pest attraction in warm, damp yards.
Match your method to local climate and storage space. In humid areas, prioritize air and light; in cold, dry regions, avoid wide exposure that freezes comb too fast.
Protect brood comb. Brood frames attract pests more than frames that only held liquid honey. Use tight seals, traps for mice, and regular checks to limit damage.
“A small investment in careful handling now gives colonies a head start when nectar returns.”

- Choose a stack or offset arrangement based on air and light needs.
- Shield brood frames more rigorously than honey-only frames.
- Label boxes and note which bee boxes need checks next year.
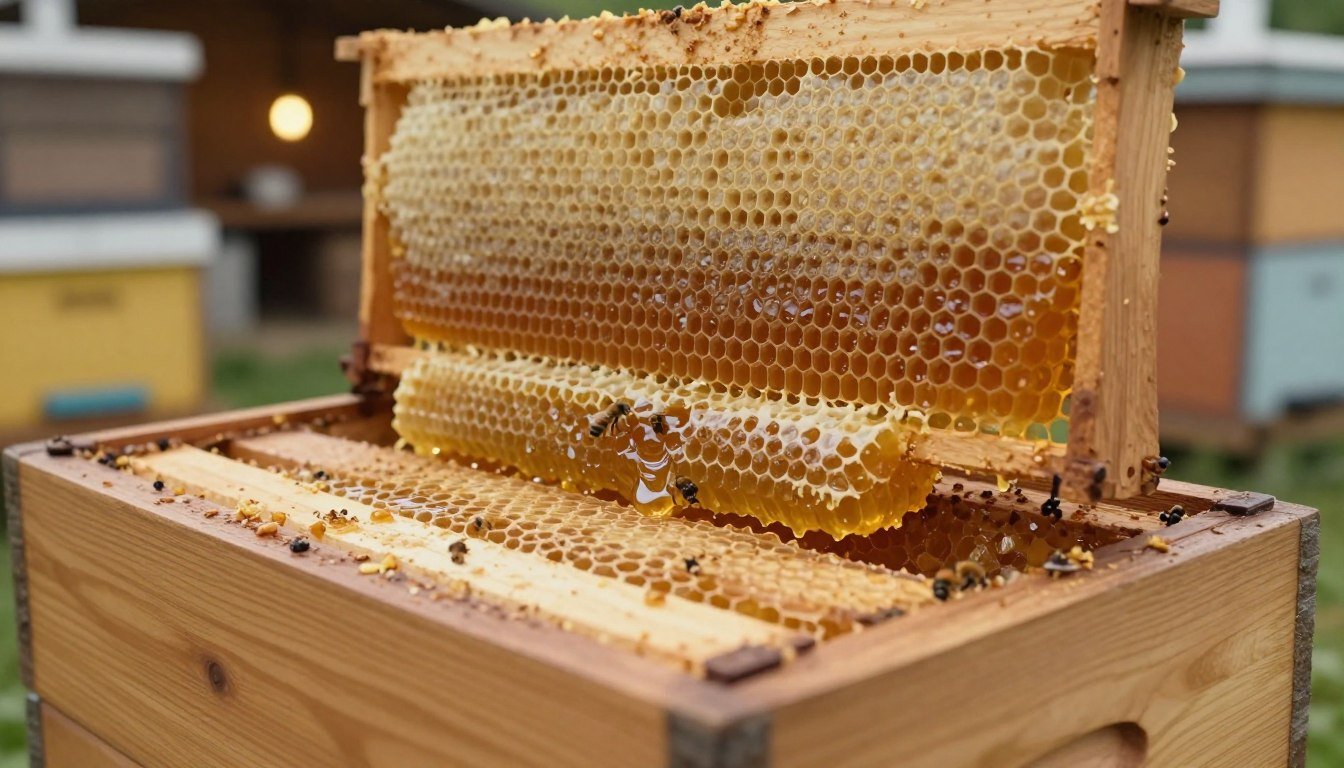
Cleaning Frames Before Storage
Letting bees remove leftover honey from empty frames is an efficient, low-cost method. Placing supers on a strong hive lets the colony tidy frames faster than most tools can. This approach saves time and protects delicate wax.
Using Bees to Clean Frames
Place frames or full boxes atop a vigorous hive for a few days to a week. Check daily to make sure the hive does not refill the frames. Monitor activity to prevent robbing or overuse of the donor colony.
Another option is to set boxes outdoors where wild bees and wasps will strip sticky honey. This is fast but invites a cloud of insects, so put boxes away from footpaths and livestock.
Thorough cleaning helps kill wax moth eggs and cuts the chance that larvae will damage drawn comb. Clean frames mean less repair work and lower pest risk in winter and spring.
- Use a strong hive to finish honey removal; watch for refilling.
- If using outdoor cleaning, place boxes off the main yard to avoid people traffic.
- Clean frames reduce wax moths and long-term damage to equipment.
“Clean frames are the best defense against moths and the easiest way to keep comb usable next year.”
The Closed Stack Method
For tight, low-light storage, the closed stack method traps protective vapors around your equipment. Use an enclosed shed or tight closet to limit light and keep out pests. This limits moths and mice and reduces damage to frames and wax.
How to set it up: Stack honey supers flat on the floor. Place a sheet of cardboard under the lowest box to act as a vapor gasket for treatments.
Place a newspaper layer between every three or four boxes to help hold vapors when using moth ice crystals. If boxes do not fit tightly, tape seams so the protective vapor stays inside the stack.
Always allow equipment to air out for several days in spring before returning any box to the hive. This removes chemical odors and makes frames safe for bees and the colony.

| Step | Action | Benefit |
|---|---|---|
| Base | Cardboard under lowest box | Seals vapor, eases treatments |
| Layers | Newspaper every 3–4 boxes | Contains vapor, protects frames |
| Seal | Tape loose seams | Prevents pest entry and leakage |
| Finish | Air out in spring | Removes odors, safe for bees |
“A sealed approach saves time and protects honey and wax through winter.”
Utilizing Open Stacking for Airflow
Open stacking offers a low-cost way to manage humidity when climate control isn’t available.
Offset boxes 90 degrees so light air can move through gaps. This simple alignment increases circulation and cuts mold risk.
Light and air together discourage wax moths and protect frames and honey during winter. Bees and colonies face less damage when moisture drops.
Use this method in an open shed or under eaves that keep out heavy rain. Protect the area with wire netting or chain link to block mice and larger pests.
Note: do not use moth crystals in open stacks. The vapor disperses and loses protection.
| Feature | Action | Benefit | When to Use |
|---|---|---|---|
| Offset stacking | Rotate boxes 90° | Improves air flow, reduces mold | Humid yards, no climate control |
| Light exposure | Allow indirect light | Deters moth activity | Open sheds or covered racks |
| Physical protection | Fence or net area | Keeps mice and predators out | Rural yards and open storage |
| No vapor treatments | Avoid moth crystals | Prevents ineffective vapor loss | Open stacking only |
“Air moving through a stack is often the best low-cost defense against mold and moths.”
Implementing Frame Racks
Frame racks keep empty frames organized and let air and light reach each piece of equipment. A vertical rack saves space and cuts the need to stack whole boxes, which often traps moisture and invites mold.
Position racks in a well-lit, secure shed or under a wire-mesh enclosure to guard against mice and larger animals. This method works well when you have many frames or extra supers frames to handle after harvest.
Racks also speed inspections. You can pull a single frame to check wax condition, brood traces, or signs of moths without unstacking heavy boxes. That saves time and reduces handling damage to honey or delicate comb.

- Use chain-link or wire mesh around the rack to block rodents and stray wildlife.
- Keep racks off damp floors and allow air to move around every row to limit mold.
- Label rows so you know which frames and equipment need checks in spring or winter.
“Regular checks of frame racks catch pest activity early and protect your investment.”
Freezing as a Primary Defense
Freezing is a proven, low-cost defense that halts moth larvae before they damage frames and wax. Use cold treatment when you suspect moth activity or before long-term storage of honey-filled or brood frames.

Temperature Requirements
Science sets clear targets: exposure to 20°F for 4.5 hours or 5°F for 2 hours will kill moth larvae. Many beekeepers leave frames in a commercial freezer overnight to ensure all life stages are eliminated.
Thawing Procedures
Thaw slowly and dry fully. Remove frozen frames and allow them to reach room temperature in a dry, ventilated area. Do not seal boxes while frost remains, or mold can form on wax and honey.
- Use a clean freezer dedicated to equipment or tightly wrapped boxes to avoid contamination.
- Let frames dry before placing them into a sealed box or rack to protect honey stored for future use.
- Combine freezing with routine inspection to reduce pest damage long term.
| Step | Target Temp | Time | Benefit |
|---|---|---|---|
| Short deep freeze | 5°F | 2 hours | Kills moth larvae quickly |
| Standard freezer | 20°F | 4.5 hours | Proven larvae kill rate |
| Overnight hold | 0–5°F | 8–12 hours | Covers all life stages |
“If you can freeze frames before long-term storage, you remove the main pest threat and save time next spring.”
For practical cold-climate tips on protecting drawn comb, see protecting drawn comb in cold climates and guidance on preventing wax moths.
Storing Supers Directly on Strong Colonies
Placing empty honey supers back onto a vigorous hive lets the colony police frames naturally. This method keeps wax and honey accessible to the bees, which cleans and protects comb against moths and mold.
Use this only on your strongest hives. A large population is needed to guard extra boxes through winter. Weak colonies may fail to defend the space, inviting pests and causing damage.
- Keep boxes tight to the brood to limit much extra space and reduce beetle risk.
- Check colonies before cold weather so you do not overwhelm a small bee population.
- Label equipment and note which hives are used for this method to save time in spring.
Pros: low-cost protection and fewer chemical treatments. Cons: only practical where colonies are robust and disease-free.
“Let the bees do the work, but don’t give them so much room that pests find shelter.”

For more on managing extra boxes on active hives see supering guidance.
Managing Wax Moth Larvae and Pests
A tidy storage area and routine checks are the beekeeper’s best defense against pests. Wax moth larvae are the main threat to comb-filled frames. They tunnel through wax and leave a sticky, webby mess that ruins honey and structure.
Mice cause different problems. They chew comb, nest in boxes, and leave droppings and hair that contaminate equipment. Inspect boxes for gnaw marks and scent of rodents.
Small hive beetles target actual honey, so keep frames dry and free of residue to deter them. Regularly check stacks and racks to catch infestations early and act fast.
Practical steps:
- Freeze suspect frames or use tight racks to kill wax moth larvae before long-term storage.
- Keep light and air moving in the storage area to reduce moths and mold attraction.
- Seal gaps to block mice, and store boxes off the floor where practical.
“Early inspection saves time and prevents irreparable damage to hives and equipment.”

Seasonal Considerations for Beekeeping Equipment
Calendar cues and local nectar patterns should guide how and when you prepare boxes for idle months. Plan around your area’s last major bloom so you remove honey at the right time and avoid surprising a colony.
As temperatures drop, decide whether to freeze suspect frames, apply an approved treatment, or rely on airflow and racks. Each method protects against wax moths and moth damage in different climates.
Products like B402 Certan, a form of BT, can be applied to foundation or honeycomb to reduce wax moths in stored equipment. Use it per label directions and pair chemical control with good hygiene.
Also factor in mice and humidity. In wet seasons, favor air and light to cut mold risk. In cold regions, freezing is often the most reliable way to kill larvae before long-term storage.
Quick seasonal checklist:
- Note last nectar flow and schedule honey removal.
- Choose freeze, treatment, or open-air methods based on local climate.
- Protect brood frames more carefully and label boxes by use and date.

| Season | Recommended Action | Key Benefit |
|---|---|---|
| Late summer / early fall | Remove honey, inspect frames, apply B402 Certan if needed | Stops moths before winter, preserves honey stored |
| Fall | Freeze suspect frames or use closed stack in dry sheds | Kills larvae, reduces spring damage |
| Winter | Monitor humidity, keep boxes off damp floors | Prevents mold and long-term equipment damage |
| Early spring | Air out boxes, check for pest signs before reuse | Ensures safe return to hive use and reduces colony risk |
“Plan your protection by season and local nectar flow to save time and keep hives ready for spring.”
For practical seasonal tips on how to pack and protect gear for winter, see how to prepare equipment for winter and guidance on timing and yield at honey production.
Conclusion
Simple routines at season’s end cut pest risk and preserve valuable frames and boxes. Proper care of equipment and careful storage protects wax and honey and keeps colonies ready for the next year.
Use proven methods—freezing suspect gear, open stacking for air, or approved treatments—to guard against moths and rodent damage. Regular checks catch problems early and save time later.
Label boxes, note brood or honey origins, and plan to add space or ventilation when colonies show pressure. For timing on when to add boxes and comb, see guidance on preparing to swarm.
Good beekeeping treats supplies as carefully as hives. That care pays off when spring arrives and your apiary starts strong.
FAQ
How should I prepare honey frames and equipment before winter storage?
Clean comb and boxes thoroughly. Remove excess honey and propolis, brush off dead bees and debris, and let equipment dry in a warm, dry place. Label boxes and frames by source and date so you can rotate stock and return the correct frames to the colony next spring.
Can I leave frames with honey in them when storing until the next season?
You can store frames with honey, but only if they are well sealed and free of brood. Honey attracts pests and can ferment if damp. Store sealed honey frames in cool, dry conditions or use a colony to protect them against moths and rodents.
What are the main risks to drawn comb when not protected?
Wax moths, mice, humidity, and mold cause most damage. Larvae tunnel through comb, leaving webbing and frass. Mice can chew wood and comb. High moisture leads to fermentation and mold, reducing comb strength and making it unusable.
How effective is freezing at killing wax moth larvae and eggs?
Freezing is highly effective if done correctly. Expose frames to -20°F (-29°C) for 48 hours to kill eggs and larvae. Ensure frames are dry before freezing and allow a gradual thaw to avoid condensation that could encourage mold.
What is the closed stack method and when should I use it?
The closed stack method seals supers in a quiet, dark pile for several weeks to force any remaining brood to emerge and be eaten or die, while reducing moth activity. It works best in cold months when bees are not flying and when you have no strong colony to host the frames.
How does open stacking help protect comb from pests?
Open stacking improves airflow and reduces humidity, making the environment less favorable for moths and mold. Leave gaps between boxes or use spacers so air circulates. Combine with light exposure and a dry location for best results.
Should I ever store comb directly on a strong colony over winter?
Yes. Placing empty frames or lightly used comb on a strong, healthy colony gives bees the chance to guard and clean them. This is a natural defense against wax moths, as bees remove eggs and larvae and maintain dry conditions inside the hive.
What are frame racks and why use them?
Frame racks hold loose frames upright for drying and storage while maximizing airflow. They reduce contact between frames and make inspections easier. Use racks in a dry, ventilated area or inside a shed with controlled humidity.
How can I use bees to clean frames before storage?
Return frames with honey to a strong colony for a week or two; the bees will remove excess honey, clean wax, and polish cells. Do this during active foraging season to avoid stressing the colony. Once cleaned, freeze or store the frames promptly.
What temperature and thawing procedures should I follow after freezing comb?
Maintain -20°F (-29°C) for 48 hours when freezing. Thaw slowly at cool room temperature for 24–48 hours inside sealed containers to prevent condensation. After thawing, inspect for damage and consider additional treatment if any live larvae appear.
How do I control wax moths in long-term equipment storage?
Combine methods: clean frames, freeze when possible, use open stacking for airflow, or store on a live colony. Use sealed containers or metal storage if rodents are a concern. Regularly inspect stored equipment and treat any infestation immediately.
Are there seasonal considerations I should keep in mind for storing comb and boxes?
Yes. Store equipment during dry, cool months to limit pest activity and mold. Avoid storing in warm, humid spaces. Plan storage after honey flows end and before brood rearing increases in spring to minimize brood presence and pest attraction.