Jenna Williams picked up her nuc package at 8am from a local supplier and planned the transfer later that day. New beekeeping hobbyists often face one clear question: whether to move bees in the evening or wait until morning. Weather, brood health, and the state of the box matter most when choosing the best time.
Prepare the right equipment for the first year: a proper hive, a bee suit, gloves, and a smoker. When the nuc arrives, place the box where the hive will sit and check the queen, brood pattern, and pollen stores before any transfer.
Move frames one at a time in order, set up the top feeder with sugar syrup for tomorrow, and use an entrance reducer so foragers reorient safely. Trusted posts and guides help nervous people follow the right way and manage the first week for healthy hives and honey production.
Key Takeaways
- Morning pickups often work best; wait an hour if bees were collected early.
- Set the box on the hive spot and inspect queen and brood before transfer.
- Essential equipment includes hive bodies, frames, smoker, and suit.
- Prepare sugar syrup and the top feeder for the colony’s first week.
- Move frames in order and use an entrance reducer so foragers reorient.
- Consult practical guides like caring for your nuc and purchasing notes from buying packaged bees and nucs.
Understanding the NUC Installation Process
Start by confirming the supplier’s reputation; healthy colonies make transfers simpler and speed recovery. Gerald Nickel’s record of installing ten nucs in one season shows how a reliable source impacts success. Thanks to good stock, inspections go faster and stress for the queen and brood drops.
When preparing the hive site, set the nuc box on a level surface. This keeps frames steady and protects the brood during the move. Place the feeder on the side of the hive to avoid disturbing frames while bees settle.
Check the weather for the next couple of days so the colony has calm conditions while they orient. If pickup is scheduled for tomorrow, have the hive ready to transfer frames without delay.
“Healthy bees from a trusted supplier make the first week far easier.”
- Observe pollen and sugar syrup brought in by the end of week one.
- Use a 10-frame hive to allow space for honey and growth.
- Always thank the supplier for quality stock; the queen’s health matters most.
| Task | Why it matters | Suggested action |
|---|---|---|
| Selecting supplier | Determines colony health and queen quality | Choose experienced breeders; verify references |
| Hive placement | Protects brood and stabilizes frames | Level foundation, secure nuc box before transfer |
| Feeder location | Reduces disturbance to frames | Mount feeder to hive side, not top during transfer |
| Weather check | Calms foragers and aids orientation | Monitor forecast for the next couple of days |
For practical community tips, see the newbie forum thread and methods to grow colony numbers in natural population boost.
Can You Install a NUC at Sunset?
Late-day transfers often raise sting risk because bees grow more defensive as light fades. Rodderick warns that moving colonies at dusk is not ideal; midday moves are calmer and safer for both handler and hive.
If pickup happened that morning, wait an hour so bees settle in the box before shifting frames. Daytime transfers help keep aggression low and protect the queen and brood during each frame move.
Place the nuc box exactly where the final hive will stand. This helps foragers reorient and reduces drift between hives. If managing several hives, stagger transfers over a couple of days to lower stress and limit mistakes.
The weather matters: avoid rainy or cold conditions for the move tomorrow. Thanks to a clear entrance on the nuc box, monitor bees as they begin to fly and explore their new home.
“Transferring during the day prevents the bees from becoming aggressive, which often happens when you try to move them at night.”
- Midday is generally best; dusk raises sting propensity.
- Wait an hour after morning pickup to let bees calm.
- Handle frames gently to keep the queen and brood safe.

For community tips, read the bee pickup tomorrow thread. For inspection steps before transfer, see this guide to inspect purchased nucs.
Essential Equipment for a Successful Transfer
Organize your suit, smoker, and hive tools first to reduce handling time when moving frames. A standard 10-frame deep hive is recommended to house the new colony and give space for growth.
Protective Gear and Tools
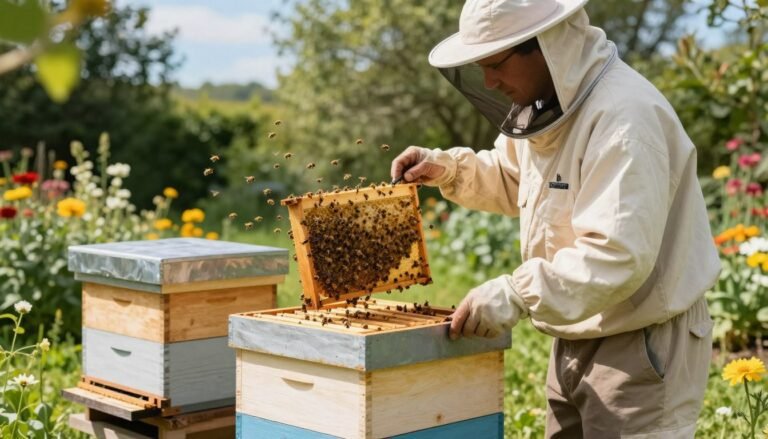
Wear a full bee suit and gloves before opening the box or lifting any frames. Protection keeps the handler calm and the bees less defensive.
Keep the smoker lit and handy. Smoke calms bees and makes working with multiple nucs much easier.
- Use a 10-frame deep hive body so frames fit without crowding the brood.
- Place the feeder on the side of the hive to provide sugar syrup and speed comb building.
- Maintain frame order when transferring to protect the brood and queen.
Fit an entrance reducer after the transfer. This helps the hive defend against robbers during the first few days.
“Having the right equipment shortens handling time and reduces stress on the colony.”
Check the top of the hive after two or three days for pollen and syrup stores. If the weather stays favorable, the transfer is often completed in one day with the queen and brood secure.
For step-by-step safety advice on moving colonies, see this guide on moving beehives safely.
Managing Forager Bees and Hive Orientation
Forager retention begins with placing the hive where returning bees expect their home.

The first hour after transfer matters most. Let foragers fly out and perform their figure-8 routines so they reset internal maps and mark the new location.
Keep the entrance clear so workers reach frames, feed brood, and tend the queen without delay. A top feeder with sugar syrup helps keep food moving in the box and steadies the colony.
The Importance of Forager Retention
- Placing the hive in the exact spot prevents most drift back to the supplier.
- Wait at least an hour after setup before covering or moving the box.
- If moved the next day, expect the colony to need a couple of days to reorient.
Reorienting the Colony
Watch for the figure-8 flights in front of the entrance. If weather turns bad, bees stay inside the hive; ensure syrup reserves for those days.
| Action | Why it matters | Quick tip |
|---|---|---|
| Place hive in same spot | Prevents foragers from returning to old site | Set base before moving frames |
| Keep entrance clear | Allows easy access to frames and queen | Remove obstructions and reduce traffic |
| Use top feeder | Keeps colony focused on new home | Offer sugar syrup until pollen flow begins |
“Foragers reorient by flying a figure-8 outside the front of the hive.”
For recommended timing and methods, read guidance on recommended timing for packages and detailed hive placement techniques.
Seasonal Feeding and Colony Maintenance
A steady feeding routine helps bees build stores and strengthens the brood before cold weather.
Seasonal feeding with 1:1 sugar syrup promotes colony growth in the first year. Offer syrup in a reliable feeder on the top of the hive during active days to encourage comb building and brood rearing.
Aim for 50–70 pounds of honey in the box before winter arrives. If stores lag, switch to a heavy 2:1 syrup in late season to boost reserves for the long night.
Inspect frames every few days. Check brood patterns and confirm the queen is laying consistently. Small, regular checks reduce stress and spot issues early.
Keep the top of the box secure and fit an entrance reducer to retain heat and limit robbing. Monitor pollen intake; pollen provides protein needed to raise healthy brood.
If bees refuse the syrup, clean the feeder and confirm it functions. Poor feeders slow weight gain and can leave the hive light on sugar when weather turns bad.
“Feed in stages, watch the frames, and aim for solid stores so hives enter winter strong.”
For guidance on feeding without triggering robbing, see feeding bees without causing robbing. Proper timing and clean feeders protect the colony while it builds honey and brood for the colder days ahead.
Final Thoughts on Your First Bee Colony
After frames are set and the feeder is ready, observation becomes the most valuable task. Successfully adding a colony is a rewarding milestone in beekeeping. Many people notice progress by watching brood, foragers, and stores over the next few weeks.
Every hive behaves differently; close, regular checks teach what each box needs. Refer to helpful posts and trusted guides when questions arise. For details on durable transport and box options, see the best nuc box for transporting bees.
Thanks to the beekeeping community, support is nearby when handling queen issues or feeding. Take time, be patient, and enjoy watching your bees grow toward honey and strong hives.
FAQ
Can you install a nuc at sunset?
Installing a nuc late in the day reduces forager activity and lowers stress on the colony. Many beekeepers transfer frames into a new box in the evening so flying bees return to the original location and remaining bees settle overnight. Use calm, dry weather and keep disturbance minimal. If temperatures drop or rain arrives, postpone until the next suitable evening or morning.
How do I select a reliable supplier for nucs?
Choose experienced sources such as local beekeeping clubs, state extension services, or reputable vendors like Mann Lake and Brushy Mountain. Verify queen genetics, health records, and brood pattern. Ask about mite treatments, feeding history, and whether the nuc was overwintered. Local suppliers often provide stock better adapted to regional weather and forage.
What should I prepare at the hive site before arrival?
Set a solid, level stand with southern exposure and morning sun. Ensure good drainage and clear flight paths. Place a water source nearby and position away from heavy foot traffic. Have tools ready: smoker, hive tool, gloves, and a nuc box or full hive with frames and foundation. Check local ordinances and neighbor awareness before placement.
What essential equipment is needed for a successful transfer?
Core items include a proper nuc or full hive body, frames with drawn comb or foundation, a queen excluder or cage if needed, feeder (top or entrance), smoker, hive tool, and protective gear. Use a screened bottom board and an inner cover with a port for feed. High-quality tools speed the process and reduce colony stress.
What protective gear and tools are recommended?
Wear a veil or full suit, gloves, and sturdy boots. Carry a smoker with fuel like burlap or pine needles, a hive tool, frame grip, brush, and a feeder loaded with sugar syrup if feeding is planned. Use gentle lighting and avoid strong scents. Proper gear improves safety and confidence during transfers.
How do I manage forager bees during transfer?
Reduce forager return by moving the nuc only a short distance initially or transferring in the evening when most foragers are home. If you relocate the colony more than a few feet, perform a gradual move: shift the hive no more than six feet per day toward the final spot. This prevents loss of returning foragers and maintains orientation.
Why is reorienting the colony important and how is it done?
Foragers use landmarks and hive entrance location to return. Reorient by placing the new hive at the same spot during evening transfer, or if moving, shift incrementally and add a visual marker near the new entrance. Slightly blocking the entrance for a day encourages orientation flights without trapping bees.
When should I feed sugar syrup and pollen supplements?
Feed syrup during nectar dearths, after installation if stores are low, or when stimulating brood rearing in spring. A 1:1 sugar-to-water mix suits spring buildup; 2:1 works for fall stores. Offer pollen substitute if natural pollen is scarce to support brood. Use entrance or top feeders to reduce robbing risk and monitor consumption daily.
How do weather and time of day affect installation success?
Calm, dry weather with temperatures above 55°F is ideal. Avoid windy or rainy conditions. Evening transfers reduce flying bees, but very late or cold nights can harm brood. Morning installations work well when bees are active for reorientation. Check forecast for several days to choose the best window.
What should I inspect in the brood and frames during transfer?
Look for a healthy brood pattern with few empty cells, presence of eggs or young larvae indicating a laying queen, and minimal disease signs like foul brood. Ensure frames contain sufficient honey and pollen close to brood for immediate feeding. Replace damaged comb and avoid splitting brood across too many frames.
How many days before moving should I prepare the colony?
Prepare several days ahead by ensuring adequate stores and reducing queenless periods. If using nucleus colonies, allow 24–48 hours for the colony to settle in a new box before full relocation. For larger moves, plan a gradual shift over a week to maintain forager orientation and reduce losses.
What steps prevent robbing and other colony stressors after setup?
Minimize entrance size initially, use robbing screens when nectar is scarce, and avoid overfeeding outside. Remove strong scents and wear clean gear between hives. Keep inspections brief and schedule them during warm, sunny hours when many foragers are out to reduce crowding at the entrance.
How soon will the queen start laying after a transfer?
If the queen is present and healthy, laying should resume within a day or two. Newly mated queens may take up to a week. Monitor for eggs or young larvae during inspections. If no brood appears after 10–14 days, investigate queen status and consider requeening if necessary.
What ongoing maintenance is needed during the first week?
Check feed levels, entrance activity, and for signs of disease or pests daily. Ensure ventilation and monitor for excessive heat. Limit full inspections to reduce disruption; perform quick checks for queen presence and adequate stores. Adjust feeders and add frames only when population growth requires space.
Are there legal or neighborhood considerations before placing hives?
Confirm local zoning, state regulations, and any homeowner association rules. Notify neighbors about your plans and position hives to direct flight paths away from common areas. Use screening, plant hedges, or place water sources to reduce conflicts and improve acceptance.
How do I handle equipment and hygiene to protect bees year-round?
Clean tools between colonies, replace old or moldy frames, and sterilize equipment if disease is suspected. Rotate comb every few years to reduce pesticide and pathogen buildup. Maintain mite control with methods like oxalic acid or Apivar following label directions and monitor regularly.