Protecting a hive starts with clear, safe management of mite control. Since the EPA approved this natural compound in 2015, many beekeepers have adopted the oxalic acid approach to limit varroa in their apiaries.
This introduction outlines practical steps to reduce mite population using proven methods like dribble and vaporization. We will cover timing, the role of the queen and capped brood, and how to handle honey supers without risking contamination.
Safety matters: always read the product label and wear proper protective equipment when applying chemical controls. Proper use of gear and following label directions keeps both the colony and the beekeeper safe.
By the end of this guide you will have actionable information on preparing a sugar solution, managing frames, and avoiding resistance. These tips help maintain healthy honey bees year-round and support long-term colony survival.
Key Takeaways
- Understand timing and brood status before application.
- Follow label instructions and use protective equipment.
- Choose the right method—dribble or vaporization—based on season.
- Manage frames and honey supers to reduce contamination risk.
- Monitor mite levels to prevent resistance and protect colonies.
Understanding the Varroa Mite Threat
Varroa mites threaten hive health because they reproduce inside capped cells, out of reach of many controls.
These parasitic mites attach to adult bees and feed on fat bodies, which weakens individuals and the whole colony.
Life cycle matters: when mites are phoretic and roaming on adult bees, they are vulnerable to many interventions, including carefully applied oxalic acid.
When they hide under capped brood, they gain protection and can evade standard measures.
Consistent monitoring is essential. Regular checks let a beekeeper spot rising mite counts before severe damage occurs.
A high mite load reduces immune response and increases disease risk across the apiary.
| Stage | Location | Vulnerability |
|---|---|---|
| Phoretic | On adult bees | High — accessible to topical controls |
| Reproductive | Inside capped brood | Low — protected from many treatments |
| Emerging | Newly hatched bees | Moderate — timing-based interventions apply |
Remain vigilant year-round. Protecting your hive from varroa is the first step to a productive, healthy apiary.
Why Beekeepers Choose Oxalic Acid Treatment for Bees
A key reason apiarists prefer this method is its low residue profile in honey and its proven record against varroa. The compound is plant-derived and appeals to those who avoid harsh synthetic chemicals.
Practical benefits: it works well when mites are mostly on adult bees and can be applied with simple tools. Research supports its role as part of a year-round management plan.
Many find it cost-effective compared to commercial products. When rotated with other controls, the risk of mite resistance drops and colony health improves.

| Feature | Plant-derived option | Synthetic chemicals | Rotation strategy |
|---|---|---|---|
| Residue in honey | Low | Variable | Minimizes buildup |
| Cost | Low–moderate | Higher | Depends on products |
| Resistance risk | Low when rotated | Higher if overused | Lowest |
- Well-documented use gives beekeepers the information needed to protect colonies.
- Integrating this option supports strong hive populations and sustainable apiary management.
Essential Safety Protocols and Protective Gear
Before any application, establishing strict safety protocols protects both the hive and the handler. Understand the hazards and plan each step so no one is surprised by fumes or spills.
Chemical Toxicity Risks
Category 1 classification means this product can harm lungs, eyes, and skin. Inhaling vapors or touching the liquid may cause serious injury.
Keep a neutralizer ready: a baking soda and water mix neutralizes small spills quickly.
Personal Protective Equipment
Every beekeeper must wear proper gear during any application. At minimum, use a respirator, chemical-resistant gloves, and splash goggles. Replace damaged items before you start.
- Read the product label and follow instructions exactly.
- Work in a well-ventilated area and avoid confined spaces near the hive.
- Store all products clearly labeled and out of reach of children and animals.
| Risk | Protective Item | Action |
|---|---|---|
| Inhalation | Respirator (P100) | Wear during vapor or spray use |
| Skin contact | Chemical-resistant gloves | Change if torn; wash after use |
| Eye splash | Goggles | Use splash-proof eye protection |
| Spill | Neutralizer (baking soda) | Apply immediately; rinse area |
The Biology of Brood Cycles and Mite Vulnerability
A clear grasp of queen cycles and brood development helps pinpoint when mites are exposed and most likely to be controlled.
Why timing matters: varroa reproduce inside capped brood cells and remain protected during a roughly 12-day capped period. That window shields many mite stages from surface-applied controls.

Key biological points every beekeeper should track
Phoretic vulnerability: Mites are most reachable when they roam on adult bees between cell visits. These phoretic mites are the primary target of topical measures.
Seasonal effects matter. In summer, much of the mite population hides under capped brood, reducing single-application success. In winter, with little or no brood present, a single well-timed application often gives the best control.
| Factor | Impact on Mite Control | Practical Note |
|---|---|---|
| Brood present (capped) | Low vulnerability | Requires multiple passes or brood interruption |
| Phoretic mites | High vulnerability | Ideal target during broodless periods |
| Bee development (egg→emergence) | 21 days total | Plan cycles around this period |
| Season (summer vs winter) | Alters mite distribution | Winter often best single-application window |
Research and field experience show that applying oxalic acid when brood is present usually needs repeat applications to hit mites as they emerge. Rotation of controls and attention to the queen’s laying pattern reduce resistance risk and protect colony health.
Determining the Optimal Time for Treatment
Timing is the single biggest factor in getting a high mite knockdown. A well-chosen window targets mites when they are mostly on adult bees and not hidden in capped brood.
Winter often gives the best chance: when the queen slows or pauses laying, brood drops and nearly all varroa are exposed. One correctly timed application can reach most of the population.
In summer, many mites hide inside cells. That means you may need multiple applications spaced over several days to catch mites as they emerge.
| Season | Brood Status | Recommended approach |
|---|---|---|
| Winter | Brood reduced or absent | Single well-timed application |
| Summer | Brood present / capped brood | Staggered applications over days |
| Year-round | Monitor | Record hive checks and adjust timing |
Track the queen, check brood frames, and log mite counts. This strategic approach reduces resistance and keeps your colony healthier over the year.
For additional non-chemical and complementary strategies, see natural remedies for varroa mites.
Preparing the Dribble Solution
Measure ingredients carefully before mixing to ensure a safe and effective dribble solution. Use 8.75 grams of oxalic acid dissolved in 6 fluid ounces of hot water, then add 3/4 cup of sugar.
Work in a dedicated, labeled container. Mark it clearly as poison and keep it away from any kitchen or honey equipment.

Stir until crystals are fully dissolved. Do not shake; avoid aeration that can release irritant fumes.
- The sugar helps the bees accept and spread the solution through the hive.
- Wear gloves and eye protection while mixing and handling the final mix.
- Use the solution within a short number of days for best efficacy and discard leftovers safely.
| Ingredient | Amount | Note |
|---|---|---|
| Oxalic acid | 8.75 g | Measure precisely |
| Hot water | 6 fl oz | Use to dissolve crystals |
| Sugar | 3/4 cup | Encourages consumption |
Proper preparation is the first step to a successful single-application approach, especially when the colony is broodless in winter. Keep safety front of mind to protect your hive and honey stores.
Executing the Dribble Application Method
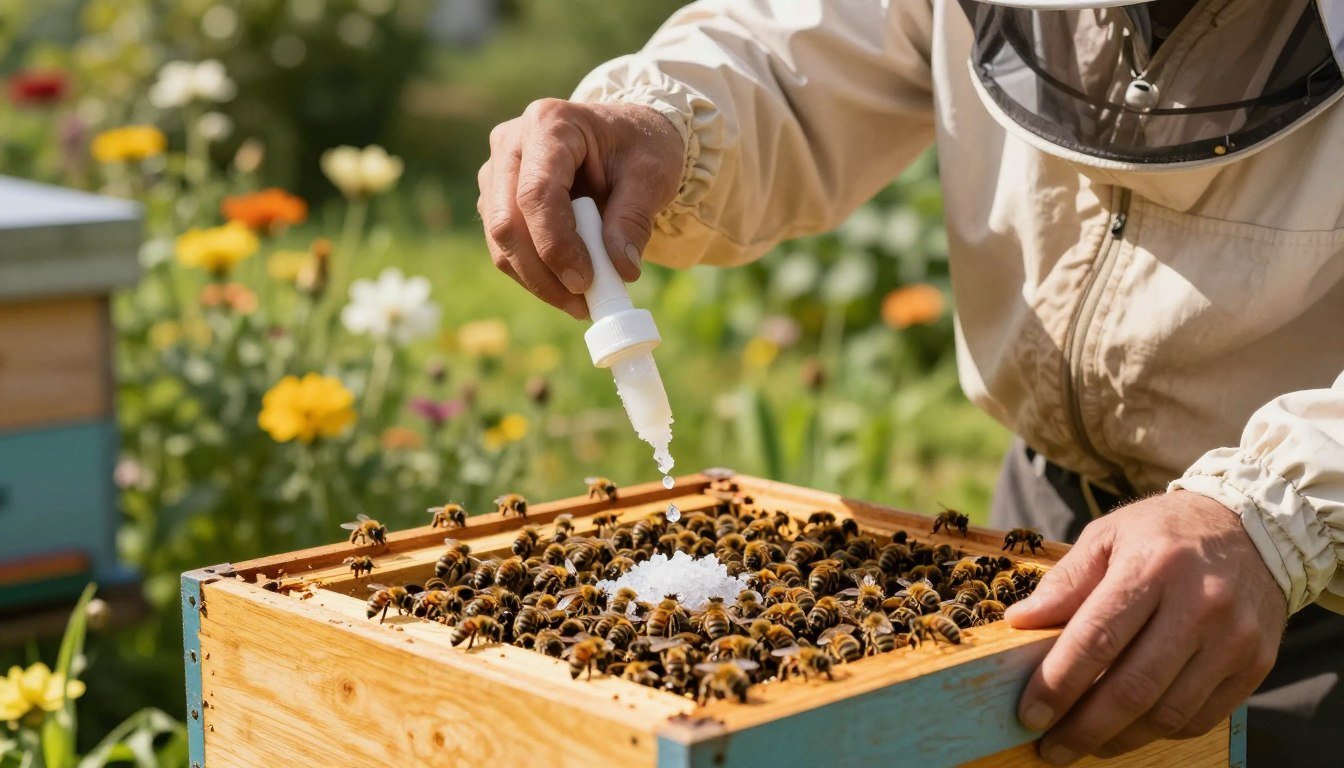
A careful dribble application puts the solution where it does the most good: directly onto clustered worker bees between frames. Use a 50ml syringe and steady hands to deliver measured doses.
Dose precisely: apply 5ml per frame gap. Do not exceed the recommended amount; over‑dosing risks harm to the hive and the handler. Focus on the frames where the cluster is densest.
Wear full protective gear and work quickly to limit hive disturbance. Avoid opening the colony when temperatures are too low; cold stress can harm the cluster.

“Apply small, direct doses and monitor the colony in the following days to confirm a decline in mites.”
- Use the syringe to dribble the solution along the bee cluster, not on comb centers.
- Keep records of the date and number of gaps treated; repeat only if monitoring shows need after several days.
- This method is simple, low-cost, and effective when brood is minimal and varroa are mostly phoretic.
After treatment, check mite drop and colony behavior over the next 7–10 days. If you want extra tips on technique, see dribble tips.
Overview of the Vaporization Technique
A controlled vapor application treats the whole hive while keeping the colony intact and calm. Vaporization heats a powdered reagent to about 157 degrees C so it sublimes into a gas that moves through the comb and cluster. This lets you reach mites that hide in capped brood without opening the boxes.
Many beekeepers prefer this method over the dribble approach because it causes less stress and works in colder weather. Seal entrances during the process so the vapor fills the space and distributes evenly.
- Wear a respirator—fumes can harm lungs.
- Follow your vaporizer manual to hit the correct temperature for sublimation.
- Use during winter when brood is low to maximize impact on mites.
“Vaporization offers fast, uniform coverage with minimal disturbance to the cluster.”
For step-by-step equipment notes and safety details see the oxalic acid vaporization guide. Apply this method as part of a wider mite-management plan and monitor drop counts over the following days.
Managing Equipment for Vaporization
Reliable gear and careful setup are the backbone of an effective sublimation run. Choose a vaporizer known for consistent heating such as Sublimox or ProVap. Confirm the unit reaches the required temperature and maintains it for the full cycle.
Vaporizer Selection
Pick durability and repeatable performance. Look for a model with good user reviews and a solid warranty. Check cords, switches, and seals before each use. Clean equipment after every session to avoid residue buildup that reduces efficiency.
Proper Heating Procedures
Place the wand on the bottom board so gas moves up through frames and cluster. Allow all crystals to fully sublimate before removing the device. Waiting the full cycle avoids partial dispersal and uneven coverage.
- Ensure power supply can run the unit for the needed days of work.
- Stand upwind and wear a respirator even when winds seem calm.
- Inspect gear for wear and replace damaged parts to protect hive and honey.
“Good equipment care makes vaporization faster and more effective, protecting both colony health and your investment.”
Introduction to Extended Release Oxalic Acid
Extended-release strips represent a major step forward in varroa control. VarroxSan, registered in 2025, delivers a steady dose over 42 days to span two brood cycles.
This product can be used while honey supers are on, giving beekeepers flexibility in spring and summer. The slow-release strips work when brood is present and reduce spikes in mite population without frequent hive openings.
Research indicates long-duration delivery keeps mite levels low, though it is not a full substitute for a fall knockdown. Follow label instructions to protect the queen and developing brood.
- Continuous coverage: 42 days across brood periods.
- Super-friendly: usable with honey supers in place.
- Gentle dosing: steady release protects colony health.
| Feature | Benefit | Notes |
|---|---|---|
| Duration (days) | 42 | Spans two brood cycles |
| Use with supers | Yes | Flexible spring/summer use |
| Target | Varroa mites | Reduces buildup; monitor counts |
Integrate strips into a year-round management plan and combine with periodic checks. For deeper context on brood timing and larval patterns, read larval feeding cycles.
“Slow-release options change how we manage mite pressure during the season.”
Preparing Extended Release Matrices
Selecting the right carrier starts with food-grade, biodegradable materials such as Swedish sponges or untreated chipboard. These hold the glycerin mix and break down safely in the hive without leaving plastics or residues that could taint honey.
Mix and heat carefully. Use a stainless steel pan on an induction plate and heat the 1:1 oxalic acid to glycerin solution to 160°F until fully dissolved. Wear gloves, eye protection, and a respirator during this step.
Soak each matrix and turn it while it absorbs so distribution is even across the pad. Allow the pieces to cool and recrystallize; cooled pads handle better during placement between frames.
Storage and handling: keep finished matrices in a sealed container to block moisture. Properly prepared pads release a steady dose over many days and protect the colony through brood cycles with minimal disturbance.
“High-quality, well-made matrices are the foundation of an effective extended release product.”
Best Practices for Applying Extended Release Strips
Positioning strips inside the cluster ensures steady exposure as bees walk over treated surfaces.
Place strips by hanging them between brood frames where worker traffic is highest. Make sure they do not reach the hive bottom so the queen can move freely.
Leave the strips in place for 60–75 days to cover the full brood period and reach mites as they cycle through brood and phoretic phases.
Wear waterproof gloves when handling strips. Concentrated product on the pads can irritate skin, so avoid direct contact.
Spot‑check pads every few weeks. Confirm they remain moist and active; if a strip dries out it loses efficacy and should be replaced.
After the set period, remove spent strips and dispose of them according to local rules. Use this method as part of a rotation plan to reduce resistance and protect colony health.
“Proper placement and regular checks are the keys to consistent control over long periods.”
| Action | Why | Notes |
|---|---|---|
| Hang between brood frames | Maximizes worker contact | Keep clear of bottom to allow queen movement |
| Leave 60–75 days | Spans brood cycles to reach hidden mites | Monitor every 10–14 days |
| Wear gloves | Protect skin from concentrated pads | Waterproof, chemical‑resistant gloves recommended |
| Remove and dispose | Prevent residue buildup | Follow local disposal regulations |
Avoiding Mite Resistance Through Rotation
A planned rotation schedule prevents mites from adapting to a single control method. Rotate your oxalic use with products that have different modes of action, such as formic or thymol, to break pest adaptation cycles.
Research shows that relying on one approach leads to reduced efficacy over time. Change products across the year and include a winter knockdown when brood is low.
Document every application and monitor mite counts before and after. Track dates, the number of days a product remains active, and whether strips or a liquid solution were used.
Practical steps:
- Plan treatments around queen cycles and capped brood periods.
- Alternate modes of action every season to protect colony health.
- Record outcomes and switch tactics if you see declining control.
“A diverse management plan is the best way to keep mite levels below damage thresholds and preserve efficacy.”
For complementary non-chemical strategies and integrated options, consult this guide on natural pest control.
Regulatory Considerations and Label Compliance
Legal frameworks determine when and how you may deploy products that target varroa. Label compliance is mandatory. Follow the registered product label exactly and keep records of every application.
FIFRA Section 2(ee) allows limited deviations in pesticide use, but it does not override label prohibitions. If a label disallows a method, you cannot apply that method even with a 2(ee) claim.
Be a responsible beekeeper and verify local rules before using any chemicals or an oxalic solution. Contact your state lead agency or cooperative extension to get current information.
“Label compliance protects your hive, consumers, and the market for your honey.”
Practical steps:
- Read and follow the product label every time.
- Verify legal allowances with your state department of agriculture.
- Never use unregistered substances or risky DIY mixes that may adulterate honey.
| Area | Why it matters | Action |
|---|---|---|
| Label directions | Legal and safety baseline | Follow precisely; log dates |
| State guidance | Local restrictions vary | Call your extension office |
| Product choice | Residue and market risk | Choose registered items; avoid DIY |
Conclusion
A consistent, year-long plan is the backbone of healthy hives and steady honey yields. Use timing, safe handling, and clear records when applying an oxalic acid treatment so brood and winter stores stay protected. A correct solution dose and careful technique make a big difference.
Master both dribble and vapor methods, and consider extended-release strips when seasonal needs require steady control. Monitor mite counts after each solution run and adjust approaches as needed to keep levels low.
Prioritize safety: wear protective gear, follow label steps, and rotate treatments to reduce resistance. With careful work and attention, your commitment will protect the colony and support productive seasons ahead.
FAQ
What is the purpose of oxalic acid when used in hives?
It targets Varroa destructor mites that infest adult bees and brood cells. Applied correctly, it lowers mite counts quickly and helps protect colony health during low brood periods when mites are most exposed on adults.
When is the optimal time to apply this treatment?
The best window is during broodless periods or when capped brood is minimal, typically late fall or midwinter in temperate regions. Timing aligns with mite biology so more parasites are on adult bees and therefore vulnerable.
Can I use this method when honey supers are on the hive?
Most labels advise against treating hives with active honey supers in place. Avoid contamination of harvestable honey by following product instructions and removing supers before application unless the product label explicitly permits it.
Does the method work if capped brood is present?
Efficacy drops when significant capped brood exists because mites inside sealed cells are protected. Beekeepers often pair this control with brood breaks or calendar rotations to reach mites emerging later.
What are the main application methods and how do they differ?
Two common methods are dribble (liquid applied between frames) and vaporization (heating to produce a gas). Dribble delivers a solution directly to bees; vaporization distributes vapor throughout the cluster. Vapor treats more uniformly but requires specific equipment.
How do I prepare the dribble solution safely?
Use precise measurements and clean sugar syrup or glycerin as the carrier, following the product label. Mix in a ventilated area, wear protective gloves and eye protection, and store only the amount needed for immediate use to prevent degradation.
What equipment is needed for vaporization and how do I maintain it?
Use a purpose-built vaporizer and compatible power source. Clean residue after each use per manufacturer guidance, check heating elements for wear, and inspect seals and cords. Proper maintenance ensures consistent temperatures and reduces risk of malfunction.
What personal protective equipment should I use during application?
Wear a respirator rated for acid vapors, chemical-resistant gloves, goggles or a full face shield, and a protective suit. Work upwind and keep bystanders, especially children and pets, away until the hive cools or vapors dissipate.
Are there environmental or toxicity concerns I should know about?
Yes. The compound can harm aquatic life and is corrosive to skin and mucous membranes. Follow disposal rules, avoid spills, and comply with label restrictions to reduce environmental impact and human exposure.
How often should treatments be repeated during the year?
Frequency depends on mite pressure, season, and presence of brood. Common approaches include a single winter application during broodless periods and targeted follow-ups based on monitoring. Rotate control strategies to limit resistance.
Can mites develop resistance to this control method?
Resistance risk exists with any single-mode agent. To reduce selection pressure, integrate mechanical, cultural, and chemical options, rotate products with different modes of action, and use threshold-based treatments informed by monitoring.
What are extended-release matrices and when are they used?
Extended-release matrices deliver low, steady doses over weeks. Beekeepers use strips or biodegradable carriers to maintain longer-term control during seasons when repeated dosing is impractical. Choose materials that comply with labels and degrade safely.
How should I apply extended-release strips in a colony?
Place strips between frames or along the cluster path as recommended on the product label. Space them evenly, avoid contact with brood where possible, and remove them after the approved exposure period to prevent residue buildup.
Are there specific regulatory or label compliance issues to follow?
Always follow federal and state pesticide regulations and the product label — it’s the law. Labels specify dosage, allowable hive placement, pre-harvest intervals, and disposal methods. Noncompliance risks legal penalties and contamination of honey.
How do I monitor mite levels before and after applying control?
Use sugar roll, alcohol wash, or sticky board counts to estimate infestation. Record results before treatment and at intervals after application to gauge effectiveness. Maintain records to inform future timing and method choices.
Can I use this method during summer or peak nectar flows?
It’s less effective during heavy brood periods and often restricted when honey supers are present. During peak nectar flows, prioritize noncontaminating integrated pest management tactics and careful monitoring instead of routine application.
What precautions should I take if my colony shows signs of queen loss after application?
Evaluate for queenright status, brood pattern, and behaviors immediately. Avoid additional chemical interventions until you confirm the queen situation. If needed, requeen with a healthy, mated queen from a reputable supplier to restore colony dynamics.
Where can I find up-to-date research and product guidance?
Consult extension services such as those from university entomology departments, the Apiary Inspectors of America, and product labels from manufacturers like Mann Lake or Brushy Mountain for current recommendations and approved products.