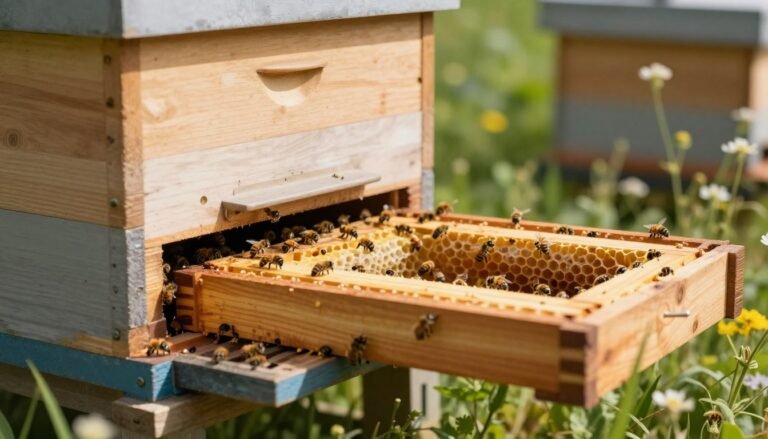
Setting a stable base matters when you bring a starter colony into your garden. Winter heaving and thawing can tilt a platform and harm your bees. Charlotte Ekker Wiggins warns that soil shifts may create a leaning tower of Pisa effect for small apiary platforms.
Use a small level in your beekeeping basket. This simple tool helps you check orientation and prevent water pooling inside the colony box. A steady base protects brood, supports honey production, and keeps entrances clear during storms.
When you place a nuc, the platform’s stability is the primary foundation for long-term health. Professional keepers make sure stands stay relatively flat across seasons. Regular checks and quick adjustments save time and protect your investment.
Key Takeaways
- Ensure the platform is stable before introducing a nuc.
- Carry a small level in your beekeeping kit for quick checks.
- Prevent water pooling by keeping the base even.
- Soil movement in winter can tilt stands; inspect often.
- A steady base supports healthy brood and honey flow.
The Importance of a Stable Apiary Foundation
A steady base keeps colonies dry and helps bees thrive through wet seasons. One simple step—raising boxes off damp soil—prevents rot and keeps wooden frames sound.
Preventing moisture buildup
Keeping a nuc off wet ground stops water from wicking into wood. That reduces decay and lowers pest pressure. A secure hive stand also prevents water pooling behind the box during heavy rain.
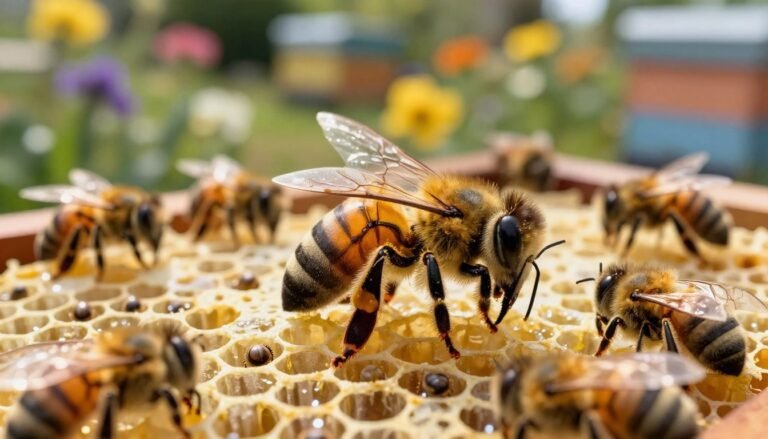
Protecting bee health
Elevation keeps the entrance clear of vegetation so foragers can fly freely. It also creates a comfortable working height for beekeepers and cuts the risk of back strain and dirty knees during inspections.
- Elevated platforms reduce moisture and rot.
- Clear entrances help bees forage efficiently.
- Stable bases lower disease and pest risks tied to wet ground.
| Issue | Benefit of Elevation | Practical Result |
|---|---|---|
| Moisture | Stops wood decay | Longer-lasting boxes |
| Blocked entrance | Reduces vegetation interference | Better foraging activity |
| Working strain | Improves inspection height | Safer routines for beekeepers |
| Uneven ground | Keeps nuc upright | Stable brood development |
For options that cut noise and vibration, consider noise-reducing hive stands that also offer solid elevation and longer service life.
How to Level a Hive Stand for a New Nuc
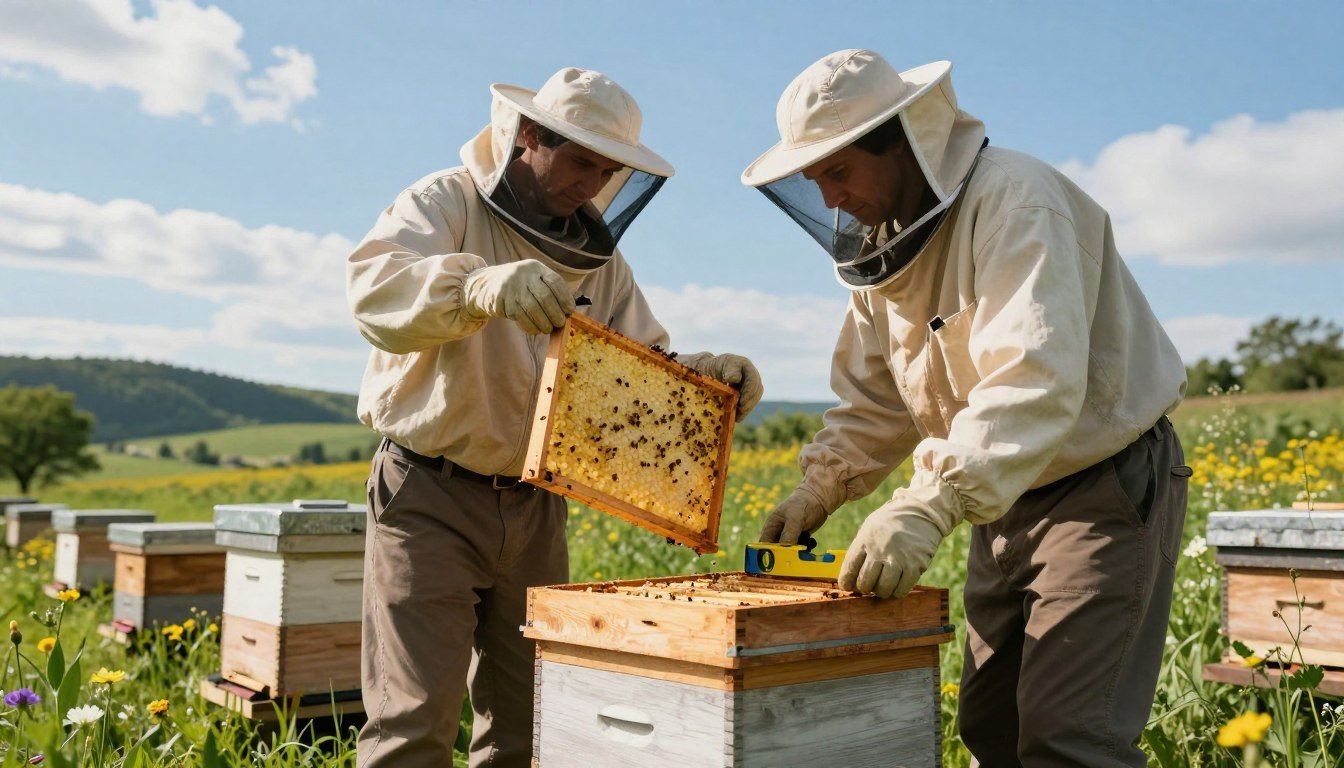
A misaligned platform can warp comb, making inspections harder and risking brood health. Start by placing the stand on firm ground and check with a small level. Make sure the surface does not rock when you press at each corner.
Prepare equipment — wear protective gloves and have a smoker ready. Use a reliable hive tool to shift posts or shim wood pieces so frames hang vertically. Aim for straight comb and an open entrance.
After moving the box, give the colony at least 15 minutes to settle before transferring frames. Avoid opening any colony on cooler days; keep inspections when temps exceed 60°F.

“Small adjustments now save time and protect the queen and brood later.”
- Confirm the base is firm; prevent tilting during wind or thaw.
- Use shims, posts, or compacted gravel for long-term support.
- Transfer frames with steady hands and a proper tool to reduce stress on bees.
| Step | Action | Benefit |
|---|---|---|
| Site check | Use level and firm ground | Vertical comb, easier inspections |
| Adjust | Shim posts or reset wood | Stable box through seasons |
| Wait | Let nuc settle 15 minutes | Less crowding, calmer bees |
| Protect | Use smoker and gloves | Safer frame transfers |
For step-by-step transfer guidance, see this short guide on nuc installation. If you prefer a simple support setup, review minimalist options at minimalist beekeeping setups.
Selecting the Right Location for Your Beehive
Choose a spot that bathes the colony in morning sun while sheltering it from strong gusts. Morning light helps bees warm comb and start foraging earlier. That boost supports brood development and early pollen collection.
Sunlight matters. Sit the hive where it gets several hours of sun each day. Sun helps bees regulate temperature and reduces pest pressure, including small hive beetles and varroa mites.
Wind protection is critical. Natural barriers like hedges, fence lines, or a row of shrubs stop strong gusts from rocking the stand. A sheltered site keeps the box steady and protects the queen and brood during storms.
- Place the stand on high, well-drained ground; avoid hollows where water pools.
- Keep the entrance pointed toward open flight paths so foragers find food quickly.
- Choose an accessible location for routine inspections of frames and brood.
For more on choosing an ideal spot, consult this concise guide to beehive location. A well-chosen site helps a nuc grow into a strong, productive colony over time.
Evaluating Different Types of Hive Stands
Different platforms offer trade-offs between cost, durability, and adjustability for uneven terrain. Choose a solution that matches your site, budget, and long-term plans for colonies.
Pallets and crates give a cheap, quick base. Pallets create a flat top but often need wedging with stones or scrap wood to reach a true level. Untreated wood can rot, so expect replacements over time.
Milk crates work for temporary bait boxes, yet they lack the strength for full boxes and heavy frames during inspections.

Pallets and Crates
Pallets suit low-cost setups but demand frequent checks. Crates are fine for short-term baiting, not long-term colonies.
Scaffold Jack Designs
Scaffold jacks are ideal on uneven ground. Typical jacks run about 600 mm and handle heavy loads—often rated near 4 tonnes. Each leg adjusts independently via an infinitely adjustable nut, so you can achieve a perfect level even on slopes.
Commercial Options
Commercial metal stands often use galvanized steel and adjustable legs. They offer best-in-class durability and enough space for frames during inspections. That extra room makes work with the queen and brood less awkward and reduces time spent shifting equipment.
| Option | Strength | Best Use |
|---|---|---|
| Pallet | Moderate | Low-cost, flat ground |
| Scaffold jack | Very high | Uneven terrain, long-term |
| Commercial metal | High (galvanized steel) | Professional setups, easy inspections |
Tip: When evaluating a platform, look for material strength, corrosion resistance, and enough space at the top to rest a frame during visits. For more design ideas, review durable beehive stands at beehive stands.
Essential Tools for Your Beekeeping Basket
A well-equipped basket keeps inspections short and gives you what you need when problems appear.
Must-have tools:
- Small level — this simple tool ensures your hive stand stays horizontal before you open any box. It helps keep comb straight and brood comfortable.
- Sturdy hive tool — needed for prying frames, separating boxes, and adjusting fittings made of steel or wood.
- Protective gear — a quality bee suit, veil, and gloves reduce sting risk and let you work calmly around the queen and frames.
- Smoker — use brief, gentle puffs to calm bees while you make stand adjustments or move brood frames.
Professional beekeepers organize their equipment so the level and hive tool are always easy to reach. That saves time and reduces stress for bees and keeper.
“Good tools make routine checks faster and safer for bees and keeper.”
Quick checklist:
- Level, tool, smoker, gloves, veil, spare frame rests.
- Keep items clean and separate when handling sick colonies — see separate tools for sick and healthy.
- If you are buying first gear, start with an entry set that fits your budget and grows with your apiary — consider this guide on buying your first hive.
Preparing the Ground for Maximum Stability
A well-prepared base prevents sinking and preserves comb alignment as seasons change.
Firm surface first. Compact soil or add crushed stone under the posts so the box does not settle over time. Even concrete mats can shift; Charlotte Ekker Wiggins notes periodic re-checks are needed after frost heave.
Where ground is uneven, place bricks or thin shims beneath concrete blocks. Small adjustments at the side of each support stop listing and keep frames hanging straight.

Choose durable materials. Use galvanized steel or treated wood for long service life and less maintenance. That reduces the chance of rot or corrosion that invites pests and slows inspections.
Inspect often. Check foundations weekly after heavy rain and after thawing. If the nuc shows tilt, act quickly so brood, queen, and comb remain secure.
For a robust design and detailed options, review the ultimate hive stand guide used by many beekeepers.
Managing Environmental Factors and Soil Movement
Frost heave can lift one side of a platform overnight and upset months of careful setup. Seasonal freeze and thaw change ground levels and may list boxes even on hard pads.
Watch the ground after heavy rain and thaw. Inspect posts and supports each spring and after storms. Small movement stresses comb, queen, and brood.
Temporary shims buy time when supports shift, but replace them once the ground settles. Adjustable scaffold jacks offer an easy, long-term fix without digging or moving the entire unit.
“Regular checks after winter and heavy rain prevent slow tilt and protect frames and honey stores.”
- Monitor sites after temperature swings and heavy water events.
- Use scaffold jacks or steel posts where ground moves often.
- Swap temporary shims for durable supports after thaw.
Professional keepers re-evaluate stability each season. For technical notes on maintaining a specific tilt, see this short FAQ on tilt maintenance, and practical installation tips are here: beehive installation.
Monitoring Your Hive for Long-Term Success
Regular, short inspections keep small colonies healthy and reveal problems before they grow.
Inspect every 7–10 days. This schedule helps you track queen quality, brood patterns, and the general behavior of the bees. Look at two or three frames each visit and count empty cells, brood, and stores.
Check for queen cells weekly. That is the chief sign a colony may swarm weeks in advance. Remove or manage cells if you do not want colonies to split.

“Short, consistent checks save time and protect brood and comb.”
- Watch the hive stand and make sure it stays level as the box gains weight.
- Record each inspection: date, frame notes, queen marks, and any adjustments to posts or equipment.
- Offer sugar syrup or pollen patties when stores look low; this helps a new nuc build strength fast.
| Check | When | Why |
|---|---|---|
| Queen presence | Weekly | Ensures steady laying and brood growth |
| Queen cells | Weekly | Early swarm detection and control |
| Frame inspection | Every visit | Assess comb, brood, and food stores |
| Stand level | After heavy rain/week | Prevents tilt and comb stress |
Over time your experience will make each inspection faster and more effective. Good records keep your apiary productive and reduce surprises.
Conclusion
A stable base protects brood, keeps frames straight, and cuts inspection time.
Prioritize a solid foundation before you bring any nuc on site. Regular checks and small adjustments prevent tilt, protect the queen, and preserve comb quality.
Routine inspections of your hives let you monitor brood, frames, and box condition. Use proper tools and prepared sites so work stays quick and safe, and bees remain calm.
Invest time in good equipment, site prep, and records. These steps pay off with stronger colonies, higher honey yields, and cleaner, professional beekeeping practices.
Learn about sourcing healthy colonies by visiting this guide on buying packaged bees and nucs.
FAQ
Why is a stable base important for a new nuc?
A solid base prevents tilt that can cause frames to shift, comb to sag, and honey or brood to spill. Stability reduces moisture buildup inside the box and lowers stress on the queen and workers during inspections and bad weather.
What signs show the stand needs adjustment?
Look for slanted frames, broken comb edges, trapped bees at the entrance, or uneven gaps under the bottom board. You may also notice bees clustering on one side or difficulty closing the lid flush.
Which tools should I keep in my beekeeping basket for leveling?
Carry a small spirit level, a rubber mallet, shims (wood or composite), a post hole digger or auger, and a tape measure. Gloves, a hive tool, and a short plank help with safe, quick adjustments.
Can I use concrete blocks or bricks under the legs?
Yes. Concrete blocks or bricks give durable support and resist rot and pests. Make sure they sit on firm ground or a compacted gravel pad to avoid sinking or tilting over time.
How do I handle sloped or uneven ground?
Create a level pad by digging a shallow area and filling with compacted gravel or crushed rock. Use a plank and level to set the stand, then add shims or pack soil around posts to lock it in place.
What about seasonal soil heaving and freeze-thaw cycles?
Use deep-set posts or concrete piers to reduce movement. Metal stands with adjustable legs or commercial jack-style bases let you re-level quickly after frost or heavy rain.
Are adjustable hive stands worth the cost?
Adjustable stands save time and protect colonies long term. They let you tune height for inspections, improve air flow, and correct tilt without moving heavy equipment—useful for uneven yards.
How level must the floor be for frames and brood health?
Aim for near level—within a few degrees. Too much tilt causes frames to rub, brood to be unevenly raised, and comb to drip honey, which stresses the colony and complicates inspections.
Should I worry about entrance orientation when placing the stand?
Yes. Face the entrance away from prevailing winds and toward morning sun when possible. This reduces cold drafts in spring, helps foraging, and keeps moisture down at the opening.
Can pallets or crates serve as long-term stands?
Pallets and crates work short term and for low-budget setups, but they rot faster and attract pests. Treat or elevate them on gravel pads if you expect multi-year use.
How often should I inspect and re-level stands?
Check stands at every monthly inspection early in the season, and after heavy storms or freeze-thaw events. Re-level immediately if you spot tilted boxes, loose entrances, or shifting posts.
Will raising the hive off the ground help bee health?
Yes. Elevation improves air circulation, lowers moisture buildup, and reduces pest access. It also makes inspections easier and reduces back strain during maintenance.
What’s the quickest field fix for a wobbly stand during an inspection?
Slide thin, weatherproof shims (vinyl or wood) under low corners, or prop one leg on a flat rock or brick. Avoid temporary blocks that compress; use firm material to hold the correction.
How do I protect wooden stands from rot and pests?
Use rot-resistant lumber like cedar or pressure-treated wood for legs and tops. Paint or apply a non-toxic sealant where contact with hive boxes occurs, and keep the area well-drained.
Can I place stands directly on grass or soil?
You can, but expect sinking and movement. A compacted gravel pad or concrete blocks under each foot gives much better stability and longevity than bare soil.
Do commercial stands like scaffold jack designs require maintenance?
Yes. Grease moving parts, check welds and bolts, and confirm feet are secure after winters. Proper upkeep prevents sudden failures and keeps adjustments smooth.
Will leveling affect inspections and frame removal?
Proper leveling makes inspections safer and simpler. Frames sit squarely, comb is less likely to stick, and opening boxes is easier. This reduces inspection time and bee disturbance.
What about wind and sun when choosing the site?
Choose a site with morning sun and afternoon shade if possible, and a windbreak for prevailing winds. This balance helps brood development, reduces heat stress, and limits moisture problems.
How do I secure stands against curious animals or vandalism?
Use heavy-footed stands, anchor posts into the ground, or bolt stands to concrete pads. For high-risk areas, consider chain-link enclosures or motion-activated lights as deterrents.