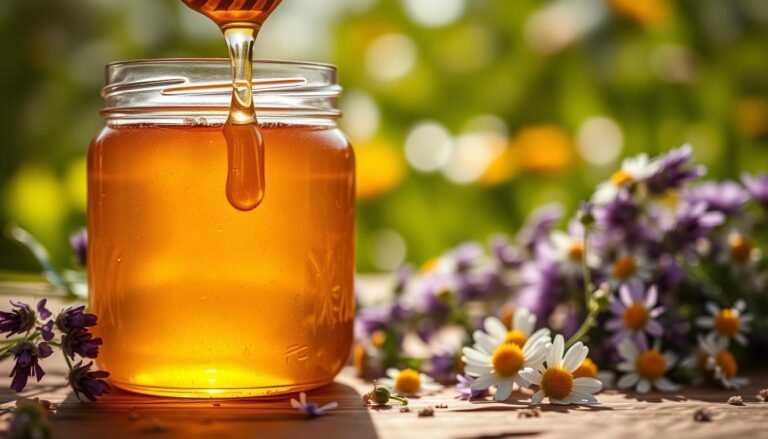
Start small and grow with purpose. A clear, step-by-step path helps a new apiary match growth to skills and gear. This guide gives practical signals for when a hive needs space and when to act. It keeps beekeeping focused on steady, sustainable results.
Seasonal yields vary. Honey flows can refill frames fast in a good year and stall in poor years. Plan budgets and inspections around flight patterns and forage availability to avoid surprise shortages.
Trust bee biology while guiding expansion. Split hives before swarming, add brood or supers in stages, and watch queen performance and brood patterns. Count the hives you can manage and set clear triggers—population, space, and brood—so growth stays controlled and productive.
Key Takeaways
- Match growth plans to current skills and equipment.
- Watch brood, queen status, and flight before adding boxes or splits.
- Expect variable honey yields; budget for lean seasons.
- Double or triple hives only when forage and time allow.
- Prioritize bee welfare and gentle handling during every change.
What “safe expansion” means for beekeepers today
A steady, skill-matched approach protects bee health during growth. Safe expansion balances bee welfare, colony stability, and your capacity to manage more hives without cutting corners.
Grow in step with inspections. A common rule of thumb is to double or triple colonies per season only if you can keep inspection cadence and respond to stressors. After a swarm, parent hives can lose half their population and may become queenless. Verify each hive is queen-right before major changes.
“Proactive management—adding space, preventing congestion, and keeping the queen laying—beats reacting after problems appear.”
Practical measures include choosing methods that fit your skill level, building checklists for gear and queens, and timing growth for favorable weather and nectar flows. Consider community impact: more bees need enough forage and water.
For a concise primer on prudent growth, see grow your honeybee population.
Assess readiness before you add colonies
A careful read of brood patterns and frames tells whether a hive is ready for growth. Inspect for eggs, larvae, and capped brood across several frames. Solid, contiguous brood with few missed cells suggests a strong queen and stable development.

Look for multiple signals at once. Fresh eggs, abundant larvae, capped brood, drones, and visible honey pollen reserves together indicate a colony can support a split. High worker density across the brood nest reduces stress during moves.
Inspection cadence and healthy patterns
Maintain a 7–10 day inspection rhythm during buildup. That cadence helps you spot crowding, queen decline, or patchy brood early. Use each day in the cycle to confirm eggs less than three days old and tight brood patterns before shifting frames.
Clarify your goal before action
Decide if you want more honey, more colonies, or better pollination. The method you choose—nuc, walkaway split, or adding frames—should match that goal and your equipment. For a practical checklist and further planning, see expansion tips.
“Confirm equipment, document brood stages, and only move frames when you can work quickly to avoid chilling brood.”
Plan for space, site, and resources
A clear site plan gives colonies the best chance to thrive. Choose locations that provide 6–8 hours of direct sun and stable ambient temperature to warm brood nests and speed morning flight. Morning warmth helps workers leave earlier and collect nectar and pollen.
Sunlight and temperature
Place hives where they receive steady sun through the morning and into midday. This boosts brood rearing and helps the queen maintain steady laying patterns.
Balance sun with afternoon shade in hot climates to prevent heat stress and conserve room for added boxes.
Wind protection and weather
Use natural windbreaks like trees or shrubs to cut gusts and lower stress on boxes. Orient entrances away from prevailing winds.
Consider local weather patterns when choosing sites so inspections remain safe and predictable.
Forage and water sources
Validate season-long nectar and pollen diversity within foraging range. Reliable forage reduces pressure on colonies during lean periods.
Provide a clean water source near the hive with landing spots and change the water often to prevent contamination.
| Factor | Ideal Condition | Why it matters |
|---|---|---|
| Sunlight | 6–8 hours direct | Speeds morning flight and brood temperature |
| Wind protection | Natural windbreaks nearby | Reduces topple risk and stress on bees |
| Water source | Clean pond or shallow dish | Hydration and cooling; prevents robbing |
| Forage diversity | Season-long nectar & pollen mix | Supports brood cycles and honey stores |
Tip: Build an apiary map that notes sun, nearest water, and room for extra hives—this simplifies inspections and training.
Proven ways to add room and bees
Simple, proven moves—nucs, splits, and timely supers—let you scale with confidence.
Expanding with nucleus colonies in spring
Install nucleus colonies in spring to add a ready-made unit with a mated queen, workers, and brood. A nuc brings instant workforce and a laying queen that speeds buildup with minimal disruption.
Tip: For a practical guide, consider an article on how to install nucleus colonies.
Performing a walkaway split
Find and exclude the original queen first. Move 2–3 frames of brood and 2–3 frames of honey or pollen into a new hive. Add empty frames for room, then confirm eggs or a capped queen cell. If none exist, supply a new queen or allow emergency rearing from young larvae.
Light feeding and an entrance reducer help the new colony hold stores and avoid robbing during the first fragile days.
Adding supers and managing frames
Add supers before hives feel crowded. Vertical room lets workers process nectar and reduces the urge to bees swarm.
Open the brood nest and cycle drawn comb. Keep frames balanced so the queen has space to lay without bottlenecks.
Timing with nectar flows and fair weather
Schedule splits and installations during strong nectar flows and calm weather days. Provide nearby water and monitor populations for several days as workers redistribute.
Record what you moved: frame contents, brood stage, and build rate. That record refines the way you perform future splits.
| Method | Main benefit | Quick steps |
|---|---|---|
| Nucleus | Fast growth with mated queen | Install in spring; feed lightly; protect entrance |
| Walkaway split | Creates new colony from strong hive | Move 2–3 brood + 2–3 resource frames; ensure eggs or queen cell |
| Supers & frames | Prevents crowding; increases honey stores | Add supers ahead of need; cycle drawn frames; monitor brood |
“Time additions for nectar flows, protect vulnerable units, and watch population distribution in the days after a split.”
How to expand an apiary safely with strong queen management
A reliable queen program is central to steady growth and calm hives. Good queen management keeps brood patterns tight and lowers the chance of bees swarm events.
When to requeen
When to requeen: performance, genetics, and 1-2 year cadence
Set a requeening cadence of 1–2 years to refresh genetics and sustain laying vigor. Watch for spotty brood, low egg counts, aggression, or drone-only laying as triggers for prompt replacement.
Introducing a new queen: caged release and pheromone acclimation
Introduce a new queen in a cage for several days so workers can accept her pheromones. Open the cage only after signs of calm and then check for steady eggs within about a week.
“A slow, supervised introduction beats quick swaps that can leave a hive queenless.”

Preventing swarms: space, brood management, and colony splits
Preventing bees swarm events means adding room, redistributing brood, and making timely splits before congestion peaks.
- Keep a small nucleus as a reserve source for quick requeening.
- Balance young workers and open brood in the receiving hive for better acceptance.
- Record queen lineage, install date, and performance for future decisions.
| Issue | Action | Outcome |
|---|---|---|
| Spotty brood | Requeen within days | Restores steady laying |
| Poor acceptance | Use backup caged queen or install a nuc | Prevents queenless decline |
| Congestion | Create split or add boxes | Reduces swarm pressure |
Coach each beekeeper on evaluating success: steady eggs, tight brood, and calm workers. For seasonal checklists, link your management notes with a seasonal beekeeping tasks plan.
Seasonal beekeeping playbook for growth
A clear seasonal routine keeps hives productive and prevents surprise problems. Use this playbook as a simple year-round guide that times inspections, nuc installs, and consolidation around forage and weather patterns.
Spring: inspections, nuc installation, swarm prevention
Start early in spring. Schedule regular inspections to verify fresh eggs and tight brood. Install nucs once queens are proven and add frames before congestion builds.
Prevent swarms: add space or perform preemptive splits during strong nectar flows.
Summer: peak populations, supering strategy, heat management
Workers peak in mid season. Add supers on time to capture honey and keep the brood nest open.
Manage heat with shade and ventilation. Watch daily traffic and adjust entrances during dearths to reduce robbing.
Autumn: consolidate boxes, secure honey stores, check brood
Reduce hive size to match cluster and conserve heat. Confirm honey stores and combine weak colonies when needed.
Replace or narrow equipment so the colony can thermoregulate through cold nights.
Winter: pause growth, protect entrances, sustain food reserves
Stop new installs and focus on protection. Fit entrance guards, check for pests, and provide emergency feed when stores look low.
Track time and resources each season to understand capacity next year.
| Season | Main focus | Key action |
|---|---|---|
| Spring | Build population | Inspections, install nucs, prevent swarms |
| Summer | Capture honey | Add supers, manage heat, monitor traffic |
| Autumn | Conserve stores | Consolidate boxes, check brood, combine weak units |
| Winter | Protect colony | Halt installs, guard entrances, maintain food |
For a regional spring checklist and a full seasonal calendar, consult these resources when planning dates and equipment needs.
Health and safety protocols that protect growing colonies
Protect hive health first; growth must follow clear disease checks. Regular monitoring and conservative treatment choices keep bees resilient while you add frames or supers.
Monitoring mites and diseases during expansion and before adding supers
Test for mites regularly during buildup and use approved products. Many mite treatments cannot be used with honey supers in place; remove honey boxes when the label requires it and follow regional guidance.
Conduct targeted inspections that focus on brood, queen performance, and visible disease. Inspect frames for unusual patterns before adding more boxes; expanding a compromised hive spreads risk across beehives.
Entrance reducers, robbing screens, and nucleus colony protection
New colonies are vulnerable. Fit entrance reducers and robbing screens on fresh splits and nucs. Light feeding and a nearby water source help them establish.
- Keep sanitation high on gear and gloves to avoid cross-contamination.
- Document health metrics and treatment dates for traceability and future management.
- Reassess colony strength after treatments before adding more bees or supers.
Good record-keeping and cautious inspections reduce spread, protect the queen’s laying environment, and guide safe decisions.
| Action | Why | Result |
|---|---|---|
| Regular mite tests | Avoid contaminated honey | Safer treatments |
| Entrance control | Prevent robbing | Stronger nucs |
| Sanitation & records | Trace treatments | Better management |
Scaling smart: equipment, inspections, and sustainable pace
Smart growth starts with clear limits on gear, time, and the number of hives you can care for. Set a realistic pace and size your plan around what you can inspect each day.
Right-sizing gear: hives, frames, supers, and room to grow
Right-size equipment before a growth day. Have spare boxes, frames, and extra supers on hand so installs run smoothly.
Standardize components across beehives to cut handling time and simplify transport.
Doubling or tripling per season as knowledge and resources allow
Many keepers double or triple their apiary in a year when knowledge, forage, and gear match goals. Choose brood boxes or supers based on whether you prioritize honey or colony count.
- Base your target number on realistic inspection capacity and available time.
- Schedule recurring inspections and track minutes per hive as a management metric.
- Keep entrance reducers, feeders, spare frames, and queen supplies ready for fast response.
“Scale only when equipment and inspection cadence keep bee health steady.”
| Focus | Action | Result |
|---|---|---|
| Equipment | Stock spare boxes and frames | Less downtime during installs |
| Inspection | Calendar recurring checks | Consistent care across hives |
| Scaling | Match number to time and forage | Healthy growth and steady honey |
Conclusion
End with a short playbook for timing moves, protecting new units, and tracking results.
Safe growth is a disciplined process: read brood, plan timing, and add frames before congestion stresses a hive. Use proven methods—spring nucs, balanced walkaway splits, and timely supering—to grow while preserving honey quality.
Keep each colony queen-right by tracking eggs and brood patterns. Pace growth to match your time and gear; act when season and forage support new colonies.
Protect vulnerable units with water, entrance controls, and light feeding after splits. Document every frame mix, acceptance timeline, and yield so future steps run smoother.
Invest in education and revisit site layout as hives scale. With steady practices centered on queen health, brood checks, and timing, you can grow confidently year after year.
FAQ
What does “safe expansion” mean for beekeepers today?
Safe expansion means adding colonies or space without compromising colony health, forage availability, or neighborhood impact. It balances queen quality, disease control, adequate nectar and pollen sources, clean water, and proper site conditions like sun and wind protection. Growth should follow inspections and clear goals such as honey production, pollination, or increasing stock for sale.
How do I assess readiness before adding colonies?
Look for strong brood patterns with eggs, larvae, and capped brood across most frames, ample worker numbers, and adequate stores. Follow a steady inspection cadence—every 7–14 days in spring—so you see consistent build-up. If frames show clustered brood, abundant nurse bees, and sufficient honey and pollen, the colony can usually handle a split or added box.
What inspection cadence is recommended and what healthy patterns look like?
Inspect every 7–14 days during active buildup, then monthly in stable times. Healthy patterns include solid brood coverage, few empty cells in the brood area, balanced proportions of nectar and pollen stores, and low disease or mite signs. Worker density should support brood care and foraging without overcrowding frames.
How should I plan for site, space, and resources before growing my yard?
Choose a site with 6–8 hours of morning sun, wind protection, and nearby forage diversity. Ensure reliable water and avoid pesticide drift. Space hive rows for ease of inspections and equipment handling. Calculate forage carrying capacity—enough nectar and pollen to support the projected number of colonies through peak season.
When is the best time to add nucleus colonies (nucs)?
Install nucs in spring at the start of major nectar flows and when daytime temperatures are reliably warm. This timing lets the nuc build worker populations and stores. Avoid installing on cold, rainy, or windy days. Match nuc numbers to available forage and your ability to monitor and support them.
What is a walkaway split and when should I use it?
A walkaway split divides a strong colony into two by moving brood, frames of honey and pollen, and nurse bees into a new hive and leaving a queen or allowing a new queen to emerge. Use it during strong spring buildup to reduce swarm pressure and increase colony count, but only when you can monitor for queen issues and disease.
How many supers and frames should I add to prevent crowding?
Add supers before space becomes tight—typically when the top brood box fills two-thirds with nectar or when bees start building burr comb. Standard practice is to add a shallow or medium super for honey flow. Maintain an organized frame rotation so brood, honey, and pollen stay balanced and queen laying space remains available.
How should queen management influence expansion plans?
Requeen based on performance and genetics every 1–2 years or when you see reduced brood, poor temperament, or disease susceptibility. Introduce new queens via caged release or mating nucs with time for pheromone acclimation. Strong queen lines reduce swarm tendencies and support better colony growth during expansion.
What steps prevent swarming during rapid growth?
Prevent swarms by giving room with extra boxes or splits, removing queen cells when appropriate, and ensuring good ventilation and forage. Regular brood inspections, timely splits, and requeening with less swarm-prone genetics all reduce swarm risk. Monitor for crowding signals like queen cups and heavy congestion at the entrance.
How does the season affect expansion tactics?
In spring focus on inspections, nuc installation, and swarm prevention. Summer is peak supering, worker management, and heat mitigation. Autumn requires consolidating boxes, ensuring stores, and confirming brood health. Stop adding colonies in winter—use that time for planning, equipment maintenance, and protecting entrances and food reserves.
What health protocols protect growing colonies during expansions?
Monitor varroa mite levels and treat before adding supers or combining colonies. Screen for diseases during inspections and isolate or requeen weak or infected stock. Use entrance reducers and robbing screens to curb robbing when adding hives. Maintain biosecurity: clean tools, dedicated equipment, and careful movement of frames.
How much should I scale each season for sustainable growth?
Scale based on your experience, time, and resources. Doubling or tripling colonies in a single season is possible for skilled beekeepers with adequate forage and equipment but risky for beginners. Add colonies at a steady pace—enough inspections, feeders, boxes, and workforce—to maintain low stress and healthy stores.
What gear changes when I grow my operation?
Right-size gear by adding extra hives, frames, supers, entrance reducers, and robbing screens. Invest in nuc boxes, queen cages, and additional extraction or storage equipment for honey. Ensure you have transport capability, safety gear, and storage for frames and supers so inspections remain efficient and colonies stay healthy.
How do water and forage diversity affect colony growth?
Clean water reduces stress and supports cooling and brood care. Forage diversity—trees, wildflowers, and crops—provides a steady mix of nectar and pollen that boosts immunity and brood rearing. If local forage is limited, supplement with sugar syrup and pollen patties during dearths, but aim to expand only when natural resources can sustain more bees.
When should I stop expanding because of weather or resources?
Pause adding colonies when nectar flows end, during prolonged bad weather, or when forage and water are scarce. Also avoid expansion before winter; late-season increases can leave colonies underprepared for cold. Ensure stores and brood patterns indicate resilience before growing numbers.