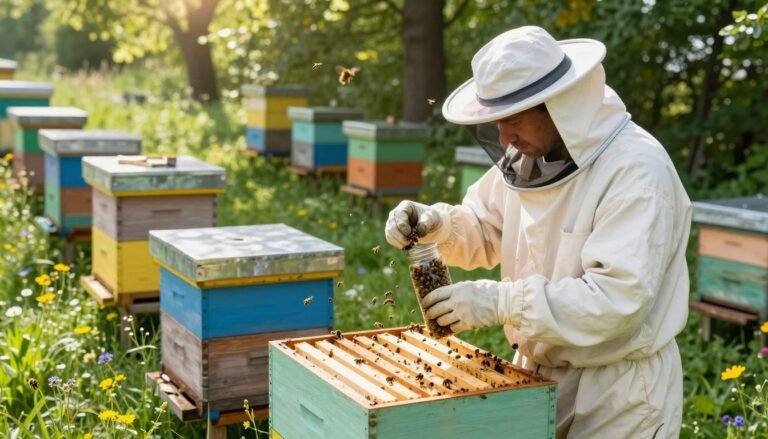
Kim Skyrm and Jennifer Lund bring decades of experience to help beekeepers protect colonies from the Varroa destructor mite. Their guidance blends inspection routines, seasonal timing, and practical steps that fit U.S. beekeeping operations.
This short guide outlines clear, research-backed actions you can apply now to maintain hive health and long-term colony survival. It stresses monitoring, timely responses, and habitat care that reduce stress on bees and improve outcomes.
Use mentor-driven practices and checklists, and consider group yard days to learn hands-on skills. For hands-on mentoring tips and checklists that pair well with these tactics, see effective beekeeper mentoring.
Key Takeaways
- Expert-backed methods: Follow tested inspection and response routines.
- Monitor counts and act on thresholds to protect colony health.
- Use seasonal checklists to schedule checks and treatments.
- Mentorship and group training improve consistency.
- Record results to track progress and overwintering success.
Understanding the Threat of Varroa Destructor
Hidden inside capped comb, a small mite quietly undermines colony health. That concealment makes early detection difficult. Yet understanding how the pest lives and spreads is the first step to protecting honey bees.
The Life Cycle of Varroa
The varroa destructor reproduces inside capped brood cells. A female mite enters a cell before it is sealed and lays eggs on developing brood.
Larvae hatch and mature alongside the bee pupa. When the adult bee emerges, new mites ride out on the adult bee and seek other cells.
Impact on Honey Bee Health
These mites feed on the fat bodies of adult bees, which weakens individuals and spreads viruses.
A rising mite population can reduce honey yields, weaken the queen, and lower winter survival of colonies.
- Hidden phases: Much of the pest’s life is inside cells, out of sight.
- Virus transmission: Mites act as vectors for deadly bee viruses.
- Rapid growth: High mite levels can overwhelm a colony in one season.
| Stage | Location | Colony Impact |
|---|---|---|
| Egg to deutonymph | Capped brood cells | Hidden reproduction; increases mite population |
| Adult female | On adult bee and comb | Feeds on fat bodies; spreads viruses |
| Dispersal | Between frames and colonies | Raises levels across hives; endangers winter survival |
Developing an Integrated Varroa Management Plan for One Apiary
Start by assigning a single, trained person to lead seasonal checks and keep clear records.
Routine monitoring should include sample counts from adult bees and brood, sticky boards, and targeted inspections of drone comb and sealed cells.

Use economic thresholds to decide when to act. Thresholds help avoid unnecessary treatments while keeping colony levels safe. The Tech Transfer Program and the Bee Health Assurance Team offer an adaptable IPM outline to guide decisions.
- Assign roles: one person schedules sampling and logs results.
- Sample often: track mite counts in adults and brood across colonies.
- Use the IPM pyramid: weigh colony stress, labor, and costs before choosing treatments.
For practical templates and methods that suit U.S. yards, review a detailed draft at crafting a varroa management guide and compare control options at mite control methods.
Establishing Unique Colony Identification
Give every hive a clear, unique ID so you can trace its history and spot trouble early.
Attach a durable tag to each colony and record its number at every inspection. This small step makes tracking a queen’s performance, brood patterns, and overall hive strength far easier.
Consistent labeling lets you map honey yields and identify which hives need extra attention after harsh weather or movement between yards.
“Accurate IDs turn scattered notes into usable data and speed decision-making during peak season.”
- Clear attribution: inspection data ties to the correct unit.
- Movement tracking: labels simplify shifts to a hospital yard or new site.
- Actionable history: compare seasons and decide when to split or feed.
| Record Item | Why it matters | Action |
|---|---|---|
| Queen status | Shows replacement needs and laying patterns | Note date of supersedure or requeening |
| Brood pattern | Indicates colony strength and disease signs | Mark frames with abnormal spots for follow-up |
| Honey yield | Tracks productivity over time | Log weights and compare by ID |
| Movement history | Helps trace stress and exposure events | Record transfers and temporary yards |
For practical field templates and note-taking tips, see field-note strategies. Clear IDs turn routine checks into a reliable database that supports better care of your colonies.
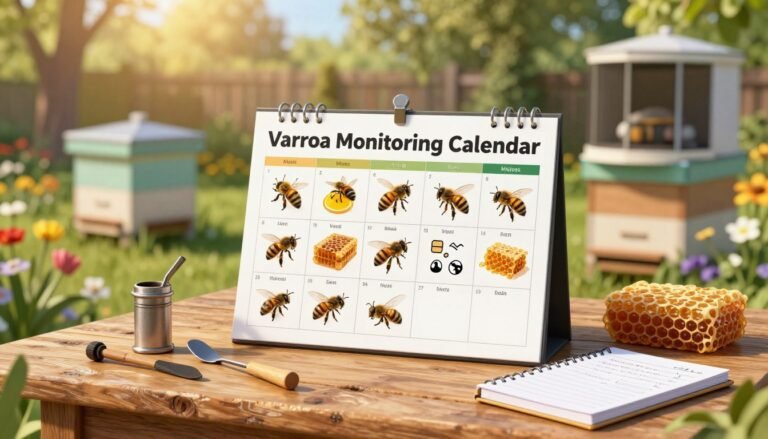
The Importance of Frequent Monitoring
Frequent inspection gives you early warning of rising mite populations and disease. Simple, regular checks spot trends before a colony collapses. Track both adult bees and brood to see impacts on health and honey production.

Choose methods that match the season and stress level of the hive. In cold months, avoid opening boxes. Use sticky boards on bottom boards to record natural mite drop without disturbing the queen.
Methods for Mite Shaker and Sticky Boards
The mite shaker method works well in warm weather when adult bees are active. It gives a quick estimate of population levels and helps decide on treatments.
- Before and after every treatment: check counts to confirm effect.
- Sticky boards should show a high initial drop that falls during effective treatment.
- No drop on bottom boards may mean the chosen chemical or technique needs changing.
- Regular brood checks help detect viruses and stressed frames early.
“Consistent monitoring is the single best way to protect colonies through winter and reduce unexpected losses.”
| Technique | When to use | What it shows |
|---|---|---|
| Sticky board on bottom boards | Cold weather / non-invasive checks | Natural mite drop; treatment trend |
| Mite shaker | Warm weather active adult bees | Estimated mite population on adults |
| Brood inspection | Seasonal spot checks | Brood health; presence of viruses and drone comb issues |
Utilizing the IPM Pyramid for Decision Making
A stepwise approach helps beekeepers choose the least disruptive actions before resorting to chemicals. The IPM pyramid guides choices from habitat and hive hygiene up to targeted treatments. It keeps focus on colony health while limiting unnecessary use of chemicals.
Start low on the pyramid: boost forage, reduce stress, rotate comb, and remove drone comb when practical. These cultural steps suppress mite population growth and support the queen, brood, and adult bees.
When sampling shows rising levels, escalate to mechanical or nonchemical techniques next. Only then consider registered chemical treatments and select products with known efficacy and safety. This staged process lowers costs, improves treatment efficacy, and reduces risk of viruses spreading through colonies.
- Prioritize prevention and regular sampling to keep mites below economic thresholds.
- Balance costs and labor—choose techniques that match your yard capacity and winter goals.
- Document results to refine future decisions and keep queen and brood needs central to control choices.
For practical comparisons of chemical options, see a detailed formic acid vs oxalic acid comparison.
Spring Sampling and Treatment Protocols
Spring checks set the tone for the season; a single, well-timed sample tells you if colonies need help.

Collect one sample of roughly 300 adult bees (about ½ cup) from each selected hive to estimate infestation. Use the mite shaker or alcohol wash technique to get reliable counts.
Sample all yards in your operation. Levels can vary widely by location. Base the number of hives sampled on total colony count so your data is representative.
Sampling Parameters
- Sample size: 300 bees (~½ cup).
- When: early spring before brood peaks.
- Record keeping: log results on the General Management Inspection Data Sheet.
Economic Thresholds
The action threshold when brood is present is 1 mite per 100 bees (1%). If counts exceed that level, take prompt treatment steps to protect capped brood and the queen.
“Timely spring sampling prevents a small mite population from exploding during summer growth.”
| Parameter | Value | Action |
|---|---|---|
| Sample size | 300 adult bees (~½ cup) | Use shaker or wash; record on inspection sheet |
| Threshold (brood present) | 1 mite per 100 bees (1%) | Initiate treatment if exceeded |
| Sampling scope | All yards / representative colonies | Adjust sample count to total colonies |
Track counts and compare treatments. If thresholds are reached, prioritize interventions that protect brood and lower mite population before honey flow and winter preparation.
For nonchemical options and natural approaches, see natural remedies.
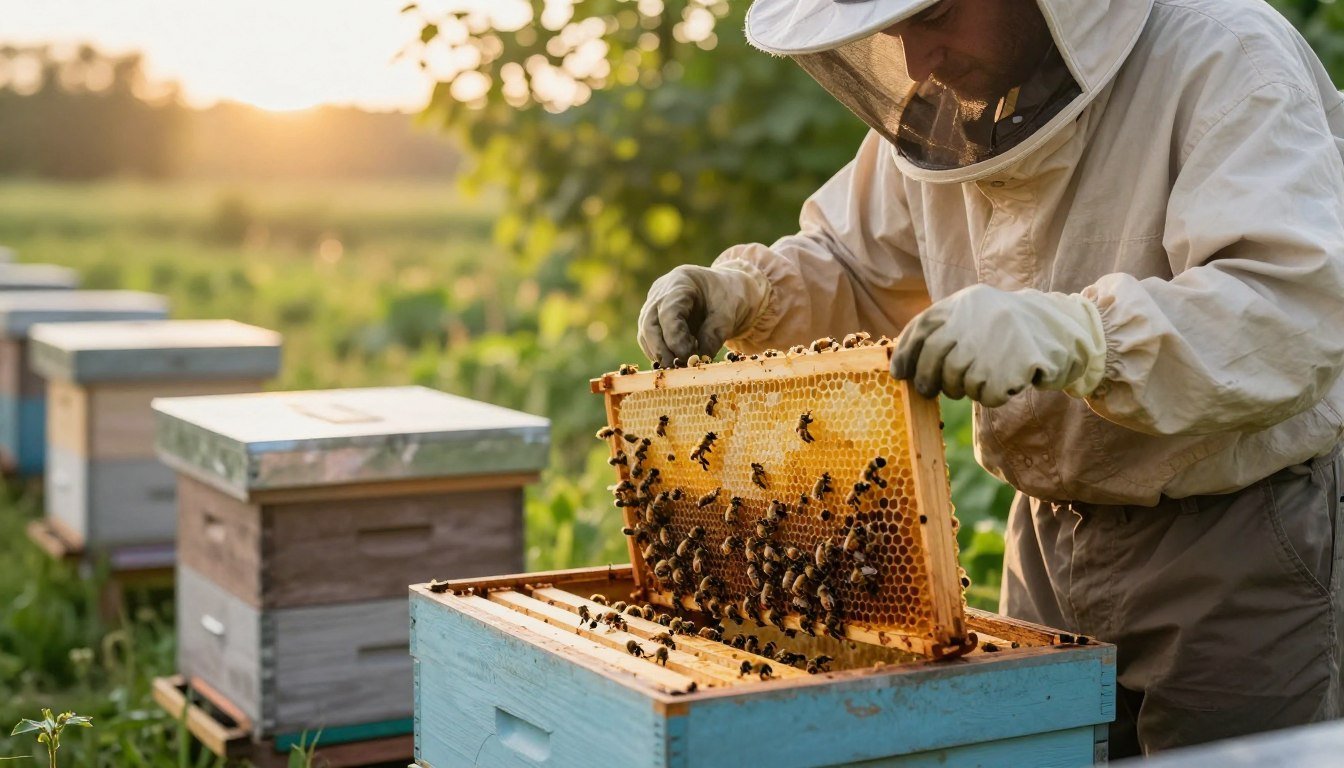
Summer Inspection and Disease Surveillance
Summer checks catch rising mite pressure and flag disease before colonies weaken.
From May through August, perform monthly monitoring to track mite population trends. Collect samples of adult bees during each visit to get an accurate mite load and assess whether further action is needed.
Open three brood frames per brood box and do a focused visual sweep for signs of American foulbrood, sacbrood virus, and abnormal brood patterns. Note queen status and any spotty or sunken cells.
Keep detailed disease inspection data sheets. These records help you spot problem colonies early and decide if a hive should be moved to a hospital yard for treatment.
Summer surveillance also reduces spread between colonies by catching pests and virus symptoms early. When counts rise or visual signs appear, escalate targeted control steps and re-sample after interventions.
For an evidence-based checklist you can adapt, review the downloadable IPM outline here: Varroa Mite IPM outline.
Fall Monitoring and Treatment Cycles
As days shorten, focus on reducing mites to protect the long-lived winter bees.

Conduct fall sampling before and after every treatment cycle. Use a single sample of 300 adult bees to estimate the varroa mite population and confirm treatment effect.
When colonies are broodless, act if counts exceed 1 mite per 100 bees (1%). Repeat sampling with each treatment to verify that mite control measures actually lowered the mites and protected winter bees.
Reducing the pest population in fall gives colonies a better chance at winter survival. Track results, note queen status and comb condition, and use decision tools like the Varroa Sampling 101 factsheet and the Evaluating Varroa Decision Tree when choosing cycles.
“Fall monitoring is the most critical time to protect the winter bees, as these bees must be healthy to survive the cold months ahead.”
| Action | Timing | Metric | Target |
|---|---|---|---|
| Sample (300 bees) | Before each treatment | Mites per 100 bees | <= 1 when broodless |
| Treat | After sampling if threshold exceeded | Reduction in mite count | Significant drop on follow-up sample |
| Verify | After treatment cycle | Follow-up sample (300 bees) | Counts remain below threshold into winter |
Managing Sick Colonies in a Hospital Yard
Create a quarantine yard where suspected sick colonies go so healthy hives stay protected. This central spot limits spread of mites and virus while making checks faster.

In a hospital yard, focus visits on weak brood frames and adult bee samples. Quick, regular inspections let you track mite population and spot failing queen or spotty brood early.
Move only the affected hive and use clean tools between handles to avoid cross-contamination. Keep treatment records and testing notes at the yard entrance.
- Isolate: reduces spread of mites and virus to strong colonies.
- Monitor: concentrated checks make treatment decisions clearer.
- Protect: moving weak units keeps honey production stable in the main groups.
| Action | When | Goal |
|---|---|---|
| Transfer suspected hive | At first sign of disease | Limit spread to other colonies |
| Daily brief inspections | Every 2–7 days | Track mite and brood recovery |
| Post-treatment sampling | 7–14 days after | Verify drop in mite population |
For field protocols and best practices, review the BMP manual to align your hospital yard routines with tested guidance.
Selecting Effective Treatment Methods
Choose treatments that match colony status, season, and your labor capacity.

Organic options often suit low-stress periods. Oxalic acid is widely used when brood is low or absent because it targets mites on adult bees and has minimal residues in honey.
Follow label directions carefully. Dosage and timing matter. Improper use can harm the queen or adult bees and reduce effectiveness against the pest and associated virus.
Chemical considerations
Registered chemical treatments can be highly effective but vary in application, withdrawal times, and equipment needs.
Weigh efficacy, safety, and resistance risk. Rotate active ingredients across seasons and record results to avoid reduced response over time.
Drone brood removal
Drone brood removal is a proven mechanical tactic that exploits the mite’s preference for drone cells.
Remove frames with capped drone brood on a schedule to reduce reproduction. Combine this with periodic sampling and, if needed, an oxalic acid treatment when brood is minimal.
“Combining mechanical brood removal with well-timed organic acid treatments creates a stronger defense than relying on a single method.”
- Select methods that match the season and brood cycle.
- Use mechanically targeted brood removal to lower mite load before chemical or acid treatments.
- Keep treatment records and confirm results with post-treatment sampling.
- Consider resources and labor—some techniques require more frequent visits.
| Method | Best timing | Strengths | Limitations |
|---|---|---|---|
| Oxalic acid (drip/vapor) | Broodless or low-brood periods | High efficacy on adult mites; low residue | Less effective with heavy capped brood; needs safe handling |
| Chemical miticides | Seasonal, per label | Strong knockdown; registered use | Resistance risk; follow withdrawal rules |
| Drone brood removal | During drone rearing peaks | Non-chemical; reduces reproduction sites | Labor intensive; requires timely removal |
Balance organic acids like oxalic acid with selective chemical use and mechanical brood removal. For a practical guide to methods and actions, see varroa mite resources.
Maintaining Accurate Inspection Data Sheets
Good recordkeeping turns each hive visit into useful data that guides timely treatment and requeening.

Use the General Management Inspection Data Sheet at every check. Record colony strength, queen status, presence of brood, honey, pollen, and visible disease.
If you suspect disease, complete the Disease Inspection Data Sheet. Note the number of mites found with a shaker or on a sticky trap and any abnormal brood patterns.
- Track trends: consistent entries reveal rising mite levels and weakening colonies across seasons.
- Make decisions: queen age and brood pattern entries help decide requeening or splitting.
- Stay eligible: thorough records support participation in state-run bee health programs.
“Accurate sheets shorten the path from observation to action and improve winter survival.”
| Field | Why it matters | How to record |
|---|---|---|
| Queen status | Signals replacement need | Age, marked/unmarked, brood notes |
| Mite counts | Measures pest pressure | Shaker or sticky trap number |
| Stores (honey/pollen) | Reflects colony nutrition | Estimate frames or % of box |
Update sheets after every inspection. If you want guidance on standardized testing and sample recording, consult the University lab resource at mite testing protocols.
Evaluating Treatment Efficacy
Regular follow-up checks show whether your chosen control method actually lowered the mite load. Monitor natural drop and shaker counts during the treatment period to confirm the effect.

Compare counts from before and after each treatment to calculate percent reduction. If counts stay high, resistance or an application error may be the cause.
Document the result for every colony and note brood status, queen condition, and any impact on honey stores. That record helps you refine future choices.
- Calculate percentage control: (pre-treatment − post-treatment) ÷ pre-treatment × 100.
- Repeat sampling during and after treatment to verify sustained drop in mite numbers.
- If efficacy is low, change method, check dosage, or adjust timing and re-sample.
Consistent evaluation turns isolated treatments into useful data that improves long-term mite control. Sharing well-documented results also helps other beekeepers fighting varroa mites in your region.
Conclusion
Long-term colony health comes from steady vigilance, data-driven choices, and combining soft and targeted controls.
Implementing integrated pest management gives the best protection against the threat of varroa destructor. Use routine sampling, accurate records, and timely interventions to keep mite levels low and preserve winter bees.
Good pest management blends habitat support, selective treatments, and genetic approaches. Read a critique of single‑weapon tactics in fighting the silver-bullet fallacy, and learn about breeding resilient stock at the future of resistant genetics.
Commit to frequent checks, clear records, and adaptive ipm. That dedication protects your colony, secures honey yields, and improves long-term bee health across regions.
FAQ
What is the best way to monitor mite levels in a hive?
Use regular sampling methods such as a sugar shake, alcohol wash, or a sticky board. Check adult bees for mites and inspect capped brood. Record counts as mites per 100 bees and compare against action thresholds. Frequent checks in spring, summer, and fall give the best picture of population trends.
How often should I sample colonies during active season?
Sample every 2–4 weeks when brood is present and every 4–6 weeks in low-activity periods. Increase frequency after treatments and before major brood breaks to assess efficacy and detect rebounds in mite population.
When should I treat to protect winter bees?
Treat in late fall after the last honey flow and before cluster formation. Target treatments that reduce mites on adult bees and in brood so winter bees start with low mite loads and lower virus transmission.
What non-chemical options effectively reduce mite load?
Drone brood removal, screened bottom boards, creating brood breaks, and heat or oxalic acid vaporization during broodless periods can lower mite numbers. Combine these with monitoring to time actions for maximum impact.
How can I tell if a treatment worked?
Re-sample 7–14 days after contact treatments and 4–6 weeks after slow-release methods. Compare mite counts before and after treatment and look for a sustained drop below your action threshold to confirm efficacy.
Are organic acids safe for honey and bees?
Formic and oxalic acids can be effective when used according to label instructions. They can affect brood if misapplied. Do not harvest honey during some treatments and always follow product guidelines to protect bees and honey quality.
What role does drone brood removal play in control?
Removing drone comb exploits mites’ preference for drone cells. Routinely cut out and freeze or destroy drone comb to remove many reproducing mites and reduce overall colony pressure without chemicals.
How should I manage sick or heavily infested colonies?
Isolate or move them to a hospital yard, increase monitoring, and apply a rapid, effective treatment. Consider requeening, brood manipulation, or combining chemical and mechanical controls to recover colony health while preventing spread.
How do I set treatment thresholds for my area?
Use local extension recommendations and historical data. Common thresholds are 2–3% infestation by alcohol wash or 3–5 mites per 100 bees, but adjust for season, colony strength, and local virus pressure when deciding action.
What records should I keep after inspections?
Note colony ID, date, mite counts, brood status, treatments applied, and queen condition. Maintain inspection sheets to track trends, evaluate treatment efficacy, and support evidence-based decisions over multiple seasons.
Can chemical resistance develop, and how do I avoid it?
Yes. Rotate modes of action, avoid underdosing, and combine non-chemical tactics. Follow label rates and timing to reduce selection pressure and preserve long-term effectiveness of acaricides.
How do viruses factor into mite control strategies?
Mites vector viruses such as deformed wing virus. Lowering mite populations reduces virus transmission and improves colony survival. Integrate monitoring, timely treatments, and strong nutrition to limit virus impact.
What equipment helps improve monitoring accuracy?
Use a reliable shaker or wash kit for quantitative sampling, clean sticky boards for fall checks, and consistent frames for brood assessments. Calibrate techniques across your yard so data are comparable between colonies.
Is it better to treat all colonies at once or individually?
Coordinated treatments across the yard reduce reinfestation risk. However, tailor actions to colonies that exceed thresholds. Combine yard-wide planning with targeted interventions for highest efficacy.
How do I integrate broodless periods into treatment timing?
Use natural or induced brood breaks to apply treatments like oxalic acid vapor when few or no capped cells exist. This maximizes mite exposure on adult bees and improves control success.
What winter practices reduce mite pressure the next season?
Treat late fall, remove excess stores of brood comb with high mite loads, maintain strong queens, and ensure good nutrition. Lower mite levels going into winter reduce colony losses and virus carryover.
Where can I find up-to-date treatment recommendations and product labels?
Consult your state extension service, university apiculture programs, and manufacturer labels for current guidance. Use research-based resources from institutions like the USDA or land-grant universities for best practices.