Clear, calm handling keeps colonies healthy and reduces accidental harm. This short guide gives practical, field-proven methods that protect the hive and the beekeeper.
Start by observing after gently cracking the lid. Slow, controlled movements cut the chance of trapped bees and stop alarm pheromone release.
Use snug nitrile or soft goatskin gloves for better dexterity. Minimal, targeted smoke and working from the side let bees move away from pinch points.
Proven frame techniques include removing an outer frame first, tilting frames before lifting, and lowering frames with a bounce-and-slide motion. Return boxes and frames angled and slid, not dropped, to avoid loud clunks and startled bees.
With lean equipment, a hive tool, and steady practice, each inspection becomes calmer. Gentle care protects brood, queen safety, and honey production while building beekeeper confidence.
Key Takeaways
- Move deliberately and observe before major handling.
- Wear snug gloves and keep a compact set of equipment.
- Use minimal smoke and approach from the side or back.
- Remove outer frames first and tilt frames before lifting.
- Lower and align components slowly to prevent clunks.
- Gentle handling preserves brood, queen, and hive productivity.
Why Gentle Hive Inspections Matter for Colony Health and Safety
Slow, purposeful movements around the hive cut alarm responses and protect the brood. Each crushed worker releases isopentyl acetate, a banana-like alarm scent that can escalate defensive behavior and make the whole inspection harder.
Calm handling reduces alarm pheromone release. That keeps honey bee behavior relaxed and lowers risk for both beekeepers and the colony. Excessive smoke or rough motions often trigger frantic running that puts more workers at risk when frames, supers, or the crownboard are returned.
Strong colonies are crowded, so pinch points at the box rim, lugs, and frame rests are real hazards. Pause before lifting a frame; this small change prevents many crushed workers and helps you spot eggs, brood patterns, and queen signs without rushing.
- Gentle technique keeps brood viability and queen stability intact.
- Fewer crush injuries lower the chance of pathogen spread like Nosema or gut viruses.
- Consistent, careful work saves time over a season and supports better honey production.
For a practical gentle-check routine, see a concise guide on gentle hive checks and expansion tips in this beekeeping expansion guide.
Prepare for Success: Mindset, Tools, and Protective Gear
Start calm, breathe, and move with intent. A steady mindset reduces rush and limits sudden bumps that harm workers and the queen. Take a moment before opening the box to plan each motion.
Adopt calm, tai chi-like movements
Move slowly and keep shoulders relaxed. Instructors recommend slow body mechanics that lower the chance of drops and loud clanks. Small, deliberate motions help bees shift away from pinch points.
Bring only essential equipment
Pack a minimalist kit: a smoker for targeted puffs, a hive tool for precise prying, a soft brush or feather, a veil, and clear notes. Uncluttered work space reduces fumbles and shortens open time. For a concise checklist and practical tips, see inspection techniques.
Choose snug, dexterous gloves
Snug nitrile or soft goatskin gloves give tactile feedback at frame lugs and runners. That feel lets the beekeeper sense a worker under a fingertip and pause before lifting. Many preferring nitrile accept occasional stings for better control.
- Practice with the hive tool until prying feels smooth and quiet.
- Use cool, steady smoker puffs rather than long bellows bursts.
- Document findings quickly to reduce open time and improve future decisions.
Good choices in gear and restraint protect both the colony and the person handling frames. For safety basics related to care and protective practice, consult this safety guide.
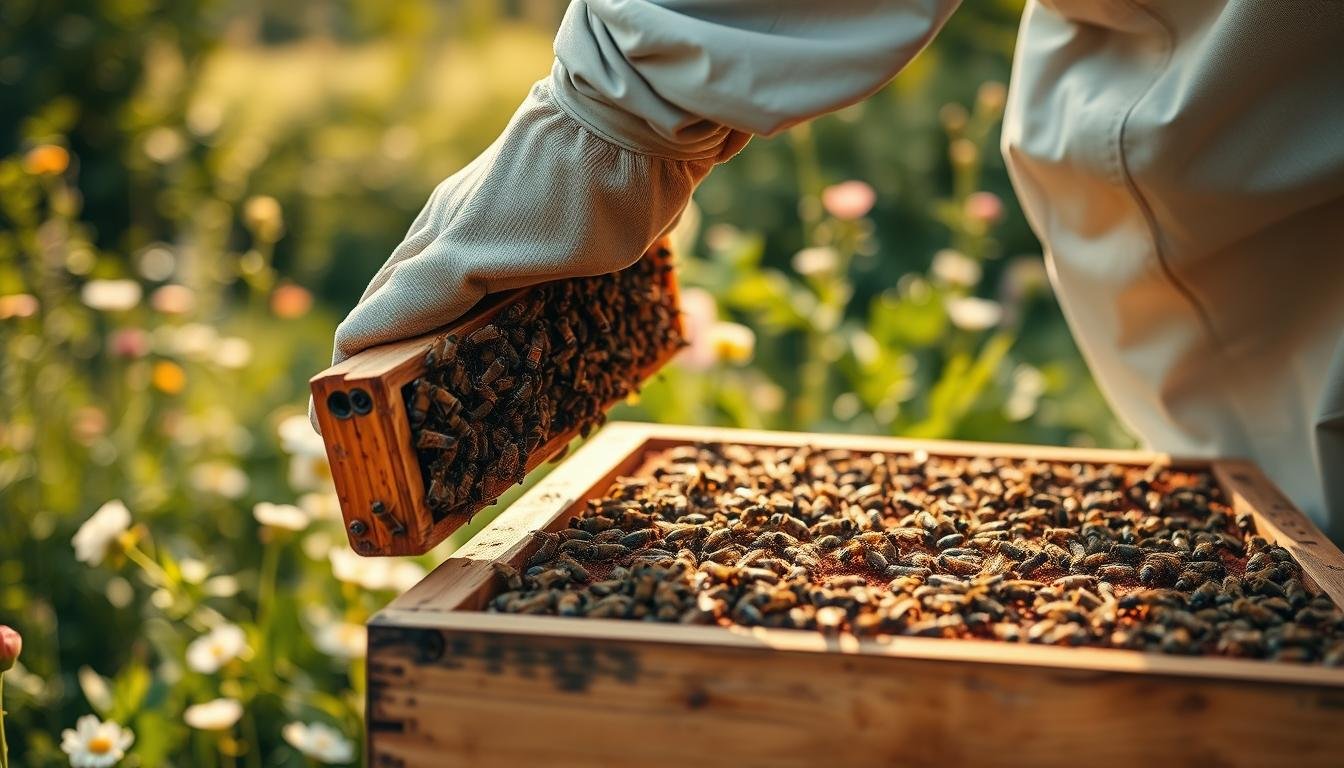
Step-by-Step: Enter the Hive Without Stressing or Crushing Bees
Start each visit by standing slightly to the side and watching the colony settle. A respectful entry reduces alarm and keeps a steady work flow. Read the hum and cluster before touching any components.

Approach from the side or back to avoid the flight path and lessen pressure on guarding workers. Prepare a smoker, but only use smoke when the colony seems tight or weather limits foraging that day.
- Crack the lid gently by easing corners and wiggling propolis free. Pause and listen for agitation.
- Remove an outer frame first to open a safe lane when there are many bees in the box.
- Tilt then lift each frame so honey bee workers can clear inter-frame space. Hold frames over the hive in case the queen slips.
- Brush upward with a feather rather than shaking; keep two hands steady and wrists firm so frames do not swing into comb.
- Work with smooth, deliberate motions and keep the inspection short and focused on essentials.
How to Avoid Crushing Bees During Inspections
Lower each frame with calm, measured motions so workers have space to move out of pinch points. This simple habit cuts trapped bees and lowers alarm responses.
Use a gentle bounce-and-slide when lowering a frame. Pause a few millimeters above the adjacent frame, bounce gently so workers move, then slide the frame into place. That motion prevents pinching and keeps comb aligned in the brood box.
With Hoffman sidebars, return frames in order so the self-spacing stays intact. Keep frames together at the end and squeeze them gently to limit wide seams and future propolis buildup.
Fingertip control at the lugs and rests matters. Thin gloves give tactile feedback: a slight waggle and a pause lets a worker clear before you set the frame down. Keep a hive tool ready to nudge and align without forcing parts.
Minimize bangs and sudden jolts that raise alarm pheromone. Use brief, aimed smoke on edges only when needed. Check brood and queen locations as you go so you can handle those frames with extra care and protect attendants and the queen.
- Lower frames slowly with a bounce-and-slide so workers clear naturally.
- Return each frame in its original order; preserve comb orientation in the brood box.
- Use a hive tool for gentle nudges and Hoffman sidebars for straight lowering.
- Rely on fingertip control and thin gloves to sense and avoid trapped workers.
- Avoid knocks and heavy clunks that can trigger alarm and defensive behavior.
Learn practical steps for fewer crushes and build a calmer workflow that protects brood, queen, and the whole hive.
Closing Up Without Casualties: Excluders, Supers, and Covers
Finish an inspection by fitting hardware gently; the last motions set the tone for hive calm. Small, deliberate moves at the end protect brood and honey and help the colony settle quickly.
Fit framed queen excluders at an angle rather than forcing flush plastic or punched zinc. Offer the framed, wired excluder in at an angle, overlap the far rim, then slide and lightly rock side-to-side so the workers move before full contact with the box.

Return heavy supers one at a time
Lift and set each super individually. Align and twist into place rather than dropping. This protects honey comb, your back, and reduces hard clunks that alarm the colony.
“The final alignment matters as much as the first lift; patience prevents trapped workers.”
- Use a tiny puff from the smoker near rim edges and frame rests before setting parts back.
- Lower inner covers and crownboards slowly; lift a corner if you spot trapped bees and let them clear.
- Wear thin gloves and keep a tool handy for gentle alignment rather than forcing pieces.
- Confirm the queen’s likely location before closing tight spaces near her.
| Component | Best Practice | Why it helps |
|---|---|---|
| Queen excluder | Framed; angled slide and light rock | Moves workers off edges; gentler than rigid fits |
| Super / supers | Return one at a time; align and twist into place | Prevents clunks; protects honey and comb integrity |
| Covers / crownboard | Small puff of smoke; lower slowly; tap to free bees | Clears edges and rests; reduces trapped workers |
| Gloves & tool | Thin gloves; use tool for nudges | Improves dexterity and alignment; limits crush points |
Put back boxes and frames with quiet, smooth motions. The way you finish an inspection matters as much as how you began. A calm close keeps the hive steady and lowers the chance of accidents.
Timing, Conditions, and Smoke: Small Changes, Big Differences
Pick calm weather and a mid-day window for checks. Plan a fair-weather day and aim for mid-morning or early afternoon when many foragers are out. This lowers traffic inside the hive and makes each task simpler.
Choose the right time and place. Avoid gusty wind, incoming storms, and extreme heat. These conditions make workers defensive and raise the risk of trapped insects in the box or between a super and frame.
Targeted smoke and minimal use
Carry a smoker but use it sparingly. A tiny puff at the entrance or under the lid masks alarm scents without stirring the colony.
- Prepare tools and notes so the box stays open for the shortest time.
- Aim puffs along contact lines when reseating a super or lowering a frame.
- Watch reactions and reduce further smoke if the hive yields space quickly.
| Factor | Best Practice | Benefit |
|---|---|---|
| Time of day | Mid-morning to early afternoon | Fewer workers inside; calmer work |
| Weather | Fair, low wind, moderate temperature | Lower defensiveness and erratic movement |
| Smoke use | Small, aimed puffs; smoker handy | Masks alarm scent without scattering bees |
Prevent Future Pinch Points: Comb, Spacing, and Record-Keeping
Straight comb and consistent frame count make reassembly predictable and safe. Spend a moment trimming problematic wax before closing so the brood box closes cleanly and without trapped workers.
Remove brace comb from top bars and the underside of excluders and covers. That clears contact surfaces and stops accidental squeezes when you reassemble the box.
Keep super frames aligned and use the same frame count per super. Consistent layout preserves bee space and prevents awkward wax bridges that bees could fill.
- Slice away brace comb where it blocks edges or rests so trapped workers are less likely on closing.
- Press frames together after checks so frames together reduce propolis seams and let the dummy board fit in the brood box.
- Use a sharp hive tool and small, aimed puffs of smoke for tidying, not scattering.
- Log recurring issues—tight gaps, drifting frame alignment, or sagging poly parts—so you arrive next visit with the right equipment.
“Small spacing fixes now prevent bigger pinch points later.”
| Action | What to check | Benefit |
|---|---|---|
| Trim brace comb | Top bars, excluder underside | Clean contact; fewer trapped bees |
| Align super frames | Same count per super; straight comb | Preserves bee space; protects honey comb |
| Squeeze frames together | Brood box spacing and dummy board fit | Limits propolis seams; eases future work |
| Mark poly crownboards | Orientation and light tap as lowered | Helps trapped bees exit before seal |
Conclusion
A calm, steady finish—slow slides and gentle taps—keeps fragile comb intact and the colony settled.
Move slowly, observe first, and handle each frame and box with deliberate care. Keep equipment minimal and organized, use precise smoke puffs, align and compress frames, and set hardware back together without clunks.
Protect the queen and brood by preserving bee space, straight comb, and tidy contact lines at every end. Apply the same method across hives so bees get consistent, low-stress care. These small, repeatable habits mean a calmer colony, healthier brood, and more honey by season’s end.
For a short checklist you can use in the field, see this beehive inspection checklist.
FAQ
What is the best mindset before opening a hive?
Adopt calm, slow, tai chi-like movements and a focused attitude. Move deliberately, breathe steady, and plan each step. A composed approach keeps the colony relaxed and reduces sudden defensive responses.
Which tools are essential for gentle inspections?
Bring only what you need: a smoker, a reliable hive tool, a soft bee brush or feather, a veil, and documentation. Minimal gear reduces clutter and helps you work smoothly without startling bees.
What gloves work well for delicate frame work?
Choose snug, dexterous gloves such as nitrile or soft goatskin. They give tactile feedback for fingertip control so you can lift and lower frames without pinching or crushing workers.
How should I approach the hive to lower stress on bees?
Approach from the side or back, avoid casting a large shadow over the entrance, and light the smoker only if necessary. Quiet, lateral entry keeps foragers calmer than head-on approaches.
What’s the safest way to crack and open a hive lid?
Crack the lid gently, observe for activity, then lift slowly. Pause between actions to let the colony settle. Rapid lid removal can spray bees outward and trigger alarm pheromones.
How can I remove and set frames without harming workers?
Tilt frames slowly and use a bounce-and-slide motion when lowering them back in. Never drop, jam, or force frames. Support the frame by the ends and keep movements smooth to avoid crushing bees along the lugs and rests.
How do I manage space so frames don’t pinch bees?
Use Hoffman frames or similar designs to maintain bee space and return frames in order. Keep frames aligned and squeeze them tightly only when required; maintain dummy boards to prevent loose space where bees get trapped.
What fingertip techniques protect bees at frame edges and rests?
Use fingertips to guide frame lugs and rest points, rolling the frame slightly to free bees from comb contact. Avoid pressing down on the comb and keep thumbs clear of brood areas.
How much smoke should I use when inspecting?
Use precise, minimal smoke—short puffs at the entrance or box edges when needed. Excess smoke can disorient bees and drive them into brood areas. Only apply more if defensive behavior increases.
When is the best time of day and weather for inspections?
Choose calm weather and mid-day windows when many foragers are out collecting. Sunny, windless afternoons reduce hive density and lower the chance of trapping bees between boxes and tools.
How do I handle heavy supers without crushing bees?
Return heavy supers individually, lift and set them down aligned, then twist gently into place. Avoid clunks or sliding that pinches bees at corners; carry supers close to your body for control.
What’s the correct method for installing a queen excluder or poly cover?
Fit framed queen excluders at an angle and slide side-to-side to seat them smoothly. Lower inner covers and poly crownboards carefully, releasing any trapped bees before fully closing the box.
How can I reduce alarm pheromone triggers?
Minimize bumps, bangs, and sudden movements. Work quietly, avoid crushing or squashing bees, and limit strong scents like diesel or heavy cologne that can amplify agitation.
What inspections practices prevent future pinch points and comb damage?
Trim brace comb, keep super frames aligned, and maintain consistent frame spacing. Regular record-keeping helps spot patterns so you can correct repeated pinch points before they harm workers or brood.
Are there quick checks to release trapped bees before closing up?
Before sealing the hive, glance along frame edges and between boxes, tapping gently to encourage movement. Lift corners slightly to let trapped bees exit, then close slowly to avoid trapping anyone.
What should I do if I accidentally trap or injure bees?
Stop, stay calm, and gently free trapped bees using a soft brush or fingertip. If an injured queen is found, isolate her in a nuc if possible. Clean the area and continue with slower, more cautious steps.
How does record-keeping improve future inspections?
Notes on timing, weather, and problem areas highlight trends like consistent crowding or propolized gaps. Use records to adjust spacing, frame layout, and inspection frequency for safer handling.