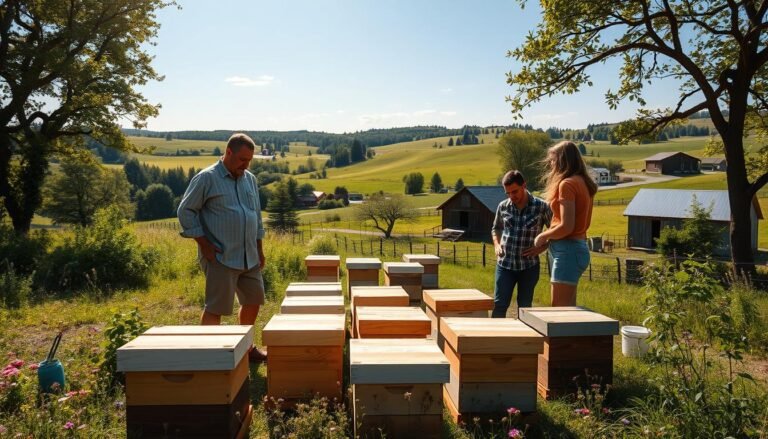
Start small and practical. This guide introduces a low-cost, step-by-step approach to producing a handful of quality queens from your best colony. You’ll learn simple methods used by experienced authors like Randy Oliver and programs such as the Penn State and Cloake Board systems.
Timing and nurse bees matter most. Plan grafting, capping, and emergence around the season and your hive strength. The day-by-day windows (capping ~Day 4, mating nucs ~Day 9, emergence ~Day 11–12) give clear milestones to follow.
We cover method choices — grafting, no-graft, Cloake, Ben Harden, Hopkins — and how to pick the right way for your climate and colony strength. Responsible production focuses on healthy survivor stock and avoids spreading pests. For a seasonal checklist, see seasonal beekeeping tasks.
Key Takeaways
- Select top genetics and concentrate nurse bees in a queenless cell builder.
- Follow clear timing: grafting, capping, mating nuc setup, and emergence windows.
- Use low-cost tools: cell cups, grafting tools, and simple feeders to succeed.
- Choose a method that fits your apiary: starters/finishers, Cloake, Ben Harden, or no-graft.
- Prioritize nutrition, timing, and ethical stock selection to protect local apiaries.
Why rear your own queens as a small-scale beekeeper
Producing queens at home helps match your hives to local nectar flows, weather, and disease pressure. This local adaptation improves survival and productivity across the year.
Practical production benefits include a dependable supply of replacements timed to splits, requeening, or recovery after loss. You avoid shipping delays and high seasonal demand.
Genetic stewardship matters: rear queens from your best-performing colony to favor traits like temperament, honey yield, and mite tolerance. Randy Oliver recommends propagating locally adapted survivor stock to limit mite bomb risks from collapsing colonies.
- Lower long-term cost: a few tools and basic methods cut repeated purchase expenses.
- Control and timing: have cells or mated females ready when your colony needs them.
- Risk reduction: be prepared for sudden failures or swarm losses.
| Benefit | Why it helps | Practical result |
|---|---|---|
| Local genetics | Matches regional nectar and weather | Better overwinter survival |
| Supply control | No dependence on vendors | Timed increases and fixes |
| Cost savings | Fewer repeat purchases | Improved apiary economics |
Treat this skill as core, not elite. Start with a handful of cells and scale as confidence grows. Responsible practice helps your apiary and nearby beekeepers alike.
Season and timing in the United States: when bees build the best queen cells
In most U.S. climates the late spring to early summer window gives the highest output of quality queen cells. Penn State notes nurse bee hypopharyngeal glands peak in May, and during a strong nectar flow a single cell builder can produce 100+ cells. In contrast, a September dearth may limit that number to 15–20.
Late spring to early summer windows and nectar flows
Prioritize May and early June when honey and pollen are abundant. Target mating periods by counting backward: graft to capping (~4 days) and emergence (~11–12 days). Use frames with young larvae during these weeks.
How days, weeks, and weather influence larvae feeding and royal jelly
- Warm, stable days increase nectar intake and jelly provisioning.
- Cold snaps reduce flights and lower feeding frequency to larvae.
- Stagger batches to cover poor weather weeks and improve mating chances.
| Season | Typical output | Key constraints | Management tip |
|---|---|---|---|
| Late spring (May) | High (50–100+) | Requires peak nurse physiology | Use strong cell builder and fresh frames |
| Early summer | Moderate (30–60) | Variable by regional flow | Time grafts with local honey flows |
| Fall (Sept) | Low (15–20) | Worker physiology shifts for winter | Limit targets; avoid over-ambitious numbers |
Bee biology that matters: nurse bees, royal jelly, and young larvae
The critical biology behind making a top female centers on nurse bee behavior and the first 72 hours of larval feeding.
Focus on nurse bees: these workers are the engine that produces royal jelly and visit young larvae thousands of times. Penn State notes any young fertilized larva can become a reproductive, but only when nurses supply intense feeding during the early window.
Most nourishment arrives in the first 2–3 days after grafting. Randy Oliver emphasizes that this early surge shapes long-term quality, so place grafts where nurses concentrate.
- Choose very young larvae; the younger the larva, the better the potential when fed well.
- Arrange brood frames to channel nurse activity to your target cells and avoid competing open brood nearby.
- Keep continuous resources—syrup and protein—so the colony does not throttle royal jelly production during critical feeding.
“Queen quality reflects colony-level nutrition and nurse physiology, not just genetics.”
Use dark, older frames with rounded cell bottoms when grafting to protect larvae and ease transfer. Ensure the starter hive is clearly queenless to trigger emergency feeding and dense nurse coverage.
For deeper bee biology background, see bee biology and larval nutrition.
Tools and setup: frames, cell cups, grafting tools, nucs, and a brood box
A compact, well-organized kit makes the difference between a fumbled graft and a high take rate.

Assemble basic gear and stage it before you open a hive. Pack a brood box with a bottom board and cover for the cell builder. Include a syrup feeder if nectar is light.
Essential kit for grafting and non-grafting methods
Use dark frames when working with larvae; the rounded cell bottoms help scoop young larvae with their jelly intact. Have Chinese grafting tools, JZ’s BZ’s plastic cell cups, a lighted magnifying headband, and a damp towel to keep larvae moist during transfers.
- Kit checklist: brood box, bottom board, cover, cell cups, grafting tool, magnifier, damp towel, and nucs ready for mating.
- Include alternate supports for no-graft methods such as the Hopkins frame support or cell punching tools.
- Stage items to reduce time with open brood—move quickly from donor frame to cups to the cell builder.
Feeding strategy: syrup, pollen, and managing a dearth
Feed with precision: when there is no flow, offer small daily amounts of 1:1 syrup and fresh pollen or patties. Keep quantities modest to avoid burr comb between cell cups and to sustain nurse bees’ gland activity.
Prepare nucs in advance so they are queenless and ready when cells are ripe. Clean lids and fitted feeders help hold steady warmth inside the hive and brood box.
“Use dark frames and light, consistent feeding to encourage strong royal jelly provisioning.”
| Item | Purpose | Practical tip |
|---|---|---|
| Dark frame | Ease grafting and protect larvae | Choose older comb with rounded cells |
| Cell cups & grafting tool | Transfer larvae safely | Work quickly; keep transfers moist with a damp towel |
| Brood box & bottom board | Stand-alone cell builder platform | Set frame positions for open brood and pollen |
| Nucs | Mate-out units | Prepare queenless nucs with proper frame spacing |
For deeper preparation and recommended reading on tools and manuals, see this resource guide.
Queen rearing basics for small beekeepers
Good planning begins with a clear target—how many viable cells and nucs can your apiary handle?
Penn State notes that season, flows, and resources determine how many queens you can produce in a year. Randy Oliver recommends starting at roughly ten cells per batch to learn timing and handling while keeping quality high.
Set realistic goals
Define the number of queen cells you want up front. Match that goal to the colonies you have and the local nectar window.
- Start small: about ~10 queen cells per batch to ensure strong provisioning by nurse bees.
- Assess each colony’s strength, stores, brood pattern, and available frames before choosing donors.
- Plan your time: grafting day, day‑4 capping check, and day‑11–12 emergence must be scheduled and tracked.
- Avoid overloading a colony; spread frames and tasks across hives to reduce swarm risk.
- Confirm you have nuc space and equipment; under-provisioned nucs lower acceptance and mate-out success.
“Track frame sources, dates, and acceptance rates to refine your next cycle.”
| Factor | Practical tip | Result |
|---|---|---|
| Season | Late spring/early summer | Higher production |
| Colony strength | Strong nurses, good stores | Better cell quality |
| Equipment | Enough nucs and frames | Higher mate-out rate |
Set up a simple queenless cell builder (the “pennies-per-queen” method)
Make a compact, queenless cell builder by concentrating the youngest, most active nurses on a single frame and giving them a clear work channel.
Select a robust donor colony and remove the laying female temporarily. Shake bees from donor frames into a separate brood box set several feet away so older foragers return and the nurse bees remain.
Arrange a center frame with open brood and very young larvae, flank it with pollen/honey frames, and cut a top-bar‑parallel channel to accept plastic cell cups. Wait a few hours of queenlessness, then insert grafted cups downward into the channel.
- Feed 1:1 syrup sparingly if no flow; avoid heavy feeding that encourages comb build-up.
- Manage entrance with a reducer and keep disturbance low; minimize smoke to preserve nurse clustering.
- Watch acceptance: by ~Day 4 many cells will be capped; plan nucs on Day 9 and transfer ripe cells Day 10–12, handling only the cup to avoid damage.
“Concentrate nurse bees, protect warmth, and follow the days closely to maximize take rates.”
For a tested low-cost workflow, see the practical guide at queens-for-pennies.
Understand cell starters and finishers: emergency vs. abundance
Separate the initiation and finishing tasks so each unit can work in its optimum state. A queenless cell builder creates an emergency response that focuses nurse bees on grafts. Penn State recommends about four frames of nurse bees to start roughly 30 cells in this mode.
Queenless starter: initiating many cells on demand
Use a queenless starter to trigger rapid provisioning. Remove competing young larvae so grafts get the full feeding effort. Stock the starter with ample nurse bees and resources; more nurses equal more started cells, but match numbers to your goals.
Queenright finisher with a queen excluder: safety and scale
After ~24 hours move well-started cups to a queenright finisher. Install a queen excluder to confine the laying female below and let foragers and nurses above sustain abundant jelly production. Under strong flows a finisher can provision 100+ queen cells.
Avoiding rogue queen cells above the excluder
Inspect above the excluder regularly. Destroy any rogue cells so an early-emerging queen does not harm your grafts. Keep frames dated and move cells to nucs before mating windows close.
| Unit | State | Key action | Practical result |
|---|---|---|---|
| Starter (cell builder) | Emergency | Remove competing larvae; add 4 frames of nurse bees | ~30 started cells per batch |
| Finisher | Abundance | Use queen excluder; sustain feed and foragers | Can finish 100+ cells in strong flow |
| Transfer protocol | System | Move after 24 hrs; mark frames by date | Improved take and predictable scheduling |
“Confirm cell quality from above: white jelly pools and long, uniform draws indicate success.”
Combination systems: Cloake Board, Ben Harden, and sustainable cycles
Hybrid setups let you create a controlled emergency above while keeping steady resources below. Use a simple system that moves a cell builder into a finisher without carrying fragile cups between boxes.
Practical advantages: the Cloake Board uses a removable slide to split and later reunite chambers. Penn State calls this reliable because you avoid extra handling when cells are fragile.
- Install the slide 4–24 hours before grafting to induce emergency behavior, then restore access to convert to abundance.
- Ben Harden is a lighter method: the laying female stays below a queen excluder while nurses above feed cells.
- Keep frames dedicated to cell bars and mark them by date to maintain warmth and coverage.
- Manage space and stores during a honey flow to reduce swarm pressure in a strong finisher.
Inspect for natural cells above the excluder and remove them early. Track outcomes versus last year to tune timing and resource allocation. The main point is simple: safer starts, fewer moves, and repeatable cycles that fit your scale of queen rearing and beekeeping.
No-graft options: the Hopkins method for easy, high-quality cells
Letting worker bees select larvae on a flat frame removes grafting skill from the equation and yields robust cells. This method uses the colony’s judgment: nurses pick the best young larvae and build long, downward comb that becomes usable cell starts.
Horizontal frame presentation
Present a brood frame horizontally above the brood nest on a modified eke so it sits flat and has room for long growth. Position strong nurse coverage under the frame to ensure heavy royal provisioning.
Controlling excess starts and clean excision
Control many queen cells by removing unwanted starts early. Use a hive tool pattern or a light dusting of icing sugar to kill select larvae and leave well-spaced targets.
- Choose older, dark frames with uniform eggs and young larvae to encourage even starts.
- Excise cells with a generous collar of comb and secure them into nuc frames by pinching or small supports.
- Work promptly: move excised cells into prepared nucs near brood warmth to reduce stress and exposure.
“This no-graft path suits anyone who can’t or won’t graft; handling differs, but results can match cup-based systems.”
| Aspect | Practical tip | Result |
|---|---|---|
| Frame placement | Horizontal on an eke | Downward-drawn cells |
| Excision | Cut with collar, secure in nuc | Higher survival in mate-out |
| Timing | Set during a honey flow | Better provisioning and quality |
Grafting essentials made simple: young larvae, jelly, and gentle handling
Keep the process quick and gentle. Successful grafting rests on choosing the right larvae and protecting them from drying while you work.

Picking the right-age larvae and using Chinese grafting tools
Select very young larvae that lie curled in a jelly pool. These young larvae make the best brood when nurses feed them heavily.
Use a Chinese grafting tool with a steady motion: slide under the larva with its jelly, lift, then deposit into a plastic cell cup. Magnification helps speed and accuracy.
Cell cups, royal jelly provisioning, and top monitoring from the cup
Load cups face-down onto a damp towel and return them quickly to a warm cell builder. Most provisioning happens in the first 2-3 days, so minimize delays.
Check acceptance by viewing the clear cup top for a jelly pool; this shows nurses have started heavy feeding.
Protecting larvae from drying: dark room, damp towel, minimal disturbance
Work in a darkened room, keep the donor frame wrapped in a damp towel, and handle cups gently. Fewer interruptions and warm conditions raise take rates.
For detailed technique and alternatives, see Penn State’s guide on grafting methods.
Handle and place ripe queen cells without damage
Handle ripe queen cell cups slowly and deliberately. Capped cells are fragile and timing matters: grafted larvae are usually capped ~Day 4 and most emerge around Day 11–12. Mark dates and watch the calendar to avoid surprises.
Recognizing capped ripe cells and early-emergence risk
Ripe cells show a firm cap and white jelly pooling beneath on inspection. Limit time in a cell builder after capping; one early virgin can destroy other starts if left unchecked.
Incubators, temperature, humidity, and timing for safe transport
When scaling, use a portable incubator near 34–35°C with good humidity to hold capped stock. Commercial practice moves caps into controlled units to keep development on schedule and reduce transit shocks.
- Minimize handling shocks: touch only the cup or comb collar and keep cells warm.
- Place cups cup-end up between warm brood frames in a queenless nuc 2–5 days before emergence.
- Reduce the entrance and keep the interior calm during insertion; provide a tiny dab of diluted honey if virgins need a short feed.
| Action | Why | Timing |
|---|---|---|
| Log graft/cap/emergence | Predict windows | Day marks |
| Move to incubator | Control temp/humidity | When frequent checks impractical |
| Insert single cell per nuc | Prevent fights | 2–5 days pre-emergence |
“Pry ripe cups gently, keep them warm, and insert over brood to give the developing female the best start.”
Make and manage mating nucs for reliable mate-out
Putting ripe cells into compact mating units is the final, critical step to producing mated females that perform in the yard. Build nucs with the goal of keeping a developing virgin warm, protected, and able to fly when weather allows.
Building nucs, inserting queen cells, and frame spacing
Construct a queenless mating nuc of about four frames in a five‑frame box. Use frames with brood or warm drawn comb to provide heat and orientation.
Insert only one ripe cell per nuc. Place the cell between frames so it hangs slightly over warm brood. Pinch frames gently to secure the cell without crushing it.
Keep frame spacing true to hive norms. Too tight and the cell risks being pressed; too loose and it may chill. Aim for dense bee coverage to maintain steady warmth.
Acceptance rates, flight windows, and checking brood
Time insertions Day 10–12 after grafting so emergence and orientation flights match good weather. Randy Oliver recommends making nucs queenless around Day 9 and inserting cells on Day 10–12.
- Expect high mate-out in fair weather—roughly four in five under good conditions.
- Check for first eggs 8–12 days after placement; in poor weather allow up to three weeks.
- Reduce entrances, position nucs for sun and shelter, and avoid handling during the first critical days.
If several nucs fail, consolidate frames and bees into successful units to protect your numbers and strengthen those that will raise brood. Record each nuc: cell origin, insertion day, emergence notes, first eggs, and brood pattern to refine timing and choices next cycle.
“Place a single cell over warm brood, give the nuc time to settle, and check for a solid pattern rather than rushing inspections.”
Troubleshooting and pro tips: from swarm pressure to many queen cells
When cell acceptance lags, a quick checklist of larvae age, warmth, and handling will often reveal the problem.
Low take rates and missing nurse activity
If acceptance is low, confirm you used very young larvae and avoided drying during transfers. Keep grafts or cups warm and return frames to the hive quickly.
Also check that enough nurse bees cover the cups or frame. If nurses are thin, move extra brood bees in or reduce the number of targets.
Manage dearths and swarm pressure
In a food dearth, lower your number of targets. Feed light 1:1 syrup and offer fresh pollen to sustain glands.
Relieve swarm pressure by harvesting brood frames from overly strong colonies and by adding space in hives.
Controlling many queen cells and starter hygiene
Hopkins-style excesses can be tamed by selective larval removal or light sugar dusting to reduce starts and produce well-spaced cells.
Remove any unintended young-larvae frames from starters so nurses focus on your grafts.
Preventing parasite spread and ethical practice
Randy Oliver warns that letting packages collapse does not create true survivor stock and harms neighboring colonies.
Do not propagate from collapsing units. Rear from healthy survivor colonies, or treat and stabilize stock before use.
“Allowing domesticated packages to die does not create survivor stock and harms neighbors.”
Practical checks and recordkeeping
- Inspect above the excluder regularly and remove rogue cells before an early-emerged virgin can destroy others.
- Stabilize temperament: minimize smoke and jolts during inspections to keep bees feeding cells.
- Standardize frame positions and mark dates so capped cells don’t get mixed with new starts.
- Track numbers at each stage—starts, caps, emerges, mate-outs—to spot bottlenecks by count and timing.
| Problem | Quick fix | Why it works | When to act |
|---|---|---|---|
| Low acceptance | Check larval age, warmth, and add nurses | Young larvae + nurse coverage = higher take | Immediately after low cap rate seen |
| Too many starts (Hopkins) | Remove larvae or dust with icing sugar | Reduces overcrowding and yields handleable cells | Within 24–48 hours of excess starts |
| Swarm pressure | Harvest brood frames, add space | Relieves congestion and lowers swarm impulse | At first sign of congestion or queen cups |
For linked operational guidance on expanding production safely, see our expansion tips.
Scaling up production while staying small: methods, cycles, and recordkeeping
Scale carefully by running predictable rounds that match your calendar and hive capacity. Plan batches so cap and emergence fall on known days. This reduces stress on your units and keeps labor efficient.
Batching, rotation, and simple logs
Batch grafts or Hopkins frames so nucs are ready when caps open. Use Randy Oliver’s timing—graft, check Day 4, expect emergence Day 11–12—to set your calendar.
Rotate starter and finisher roles across hives to avoid wearing down any single cell builder. Penn State notes queenright finishers lose efficacy over successive rounds unless requeened or split.
Label frames and bars by date and source colony. Keep a short notebook or spreadsheet with graft day, cap counts, emerge dates, and mate results.
| Focus | Action | Result |
|---|---|---|
| Batching | Align grafts to fixed days | Predictable workload |
| Rotation | Swap starter/finisher roles | Maintains strong builders |
| Records | Log frames, counts, and outcomes | Spot best method and builder |
“Run small, repeatable cycles and keep crisp records to improve outputs over weeks.”
Conclusion
Consistent timing, nurse density, and gentle handling turn simple methods into repeatable success in the apiary.
You can produce quality queens at home using queenless builders, starter/finisher systems, Cloake or Ben Harden combos, or the Hopkins no-graft way.
Keep records to compare this year with last year and set modest targets around local honey flows. Prioritize nurse bee abundance, early larval feeding, steady warmth, and careful transport of each cell and mature queen cell.
Protect colony health and rear only from stable stock so your work helps neighboring apiaries. Verify mated females by brood pattern and refine steps one cycle at a time to raise resilient, locally adapted queens season after season.
FAQ
What are the main reasons a small-scale beekeeper should raise their own queens?
Raising your own breeding females saves money, allows selection for local traits like gentleness and mite resistance, and speeds recovery after colony losses. It also reduces reliance on suppliers and gives control over genetics and timing.
When is the best season in the United States to encourage bees to build queen cells?
Late spring through early summer is prime time when nectar flows peak and colonies expand. Warm weather, abundant forage, and longer daylight increase nurse bee provisions and the likelihood of successful cell development.
How do days, weeks, and weather affect larval feeding and royal jelly production?
Young larvae need intensive nurse feeding for the first three days to receive enough royal jelly. Prolonged cold or rain reduces foraging and nurse bee activity, slowing development. Consistent warm days help maintain steady food and fast cell growth.
Which aspects of bee biology have the biggest impact on success: nurse bees, royal jelly, or larval age?
All three matter, but nurse bee population and the availability of fresh royal jelly are critical. Only larvae younger than about 24–36 hours reliably develop into quality females when given sustained feeding by many nurse bees.
What basic tools and equipment should beginners have on hand?
Essential items include donor brood frames, empty frame with cell cups, grafting tool or Chinese tool, nuc boxes, a strong brood box for the cell builder, and feeding gear for syrup and pollen substitutes during dearth.
What feeding strategy helps during a nectar dearth?
Feed thin sugar syrup and provide protein supplement or pollen patties to sustain nurse bees. Keep entrances managed to reduce robbing and maintain colony strength without over-stressing resources.
How many cells and colonies should a small operator realistically plan to support?
Start modestly: plan for a few to a dozen cells depending on your nuc space and time. Supporting too many reduces nurse attention per cell and lowers take rates. Scale up gradually as you gain experience and recordkeeping data.
How do you set up a simple queenless cell builder using the pennies-per-queen method?
Choose a strong donor, move concentrated nurse bees onto a box with several frames of open brood and pollen, place grafted or natural cells on a central frame, and feed to encourage production. Maintain warmth and limit disturbances.
What frame arrangement improves acceptance: brood, pollen, and cell cup placement?
Place frames of open brood near the center, pollen and honey nearby for food, and position cell cups where nurse traffic is highest. A channel of clean comb helps bees access and tend cups without congestion.
What is a safe day-by-day timeline from grafting to emergence?
Graft larvae less than 24–36 hours old. Cells are typically capped around day 8–9 and workers emerge around day 16. Monitor closely for capping and avoid excessive handling during the capping window.
How do you keep cells warm and prevent chilling during transfers?
Move cells quickly in a shaded, wind-free container. Use damp towels to maintain humidity and avoid direct sun. Keep transport time short and place cells into a warm, prepared nuc or mating box promptly.
What’s the difference between a cell starter and a finisher?
A starter is queenless and prompts many emergency cells; it initiates graft acceptance. A finisher is queenright but configured so nurse bees care for capped cells until emergence, often using a queen excluder to protect the resident female.
How can I use a queen excluder safely in a finisher without creating rogue cells above it?
Place the excluder between the resident queen and finishing frames, ensure adequate nurse bee numbers below, and monitor upper boxes for queen cell construction. Remove any unauthorized cells promptly to prevent supersedure or swarming.
What combination systems are practical at small scale: Cloake Board or Ben Harden?
Both systems let you switch between emergency and abundance states to control cell initiation. Cloake Boards offer a reversible queenless period, while Ben Harden-style setups manage brood flow; choose based on your management style and hive count.
How does the Hopkins no-graft method work and why use it?
The Hopkins method presents frames horizontally so workers choose suitable larvae. It avoids delicate grafting, produces large numbers of high-quality cells, and fits beekeepers wanting lower skill barriers with good results.
What grafting tips give the best take rates with young larvae?
Use larvae under 24–36 hours, handle them gently with a clean, moistened tool, limit exposure to air, and provide a strong starter colony rich in nurse bees. Good lighting and steady hands reduce damage.
How do you recognize a ripe capped cell and avoid premature emergence during handling?
Ripe worker cells are domed and sealed; the cap often darkens. Avoid shaking or tilting frames, move cells in padded containers, and schedule transfers at least a day before expected emergence to reduce stress.
When and how should I place a cell into a mating nuc?
Insert a capped cell or a very young emerging female into a well-prepared nuc with enough bees and food frames. Space frames to allow flight and keep the nuc sheltered. Check for acceptance and later for solid brood pattern.
What acceptance rates and flight timing should I expect after placing a mated female?
Acceptance varies with strength of nuc and season; expect 60–90% under good conditions. Mating flights occur a week or two after emergence; monitor for egg-laying to confirm successful mating.
What common problems reduce take rates and how can I troubleshoot them?
Low nurse numbers, poor forage, weather and mites reduce success. Improve nutrition, move cells to stronger starters, time grafts with nectar flows, and rotate healthy colonies to avoid mite-burdened stock spreading issues.
How do I prevent spreading mites or disease when propagating new colonies?
Use healthy donor stock, inspect and treat for Varroa before grafting cycles, isolate new nucs briefly, and avoid moving heavily infested comb. Record treatments and test regularly to maintain ethical propagation standards.
How can a small-scale operator scale production responsibly while staying manageable?
Batch grafts, rotate cell builders, keep detailed records of days and frames, and expand mating nucs incrementally. Track results to refine timing and techniques rather than multiplying hives indiscriminately.