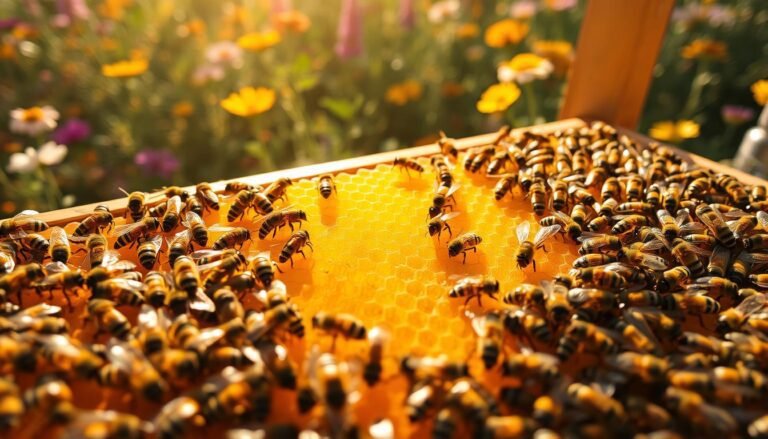
Thoughtful surface work improves the hive envelope and helps bees conserve heat during cold days. Careful coating, timed in calm weather, complements wraps, covers, and interior foam to reduce air leaks and wetting.
Painting is one piece of a whole-hive strategy. Proper prep, priming end grain, and selective coating protect wood, shed water, and help stabilize temperature and moisture so the cluster uses less fuel.
Small changes matter: a 1/2″–3/4″ foam under the cover cuts condensation, while snug XPS panels or Bee Cozy and Ez-On wraps add proven R-value. These steps do not heat the colony, but they keep stored heat from escaping and reduce drip on bees during winter.
Key Takeaways
- Good surface work reduces air infiltration and wetting around the colony.
- Prime end grain and use durable exterior coatings on key pieces only.
- Combine coatings with a foam cover insert and snug wraps for best results.
- Options like Bee Cozy and Ez-On add measurable R-value in cold zones.
- Proper prep in fair weather saves rework and helps spring build-up.
Understanding why paint matters for hive insulation and winter efficiency
A well-finished exterior changes how a colony loses heat and handles moisture. Good surface work does not heat bees, but it helps keep warmth where the cluster needs it most.
Heat, moisture, and the physics of R-value in wooden hives
Warmed air from a cluster transfers heat to inner walls, then out through the shell. Thin 3/4″ pine boxes offer roughly R-1, so heat moves quickly through wood.
Higher R-value materials slow that loss. One-inch XPS gives about R-5 and polystyrene bodies often exceed R-6. Tree cavities can reach R-5 or higher, which explains why natural sites retain warmth better.
Bees heat the cluster, not the hive—what that means for your paint strategy
Bees keep the cluster core near 70°F without brood and near 90–95°F with brood. The outer shell drops toward ~41°F, so reducing conductive and convective loss saves vital energy.
Practical point: a well-sealed, water-shedding finish prevents swollen seams, limits air paths, and keeps the thin air film at the surface more stable. That aids cluster mobility and lowers starvation risk when temperatures plunge.
| Material | Typical R-value | Effect on heat loss | Role of paint/seal |
|---|---|---|---|
| 3/4″ pine box | ≈ R-1 | High conductive loss | Paint sheds water, protects grain |
| 1″ XPS board | ≈ R-5 | Slows conductive loss greatly | Works with caulked seams to stop drafts |
| Polystyrene body | > R-6 | Significant retention of internal heat | Minimal paint needed; seal joints |
| Tree cavity | ≈ R-5+ | Natural buffer against cold | Not applicable |
Bottom line: Match paint, primer, and sealants with planned R upgrades such as wraps or foam. Use a snug cover insert and sealed exterior to reduce condensation and keep colonies safer through winter.
Hive painting tips for better insulation
Start with solid surface prep to lock out drafts and stop wood from soaking winter moisture.
Surface prep: cleaning, drying, and repairing wood for a tighter envelope
Brush off debris, scrape loose coatings, and let every box dry completely before any work. Wet or dirty surfaces prevent primers and paints from bonding.
Fill checks and tighten loose joints to cut air paths that bypass insulation. Repairing seams reduces conductive loss through thin boards.
Priming and sealing end grain to reduce heat loss and moisture wicking
Prime all faces and pay special attention to end grain. End grain acts like straws and soaks water quickly unless sealed. A good primer limits swelling and the gaps that follow.
Caulk exterior seams where needed but keep entrances and ventilation routes open so bees can manage the cavity microclimate.
Choosing exterior paints that stand up to winters and UV
Select high-quality exterior latex or alkyd with flexible resins and light-fast pigments. Paint the outside of the box and rims, but leave interior surfaces bare to protect honey and bee health.
After coatings cure, confirm frames and lids operate smoothly so painted rabbets don’t pinch or jam during inspections.
| Surface | Issue | Recommended action |
|---|---|---|
| Raw wood sides | Wicks moisture, swells | Prime faces and seal end grain, then coat exterior |
| Box joints and rims | Draft paths | Caulk selective seams and paint continuous edges |
| New equipment | Exposed edges | Prime before assembly, touch up after final fit |
Further reading: See the guide on beehive paint and color choices to match color strategy with your climate.
Color strategy: using paint to balance solar gain and temperature control
Using color and selective wraps can modestly change how a colony gains or sheds heat on sunny winter days. Dark finishes on sun-facing sides absorb more solar energy and can raise interior temps a few degrees. That small gain helps bees move toward stores and eases short cold snaps.
Dark sides vs. light tones
Use darker tones on the south and west facing side surfaces in cold areas to capture midday sun. Lighter shades across broad faces limit overheating during hot weather.
Selective painting and placement
- South/west accents: add dark paint where winter solar gain is useful.
- North protection: keep the windward side durable and water resistant against driven snow.
- Test first: paint one stack or a small panel to compare results across weather and days.
Remember: color alone won’t fix air leaks or moisture. Combine durable, UV-stable pigments and wraps like black roofing felt to complement sealed seams and proper ventilation. Match choices to site exposure, tree cover, and yard layout so bees and keepers both benefit.
Wrapping vs. insulating: how paint complements hive wraps and foam
A snug wrap can cut wind-driven chill, while foam boards truly add R-value that slows heat escape.

Roofing felt and similar covers offer solar gain and wind sealing but add almost no true thermal resistance. They work well where wind and sun are the main threats.
Roofing felt wraps for solar gain and wind sealing
Felt-like wraps stop drafts and warm sunlit sides on clear days. Use them to keep wind off the walls and to reduce convective chill.
Foam board and high‑R bodies for real thermal gain
Foam boards (XPS) and fiberglass sleeves provide measurable R-value. XPS gives roughly R-5 per inch; Bee Cozy sleeves run near R-8 and Ez-On wraps near R-4. Paint both sides of exposed XPS to prevent UV damage and warping.
Avoid gaps that trap bees behind panels
Keep all wraps and boards tight to the stack. Small air gaps can lure bees behind insulation where they chill and die.
“Top insulation under the cover combined with snug side panels yields the largest reduction in condensation and heat loss.”
- Ez-On: R-4, installs without removing the cover.
- Bee Cozy: R-8, slips over the body and staples in place.
- XPS panels: customizable R, secure with straps or bungees; paint both sides.
| Type | Approx. R-value | Primary role | Notes |
|---|---|---|---|
| Roofing felt wrap | ≈ R-0 | Wind seal / solar gain | Low R; best where sun and wind dominate |
| Ez-On sleeve | ≈ R-4 | Moderate thermal + easy install | Velcro closure; fits double deeps |
| Bee Cozy sleeve | ≈ R-8 | High-R wrap | Fiberglass fill; staples on |
| XPS foam panels | ≈ R-5 per inch | Adjustable thermal barrier | Paint both sides; secure snugly to avoid gaps |
Practical takeaway: pair side wraps or foam boards with a top foam under the cover. That combination reduces heat loss, cuts condensation, and helps colonies conserve stores through cold winter periods.
Ventilation and moisture control to pair with painted surfaces
A dry colony depends on managed ventilation that lets warm, wet air rise and leave. Painted exteriors help shed water, but they do not remove the humidity that bees produce.
Upper entrances and top insulation to prevent condensation
Keep a small upper entrance open so moist air can escape when lower openings plug with snow. This also gives emergency flight access on mild days.
Install a thin foam insert under the cover (1/2″–1″) to stop the cold-lid effect that freezes rising vapor into wet layers and drip.
Moisture quilts and airflow paths
Moisture quilts sit above the cluster and absorb humidity while letting air move upward. That reduces water pooling over the bees and the risk of condensation on cold surfaces.
- Do not seal ventilation openings with wraps or panels; allow a clear space and baffle wind.
- Combine retained heat with controlled air exit to cut frost and wetting.
- Leave interior wood bare so it can buffer small swings in humidity naturally.
“A modest top insert and an upper entrance deliver outsized winter protection with minimal disruption.”
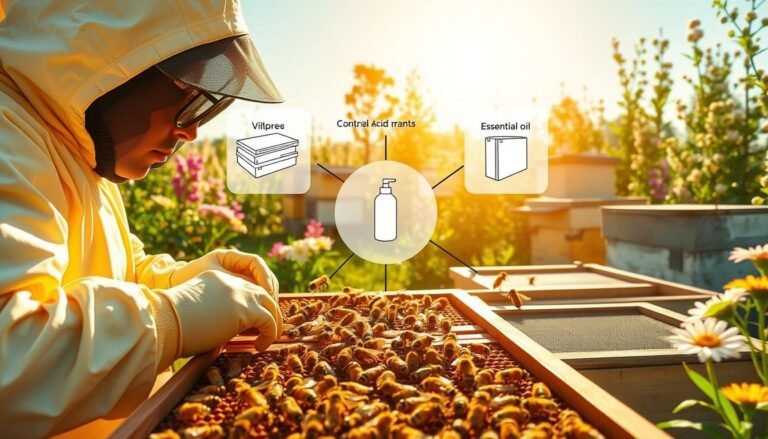
Materials and tools checklist for painting and insulating hives
Gather the right materials and set up a clean workspace before you touch any boxes or boards. A short checklist saves trips and reduces mistakes.
Coatings and application tools
Coatings: high-quality exterior primer and paint, exterior caulk, and an optional penetrating sealer for exposed end grain.
Application tools: brushes and rollers sized for boxes, sanding sponges, drop cloths, and a respirator when using strong solvents.
Insulating materials and fasteners
- Roofing felt (cut ~80″ for a standard Langstroth stack); anchor with a short pan-head screw and a wood batten pre-started with drywall screws.
- XPS foam board panels (~R-5 per inch) — paint both sides; use straps or bungees to hold boards snugly.
- Commercial wraps like Bee Cozy or Ez-On as an alternative depending on the type you prefer.
Practical notes: add a 1/2″–1″ foam piece under the cover to reduce condensation and heat loss. Keep ventilation ports clear. Mark each box and board so panels fit the intended stack and avoid wasted space.
| Item | Role | Tip |
|---|---|---|
| Short pan-head screw | Anchor felt | Use with wood batten |
| Straps / bungees | Secure foam | Prevent gaps |
| Top foam piece | Cut condensation | 1/2″–1″ under cover |
Safety & storage: label solvents, keep materials dry, store wraps flat, and plan plenty of workspace so painted pieces cure fully before reassembly.
Step-by-step: paint and insulate a Langstroth hive for winter
Work on one stack at a time so paint and foam cure fully before you reassemble frames and covers. Stage parts, label each box and rim, and pick a calm, dry day.
Seal and paint boxes, covers, and rims
Disassemble and paint outer faces and edges while leaving interior wood bare to protect bees and store moisture safely.
Prime first, then apply two finish coats to exteriors. Reinstall hardware after curing and check that frames slide freely.
Install top insulation
Add a 1/2″–3/4″ foam piece under the telescoping cover to cut condensation and heat loss. Keep the upper entrance clear so warm, moist air can escape.
Apply wraps or foam panels snugly
Choose a roofing felt wrap for wind sealing or paint both sides of foam board panels for higher R-value.
- For felt: cut ~80″ to stack height, anchor with a 1/2″ pan-head screw, overlap and fasten with a 3/4″x3/4″ batten and drywall screws.
- For foam panels: cut to fit, press tight to the boxes, and secure with straps without leaving gaps.
| Method | R-value | Key action |
|---|---|---|
| Roofing felt wrap | ≈ R-0 | Anchor, overlap, batten |
| Painted foam board | ≈ R-5 per inch | Paint both sides; strap tight |
| Top foam piece | ≈ R-1 | 1/2″–3/4″ under cover; keep entrance clear |
Final check: verify no gaps behind panels, add a cover strap or weight to prevent blow-offs, and confirm that no bees can get trapped behind insulation.
Regional guidance: tailoring paint, wraps, and foam to U.S. climates
Where you keep bees matters: microclimate, exposure, and altitude change how a box performs in winter.
Cold zones (USDA Zone 5 and colder) need higher R and thoughtful color choices. Use durable coatings and 1–2″ XPS or Bee Cozy sleeves to cut heat loss. Darker panels on south-facing sides can add modest solar gain on clear winter days.
Milder winters and shoulder seasons demand attention to airflow and moisture. Lighter colors reduce overheating on warm afternoons. Keep upper entrances clear and add a thin top foam piece to control condensation.

Wind and special areas: in windy spots, pair wraps with fences or wind breaks to stop convective stripping. High-altitude stacks benefit from solar-facing dark panels plus sealed joints. In humid coastal yards, prioritize air movement and moisture quilts.
“Top insulation under the cover gives outsized protection across climates when paired with snug, gap-free installs.”
- Cold areas: higher-R panels, darker south sides, wind breaks.
- Mild areas: light tones, strong ventilation, moisture control.
- Desert/high-altitude: balance day heat with night retention; seal joints tightly.
Practical rule: test one stack, track results by area and weather, and adjust. Snug installs and clear airflow paths are the baseline for reliable winter performance.
Durability and maintenance: keeping painted hives weather-tight for years
Small maintenance steps each season prevent a lot of heat loss and structural damage over the years. A short annual checklist saves time and limits colony loss during cold days.
Inspect painted walls and wood faces yearly. Look for peeling, hairline cracks, and chalking on sun-exposed sides. Repaint or touch up before moisture can soak into end grain.
Check the cover and top padding. Replace compressed or waterlogged material so the cover keeps lid condensation down. Strap or weight covers after storms to stop blow-offs and water entry.
Watch panels and wraps closely. Repaint foam faces if UV has damaged them and retension straps so boards stay snug against the box. Repair tears and warped sections that let drafts into the body.
“A weather-tight exterior preserves insulation performance and reduces the risk of colony loss tied to dampness and drafts.”
- Recaulk micro-gaps where wood has moved; preserve upper vents and entrances.
- Confirm frames slide freely; sand or touch up rabbets to keep correct bee space.
- Keep records of products and dates to judge longevity across years.
For ventilation details and seasonal checks, see a guide on ventilation and moisture control and an article on surface coatings and finish choices. A weather-tight shell keeps the colony drier and reduces heat loss over time.
Beekeeper insights: proven practices from the field
Field-tested changes often start at the roofline — small top fixes give the largest payoff.
Top insulation success: simple foam under telescoping covers
Many beekeepers report clear gains after adding a 1/2″–1″ foam piece under the telescoping cover. The small insert cuts condensation, keeps lids drier, and reduces mid-winter disturbance.
When to use Bee Cozy or Ez-On wraps—and how they fit with your paint plan
Bee Cozy works well where stacks are imperfect; it slips on and gives high R. Ez-On installs with Velcro and fits without opening the boxes, so you can add protection on active days.
Integrate wraps with a sealed, durable exterior so panels sit tight and wind does not pull gaps open. Some keepers add black roofing felt on sunny winter days to get modest solar gain.
“Snug, gap-free installs and sound painted shells tend to overwinter stronger, with more colonies ready for early flows.”
- Keep a small upper entrance open so moist air can escape and steady air reduces drip.
- Place a weight or strap on the cover in windy sites; top foam lessens uplift risk.
- Track each colony’s response and remove seasonal layers in spring to avoid overheating.
Note: these field practices pair best with sound mite control and ample stores of honey to protect the colony through cold days.
Troubleshooting common winter losses tied to paint and insulation
Identifying where warm, wet air meets cold surfaces stops many common seasonal losses. A quick inspection can separate simple fixes from deeper problems.
Condensation drip and chilled bees: signs and fixes
Signs: wet inner covers, frost that later turns to drip, or dead, damp bees under the lid.
Fixes: add or increase top foam, open a small upper entrance to let moist air escape, and check that wraps do not block airflow.
Starvation near unreachable honey: improving cluster mobility with warmth
Clusters can stay too tight to reach nearby honey when temperature and retained heat are low. This causes avoidable starvation losses.
- Raise wall R-value where feasible and install a thin top pad to retain heat.
- Confirm frames align so the cluster can move across adjacent frames when weather allows.
- Remove gaps behind panels; trapped bees often die during brief warm spells when they venture into spaces they cannot exit.
“A dry interior and a snug cover reduce condensation and give the colony a better chance to access stores.”
Quick checklist: inspect seals and paint at seams, strap the cover flat, consider a moisture quilt in damp yards, and track internal temperature during fair weather. For regional adjustments, see the regional climates guide.
Conclusion
A solid exterior finish and snug wraps act together to keep stored heat where the colony needs it most.
Combine a sound coat, sealed end grain, a thin foam piece under the cover, and tight panels and you cut heat loss and condensation through long winters. These measures do not heat the colony; they help the bees hold temperature with less fuel and risk.
Prepare boxes in good time, seal seams, install a 1/2″–3/4″ pad beneath the telescoping cover, and fit wraps or foam without blocking airflow. Small changes—more R, less moisture, a tighter envelope—add up to a lot over the season.
Maintain equipment year to year: routine checks extend service life, reduce rework, and give colonies a stronger start in spring. Pair these physical steps with solid honey bee care, mite control, and ample stores.
Act now: choose materials, schedule the work while weather allows, and you’ll give your bees the best chance to thrive through winters and surge into spring.
FAQ
How does paint affect insulation and winter efficiency of a wooden hive?
Paint primarily protects wood from moisture and ultraviolet damage, which preserves structural integrity and reduces drafts. While paint adds negligible R-value, a well-sealed exterior prevents air infiltration and water wicking. That keeps internal cavities drier and helps the colony hold heat more effectively. Use exterior primers and topcoats to maintain a tighter envelope and extend the life of the boxes, frames, and covers.
If bees generate heat, why bother painting or insulating the boxes?
Bees heat the cluster, not the whole cavity. Insulation and weatherproof finishes reduce heat loss from the brood area and lower the colony’s energy demands. Proper sealing and selective insulation help maintain a stable temperature, reduce food consumption in winter, and limit brood stress in spring.
What surface preparation steps are essential before applying primer and paint?
Clean loose debris, remove peeling finish, and let wood dry fully. Repair splits and end grain with exterior-grade caulk or wood filler, sand rough spots, then prime bare wood and cut ends. Good prep ensures the primer bonds, reduces moisture wicking at joints, and prevents future cracking or peeling.
Which paint types and finishes perform best on apiary boxes?
Use high-quality exterior acrylic latex or oil-modified enamel for durability and UV resistance. Choose breathable primers where possible to avoid trapping moisture in aged wood. Satin or semi-gloss finishes shed water well and are easier to clean than flat paints.
How should I decide on color—dark or light—for my apiary in different seasons?
In cold climates, darker tones on south-facing walls can capture winter sun and provide a small solar gain. In hot regions, light tones reflect sunlight and reduce summer overheating. A selective approach—dark fronts or southern faces, lighter north faces—balances winter warmth and summer cooling.
Can paint replace wraps, foam board, or other insulation methods?
No. Paint protects and seals but doesn’t supply significant R-value. Combine painting with foam board, telescoping cover insulation, or wraps for meaningful thermal performance. Use rigid XPS panels under covers or snug foam around boxes while avoiding trapped cavities behind insulation that bees can’t access.
What are safe ways to wrap and insulate without trapping moisture or bees behind the material?
Leave airflow paths: maintain small upper entrances or screened vents and install moisture quilts or absorbent material under the telescoping cover. Secure wraps and foam tightly to avoid gaps where bees can become stranded. Avoid covering ventilation slots and make sure insulation is breathable or paired with controlled vents.
How do I manage ventilation to prevent condensation after sealing and painting?
Provide a top vent or small upper entrance so warm air can escape and dry air can circulate. Add a moisture quilt or insulating block under the outer cover to intercept water. Remember: warm air rises; without proper escape routes, moisture condenses and can drip onto the cluster, harming the colony.
What materials and tools should I have on hand for painting and insulating a Langstroth system?
Prepare exterior primer and paint, brushes or rollers, painters’ tape, exterior caulk, weatherproof screws or straps, XPS foam panels, roofing felt, and inexpensive moisture-absorbing material for quilts. A cordless drill, utility knife, and straightedge speed installation and trimming.
Step-by-step: what’s the process to seal, paint, and add top insulation to a Langstroth body?
Start by cleaning and repairing boxes, fill splits and sand rough areas, prime bare wood and end grain, then apply two coats of exterior paint. Paint covers and rims while leaving internal frames and comb areas bare. Add a moisture quilt or foam board under the outer cover and secure wraps or panels snugly without compressing the brood space.
How should paint and insulation strategy change across U.S. climate zones?
In colder zones (Zone 5 and lower), use darker palettes on sun-facing sides, higher-R insulation, and wind breaks. In mild-winter areas prioritize ventilation and moisture control; lighter colors work well to reduce summer heat stress. Tailor insulation thickness and airflow to local winter duration and typical humidity.
How often should I inspect painted and insulated colonies for maintenance?
Inspect annually in spring or late fall. Look for peeling paint, cracked caulk, warped foam, and loose straps. Repaint or reseal compromised areas, replace degraded foam, and check that vents and entrance reducers remain functional to prevent losses over multiple years.
What simple insulation practices have experienced beekeepers found most effective?
Many beekeepers use thin foam under the telescoping cover, add an insulating inner cover, and apply breathable wraps like Bee Cozy or Ez-On when needed. These low-cost measures, paired with a well-sealed, painted exterior, often reduce winter feed needs and improve spring buildup.
What are common winter problems tied to paint and insulation, and how do I fix them?
Condensation drip, chilled clusters, and near-hive starvation are common. Fix condensation with better top insulation and airflow, relocate stored honey frames closer to cluster position, and eliminate cold drafts by resealing cracks and replacing warped wood. Ensure bees can move vertically and laterally to reach food as temperatures fluctuate.
Are there any brands or products recommended for wraps, foam panels, or protective coatings?
Established products like Bee Cozy and Ez-On offer wraps designed for beekeeping. Use XPS foam panels for consistent R-value and Gorilla or DAP exterior-grade caulks for sealing. For paint, Benjamin Moore and Sherwin-Williams exterior acrylics have reliable durability and UV resistance in field use.