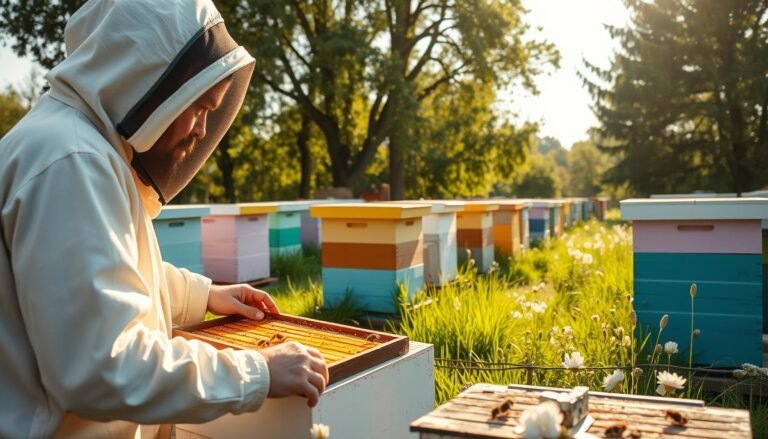
This guide outlines a compact, safe pathway for turning a spare room or bench into a focused DIY lab for bee-focused work. It balances practical design, essential equipment, and simple safety practices so you can run observational studies and benign experiments with confidence.
Start by setting clear goals: define what data you will collect, which assays are feasible, and which biosafety limits you will respect. Keep bench surfaces clean, label tubes, and use calibrated scales and pipettes for reliable results.
Plan the layout around storage and PPE. Use affordable tools like steam cookers for sterilization, camping burners for local sterile zones, and -20°C freezers for samples. Document workflows and log temperatures so each run improves the next one.
Key Takeaways
- Set clear project goals and safety limits before you begin.
- Prioritize clean benches, labeled containers, calibrated tools, and PPE.
- Choose affordable, reliable equipment that supports repeatable results.
- Adopt professional workflows and simple data logging from day one.
- Phase upgrades: add capability only when your roadmap justifies it.
Purpose, scope, and safety first for a home bee micro‑lab
Clarify your project goals: observation, benign culture work, and what outcomes you will record. Start small and restrict activity to non‑pathogenic samples so people, pets, and pollinators stay safe.
User intent and project goals
User intent and project goals: observation, non‑pathogenic cultures, and data
Define clear methods for each task and write them down. Limit experiments to observation and safe culture procedures that yield usable data for local research efforts.
Safety and compliance in the United States: PPE, waste, and what not to culture
Require PPE, hand hygiene, and routine surface cleaning to reduce contamination. Set stop points for unacceptable risk levels and never attempt unknown isolates or pathogens in a home setting.
- Documented PPE and spill response
- Segregated waste and steam or bleach treatment before disposal
- Routine checks of the work environment and record keeping
| Activity | Allowed | Prohibited | Control |
|---|---|---|---|
| Observation | Yes | No | Basic PPE |
| Non‑pathogenic culture | Yes | No pathogens | Steam/bleach treatment |
| Environmental isolates | Limited | Unknown isolates without containment | Strict documentation |
“Routine training, PPE access, and clear cleaning schedules keep small labs effective and safe.”
Follow simple lab habits from professional labs and track each culture’s purpose, run time, and end-of-experiment treatment. These steps ensure your at‑scale research stays safe and reproducible.
Designing your micro‑lab space and workflow
Design the workspace so materials move in one direction: clean to used. This minimizes cross contact and keeps tasks efficient.
Work zones: clean bench area, media prep corner, and cold storage
Divide the room into three distinct stations. Keep a dedicated clean bench for sterile handling, a media prep corner with heat sources and scales, and a consolidated cold storage area with a -20°C freezer.
Environmental conditions: room temperature, humidity, and ventilation
Maintain stable conditions: steady temperature, moderate humidity, and steady ventilation. These elements support consistent results and safer chemical use.
Contamination control: cleanable surfaces, traffic flow, and storage order
Choose smooth, cleanable surfaces and set an order for tools and consumables. Stage pre‑labeled tubes and dishes in the precise order you will use them to shorten open time.
- Install simple systems for consumable tracking and expiration.
- Minimize foot traffic through the clean area and avoid drafts near sterile work.
- Keep a laminated floor map and a daily reset checklist for consistency.
| Zone | Primary controls | Key practice |
|---|---|---|
| Clean bench | Alcohol wipes, limited access | Work from sterile items outward |
| Media prep | Heat source, scales | Isolate messy steps from bench |
| Cold storage | Monitored -20°C unit, labels | Use small containers and logs to check temperature |
“Clear zones and monitored systems reduce errors and speed recovery after each session.”
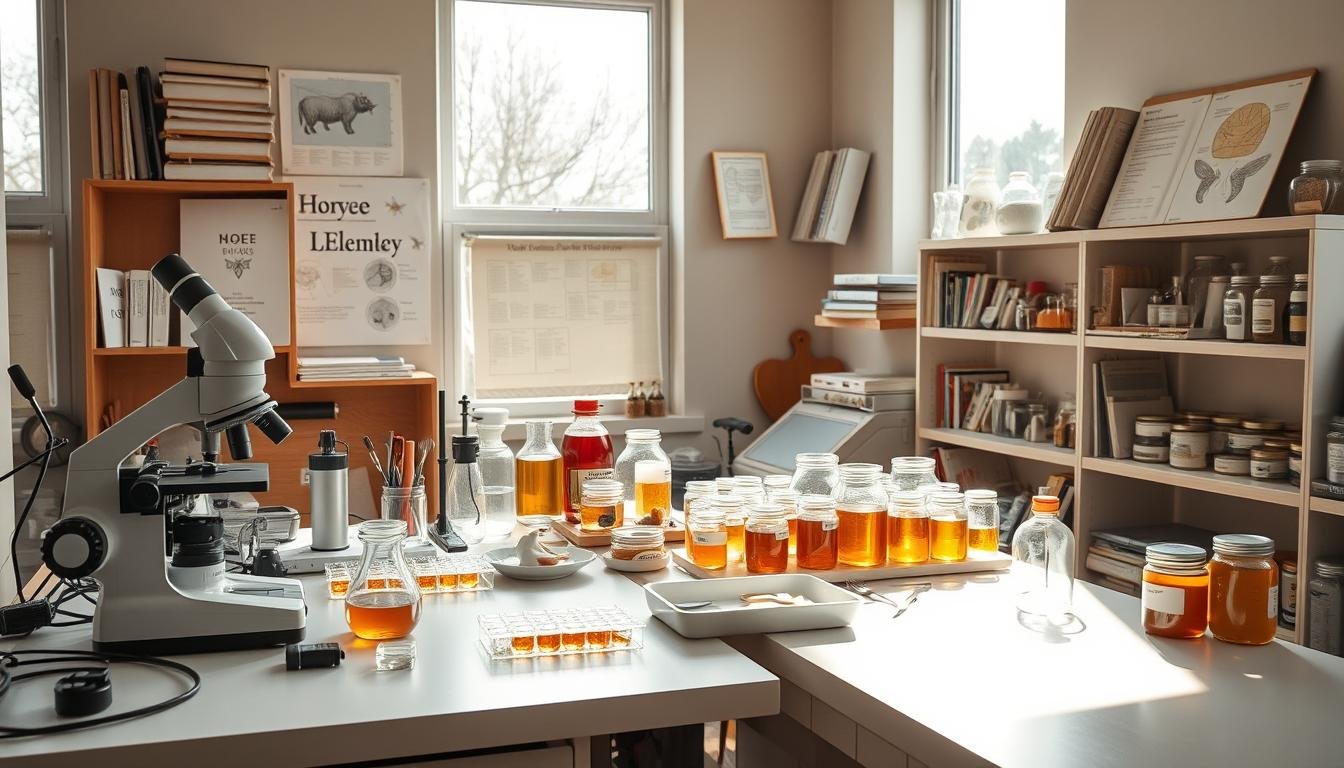
Essential DIY lab equipment and materials to get started
Assemble a compact kit of precise instruments and organized materials before your first session. Start with a small set of pipettors (20 µL, 200 µL, 1000 µL) and matched tips, some with filters for sensitive steps.
Calibration habits matter: check pipettors and the scale monthly and log adjustments. Accurate pieces keep results consistent and reduce repeat runs.

Pipettors, tips, and maintenance
Use standardized tip formats to avoid mismatches. Carry spare tips and a tip box for each volume range. Service pipettors on a schedule and store them upright when not in use.
Sterilization options and quick decontamination
A steam cooker can reach about 120°C for 15–20 minutes and serve as an affordable autoclave alternative; verify cycles with indicator tape that shows black stripes when done. For fast cleanup, use bleach solutions and alcohol wipes on benches.
Plastics, dishes, tubes, racks, and labels
Stock 100 mm petri dishes, Eppendorf-style tubes (0.2, 0.5, 1.5 mL), and 12–50 mL test tubes with racks. Use solvent-resistant pens and a small thermal or ink printer for clear container labels.
Cold chain and storage
Keep a reliable -20°C fridge/freezer and modular plastic containers. Organize samples by date and experiment and maintain a log of temperature checks for safe storage of enzymes and strains.
- Core equipment: pipettors, steam cooker, micro-flame, and scale.
- Starter materials: petri dishes, racks, foil, and labeling tools.
- Spare pieces: extra racks, pens, and tips to avoid workflow stops.
Budget‑friendly alternatives and sourcing strategies
Practical procurement means knowing which items you can safely buy used and which need to be new.
Look for surplus auctions, lab closures, and reputable resellers when seeking second‑hand gear. Inspect seals, gaskets, and wear at the point of purchase. Bring a checklist and check that parts are available for replacement.
Buy new for critical safety and accuracy items. Cold storage units like a -20°C freezer, electrical incubators, and precision scales often justify full price. For other items, a tested second‑hand pipettor can work well if you plan for calibration.
- Test key devices on arrival: pipettors, scales, and heaters. Run a quick test and log baseline readings.
- Place recurring consumables on a standing order to standardize tips and tubes and avoid mismatched lots.
- Expect a lot of small pieces; label bins and track inventory simply but consistently.
“Emulate procurement tracking from professional labs at a smaller scale to keep your setup reliable and audit‑friendly.”
How to build a bee research micro-lab at home: step‑by‑step setup
A disciplined start—clean bench, staged tools, and labeled tubes—reduces errors and speeds every trial.
Bench setup: alcohol, flame, and sterile technique
Clear the surface, disinfect with 70% alcohol, and place items in a clean tray. Use a small alcohol flame only when safe and allowed. Keep sterile items covered and open them in the order you will use them.
, the ideal incubation temperature for a bee research lab. The display is centered in the frame, with a clean, minimalist background that evokes a clinical, scientific environment. Subtle, diffused lighting illuminates the digital readout, making the temperature reading clear and easy to interpret. The overall composition conveys a sense of precision, control, and attention to detail - essential elements for maintaining a successful bee research micro-lab.")
Media and water preparation: measuring, mixing, and containers
Measure powders precisely and add clean water in labeled flasks. Cover mouths with foil and sterilize in a steam cooker following your chosen methods. Record batch details, date, and water source in the log.
Incubation approaches: room boxes and DIY incubators
Use a stable room‑temperature box or a DIY incubator that holds a steady setpoint. Place a thermometer or data logger inside and check temperature at intervals during each experiment. Note any drift and adjust for the next run.
“Reset, record, and rinse—this simple cadence scales your lab work and improves repeatability.”
| Step | Action | Check |
|---|---|---|
| Pre‑run | Disinfect bench, stage tools | Clean surface, supplies ready |
| Prep | Mix media with measured water, cover | Sterilized and labeled |
| Incubate | Place in box or incubator, log temp | Stable setpoint recorded |
Starter experiments relevant to bees: methods, media, and expected results
Start small with clear, repeatable assays that show visible changes over days rather than hours.
Benign cultures and simple assays
Begin with safe bacteria such as Lactobacillus plantarum on 100 mm petri dishes or on trimmed cellulose pieces.
Use MRS media with optional X‑Gal for color readouts. On wet cellulose skins, plantarum can produce a greenish‑blue signal that is easy to photograph.
Cellulose biomaterials and add‑ons
Grow kombucha SCOBY skins and test small chitosan blends (9–12%).
Try syringe heads on a filament printer for repeatable deposition of chitosan or pulp pieces. Note dried chitosan can soften when sandwiched with wet skins in sun.
Colorimetric concepts and data logging
Prototype visual sensors with hardy, benign strains. Use photos and simple temperature logs to track growth and contamination.
“Plant fiber cellulose may be removed by bees while microbial cellulose can persist longer in hive trials.”
| Test | Condition | Expected result |
|---|---|---|
| L. plantarum on MRS + X‑Gal | Wet cellulose, 25–30°C | Green‑blue colonies on petri dishes in 48–96 hrs |
| Kombucha SCOBY skin | Moist incubation | Thick microbial cellulose, durable vs. plant fiber |
| Chitosan blends | 9–12% syringe‑printed pieces | Stiff dried pieces; sun exposure may fade or warp |
| Colorimetric sensor trials | Controlled hydration | Visual readouts; document temp and contamination notes |
Contamination prevention, treatment scheduling, and quality control
Small daily habits cut contamination and make results repeatable.
Sterile methods checklist. Wipe benches with 70% alcohol, work near a small flame if allowed, and keep sterile supplies covered until used.
Use indicator tape for steam cycles (120°C for 15–20 minutes) and confirm black stripes before trusting sterility.
Sterile methods: flame, tape indicators, and waste boxes
Practical controls: maintain dedicated waste boxes for tips, tubes, and disposable items. Treat or neutralize waste by steam or approved bleach before household disposal.
Calibration cadence for scales and pipettes
Set a regular schedule for calibration and log each result. Daily checks for pipettes used heavily and monthly scale tests help spot drift early.
- Label calibration logs with date, operator, and corrective action.
- Keep spare tips and a backup scale on the procurement list.
| Area | Action | Frequency | Acceptance levels |
|---|---|---|---|
| Bench cleanliness | Alcohol wipe, remove clutter | Before every run | No visible residue; surface dry |
| Calibration | Pipette and scale verification | Pipettes: daily/weekly; scales: monthly | Within manufacturer tolerance |
| Freezer maintenance | Defrost, temp log check | Monthly and after outages | Stable -20°C ± acceptable range |
| Waste handling | Collect, treat, document disposal | After each session | Neutralized or steam-treated per local rules |
“Routine cleaning, calibration, and clear logs keep systems reliable.”
Close the loop by reviewing QC notes after every test. Use those notes to decide whether to proceed, repeat, or change methods for the next run.
Optional add‑ons for deeper research
Consider modest upgrades that unlock clearer views of cells and steadier run conditions.
Microscopy basics: sample prep and observing microbes
Add a brightfield microscope and basic prep tools for wet mounts, stains, and surface swabs. A simple light microscope reveals cell shape, motility, and contamination quickly.
Keep sample prep clean: use clean slides, cover slips, and single-use pipettes. Document magnification and lighting settings for each image.
Incubators and environmental boxes for controlled conditions
Upgrade to a purpose-built incubator when room variability affects results. Incubators deliver stable temperature setpoints and uniform growth across replicates.
For drying, material conditioning, or colorimetric assays, an environmental box keeps humidity and heat steady. Choose units with clear readouts and reliable controls.
“Choose equipment with stable setpoints and log performance checks to validate reproducible runs.”
- Add a brightfield scope for routine checks of cells and surface films.
- Buy or build an incubator when precise timing and temperature matter.
- Use an environmental box for humidity control during material tests.
- Keep maintenance and calibration notes with every new piece of equipment.
- Plan future dna‑safe workflows if you later expand to molecular endpoints.
| Upgrade | Primary benefit | Recommended check |
|---|---|---|
| Brightfield microscope | Visualize cell morphology and surface contamination | Clean optics, calibrated stage, image log |
| Small incubator | Stable temperature for reproducible growth | Setpoint verification, temp log, alarm test |
| Environmental box | Humidity and temperature control for materials | Hygrometer check, cycle repeatability |
Ethics, legal considerations, and safe disposal in home labs
Prioritize safety, legality, and stewardship before you open any sample or container. Set clear limits that keep activities non‑hazardous and within local rules. Maintain PPE, basic training, and labeled spaces for clean work.
What belongs in a private setting versus an institutional lab
Limit your project to non‑pathogenic assays with clear visual endpoints. Reserve advanced methods and hazardous agents for facilities with oversight and certified waste treatment.
- Make disposal plans explicit: collect disposables in labeled containers and apply heat or bleach treatment before final disposal.
- Keep water handling inside a controlled sink area and never pour untreated cultures down household drains.
- Use sturdy plastic consumables and avoid reusing single‑use pieces that may fail sterility or integrity.
| Area | Recommended practice | Why it matters |
|---|---|---|
| Waste | Labeled containers, steam or bleach treatment | Reduces environmental and health risk |
| Water | Confined rinsing, treated effluent | Prevents household contamination |
| Consumables | Use durable plastic; discard single‑use items | Maintains sterility and prevents failure |
“Document purpose, benefit, and controls so you can explain choices and demonstrate safety.”
When in doubt, consult community lab policies or local regulators at the point of planning. Clear records and simple stop points keep work safe and responsible.
Conclusion
Conclude by centering practices that turn small tests into reliable data for future experiments.
Keep the focus on a clean bench, routine calibration, and stable temperature control. These three pillars make experiments with bacteria and cells reproducible and safer.
Start with one experiment at room temperature or in a small incubator and record each result carefully. Use simple visual readouts on petri dishes or cellulose, then add microscopy to check cells and surfaces.
Prioritize safe disposal and labeled plastic consumables after each run. Treat cultures before disposal and maintain a dated cold storage log in your fridge or -20°C unit.
Finally, expect incremental improvements: top changes in labeling, temperature stability, and workflow order often yield outsized gains. For practical arena and incubator examples, see this short report on small arenas and controlled incubator runs: P‑cup arena and incubator practices.
FAQ
What is the primary goal of a DIY bee research micro-lab?
The main aim is careful observation and non-pathogenic experiments related to bee health and materials. Projects usually focus on harmless microbes like Lactobacillus, cellulose biomaterials, and environmental monitoring rather than culturing dangerous pathogens. Clear goals help define equipment, containment, and safety steps.
Which safety and compliance steps are essential for U.S. home labs?
Follow basic biosafety measures: wear nitrile gloves, eye protection, and a lab coat; segregate work and living areas; use dedicated waste containers for biohazardous material and disinfect with 10% bleach; and avoid culturing BSL-2 or higher organisms. Consult local public health guidance for disposal rules and restrictions.
How should workspace be organized for clean workflow?
Divide the area into distinct zones: a clean bench for handling cultures, a media prep corner with measuring tools, and cold storage for samples. Keep consumables organized by first-in, first-out and maintain uncluttered, cleanable surfaces to reduce contamination risk.
What environmental conditions matter most for experiments?
Monitor room temperature and relative humidity; many benign cultures grow well at room temperature (20–25°C). Ensure good ventilation without direct drafts over sterile work, and use sealed incubators or boxes when precise temperature control or elevated conditions are necessary.
Which essential tools should I acquire first?
Start with calibrated pipettors and tips, disposable petri dishes, sterile reaction tubes, racks, labeling materials, digital thermometers, and a reliable small fridge or -20°C freezer. A basic compound microscope and a DIY incubator box are useful next steps.
What sterilization options work in a DIY setting?
Use a pressure cooker for heat sterilization of liquids and glassware, 70% isopropyl or ethanol for surface disinfection, and 10% bleach for waste. Flame sterilization with a small alcohol lamp can be used for metal tools but handle carefully and never near flammable materials.
Can I use second‑hand equipment, and where should I buy new items?
Buy reusable precision items like pipettes and digital scales from reputable sellers or refurbished lab suppliers. Purchase critical sterile consumables—tips, petri dishes, media—from trusted vendors such as Fisher Scientific or Carolina for guaranteed sterility.
What basic experiments are safe and informative for beginners?
Simple hands-on projects include culturing Lactobacillus on nutrient agar, testing growth on cellulose surfaces (like kombucha SCOBY samples), and running colorimetric assays with safe indicator strains. These teach aseptic technique, recording growth curves, and contamination recognition.
How can I create a low-cost incubator for temperature control?
Use an insulated box or cooler, a thermostatic heater or aquarium heater, and a digital thermostat controller. Add a thermometer and a tray for petri dishes. Ensure even heating and monitor closely to prevent overheating and contamination.
What contamination controls and quality checks should I follow?
Implement a sterile methods checklist: wipe surfaces with 70% alcohol, flame or use sterile tools, use taped petri dishes to detect leaks, and isolate suspect plates. Calibrate pipettes and scales periodically and log results to detect drift or procedural error.
How do I log experiment data effectively?
Keep concise lab notebooks with dates, media recipes, incubation conditions, and photographic records. Use simple spreadsheets for temperature and growth measurements. Regular notes on contamination incidents help improve protocols over time.
What microscopy basics help in observing bee-related microbes?
A compound microscope with 400x–1000x magnification and basic staining kits (methylene blue or Gram stain) reveal cell shape and basic morphology. Prepare thin smears, heat-fix carefully, and practice focusing with unstained samples before staining.
When should work move from a home setup to an institutional lab?
Transfer experiments that involve potential pathogens, genetic modification, or work requiring BSL-2+ containment to a licensed facility. If experiments carry legal or ethical risks, partner with a university, extension service, or community bio lab for oversight and proper equipment.
How should bio-waste and contaminated materials be disposed of safely?
Autoclave or pressure-cook liquid and solid bio-waste when possible, then double-bag and label before disposal per local regulations. Use bleach to pre-treat infectious materials and consult municipal guidelines for sharps and chemical waste.
What optional add-ons improve capability for advanced studies?
Consider a benchtop incubator with humidity control, a higher-quality compound microscope with phase contrast, environmental boxes for CO2 or humidity, and simple data loggers for continuous temperature and RH records to enhance experimental reproducibility.
Are there ethical or legal issues I should consider?
Yes. Avoid experiments that could harm bees, the environment, or public health. Do not culture regulated organisms or perform genetic modifications without institutional approval. Always follow state and federal rules and prioritize welfare and transparency.