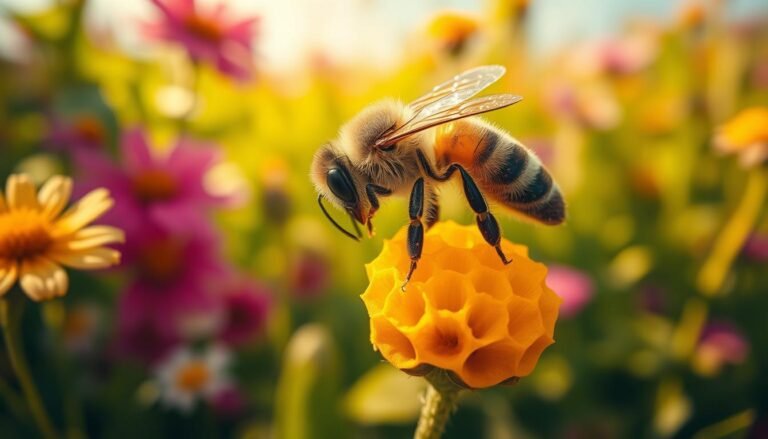
Start the first year with a clear goal: keep a healthy hive and build a resilient colony rather than chasing jars of honey. Small slips early—late feeding, skipped mite checks, or careless openings—can cascade into big losses.
Hands-on time matters. Books and videos help, but real inspections teach smell, sound, and subtle signs of a queenright hive. Plan each visit, use cool smoke gently, and close the hive quickly.
Practical tips: monitor mites, keep extra equipment on hand, and be ready to feed when nectar is scarce. Consider two colonies for flexibility if a queen fails. If bears live nearby, install electric fencing before you set hives.
For a deeper checklist and common early pitfalls, see this guide for focused information and practices that help new beekeepers through the first year.
Key Takeaways
- Prioritize colony survival over harvest in year one.
- Do timely mite checks, feed when needed, and prevent robbing.
- Hands-on inspections teach signs books cannot.
- Two colonies offer insurance for queen loss.
- Use electric fencing ahead of bear issues.
- Plan each hive opening; short, goal-driven inspections reduce stress.
Understanding the biggest risks for new beekeepers right now
Early-season choices set the course for hive survival by fall. Set a clear target: robust colony health, not jars of honey, during your first year. Health of the colony should be the main metric.
Common risks and practical priorities
Timing matters more than equipment. Late feeding, delayed mite control, or missed predator prevention can kill a colony fast.
- Clarify year-one objectives: brood, comb, and stores by fall; honey is a bonus.
- Assume varroa mites arrive with packages or nucs; monitor and act early.
- Know local conditions—blooms don’t guarantee nectar; dearths happen.
- Watch front-door activity closely; sudden spikes may mean robbing, not vigor.
- Plan inspections with purpose and keep concise logs for better decisions.
| Risk | Why it matters | Action | Timing |
|---|---|---|---|
| Late feeding | New colonies lack stores | Feed sugar syrup and use pollen patties | Early season, as needed |
| Varroa/mites | Always present; weakens brood | Monitor and treat with approved methods | Midseason and late summer |
| Robbing/predators | Can destroy stores quickly | Use reducers, robbing screens, electric fencing | When activity spikes or bears are nearby |
| Poor planning | Gaps in gear and schedule raise stress | Budget essentials and set a seasonal checklist | Before bees arrive |
Set realistic expectations
Keep inspections short and goal-driven. Log queen signs, brood, stores, and treatments. This information builds knowledge and reduces costly guesswork.
Setup slip-ups: colonies, placement, and protection
Site setup and the number of colonies you start with shape how you’ll respond to common setbacks.
Start with two colonies if you can. A second colony gives you a nearby source of brood, eggs, or honey frames you can move into a weak hive. That flexibility raises survival odds when queens fail or pests hit hard.
Placement matters. Morning sun helps bees get flying early, while afternoon shade lowers heat stress. Many honey bees prefer shaded cavities near sunny openings, so partial shade with good airflow and dry footing is often ideal.
Predator protection is nonnegotiable in bear country. An electric fence is the only reliable deterrent; bears learn and return to food sources, and one incident can destroy equipment, comb, and queens.

Practical checklist
- Begin with two colonies for sharing brood and comparison.
- Use level stands, good drainage, and clear flight paths.
- Install electric fencing before bees arrive if bears roam nearby.
- Keep basic predator gear: entrance reducers, mouse guards, and secure straps.
- Stage extra equipment—supers, frames, feeders—so you can act fast during flows.
| Issue | Why it matters | Recommended action | Timing |
|---|---|---|---|
| Single colony | Limits options for moving brood or resources | Start with two colonies when feasible | Before first season |
| Poor placement | Heat stress, poor foraging, wet bases | Morning sun, afternoon shade, level stand | Site selection |
| Bears & predators | Can destroy hive, comb, and queen | Electric fence, baiting, secure lids | Install before bees arrive |
| Lack of spare gear | Missed opportunities during nectar flows | Stage supers, feeders, extra frames | Preseason |
Beginner mistakes in beekeeping — and how to avoid them
A steady cadence of checks helps you spot queen issues and store shortages before they escalate. Set an inspection rhythm: every 2–4 weeks is a practical balance for most seasons. This cadence protects hive temperature and moisture while letting you monitor progress.
Always open with a purpose. Define one or two goals before lifting the lid—verify eggs, assess brood pattern, check stores, or apply a treatment. A focused plan means you get in and out quickly and reduce disturbance.
Use smoke sparingly and correctly. Light fuel that makes cool, dense smoke and give a few gentle puffs at the entrance and under the lid. Wait a minute for bees to settle; hot or excessive smoke sharpens agitation and can harm wings.
Handle frames slowly and deliberately. Roll bees off frames rather than crushing them and keep frame order to protect brood and the queen. Watch for signs you’re overworking the colony—bees pouring out or a loud defensive buzz—and shorten the task list.
- Keep a checklist so missing tools don’t prolong an inspection.
- Consider observation hives or side windows for noninvasive checks.
- Train yourself to read the brood nest fast: eggs, young larvae, then brood pattern.
- Log each visit to track trends in health and behavior.
For expansion planning and seasonal practices, see this expansion tips.
Food, water, and dearth: preventing starvation from spring to winter
Timely syrup and protein support help new colonies draw comb and raise brood reliably. New packages arrive with almost no stores. Light sugar syrup gives energy for wax production, nursing, and defense while the colony builds strength.

Not feeding new colonies drawing comb
Start light syrup early. Use a 1:1 sugar solution while comb is being drawn. Add pollen patties when pollen is scarce to support brood rearing.
Missing nectar dearths
Watch for slowed weight gain, restless foragers, and spikes at the entrance that suggest robbing. During midsummer gaps, reduce the entrance and use robbing screens if needed.
Winter realities and emergency feed
Don’t fear a quick, planned opening on a cold day if bees are starving. Pre-stage feed, move fast, and add solid sugar or heavy syrup as appropriate before closing the hive.
Providing water in hot, dry conditions
Offer a shallow source with landing spots close to the hive. Consistent water reduces dehydration and keeps bees from visiting neighbors’ pools.
- Choose feed by season: light syrup for comb, heavier syrup pre-winter, and solid bricks for cold snaps.
- Track frames of honey and pollen near brood so stores are accessible when temps drop.
- Keep feeders, patties, and spare sugar on hand for prompt action.
Queen and brood mistakes that spiral fast
A lost or failing queen can turn a tidy hive into a crisis within weeks.
Learn the core signs early. Confirm a queen by finding eggs and very young larvae. If multiple frames lack eggs, suspect a queen problem and act quickly.
Not recognizing queenlessness: eggs, larvae, and queen cell clues
Look for emergency or supersedure cells. These show the bees are responding to queen loss or poor performance. Spotty brood patterns and frequent new cells mean requeening should be considered.
Busy flight doesn’t always mean health
Heavy activity at the entrance can be robbing, not vigor. Watch for fighting, torn cappings, and frantic behavior. Investigate sudden spikes before assuming the colony is thriving.
Protecting the queen during inspections and requeening options
Minimize shaking frames, keep brood frames centered, and limit open-hive time to preserve pheromones and brood temperature. If queenless, add a frame of eggs from a donor or introduce a mated queen promptly.
“Check again in a week: new eggs and tiny larvae tell you the remedy worked.”
Late season? Consider combining with a strong, queenright hive rather than a risky requeen. For seasonal timing and tasks, see seasonal tasks.
Varroa mites and other pests: have a plan before there’s a problem
Start your season with a mite-monitoring rhythm so you catch rising counts before damage mounts.
Assume varroa arrive with packages or nucs. Use regular alcohol wash or sugar roll checks to quantify loads rather than guessing. Log each result and act when thresholds are reached.
Match treatments to biology. Formic acid (MAQS) can reach mites under cappings and works when brood is present, but follow temperature windows to protect the queen and avoid excess stress.
- Oxalic acid excels when brood is minimal—often late fall—via vapor or drizzle.
- Many keepers treat twice yearly: summer (before heat extremes) and late fall after drone eviction.
- Coordinate timing so treatments do not contaminate honey during flows.
| Treatment | Best window | Notes |
|---|---|---|
| Formic (MAQS) | During brood | Watch temps; follows label |
| Oxalic | Broodless periods | Vaporize or dribble; PPE required |
| Cultural | Year-round | Drone culling, splits reduce pressure |
“Document every treatment: date, product, dose, and observed outcomes.”
Use proper PPE, accurate dosing, and the right equipment. Recheck counts after treatment and expand plans to cover small hive beetles, wax moths, and local pests. For regional guidance on varroa, see varroa mites resources.
Timing and record-keeping: doing the right things at the right time
A reliable calendar and tidy notes keep small issues from growing fast.
Must-do tasks have windows. If you miss spring feeding or the pre-summer mite treatment window, the late action often has little benefit. Mark critical days on a season calendar and treat those dates as priorities.
Missing critical windows: feeding, mite treatments, and winter prep
Build a simple timeline: spring buildup feeding, pre-summer mite checks and treatments, late-summer stores assessment, and final winter prep. Missing any one window raises risk quickly.
Poor record keeping: tracking inspections, queen status, brood, and stores
Use a standardized form for each inspection: eggs, larvae, queen status, brood frames, honey frames, temperament, and mite counts. Log dates and outcomes so you can see trends across days and seasons.
Using templates or apps to capture trends across colonies
Adopt a tool that fits your workflow. Some beekeepers use Hive Tracks while others prefer a notebook. Digital tools make it easier to compare hive metrics and spot slow declines.
- Keep a “to-do next” after every inspection so your next visit is focused.
- Record quantitative details: frames of brood, frames of honey, and mite counts.
- Note weather and forage conditions alongside hive notes for context.
- Include photos of brood patterns and problem spots for faster diagnosis.
| Critical Window | Action | Why it matters |
|---|---|---|
| Spring buildup | Feed 1:1 syrup, add pollen substitute | Supports comb drawing and early brood |
| Pre-summer | Mite check and treatment if needed | Reduces pressure before peak brood |
| Late summer | Assess stores; add supers or feed | Prepares hive for winter |
| Fall/Winter prep | Insulate, reduce entrance, final feed | Improves winter survival odds |
“Records turn single events into useful information for better practices.”
Equipment and costs: preparedness without overspending
Choose a compact kit that covers urgent needs but won’t overwhelm your budget. Many starter kits lack parts needed for a full season. Plan to add a box before a hive is 70% drawn so you don’t force bees into burr comb.
Assemble and paint supers ahead of flows. Bees can draw comb quickly. Having frames ready prevents frantic rushes during a nectar window.
Suit up: protective clothing reduces stress for helpers and keeps inspections calm. New beekeepers who skip proper gear often lengthen checks and risk stings.
- Stage extra supers and frames so you can add space when a box is ~70% full.
- Keep spares: entrance reducers, inner covers, straps, screws.
- Carry a simple tool kit to avoid multiple trips mid-inspection.
- Buy core items first—smoker, hive tool, boxes, feeders—and delay premium extras.
Budget realistically: many first hives fail; don’t expect equipment costs to be offset by early honey. If you need safety guidance, review safety precautions for practical steps that protect you and your colony.
Honey expectations and ethics in the first year
Protecting the colony’s winter food supply matters more than a single jar of honey. In year one, plan to harvest nothing so the hive keeps enough food for cold months.
New colonies need substantial stores. In colder regions aim for about 90–100 pounds; in warmer areas 40–50 pounds often suffices.
Estimate quickly during inspections: a deep frame holds roughly 8 pounds of honey and a medium about 6 pounds. Use that math to judge whether the bees have enough.
- Set an ethical rule: no harvest the first year unless the colony is vastly overstocked.
- Have sugar bricks or heavy syrup ready for feeding ahead of cold snaps if stores look marginal.
- A spoon-tip taste from a single capped cell is fine; avoid taking “just a little” in fall.
- Confirm stores in early fall and again before sustained cold; feed proactively rather than reactively.
“Late nectar can mislead; a short cold spell can turn apparent abundance into shortage.”
Learning pathways that shorten the beekeeping learning curve
Active mentorship and local classes compress the time it takes to read a hive well. Books and videos give useful information, but they can’t teach the smells, sounds, and movement you feel at the top box. Real guidance helps you react faster and with less risk.
Classes, clubs, and mentors
Enroll in a reputable class for structured, safe demonstrations. Join a local club for region-specific advice and seasonal tips. Seek a mentor who will answer questions while you work at the hive.
Hands-on experience
Volunteer on inspections with experienced keepers to learn to read comb and colony layout. Listen for the steady hum that signals a queenright hive and notice warm brood scents that indicate good growth.
- Enroll in a reputable class for live demos and safe techniques.
- Join a club for regional information, forage notes, and regulations.
- Find a mentor who provides on-site answers and ongoing advice.
- Practice sensory reading: smell, sound, and calm bee movement.
- Build a feedback loop: apply advice, record results, refine practices.
“Guided practice turns useful information into reliable skill.”
Conclusion
Finish each season with clear notes and a simple plan that targets varroa, stores, and timing. Timely action matters: late mite checks, delayed feeding, or slow robbing control often costs a colony in winter.
Act on time. Treat mites early, add sugar or patties in spring and fall, and open briefly in cold weather if starvation is likely. A single quick visit can save months of loss.
Keep it practical: inspect with purpose, log results, and favor colony health over early harvest of honey. Learn from each mistake and lean on local beekeepers for faster progress.
Close the loop after winter. Review what worked, update your checklist, and plan the way you will act next year so important things don’t slip away.
FAQ
What are the biggest risks for new beekeepers this season?
New keepers often face colony loss from poor timing, missed mite monitoring, insufficient food during dearths, and improper hive placement. Set goals for colony health rather than early honey harvests, schedule regular inspections with clear checklists, monitor Varroa levels, and ensure adequate stores and water sources.
Is it okay to start with a single colony?
Starting with only one hive limits options when disease, queen failure, or poor weather strike. With multiple colonies you can borrow brood or frames, compare behavior, and reduce risk. If budget restricts you, build strong relationships with local mentors or clubs to access spare equipment and advice.
Should hives be placed in full sun or partial shade?
Bees do well with morning sun and afternoon shade. Full sun helps warmth and spring buildup but can overheat in summer. Aim for a site with wind protection, good drainage, a nearby water source, and late-day shade to keep frames from overheating.
How important is predator and bear protection?
Very important in areas with bears, raccoons, skunks, or vandals. Electric fencing is the most effective deterrent for bears. Simple measures like elevated stands, tight entrance reducers, and sturdy lids help against smaller predators and curious animals.
How often should I open the hive during my first year?
Balance is key. Early spring inspections every 7–14 days help evaluate stores, brood, and queen status. During stable summer months, extend intervals to 2–3 weeks. Avoid excessive disturbance; have a clear checklist before every inspection to be efficient and calm.
What should I prepare before each hive inspection?
Define the purpose: check queen status, brood pattern, stores, pests, or add supers. Bring tools: smoker, hive tool, frame grip, notebook or app, and protective wear. Move deliberately, using gentle smoke and slow movements to minimize stress on the colony.
When should I feed a new colony drawing comb?
Feed sugar syrup (1:1 in spring) and pollen patties when stores are low and nectar is scarce to support brood rearing and comb drawing. Monitor stores each inspection and reduce feeding when natural nectar flow begins to avoid robbing and mold issues.
How do I spot a nectar dearth and respond?
Signs include reduced forager returning, rapid consumption of stores, and increased robbing. Respond by providing syrup feeders, pollen supplements if brood is present, and minimizing hive openings. Time supplemental feeding to bridge the gap until blooms resume.
Can I open the hive in winter to add emergency food?
Open hives only in mild, calm spells above freezing. Disturbing clustered bees wastes heat. Instead, add emergency food from above (fondant or candy boards) and insulate. If you must inspect, work quickly and limit openings to under 10 minutes.
How important is a water source for colonies?
Essential. Bees need water for cooling, feeding brood, and diluting syrup. Provide a shallow, reliable source with landing materials (stones, corks) during hot, dry periods to reduce foraging stress and limit fighting with neighbors’ bees.
What signs indicate queenlessness?
Indicators include spotty brood patterns, no eggs but larvae present, increased drone brood, and emergency queen cells or lack of queen cells depending on timing. Confirm by finding eggs or a laying queen. Requeen promptly with a mated queen or use accepted replacement techniques.
Does heavy flight activity always mean a healthy colony?
No. A high number of outgoing bees can mask problems like robbing, drifting, or disease. Inspect for food stores, dead bees, and signs of robbing. Check entrance activity patterns and guard behavior to differentiate healthy foraging from stress-driven activity.
How do I protect the queen during inspections?
Handle frames gently, avoid flipping brood frames, and minimize frame shaking. Spot the queen visually before manipulating frames and work slowly. If concerned, use a queen clip or confine her to one box during more invasive work until you gain confidence.
When should I start Varroa monitoring and treatment?
Monitor from the first spring after installation and continue through fall. Use sugar rolls, alcohol washes, or sticky boards to measure mite loads. Treat when thresholds are exceeded or as part of an integrated calendar aligned with brood cycles and local recommendations.
How do I time treatments around brood cycles?
Treat when brood presence is lowest to increase effectiveness, often late summer or early fall, depending on locale. Oxalic acid works best during broodless windows; formic treatments can penetrate capped brood. Follow manufacturer guidelines and local extension advice for timing and safety.
What records should I keep for each hive?
Track inspection dates, queen status, brood pattern, stores, treatments, feeding, disease signs, and weather. Use simple templates or apps like BeePlus or HiveTracks to spot trends and make better seasonal decisions across colonies.
What equipment should I prioritize without overspending?
Prioritize quality protective clothing, a reliable hive tool, a smoker, and basic frames and supers. Buy extra frames and a spare bottom board or two. Delay nonessential items like multiple extractors until you confirm long-term commitment and production plans.
Is it ethical to take honey in the first year?
Generally no. Removing honey in year one risks winter survival. Focus on colony development and leave sufficient stores for overwintering. If harvest is considered, do so only if colonies have abundant stores and you replace taken weight with appropriate feed.
What learning pathways shorten the beekeeping curve?
Combine reading with hands-on classes, mentorships, and local beekeeping club participation. Courses from universities or extension services, plus shadowing experienced keepers during inspections, accelerate practical skills like recognizing brood patterns, pests, and seasonal needs.