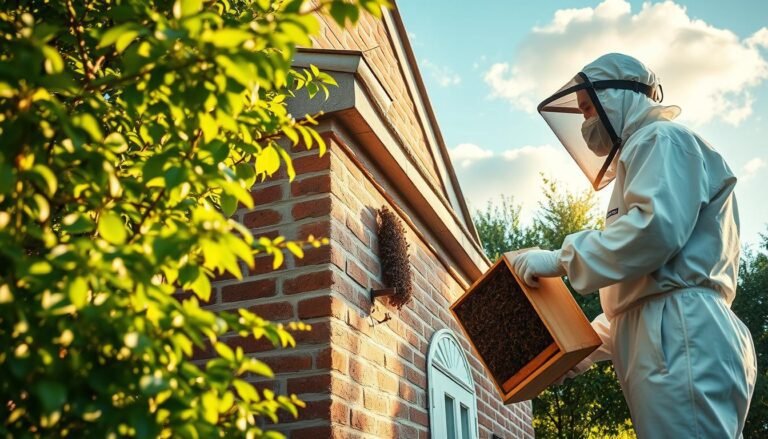
Preparing a hive for harsh winter takes clear steps and timely action. Honey bees survive by forming a tight cluster and using wing-muscle thermogenesis to keep brood areas near 92°F when brood exists. A healthy colony needs roughly 60–100 pounds of honey going into winter to fuel constant heat.
Clustering begins around 50–55°F, which limits safe inspection windows. In Langstroth equipment, clusters move upward and can “top-out,” risking starvation near stores if frames block lateral access. Southern weather adds intermittent flying days that drain stores between freezes.
This guide focuses on practical, time-sensitive steps to protect bees and the hive: site placement, insulation and wrapping, ventilation to control moisture, and non-invasive midwinter checks. If stores run low, use refined white sugar as the only recommended supplemental feed.
Key Takeaways
- Colonies generate heat by clustering and burning honey; plan for 60–100 lbs of stores.
- Limit inspections once temperatures fall near cluster thresholds.
- Prevent top-out in Langstroth hives by keeping frames and stores aligned.
- Insulate and ventilate to reduce moisture while retaining warmth.
- Use refined white sugar only for emergency feeding; avoid raw or molasses sugars.
Why Cold-Climate Beekeeping Demands a Different How-To Approach
As the thermometer drops into the lower 50s, bees switch into a conservation mode that reshapes every hive task.
Heat retention, moisture control, and secure food stores become the top priorities. Once outdoor temperatures fall below about 50–55°F, colonies cluster to generate heat and foraging falls to near zero.
Prolonged winter means stored honey and emergency feed power survival. In southern zones, warm flying days between freezes make bees burn extra energy and can exhaust stores fast.
Minimize disturbance and schedule work for safe temperature windows. Move major interventions to fall. Reserve winter for light, non-invasive checks and weight or sound assessments.
- Place food near the cluster and limit drafts while keeping ventilation paths.
- Choose wraps, entrance setups, and feeders to match local weather and shifting temperatures.
- Plan time carefully to avoid chilling the colony during inspections.
For regional detail, see this guide on beekeeping in different climates to align choices with your conditions and reduce avoidable losses.
How Honey Bees Actually Survive Cold: Clustering, Heat, and Movement
A bee cluster acts like a portable furnace, with thousands of workers arranged to make and conserve heat.
Wing-muscle thermogenesis is the core: core workers vibrate thoracic muscles to raise the temperature near brood to about 92°F when brood is present. Outer layers form insulation, keeping the colony warmer than the surrounding air.
The cluster contracts during colder spells to reduce surface area and conserve heat. In brief warmups it loosens so bees can move to adjacent honey and feed.
Movement, food access, and hive layout
As honey under the cluster is used, the cluster slowly moves upward toward capped stores. This “upward food march” creates a real risk of a top-out if frames and spacing block lateral travel.
- Keep honey immediately above or next to the cluster to reduce risky crossings.
- Avoid inspections that break the cluster; plan feed placement over the cluster when needed.
“The colony controls temperature; the box only holds the space.”
Assessing Winter Risk: Temperature Thresholds, Moisture, and Food Access
A practical winter risk check begins with weather forecasts, cluster position, and easy food access. Use these points to decide if a hands-on inspection is worth the disturbance.
When to avoid opening the hive
Do not open boxes when bees are clustered around 50–55°F. Breaking propolis seals or exposing frames lets cold air drop internal temperature and can shock the colony.
Moisture versus heat: finding the balance
Respiration creates moisture that condenses on cold surfaces and can drip onto the cluster. That wetting raises mortality risk more than a slightly warmer box often would.
Small, controlled ventilation—an upper vent or a quilt box—lets damp air escape while keeping heat trapped below.
- Keep stores within inches of the cluster to prevent starvation when movement is limited.
- Use entrance adjustments to block wind but allow air exchange and warm-day exits.
- Rely on external checks (flight on warm days, debris, heft test) instead of full inspections at marginal temperature.
| Risk Factor | Sign to Watch | Low-impact Action | Why it matters |
|---|---|---|---|
| Temperature | Cluster tightness, no flight | Delay opening; use heft for weight | Opening chills brood and workers |
| Moisture | Drops on inner cover, wet frames | Add quilt box or slight top vent | Dripping wet kills bees faster than cold |
| Food access | Cluster far from stores | Place fondant/top feeder over inner cover | Bees can starve inches from honey |
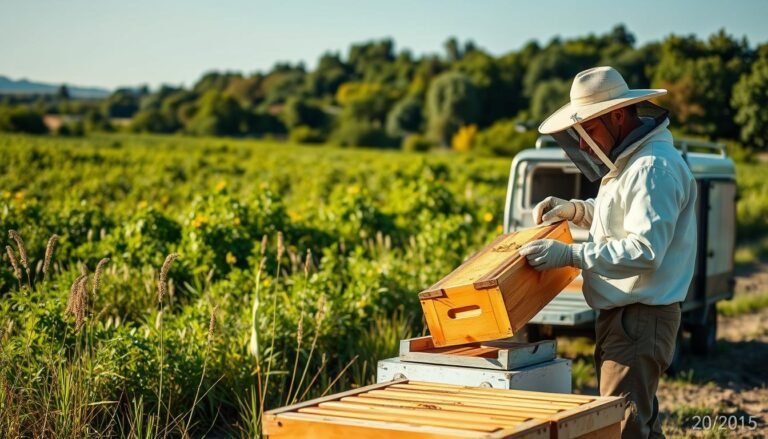
Fall Prep That Determines Winter Outcomes
How you finish the season determines whether your hive starts the next year strong or weak. After harvest, take decisive steps to lock in stores and health. Aim to leave 60–100 pounds of honey on the hive and confirm the queen is productive.

Post-harvest checklist
Verify adequate honey reserves and note weight estimates. Inspect brood patterns for consistency and confirm the queen’s laying is steady.
Mite targets and treatment timing
Monitor Varroa early. Aim for mite levels below ~3% by late summer. Some treatments need specific temperatures or brood conditions, so plan accordingly.
- Assess colony strength by counting bees and frames of brood to set box configuration.
- Record queen status, frames of brood, and weight to guide feeding and space decisions.
- Remember recovery after heavy mite pressure can take multiple brood cycles; start treatments in time.
Good fall beekeeping — right honey left, timely mite control, and focused records — sets the trajectory for winter survival and a strong spring build the next year.
Placing Hives for Winter Success: Sun, Windbreaks, and Drainage
Placing colonies where they warm quickly in the morning reduces stress and conserves stores. Site hives in full or early sun so boxes heat sooner on cool days and bees can use short warm periods for cleansing flights.
Use natural or man-made windbreaks—hedges, fences, or buildings—to cut wind pressure at the entrance. This lowers convective heat loss and keeps flights safer on blustery days.
Elevate the hive off wet ground to improve drainage and protect the bottom board from rot. Keep entrances clear and oriented away from prevailing winds.
Ensure space around stands so you can reach boxes quickly for top feeding or emergency checks without long exposure. Level stands side-to-side so frames hang plumb and comb movement stays reliable.
“A well-chosen site reduces moisture build-up and gives bees the best chance to conserve energy between warm days.”
- Avoid frost pockets and low-lying drainage paths that hold cold air.
- Keep flight paths clear of obstructions and icy runoff that could block access.
| Placement Factor | What to Do | Why It Helps |
|---|---|---|
| Sun exposure | Face hive to catch morning sun | Warmer boxes, earlier flights, less energy use |
| Wind protection | Add fence or hedge windbreak | Reduces entrance drafts and heat loss |
| Elevation & drainage | Raise hives on stands, avoid runoff | Prevents damp bottom boards and icy access |
| Access & level | Leave clear space and level stands | Quick checks, plumb frames, safe feeding |
Insulation and Wrapping: What to Use, When, and Regional nuance
Choosing the right materials shapes how a hive holds warmth and handles dampness through winter. Match wraps to local weather and colony strength so you do not trap condensation or block needed vents.
Inner covers, foam panels, and mindful wraps
An inner cover reduces direct drafts over the cluster and helps limit convective currents when used with a small upper vent. Foam board on sides or insulated covers cut heat loss in long freezes.
Avoid compressing boxes tightly. Leave designated vents or notches so air moves without creating a chill line above the cluster.
Southern versus Northern practice
In the North, add foam and full wraps to stabilize internal temperature during extended freezes. Pair that with modest upper ventilation to prevent condensation.
In the South, a lighter touch often suffices. Frequent warm days mean heavy wraps can trap moisture and harm bees unless ventilation is managed.
- Monitor weight and short-term temperature forecasts before adding or removing wraps.
- Keep the bottom board dry and entrances clear of snow or debris to preserve bottom ventilation.
- Use quick touch checks or thermal imaging to confirm your choices work.
| Option | Best for | Key benefit |
|---|---|---|
| Foam side panels | Very cold regions | Reduces heat loss through boxes |
| Insulated outer wrap | Stable colonies | Stabilizes temperature and blocks wind |
| Light cloth or none | Mild, southern weather | Prevents trapped moisture, allows flights |
“Balance insulation with ventilation; moisture, not the cold, often causes losses.”
Ventilation That Prevents Deadly Moisture Without Losing Heat
Moist air from a hive can pool on cold surfaces and turn a survivable chill into lethal wetting.
Moisture kills faster than low temperature. Condensed droplets on the inner cover or frames can chill and drown the cluster. That makes controlled venting essential.
Upper exits, quilt boxes, and simple fixes
Provide a small upper exit for humid air with a notched inner cover, a thin shim under the cover, or a quilt box filled with dry material. These wick moisture without creating drafts that strip heat.
- Air enters low at the bottom and warms over the cluster, then exits high—this vertical flow removes dampness.
- Keep the bottom entrance clear to sustain that steady column and allow cooler, drier intake.
- Avoid wide-open vents; small, controlled ventilation prevents heat loss while shedding moisture.
Watch for damp odors, mold, or dripping under the cover as signals to adjust venting. In a snap, add a shim rather than opening boxes. Insulation and ventilation must work together; one without the other creates problems.
| Issue | Quick Action | Why it helps |
|---|---|---|
| Condensation on cover | Add quilt box or absorbent layer | Wicks moisture away from bees and frames |
| Dripping inside hive | Increase small top vent; clear bottom | Restores vertical airflow and dries comb |
| Excess drafts | Reduce vent size; use insulated cover | Retains heat while keeping moisture moving |
“If surfaces are wet and the cluster is tight, improve upper ventilation before other interventions.”
Extreme cold beekeeping strategies
Small, well-placed changes at the hive entrance and nearby can make the difference between survival and loss during hard winter spells.

Entrance reducers and draft sealing
Use entrance reducers to shrink wind exposure while keeping a steady flow of air. A partial reducer limits drafts but lets foragers and ventilation continue.
Seal large cracks in boxes and stands, but do not block designed vents. Blocking vents raises moisture and threatens the cluster.
Emergency heat and thermal mass
Consider safe, low-wattage heaters with thermostats for short emergencies. Install per manufacturer guidance to avoid hot spots and fire risk.
Thermal mass, such as water barrels placed near but not touching the hive, buffers temperature swings without electricity.
Positioning for warm spells
Orient the entrance to catch midday sun and add windbreaks so bees can take cleansing flights when weather allows.
Keep the bottom entrance clear of ice and dead bees. Track local forecasts and act during milder hours to minimize disturbance.
Feeding for Survival: Honey Targets, Proximity, and Timing
A well-timed feed can be the difference between a steady colony and a late-season collapse. Aim to enter winter with 60–100 pounds of honey in the hive. That range supports thermogenesis and lowers the chance of midwinter emergency feeding.
Place food where the cluster can reach it without long travel. Top feeding with jars or bucket feeders over the inner cover hole works well. Division-board feeders set along the cluster edge also minimize movement.
Practical feeding rules
- Set targets: leave 60–100 pounds of honey per colony to sustain heat and brood when needed.
- Feed proximity: put stores directly above or adjacent to the cluster; avoid entrance feeders in winter.
- Top hive methods: use a shim or empty super to hold containers and limit heat loss during refills.
- Checks and timing: use heft tests and external cues to schedule quick top access at the warmest time of day.
“Every opening costs heat; smart placement of food is your best winter insurance.”
Record feed consumption over time to predict needs. Distribute frames of honey early around the cluster to prevent starvation and reduce risky late interventions.
What to Feed in Cold Weather: Syrup, Fondant, and Candy Boards
Select feeding methods that let the colony eat without leaving the warm cluster.
Use only refined white sugar (sucrose) for winter feed. Brown sugar, molasses, or raw cane contain compounds that can cause digestive stress and dysentery in bees. Keep real honey frames directly above the cluster whenever possible; substitutes bridge gaps only.
Feeder types and placement
Top jar or bucket feeders over the inner cover hole make refills quick and limit hive exposure. Division board feeders sit beside the cluster and reduce travel when the cluster must reach food.
Fondant and candy boards
When temperatures are too low for liquid feed, place fondant under the cover directly over the cluster. Candy boards act as a “ceiling of food” that softens with hive humidity for easy access and low disturbance.
- Minimize added water exposure; avoid open syrup that can chill bees or raise moisture.
- Prevent drowning by using small lid perforations and secure cover shims for quick swaps.
- Adjust upper ventilation if syrup use causes condensation under the cover.
“Feed refined sucrose only; alternative sugars increase digestive risk and winter losses.”
| Feeder Type | Best Use | Key Benefit |
|---|---|---|
| Top jar/bucket (over inner cover) | Mid-winter refill access | Fast refill, limited hive exposure |
| Division board feeder | Close access to cluster | Less bee movement, low disturbance |
| Candy board / fondant | Very low temps | Solid food above cluster, minimal moisture risk |
Managing the Cluster in Langstroth Hives: Avoiding the “Top-Out” Trap
In Langstroth nests the bee mass tends to climb through boxes as lower stores are used, so frame layout dictates survival.
Vertical movement is far easier for a tight cluster than lateral travel. In winter, workers move up through adjacent frames but will not cross cold gaps or wide empty space to reach comb. That geometry limits how bees find honey when temperatures drop.
Why vertical movement beats lateral movement
Frames sit stacked so bees can march upward within warm passageways. Crossing sideways means exposure and heat loss, so bees avoid long lateral walks.
Recognizing and preventing a top-out
A “top-out” happens when the cluster reaches the topmost box but honey sits only to the side. Colonies can starve inches from stores they cannot access. Stage capped honey directly above and flanking the cluster’s anticipated winter position to stop this.
Practical staging and box management
Reduce empty boxes and unnecessary space so the cluster stays tight under a canopy of honey. Use follower boards or consolidate boxes to keep bees under food and maintain warmth.
During warm spells, carefully shift honey frames closer if weight and access demand it. Perform quick top checks to infer cluster height and act before the colony nears the top.
Minimize bottom gaps in deep freeze periods to prevent cold convective currents from chilling bees beneath the cluster. Plan comb layout in autumn so winter access is automatic and risky midwinter moves are rarely needed.
“Correct frame staging and controlled space are central to avoiding starvation from access constraints.”
Midwinter Hive Checks and Cold-Snap Playbook
In tight winter conditions, subtle cues — weight, sound, and surface heat — reveal colony status without an interior inspection.
Non-invasive assessments
Start with a heft test to judge remaining stores by feel. Lift the back of the hive a few inches and note resistance; repeat several times for consistency.
Next, listen. Use a stethoscope or cup to detect strong buzzing, weak noise, or near silence. Thermal imaging or an infrared gun can locate the cluster through the top and show hot spots.
Emergency feeding without chilling the cluster
Time any top access for the warmest hours of the day and prepare materials in advance. Place fondant, a candy board, or a warmed syrup jar directly over the inner cover hole so bees can reach food without long travel.
- Keep openings brief and work swiftly to limit temperature loss.
- Maintain modest ventilation to reduce condensation and control moisture under the cover.
- Clear the entrance of ice or dead bees to allow airflow and occasional flights on mild days.
“Record each intervention with date, temperature, and food added to spot trends and decide follow-up actions.”
| Check | How | Action |
|---|---|---|
| Weight / Heft | Lift back of hive | Add emergency food if light |
| Sound | Stethoscope or cup | Locate cluster; judge vitality |
| Surface heat | Thermal image at top | Place food above hot spot |
| Vent & entrance | Look for fogging or ice | Adjust small vent; clear entrance |
Beekeepers should balance caution with timely help. Use non-invasive checks first, act fast during warm weather, and keep clear notes so you can refine choices as winter days pass. For seasonal planning, check a trusted beekeeping calendar.
Troubleshooting Winter Problems You Can Still Fix
Watch for clear signs at the entrance and on the cover. These clues tell you which colonies need urgent attention.
Cold stress signals and quick checks
Look for loose clusters, lots of dead bees at the bottom, or an eerie silence. These indicate starvation, chill, or a failing brood nest. Use a heft test and listen through a cup before opening on a cold day.
Low population fixes
If a small group shows a poor queen or few workers, consider combining with a stronger colony. Confirm queen status during a warm spell and move frames carefully to keep bees tight and over honey.
Frostbite and moisture mitigation
Improve upper ventilation and keep entrances clear and dry to reduce moisture build-up. Remove deadouts fast to prevent robbing and small hive beetles.
| Problem | Immediate Action | Why It Works |
|---|---|---|
| Loose cluster / low sound | Add fondant over inner cover; warm-hour check | Restores food access without breaking cluster |
| Excess dead bees at bottom | Remove deadout; consolidate frames | Prevents pests and keeps remaining bees tight |
| Damp cover / dripping | Increase small top vent; dry quilt material | Reduces condensation and chilling |
Act promptly but minimally: prioritize food access, moisture relief, and queen-right status.
Health Foundations Laid in Late Summer: Varroa, Viruses, and Protein
Healthy winter performance begins with decisions made in late summer and early fall. Mite levels, nutrition, and brood quality then determine how well a colony endures the colder months.
Fat-body reserves and fall protein
Fall pollen intake builds fat-body reserves in developing workers. Those reserves let winter bees produce brood food and survive long, low-activity stretches.
Quality protein in late summer improves individual bee longevity and supports a steady flow of healthy young bees on frames.
Recovery timelines after mite control
Reducing Varroa below ~3% in late summer lowers virus loads and helps produce long-lived bees. Expect recovery to take time: plan for 2–3 brood cycles before full vigor returns.
- Track mite loads and repeat assessments to keep infestations low.
- Provide pollen or protein patties in late summer so bees build fat-body reserves.
- Confirm queen laying and population rebound during warm checks; record results for the year.
| Issue | Action (late summer) | Why it matters |
|---|---|---|
| High mites | Treat to reach | Reduces virus transmission; improves bee lifespan |
| Poor nutrition | Add pollen substitute near frames | Builds fat reserves and better brood food |
| Post-treatment check | Assess queen, brood pattern, weight | Confirms recovery and guides feeding |
“A strong colony entering winter is earned in fall, not found in a single winter rescue.”
Regional Strategy Adjustments: North vs South in the United States
Adjust your winter playbook to local weather and the way your bees use stores. Local temperature swings, sun, and wind change what hives need most.
Intermittent warm days in the South and accelerated store depletion
In southern zones, mild days spur cleansing flights and a few foraging attempts. Those short warm days burn calories without steady nectar returns.
That repeated activity accelerates consumption of stores. Do frequent heft checks so you spot light hives before they starve.
Contrasts and practical adjustments
- North: Favor heavier honey reserves, thicker insulation, and earlier consolidation of boxes to keep the cluster compact.
- South: Monitor rapid store use, choose feeders that sit over the cluster, and plan more frequent, low-impact checks.
- Adapt entrance size and wind protection to local conditions to balance defense with needed ventilation.
“Watch real weather, not calendar dates; year-to-year variability means your approach should remain flexible.”
| Region | Primary concern | Recommended action |
|---|---|---|
| Northern | Prolonged low temperature and moisture | Large starting stores, foam or full wraps, early box consolidation |
| Southern | Intermittent warm days and faster store use | Frequent heft checks, fondant or top feeders over cluster, lighter wraps with vents |
| Both | Moisture control and ventilation | Quilt, top notch, or shims tuned to local patterns; clear entrance and manage drafts |
Learn from local beekeeping groups to refine boxes, wrapping, and venting for your microclimate. Align stores, insulation, and ventilation with regional weather signals for the best winter outcomes.
From Winter to Spring: Safe Exit Ramps and Build-Up
Spring’s first warm spells tell you where the bees sit and how much food they still carry. Use gentle checks — heft, a quick thermal scan at the top, and a look for pollen — to set a safe plan for expansion.
Reading the cluster’s position, stores, and brood restart
Note whether the cluster is near the top or middle of the hive. A top cluster with light weight means stores are low and action is needed soon.
Listen for low, steady brood buzz and watch for pollen entering the entrance as the first real sign of brood restart.
Record time-stamped observations so you can compare growth across days and avoid needless openings.
Gradual scale-up: opening entrances, adding space, and feed-down
Open the entrance in small steps as traffic rises. Wider entrances help airflow and reduce congestion during warm hours.
Add space incrementally—one super or a handful of frames at a time—so bees can regulate brood temperature during volatile weather.
Transition food from fondant or candy to thin syrup, then rely on natural nectar once flows start.
“Move slowly in spring; measured additions protect the queen and prevent stress during the build-up.”
| Sign | Action | Why it helps |
|---|---|---|
| Top cluster, light heft | Add frames of honey or fondant; plan refill | Prevents starvation while brood resumes |
| Pollen at entrance | Open entrance; add minimal space | Supports brood feeding and incoming forage |
| Consistent flight and rapid comb use | Add super or more frames; remove heavy insulation | Gives room for honey and queen laying |
For seasonal task planning and timing cues, consult a regional guide such as the seasonal beekeeping tasks page to match actions to local forage and weather.
Conclusion
Keeping the cluster fed, dry, and undisturbed is the practical core of successful winter care for honey bees.
Focus on three pillars that help bees survive winter: place adequate honey or refined sugar where the cluster can reach it, manage upper vents to control moisture, and limit openings to reduce heat loss.
Beekeepers should read weather and hive cues, use heft and sound checks, and act only during warm windows to avoid chilling the colony. Good fall varroa control and protein support make winter bees stronger and reduce emergency work.
Set clear goals—protect the colony, conserve heat, manage moisture, and secure food stores—and record outcomes. Disciplined, data-informed choices give each honey bee group the best chance to survive winter and thrive as spring arrives.
FAQ
What core preparations in fall most determine whether a hive survives winter?
In late summer and fall focus on three priorities: leave sufficient honey stores (aim for 60–100 pounds depending on region), confirm a strong and mated queen with a solid brood pattern, and reduce Varroa to low levels (target below ~3%). Also assess colony population size and provide late-season protein so winter bees build fat-body reserves. These actions create the energy, population, and health the colony needs to thermoregulate and forage on brief warm days.
How do honey bees generate heat and keep brood warm during freezing weather?
Bees produce heat through wing-muscle thermogenesis: workers vibrate their flight muscles without flying to raise temperature inside the cluster. They maintain brood near 92°F by contracting a dense central cluster around the brood and moving outward as they consume stores. This upward march toward honey frames preserves brood warmth while conserving energy.
When do bees form a winter cluster and how should that change inspection timing?
Bees typically cluster when ambient temperatures fall to about 50–55°F. At this point they stop normal foraging and limit internal movement. Inspections should cease once clustering begins; noninvasive checks like weighing, listening, or thermal imaging are safer. Open-hive inspections risk chilling the cluster and increasing mortality.
How do I balance condensation control with heat retention in winter hives?
Preventing moisture buildup requires ventilation high in the hive so warm, moist air can escape while keeping the colony draft-free. Use an upper vent, quilt box, or breathable insulation and avoid completely sealing the hive. A small top opening plus an insulated inner cover reduces condensation on combs while preserving heat.
What are practical insulation and wrapping options for northern versus southern climates?
In the North, add foam boards, insulated inner covers, or breathable wraps to reduce radiative heat loss, and consider a quilt or moisture-absorbing layer. In milder southern areas, a light-touch approach—windbreaks, entrance reducers, and minimal wrapping—usually suffices. Always allow some ventilation to prevent moisture problems regardless of region.
When should I use entrance reducers and how do I avoid blocking airflow?
Install entrance reducers in late fall to limit drafts and deter robbing and mice. Use sizes that allow worker traffic and adequate ventilation—do not seal the entrance completely. Combine reducers with an open upper vent to maintain airflow and prevent CO2 and moisture buildup.
What emergency heating options are safe if a hive is facing a severe cold snap?
Emergency heat should be passive and low-voltage: insulated wraps, heated boards designed for hives, or thermal mass like sealed water containers placed near—but not inside—the hive. Avoid open flames and high-wattage heaters that can over-dry comb or cause fire risks. The goal is to reduce stress, not to raise brood temperatures artificially.
How much honey or sugar do colonies need going into winter, and where should it be placed?
Aim for roughly 60–100 pounds of honey into winter, adjusting for local climate and colony size. If supplementing with sugar, use refined white sucrose in forms bees can access without chilling—fondant or candy boards placed above the inner cover or top-jar feeders near the cluster are best. Always place feed close enough for the cluster to reach without excessive movement.
Why is refined white sugar recommended and what feeders work best in cold weather?
Refined white sugar (sucrose) is recommended because it lacks impurities that can ferment or promote dysentery. In cold weather use candy boards, division-board feeders, or top-jar/bucket feeders that allow feeding above the cluster. Avoid syrup that can chill bees during midwinter unless applied briefly during a warm spell.
How do I avoid the “top-out” problem in Langstroth hives where the cluster can’t access stores?
Stage frames so honey stores sit adjacent to where the cluster will form. In late fall move honey frames toward the center and top of the cluster area and avoid leaving a large gap between brood and stores. Use shallow or medium frames above brood boxes to provide accessible stores and reduce lateral movement limits.
What noninvasive checks can indicate midwinter colony health without opening the hive?
Weighing hives shows store depletion. A gentle thump or listening can indicate activity and cluster location. Thermal imaging reveals cluster position and potential cold spots. Look for consistent flight activity on warm days and reduced dead bees at the entrance. These signals help decide if emergency feed or intervention is needed.
When is it appropriate to add emergency feed during winter without chilling the cluster?
Add emergency feed on a warm day when temperatures exceed the cluster threshold (near or above 50–55°F) so the bees can move. Use above-cluster feeders like candy boards or top feeders that don’t require opening the brood chamber. If you must open the hive, work quickly and limit exposure to protect cluster temperature.
How should I troubleshoot midwinter problems like loose clusters, deadouts, or frostbite?
Loose clusters and lots of dead bees at the entrance indicate cold stress or queen failure. If population is low, consider combining weak colonies using newspaper method. For moisture issues, improve top ventilation or add a moisture-absorbing quilt. Frostbite requires minimal disturbance; focus on stabilizing temperature and stores, and intervene in spring if queen or brood loss is evident.
What late-summer health steps support winter survival related to Varroa and viruses?
Treat Varroa in late summer or early fall to reduce virus transmission and allow recovery time before winter. Monitor mite loads with sugar-shake or alcohol-wash, and choose treatments appropriate for season and brood status. Improving protein nutrition and reducing stressors in late summer builds resilient winter bees with stronger fat-body reserves.
How should northern and southern beekeepers adjust winter tactics?
Northern beekeepers prioritize heavier insulation, windbreaks, and maximizing stores. Southern beekeepers focus on preventing overheating, ensuring intermittent flight days for cleansing, and managing accelerated store depletion from warmer winters. Both regions must control mites and adapt feeding to local foraging windows.
How do I manage the transition from winter to spring to support colony build-up?
In early spring, read the cluster’s position and remaining stores. Gradually open entrances and add space as brood resumes. Offer supplemental feed if stores are low and avoid sudden manipulations. Staged expansions—adding a frame or a super when activity increases—prevents chilling the cluster and supports steady population growth.