This practical guide frames off-grid beekeeping as a hands-on way to support a garden, produce honey and beeswax, and build pollination resilience on small U.S. properties. Populations of honeybees have shrunk since the mid-20th century, so modern keepers must manage colonies more actively than decades ago.
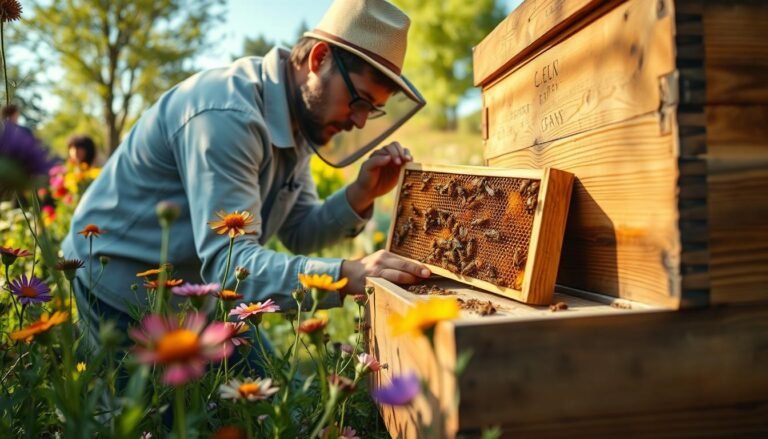
Honey stores and beeswax offer long-lasting value for barter and household use. A single hive can pollinate plants within about a two-mile radius, helping gardens and local forage. New keepers typically buy basic equipment: a protective suit, veil, gloves, smoker, hive tool, and woodenware.
Start with two hives if possible to compare strength and share brood. Favor simple, low-power methods: foundation-less frames, smaller harvests, and leaving winter stores. Plan regular but brief inspections, watch for pests and disease, and avoid used woodenware to reduce long-lived spores.
Key Takeaways
- Off-grid beekeeping is a practical path to pollination and durable outputs for remote homesteads.
- A hive supports a garden within ~two miles and yields honey with long shelf life.
- Basic equipment and starting with two hives speed learning and resilience.
- Sustainable methods reduce disturbance and suit low-infrastructure settings.
- Local swarms, mentors, and clean gear improve survival and cut risks.
Why Beekeeping Belongs in an Off‑Grid Lifestyle
A single healthy colony can boost garden yields, provide shelf‑stable food, and supply wax for home uses. Small hives need little daily attention but return pollination across roughly a two‑mile area. This makes them a smart fit when resupply trips take time.
Honey stores last for years without refrigeration and serve in cooking, first aid, and barter. Beeswax supports long‑burning candles, waterproofing, and balms. Combined, these outputs give resilient value to a small household with modest inputs.
Keep in mind that modern pests and environmental pressures mean attentive care matters. Prioritize colony health over maximum honey production to protect long‑term yields and local biodiversity.
| Output | Seasonal timing | Practical uses |
|---|---|---|
| Pollination | Spring–summer | Improves fruit, vegetable, and flower yields in the area |
| Honey | Late summer harvests; stores year‑round | Food, medicine, barter; long shelf life |
| Wax | After honey extraction | Candles, waterproofing, balms, lubricants |
For practical lessons on managing colonies with sustainability in mind, see sustainable beekeeping lessons. Later sections show how to turn these benefits into site plans, gear choices, and first‑season routines.
Off-grid beekeeping: planning your apiary for self-reliance
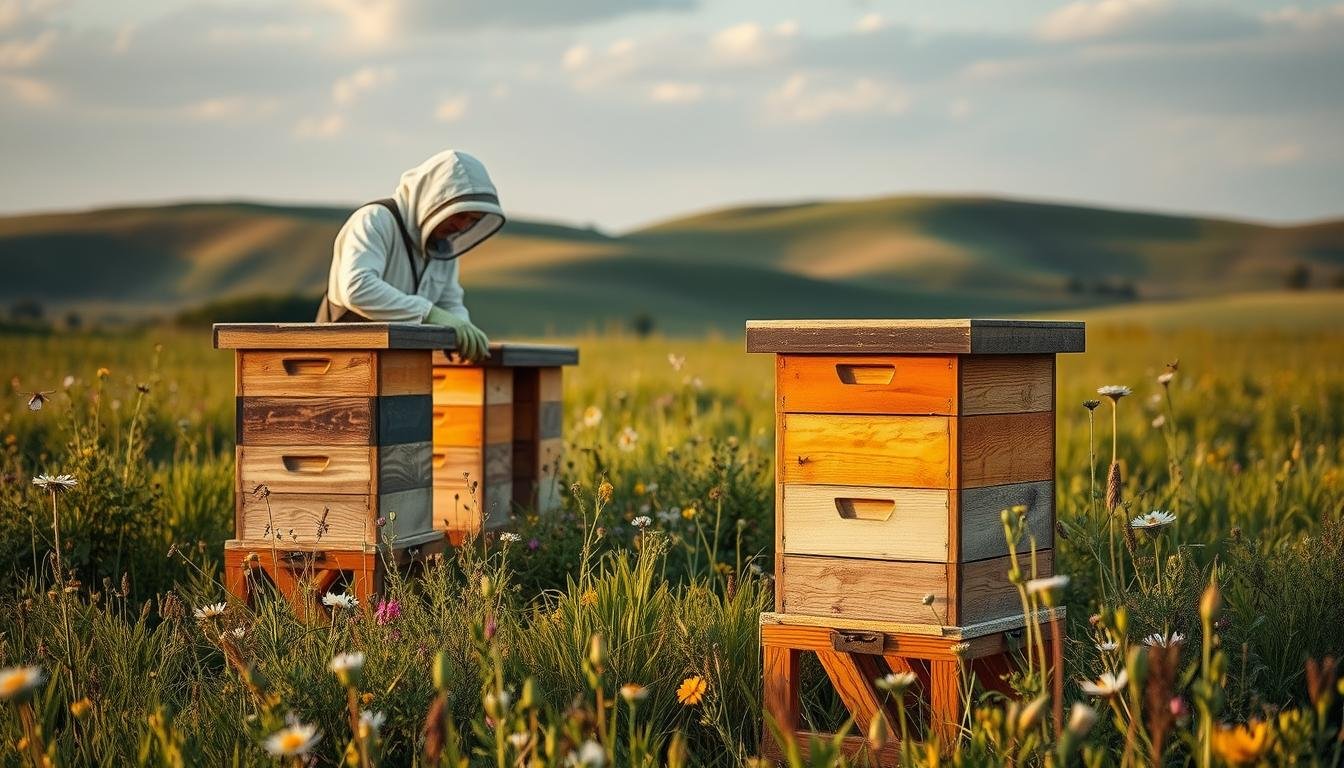
Pick a site that balances sun, shelter, and safe access to keep colonies healthy and easy to work. Position the hive so the flight path faces away from walkways and neighbors. Allow room behind boxes for inspections and gentle handling.
Selecting a site: sun, wind, access, and wildlife protection
Choose morning sun in cool zones and afternoon shade in hot areas. Elevate entrances on stout stands to keep skunks from reaching brood.
In bear country, plan a properly grounded electric fence with a solar charger to protect your investment.
Water without tap lines: off-grid watering methods and placement
Provide shallow water near the hive with stones, corks, or sticks so bees can land safely. Use rain capture barrels and refresh basins after dry spells.
Place water closer than competing sources to reduce drifting and nuisance visits to human features.
Sustainable choices: foundation-less frames and fewer invasions
Run foundation-less frames to avoid introducing contaminated wax and to let bees build natural comb. Accept uneven comb if you plan crush-and-strain extraction.
Adopt an outside-in routine: watch entrance traffic, pollen loads, and temperament to limit interior inspections and stress.
Letting bees keep their honey: winter readiness without heavy sugar feeding
Budget winter stores early. Leave more capped honey on the hive and use sugar feeding only as an emergency. This way supports natural resilience and cuts labor in cold months.

| Need | Recommendation | Why it helps | Notes |
|---|---|---|---|
| Site | Sunny, wind-sheltered, firm access | Stable temps and easy inspections | Flight path away from people |
| Water | Shallow basins with landing material | Reduces drifting and dehydration | Use rain capture to refill |
| Wildlife | Elevated stands; solar electric fence | Protects brood from skunks and bears | Proper grounding is essential |
| Equipment | Foundation-less frames; no excluder optional | Reduces disease risk; lowers stress | Good for crush-and-strain extraction |
Off-grid gear and hive setups that work
Match your hive style to terrain, lifting capacity, and what you plan to harvest. Choose a system that makes inspections easy and keeps routine tasks short.
Hive types compared:
Langstroth, top-bar, and long-box
The Langstroth stacks boxes with 8–10 removable frames. That makes inspections and spin extraction straightforward.
Top-bar hives expand horizontally. They cut initial cost and avoid lifting heavy supers, but they usually require crush‑and‑strain for harvests.
Long‑box hives hold standard frames in a single body. They give the horizontal ease of access while keeping compatibility with conventional frames.
Frames, foundation, and harvest methods
Removable frames support efficient checks and higher honey production when you can use an extractor.
Foundation‑less frames reduce reliance on purchased wax and favor natural comb. Wired foundation helps straighter frames if you plan to spin.
If you lack power or an extractor, plan for crush‑and‑strain with food‑safe buckets and mesh cones.
Protective basics and smoker fuel
Minimal durable equipment includes a quality suit or veil, long‑cuff gloves, a hive tool, and weatherproof storage for gear.
A smoker calms colonies. Test readily available fuels like wood chips, pine needles, cardboard, or cotton cloth. Always keep a fire‑safe container and water nearby.
| Need | Recommended option | Why it helps |
|---|---|---|
| Hive type | Langstroth / Top‑bar / Long‑box | Scales with goals: extraction, low lift, or compatibility |
| Frames | Removable wired or foundation‑less | Wired for spin extraction; foundation‑less for natural wax |
| Harvest method | Spin extract / Crush‑and‑strain | Spin for more honey production; crush for simple, low‑power harvests |
| Protective kit | Veil, suit, gloves, hive tool, smoker | Reduces stings, improves control, keeps work calm |
Standardizing on one hive type helps as colonies multiply. Interchangeable frames and parts speed repairs and swaps.
For a practical starter guide to handling your first hive and gear choices, see how to start your first hive.
Acquiring bees the smart way: local swarms, nucs, and gentle strains
Choosing how you acquire your first colony shapes your learning curve and your odds of early success.
Good sources include local beekeepers, Extension services, and swarm lists. Each option has trade‑offs in cost, time, and hands‑on needs.
Swarms vs nucs: installation, readiness, and learning curve
Packages of worker bees (about 3 lb, ~10,000 bees) arrive with a caged queen and a sugar plug. Installation means placing the queen cage with the candy facing down and gently shaking workers into the hive.
Nucs come with 4–5 brood frames and a laying queen already on comb. Transfer frames in order, keep brood centered, and add empty frames at the edges.
Costs to expect and how to save without risking disease
Expect roughly $140 for a 3‑lb package and about $165 for a nuc, varying by area and season. Order early for spring delivery to secure timing and build‑up for the year.
Save smartly: build your own woodenware, join cooperative swarm lists, or use bait hives with lemongrass oil. Avoid used boxes and frames to reduce the risk of American foulbrood spores.
Breed selection for beginners: Italian, Carniolan, Russian considerations
Choose a calm, locally adapted type. Italians build steadily and are easy for a new beekeeper to manage.
Carniolans expand fast in spring and stay gentle. Russians offer mite tolerance but need careful swarm management.
Bait hives and swarm lists: low‑cost pathways to your first colony
Set a bait hive with lemongrass oil during swarm season and add your name to local lists. Mentor help speeds problem solving for queen acceptance, drifting, or mismatched frames.
 clustered on a natural hive, nestled in the branches of a sturdy oak tree. In the foreground, worker bees rhythmically flapping their wings, fanning the hive entrance to regulate temperature and circulate air. The mid-ground reveals the intricate honeycomb structures, glistening with fresh golden honey. Overhead, a soft, diffused natural light filters through the leafy canopy, casting a warm, earthy glow over the scene. The overall atmosphere conveys a sense of industrious harmony, reflecting the cooperative nature of a healthy, well-managed beehive.")
| Source | Pros | Cons |
|---|---|---|
| Package | Lower cost; teaches installation | No brood; queen acceptance risk |
| Nuc | Ready brood, laying queen, faster build | Higher cost; regional availability varies |
| Swarm / Bait | Low cost; locally adapted stock | Unpredictable timing; need quick response |
Bring basic equipment on day one: smoker, veil, gloves, and a hive tool. Keep sugar syrup on hand in case weather or forage delays require feed.
Tip: if budget allows, start with two hives to compare performance and recover from early problems. Log time and observations to improve decisions next year.
First-season hive management off the grid
A simple, repeatable inspection habit will help you spot queen health, pests, and feed needs without wasting time. Start with short checks while the queen establishes and then settle into a 10–14 day rhythm on warm, calm days.
Signs a colony is queen-right: look for eggs and tiny larvae on frames, a steady laying pattern, and regular foragers returning with pollen and nectar. Expect a “rainbow” on central frames: brood in the middle, pollen nearby, and honey at the edges.
Use sugar feed only when necessary. An easy trick is a zippered freezer bag with small slits placed across the top frames. This gives quick energy during cold snaps, drought, or early installs without long-term dependency on syrup.
Threats and simple defenses
- Monitor varroa and tracheal mites with sticky boards or sugar rolls and treat per local advice to protect honeybees.
- Keep gear clean to deter small hive beetles and wax moths; contact your state apiarist if you suspect foulbrood disease.
- Watch for peanut-shaped queen cells as a sign of swarm pressure or supersedure, and add space before congestion forces a split.
- Harden against mammals: elevate entrances for skunks and install a solar electric fence in bear country for reliable protection.
| Issue | Quick action | Why it matters |
|---|---|---|
| Varroa mites | Monitor, treat per label | Reduces disease and colony loss |
| Small hive beetle | Sanitation, beetle traps | Protects comb and honey production |
| American foulbrood | Report to state; follow protocol | Fatal; equipment may need destruction |
Work calmly, wear gloves and a well-fitted veil, keep a cool smoker handy, and maintain a nearby water source with safe landings. Log inspections, weather, and blooms so you can judge production and winter readiness by late summer.
Conclusion
A steady routine and simple priorities turn a single hive into lasting pollination and pantry value.
Prioritize colony health over short-term harvests: leave ample stores for winter, keep frames and tools clean, and limit invasive inspections. These habits protect the queen and growing brood while supporting steady honey production.
Work calmly, provide reliable water, and keep notes by bloom period. Connect with local beekeepers, join a club or take a short course to speed learning and reduce costly mistakes.
Track first-year milestones—queen establishment, comb building, brood expansion, and pre-winter checks—and treat this season as a practical guide to future success. With steady care, your bees will repay you with food, wax, and stronger pollination each year.
FAQ
What are the essential site features when planning an apiary for a self-reliant lifestyle?
Choose a sunny, well‑drained spot with morning sun and afternoon shade if possible. Protect hives from prevailing winds and place them where wildlife exposure—bears, skunks, and raccoons—can be managed with fencing or elevated stands. Ensure easy seasonal access for inspections and honey collection while keeping distance from neighbors. Include a nearby water source or plan for water placement to keep foraging directed and reduce robbing.
How can I supply water to colonies without connecting to a tap line?
Offer shallow water stations with floating materials like corks or twigs so bees can land safely. Use rain barrels, livestock tanks, or a solar‑powered pump to refill basins. Position water 10–20 feet from hives and change water regularly to prevent disease vectors. Natural sources—puddles, ponds, or slow drains—also work if they are reliable year‑round.
Which hive types work best for an off‑grid keeper: Langstroth, top‑bar, or long‑box?
Langstroth hives give modularity and easier honey extraction with frames. Top‑bar hives suit low‑input systems and allow comb to stay largely intact, great for crush‑and‑strain harvesting. Long‑box designs blend features for larger single‑story colonies. Choose based on your extraction method, mobility needs, and how much time you can spend on inspections.
Should I use foundation or run foundation‑less frames and why?
Foundation‑less frames reduce cost and let bees build natural comb, which supports sustainable management and better adaptation to local nectar flows. Foundation helps guide straight comb and speeds colony expansion. Off‑grid keepers often prefer foundation‑less to minimize inputs and allow bees to manage wax production naturally.
What are low‑impact extraction methods suitable for remote locations?
Crush‑and‑strain and solar‑melting methods work well without electricity. With crush‑and‑strain, cut frames of capped honey, crush the comb into a mesh strainer, and let honey drain. Use food‑grade buckets and fine cloth. For small volumes, a hand‑crank extractor or battery‑powered extractor run from a solar setup also works.
How do I winter‑ready colonies without heavy sugar feeding?
Focus on building strong stores during the season by encouraging late nectar flows and minimizing unnecessary honey removals. Insulate and reduce hive entrances to conserve heat, provide windbreaks, and leave adequate honey frames for brood rearing. Use fondant or small sugar patties only when stores are critically low and other options aren’t viable.
What protective gear and smoker fuels are practical when sourcing materials locally?
A durable veil, gloves, and a full suit give reliable protection. For smokers, use pine needles, burlap, dry grass, or untreated wood shavings for consistent smoke. Always carry a lighter or flint, and keep a metal box to store fuel. Use minimal chemical treatments in an off‑grid setup to avoid contamination of honey and wax.
How do I acquire healthy stock: local swarms, nucs, or purchased queens?
Local swarms and nucs often bring regionally adapted genetics and lower transport stress. Nucs are easier for first‑season management because they include brood, stores, and a laying queen. Buying a mated queen from reputable suppliers like Mann Lake or Brushy Mountain can help select desired traits, but ensure proper introduction to avoid rejection.
What breeds are recommended for beginners focused on resilience and gentle behavior?
Italians are gentle and productive, Carniolans respond well to nectar flow changes and overwinter well in northern areas, and Russians offer resistance to Varroa mites. Match breed choice to your climate, available forage, and tolerance for swarming versus overwintering performance.
How do I install a swarm or a nuc safely and encourage quick establishment?
For a nuc, transfer frames directly into the new hive in the same order. For a swarm or bait hive, place the box in a sheltered, elevated spot with local scents like lemongrass oil on a dowel. Minimize disturbance for the first 7–10 days, provide sugar syrup only if stores are low, and mark or check for a laying queen after two weeks.
What inspection rhythm suits a first season without stressing the colony?
Inspect every 7–14 days during spring and summer, focusing on queen‑right signs, brood pattern, stores, and pest presence. Keep inspections short and work calmly to reduce stress. In fall and winter, reduce to occasional checks to confirm ventilation and hive integrity unless issues present themselves.
How do I recognize and manage common pests and diseases with limited resources?
Monitor Varroa with sugar or alcohol washes and treat with organic options like oxalic acid vaporization, formic acid pads, or powdered sugar dusting based on thresholds. For small hive beetle and wax moths, maintain strong colonies, clean equipment, and use traps. Isolate and report suspected foulbrood to state apiarists; burning severely infected equipment prevents spread.
What costs should I expect starting out and where can I save without raising disease risk?
Expect costs for hives, basic tools, protective gear, and bees. Save by sourcing used equipment from local clubs, reusing frames after heat‑treating or freezing to control pests, and catching swarms. Avoid risky shortcuts like mixing untested medicines; invest in quality queen stock and sanitation to reduce long‑term losses.
How can I deter wildlife such as bears while still keeping hives accessible?
Use sturdy electric fencing, elevated stands, or metal hive covers to reduce damage. Place hives in groups and employ smell and noise deterrents only as temporary measures. Check local regulations for recommended bear‑proof setups and collaborate with neighbors for broader deterrence strategies.
Which tools are must‑haves for extraction and routine maintenance in a remote setting?
Essential tools include a hive tool, bee brush, queen excluder if you use one, frame grips, and a portable uncapping knife or hot knife. For extraction, carry a hand‑crank or battery extractor if you have solar power, plus food‑grade buckets and strainers for crush‑and‑strain. A smoker, spare frames, and basic repair materials round out the kit.
What legal or neighborhood considerations should I check before starting?
Verify local ordinances, nuisance laws, and any county registration requirements. Notify neighbors of your plans and siting; cooperative relationships reduce complaints. Some areas have requirements for hive setbacks, registration, or inspections to control disease spread.