Ready to outfit your apiary with gear that lasts? This short guide helps new and experienced beekeepers make sound decisions about protective clothing, hive tools, smokers, feeders, and frames.
We focus on safety, durability, and what your bees need. Stainless steel smokers, ventilated suits, tight-weave veils, and sturdy frames with proper foundation all matter for long-term colony health.
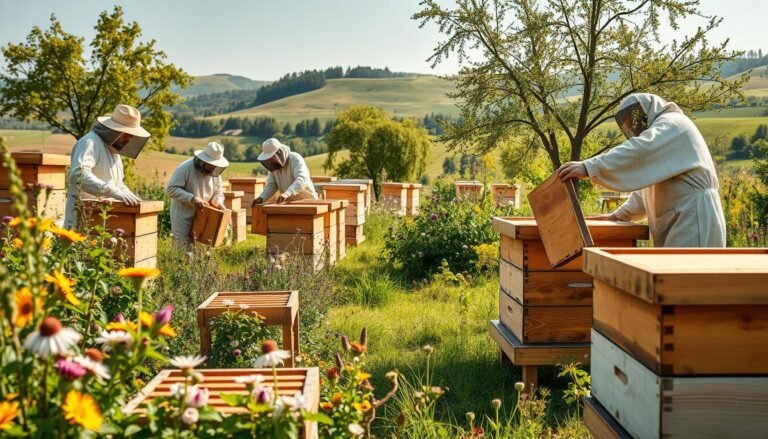
U.S. suppliers such as Betterbee, Mann Lake Ltd., Dadant & Sons, and Kelley Beekeeping offer starter kits that bundle brood boxes, frames with foundation, a smoker, hive tool, and protective clothing. Brick-and-mortar shops let you try on suits; online stores provide reviews and broad product choice.
This introduction sets clear expectations: compare gear by safety, quality, and total cost of ownership so you buy smart. It also points to training and courses for practical skills at beekeeping courses and training.
Key Takeaways
- Prioritize safety and durability when evaluating beekeeping equipment.
- Ventilated suits and stainless steel tools improve comfort and lifespan.
- Frames and foundation shape brood health and honey management.
- Try on gear locally; use online reviews for broader product comparison.
- Think long-term cost, maintenance, and colony needs when buying.
Buyer’s guide overview: how to choose beekeeping equipment in the United States
A solid buyer’s checklist turns overwhelming product pages into confident choices. Start by ranking needs: safety, fit, durability, climate suitability, and supplier support. These core criteria guide smart decisions for new and experienced beekeepers alike.
Prioritize essentials: protective clothing, a reliable hive tool, a good smoker, feeders, and a sturdy hive body. Leave harvesting tools until year two so you buy only what you will actually use.
Climate shapes choices. In hot regions, ventilated jackets and round or fencing veils with tight mesh improve comfort. Humid or cold areas call for moisture-resistant finishes and heavier wood or metal components for longer life.
Brand and supplier support matter. Read reviews, confirm replacement parts, and check warranties. Learn to read specs: mesh density in veils, zipper quality in suits, and steel grade in smokers and hive tools.
“Match boxes, frames, and covers to avoid surprises during inspections.”
- Ensure box, frames, and foundation compatibility.
- Pick gloves that balance dexterity and protection.
- Plan apiary growth so equipment scales and stays compatible.
- Use reputable suppliers for after-sales parts and support.
| Item | Typical choice | Why it matters |
|---|---|---|
| Gloves | Goatskin or cowhide | Dexterity vs thicker protection |
| Veil | Round or fencing | Visibility and airflow |
| Hive tool | Stainless steel | Durability and leverage |
Before you buy, check this quick checklist: needs, budget, climate, compatibility, and supplier reviews. For a practical starter list and supplier options, see essential beekeeping gear.
User intent and decision factors for new and experienced beekeepers
Your goals—safety, scale, or efficiency—should guide every purchase choice. New beekeepers often pick simple, safe gear that builds confidence. Many prefer jackets over full suits at first for comfort and visibility.
Experienced beekeepers prioritize tools and configurations that speed inspections and reduce downtime. They invest in durable frames and varied foundation types to tune colony performance.
Budget shapes decisions. Beginners typically buy starter bundles. Advanced keepers buy heavy-duty components that last and cut replacement cycles.
- Prioritize protective fit, glove dexterity, and veil visibility to reduce bee stress.
- Choose a smoker and hive tool pair that supports efficient, low-stress inspections.
- Pick modular hive bodies and compatible frames so you can scale smoothly.
Document heat tolerance, glove feel, and veil sightlines as you test gear. Use online reviews and local mentors to compare similar products, and consult a practical starter list like this essential gear guide or a beginner hive overview at beehive for beginners.
20. choosing beekeeping equipment USA
Start local: regional weather and supplier access shape the practical gear you’ll actually use.
Begin with the basics: a ventilated jacket or suit, a dependable hive tool, and a stainless steel smoker. These three items reduce stress for you and your bees during inspections.
Next, add a simple feeder and a sturdy hive body fitted with compatible frames and foundation. Standardized parts make expansion easier and cut compatibility headaches.
“Choose once, maintain well — comfortable, durable gear supports your bees for many seasons.”
- Check quality cues: tight-weave veils, heat guards on smokers, and solid frame construction.
- Decide between local shops and online sellers based on the need to try on suits vs variety and reviews.
- Keep year one simple — avoid extractors and specialty tools until you know your hive rhythms.
Action step: make an itemized purchase list, note suppliers (Betterbee, Mann Lake, Dadant & Sons, Kelley), and set a maintenance plan to extend tool and hive life.
Protective gear that builds confidence: suits, veils, and gloves
Comfortable, well-made protective gear lets you focus on frames and hive health instead of worrying about stings. The right apparel keeps a beekeeper calm and helps bees stay less defensive during inspections.
Ventilated jackets vs single-layer cotton
Ventilated jackets use multi-layer mesh and foam to move air while keeping sting protection. They work well in hot U.S. summers and reduce heat stress.
Single-layer cotton suits can be cooler at first cost, but quality varies. Choose tight-weave fabric and heavy-duty zippers for better long-term performance.
Veils: round or fencing
Round veils offer better airflow and sightlines; fencing veils pack flat for storage. Look for semi-flexible metal mesh that holds shape and resists wear.
Glove choices for dexterity and protection
Goatskin gloves give the best dexterity for handling frames and foundation. Cowhide offers thicker sting resistance. Long-cuff nitrile is ideal for wet work and medicines—avoid black nitrile near defensive bees.
- Quality cues: reinforced seams, removable veils, tight-weave fabrics, and heavy-duty zippers.
- Size gloves so cuffs overlap sleeves; small gaps invite stings and reduce control.
- Clean suits, veils, and gloves regularly to remove scents that upset bees.
“Try visibility and glove dexterity before you buy — fit matters more than style.”
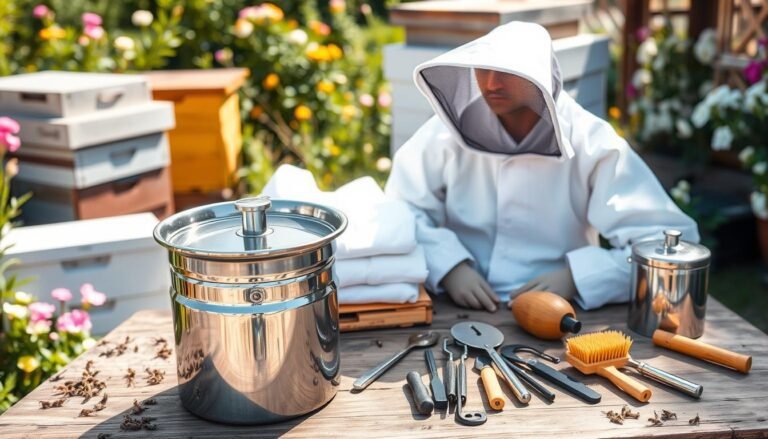
Essential hive tools and inspection kit
A compact inspection kit makes routine hive work faster and less stressful. Pack the reliable basics: a durable hive tool and a smoker that produces cool smoke. These two items form the core of safe, efficient hive inspections.
Practical hive tool choices
Flat vs J-hook: a flat hive tool excels at scraping propolis and prying sticky boxes. A J-hook lifts frames gently without warping comb or damaging foundation. Choose a length and weight that reduce wrist fatigue.
Smoker features and fuel tips
Pick a smoker with a stainless steel body, a heat guard, strong bellows, and a stable hook for resting between puffs. Use fuel that burns cool and steady—cardboard, untreated burlap, or wood chips—so smoke calms bees without overheating the comb.
“Consistent technique with your tools protects frames and preserves brood patterns.”
- Keep backups of hive tools and spare fuel to avoid mid-inspection delays.
- Include a lighter, cleaning scraper, and spare foundation in your checklist.
- Ergonomics matter: lighter tools cut fatigue when working multiple hives.
Feeders and seasonal management gear
A feeder choice shapes your seasonal plan and helps colonies through lean periods.
Selecting the right feeder supports spring build-up, helps new nucs draw comb on foundation, and supplies food during droughts. Use feeders as a temporary aid, not a long-term substitute for forage.

Entrance vs top/internal feeders
Entrance (Boardman) feeders are simple and let you watch consumption without lifting boxes. They work well for quick top-ups and observation but can attract robbers in busy forage gaps.
Top or internal feeders reduce robbing risk and hold warmth better in cool weather. They also keep syrup away from comb and help bees feed discreetly while building comb on frames and foundation.
“Feed only when colonies need it—timing and fit matter more than volume.”
- When to feed: early spring, after installing packages or nucs, and during prolonged low-forage spells.
- Syrup care: keep feeders clean, avoid contamination, and pair feeding with calm inspections and a smoker if needed.
- Fit and sanitation: ensure feeders match your boxes and covers, monitor consumption, and clean feeders to prevent mold or pathogens.
| Feeder type | Best use | Main advantage |
|---|---|---|
| Entrance (Boardman) | Quick observation, small top-ups | Simple access; easy to watch consumption |
| Top/internal | Heavy feeding, cool climates | Less robbing; better temperature stability |
| Frame feeders | New colonies drawing comb | Encourages foundation draw and brood expansion |
| Jar spare parts | Peak demand backup | Keeps feeding uninterrupted when in heavy use |
Choosing your hive setup: Langstroth and top bar options
Your choice of hive architecture affects harvests, inspections, and long-term scaling. Match the format to how you like to work and what you hope to get from your apiary.
Langstroth configurations: bottom boards, brood boxes, and hive covers
The Langstroth hive is the standard for many beekeepers because its boxes and frames follow consistent sizing. Bottom boards, brood boxes, inner and outer covers all fit together for easy transfers and expansion.
Frames and foundation sit inside brood boxes to guide comb building and support tidy brood patterns. This setup simplifies honey harvests and moves parts between hives when needed.
Top bar hive considerations: bar “frames,” design nuances, and management
Top bar hives use bars instead of framed boxes. Comb hangs from each bar and requires gentler inspections and different honey removal methods.
Top bar systems favor low-cost materials and a more observational style of beekeeping. They demand careful comb support and a management rhythm that differs from Langstroth workflows.
Quality matters: choose well-milled boxes and tight-fitting covers to keep weather and pests out. Match ventilation and cover choices to local climate to control moisture and protect bees.
“If you plan to scale quickly or need easy parts sourcing, start with a standard Langstroth setup.”
For an alternate hive style and detailed comparison, see our guide to horizontal hives at horizontal beehive options.
Frames and foundation: building strong comb for brood and honey
Frames form the skeleton of comb and decide how well brood and stores survive handling. Proper frame and foundation choices set the stage for steady brood patterns and reliable honey storage.
Foundation materials guide worker-sized cells so bees build straight comb. Wax foundation, plastic foundation, and foundationless bars each affect cell size, draw speed, and comb strength.
Foundation materials, cell support, and durability
Choose foundation that resists sagging during inspections and extraction. Plastic with wired support, thick wax sheets, or reinforced foundationless frames can cut collapse risk.
Look for frame durability cues: tight joinery, rigid end bars, and correct spacing. These features protect brood and make lifting with a hive tool safer for both bees and beekeepers.
- Comb strength: supported cells keep brood patterns steady and improve honey handling.
- Maintenance: retire warped frames and replace worn foundation to sustain colony productivity.
- Extraction fit: match frames to your manual or electric extractor to avoid damage during harvest.
“Investing in quality frames and foundation reduces inspection time and preserves comb integrity.”
Use a consistent frame standard across the hive to simplify ordering and training. Robust frames shorten open-hive time, lower stress, and improve outcomes for bees and beekeepers.
Honey harvesting tools to add in year two and beyond
Harvest gear usually waits until your second season, when colonies consistently produce surplus honey.
Start small: delay major purchases until you know your hive rhythms and honey production. This saves money and helps you buy the right tools for the job.
Uncapping knives and forks free capped cells with minimal comb damage. Knives speed work for many frames; forks lift wax cappings gently for small batches.
Extractors: manual extractors suit backyard apiaries. They are cost-effective and gentle on frames. Electric extractors boost throughput for multiple hives and cut labor time.
“Use stainless contact surfaces to keep honey safe and make clean-up easy.”
- Choose stainless-steel components for hygiene and long service life.
- Handle frames carefully to avoid warping and protect foundation for reuse by bees.
- Plan floor space, stability, and a cleanup zone so harvesting stays tidy.
- Consider renting or sharing extractors to lower upfront costs.
- Use filters and strainers to refine the final products without stripping pollen or flavor.
Record yields and timing to right-size future purchases. Proper storage and routine cleaning keep tools ready and protect honey quality for seasons to come.
Materials and construction quality: what lasts for years
Durable materials make routine hive work simpler and keep bees safer over many seasons.
Stainless steel resists rust in smokers, hive tools, and extractors. Choose grade-marked steel for long service and easy sanitation.
Look for heavy-duty zippers and reinforced stitching on suits and jackets. Tight-weave or multi-layer ventilated fabrics stop sting penetration and wear better than thin cotton.
Durability markers and quick inspection checklist
- Metals: stainless steel parts and corrosion-resistant finishes.
- Textiles: tight-weave fabric, strong seams, and heavy zippers.
- Veils: semi-flexible metal mesh that keeps shape and visibility.
- Frames & covers: well-milled joinery that resists warping and keeps a tight hive seal.
- Supplier checks: read specs and user reviews for reported lifespan and failure points.
“Paying a bit more up front for higher quality products often saves money and time over the years.”
| Category | Durability cue | Why it matters |
|---|---|---|
| Smoker & tools | Stainless steel, heat guard | Resists rust; easy to clean |
| Protective wear | Tight-weave fabric, heavy zippers | Less wear; better sting protection |
| Veils | Metal mesh, reinforced rim | Maintains sightlines and safety |
| Frames & foundation | Rigid joinery, stable foundation | Prevents warping; protects brood and stores |
Fit, comfort, and safety: getting sizing right
Proper fit reduces gaps that let bees into your suit and keeps you agile at the hive. A well-fitted jacket or suit and a secure veil cut down entry points. Long cuffs that overlap sleeves stop bees from crawling inside during inspections.
Measure before you buy. Check shoulder width, sleeve length, chest, and waist. Try raising your arms to ensure shoulders and sleeves don’t bind. Tight shoulders and short sleeves limit reach and make handling frames harder.
Veils with detachable rims ease cleaning and let you test clearance. Pick a veil with good face space so mesh doesn’t contact skin—this improves visibility when reading frames and foundation. Secure veil attachments; loose fits create risky gaps.
Glove fit should balance dexterity and protection. Thin goatskin-style gloves help when lifting frames; thicker gloves give more sting resistance. Ensure cuffs overlap your jacket sleeves and fasten snugly.
Jackets vs full suits: jackets are quicker to don, cooler in warm weather, and work for short inspections. Full suits offer the highest protection and suit children or very defensive apiaries. Choose based on heat, task length, and comfort.
Comfort reduces fatigue and supports calm, precise movements that keep bees less defensive. Re-check fit seasonally—layers and weight change—and consult size charts and reviews or try gear in person when possible.
Budgeting and total cost of ownership
Plan your budget around long-term use, not just the sticker price. A higher initial outlay for hardy gear often cuts replacement needs and downtime that can harm hive health.

Starter kit range typically bundles brood boxes, 10–20 frames with foundation, a smoker, hive tool, protective clothing, and a feeder. Expect a fair cost spread so you can benchmark products and spot poor value.
Starter kit cost ranges and when to upgrade
Begin with a complete kit that matches your planned hive count. Upgrade tools after one season if your inspections show frequent wear or if climate forces heavier use.
Saving on long-term maintenance vs cheap replacements
Spend where failure matters: suits, smokers, hive tools, boxes, frames. Stainless steel and reinforced fabrics give better service life over years and protect bees and your time.
- Plan annual funds for foundation replacements, veil cleaning, and smoker fuel.
- Rent or share extractors and harvest gear until yields justify purchase.
- Standardize box and frame sizes to avoid costly mismatches as you scale.
| Item | Typical cost cue | Why it matters |
|---|---|---|
| Starter kit | Mid-range to high | Covers brood boxes, frames, basic tools |
| Ventilated jacket | $100–$150 | Comfort reduces inspection time; lasts multiple years |
| Smoker & hive tool | Durable materials | Stainless steel resists rust and lowers replacement cost |
| Frames & foundation | Buy quality | Protects brood and simplifies harvests |
“Good quality now reduces hidden failures later.”
Where to buy in the USA: online vs brick-and-mortar suppliers
Deciding where to buy gear affects cost, fit, and how quickly you can get started.
Online retailers offer a broad variety and detailed specs. Major suppliers like Betterbee, Mann Lake Ltd., Dadant & Sons, and Kelley Beekeeping list many products, user reviews, and shipping options. Buying online is efficient for standardized hive parts, frames, and foundation you’ll reorder as the apiary grows.
In contrast, local stores let you try on suits and inspect build quality. Testing veil mesh, zipper action, and material thickness avoids surprises. A quick in-person check also helps you confirm fit and comfort before long inspections.
“Order standard hive components online; buy your primary suit in person when possible.”
- Compare catalogs for product specs, photos, and buyer reviews before you buy.
- Verify return policies and after-sales support for sizing-sensitive items.
- Consider local pickup for bulky boxes and heavy frames to cut freight risk and cost.
- Keep SKU numbers, measurements, and warranty notes for consistent reorders.
| Channel | Best for | Key advantage |
|---|---|---|
| Online suppliers | Standardized hive parts, bulk orders | Wide selection, reviews, fast shipping |
| Local retailers | Suits, veils, hands-on checks | Try fit, inspect quality, immediate advice |
| Mixed approach | Scaling apiary | Best balance of choice, fit, and cost |
Starter kits for beginner beekeepers: what to look for
A solid starter kit should let you focus on bees and learning the rhythm of the apiary. Look for a package that bundles boxes, protective wear, core tools, and clear guidance so you don’t scramble for parts in season one.
Essential components included and after-sales support
Must-haves:
- Brood boxes and a matched set of frames (10–20) with foundation so hives are ready at install.
- A stainless steel smoker and a sturdy hive tool for calm, efficient inspections.
- Full protective clothing: ventilated suit or jacket, removable veil, and gloves that balance dexterity and protection.
- A feeder and simple guidance materials or starter manuals to guide early decisions.
Prioritize kits that list materials, warranty terms, and clear sizing charts. Responsive after-sales support and educational resources help new beekeepers solve problems quickly.
“A well-chosen kit minimizes guesswork and speeds learning during your first season.”
Tip: check product reviews, confirm box-and-frame compatibility for future scaling, and add only a few optional extras like spare fuel and basic cleaning tools rather than overbuying early.
Used equipment: how to save safely
A balanced mix of sturdy used woodware and new consumables can cut startup cost while protecting colony health.
Inspection and restoration
Start with a careful walk-through. Check boxes for cracks, rot, and tight joints. Smell for sour or foul odors that hint at disease.
Inspect frames for warping, broken tops, and old comb. Confirm there are no visible pests or wax moth damage. Ask the seller about provenance and prior hive history.
- Sanitize: scrape, solarize, or heat-treat woodware and use non-toxic paints or sealers.
- Replace old foundation and any compromised frames to reset biosecurity.
- Keep stainless steel smokers and hive tools — they often outlast wood parts and offer great value.
- Favor new veils and suits for fit and hygiene; used gear can harbor pathogens or wear.
“Blend used boxes with new frames or foundation to balance savings and safety.”
| Item | What to check | Action |
|---|---|---|
| Boxes | Joinery, cracks, odor | Sand, paint with non-toxic coating, re-inspect |
| Frames | Warping, old comb | Replace foundation; discard damaged frames |
| Tools & smokers | Stainless integrity, rust | Clean, keep or replace if compromised |
Final step: re-inspect restored hive parts before placing bees. That confirms readiness and keeps your apiary safe.
Sustainable beekeeping gear and practices
Small shifts in what you buy and how you use it can lower your apiary’s footprint. Focus on long-life choices that protect bees and preserve honey quality.
Eco-friendly materials matter: prefer FSC-certified wood, recycled plastics, and stainless steel parts. Choose non-toxic paints and sealants so chemicals do not taint comb, frames, or foundation.
Reusable, durable products reduce waste and save money. A high-quality suit, a stainless smoker, and well-built hive bodies last longer and cut replacement cycles.
Practical steps for greener apiaries
- Buy from suppliers that publish environmental credentials and offer take-back programs.
- Prefer manual or solar-assisted extractors to lower energy use during harvest and support cleaner honey production.
- Track the lifespan of frames and foundation to plan repairs and maximize reuse.
- Consolidate orders and choose recyclable packaging to reduce shipping impact.
- Share seldom-used tools within the local community to cut consumption and cost.
“Sustainability and durability often go hand-in-hand—choose well and your hive will thrive.”
Climate and weather considerations across U.S. regions
From hot deserts to cold mountains, local weather affects how you outfit boxes, frames, and protective wear for your hive.
Hot and humid: use ventilated jackets and light veils to stay cool and keep bees calm. Thin layers reduce sweat and let you work longer without stressing the colony.
Cold and wet: favor insulated covers, tight-fitting boxes, and controlled ventilation to manage moisture. Internal or top feeders help keep syrup warm and cut robbing in chillier months.
Arid and windy areas: choose thicker, well-fitted boxes to reduce drafts and select finishes that resist UV and low precipitation. Durable exterior paint or sealant extends box life.
Frame & foundation care: pick sturdy frames and stable foundation that tolerate temperature swings and glove handling. Standardized Langstroth parts make climate adjustments easier as you learn local rhythms.
“Talk with regional beekeepers to refine gear choices for local conditions.”
- Pick veils for the right balance of airflow and sun protection.
- Schedule inspections around mild days to limit hive disturbance.
- Prioritize materials and finishes that match your regional stresses for long-term quality.
Maintenance and storage: extending the life of your equipment
Simple cleaning steps after each inspection cut contamination risk and save money over years. Regular care protects your hive health and keeps tools ready when you need them.
Cleaning routines should be short and regular. Wipe propolis and residue from hive tools and the smoker after use. Scrape and oil metal to stop rust and keep levers working smoothly.
Daily, monthly, and seasonal checklist
- After each hive visit: clean hive tool, empty smoker ash, and return gear to its kit.
- Weekly in season: hand-wash veils and line-dry suits; check zippers and seams.
- Before storage: sanitize feeders and frames, replace old foundation, and remove any mold or sticky buildup.
- Seasonal: inspect boxes and covers for cracks, warping, or gaps that harm seals.
Storage tips: keep all gear in a dry, cool area to prevent rust and mildew. Label bins and parts so you can pull a clean inspection kit fast and reduce time the hive is open during hive inspections.
“Consistent maintenance extends usable years and stabilizes colony performance.”
| Item | Service | When |
|---|---|---|
| Veils & suits | Hand-wash; air dry | Weekly / after heavy use |
| Tools & smoker | Scrape, oil, empty ash | After each use |
| Frames & feeders | Sanitize; replace foundation | Pre-season and post-harvest |
Track service dates and swap worn gloves, gaskets, or foundation before peak season. Good care preserves quality, protects your bees, and stretches the life of your beekeeping equipment.
Conclusion
Close your plan by focusing on a few reliable choices that protect you and support colony health.
Prioritize comfort and fit, durable smokers and hive tools, and standardized hive parts so inspections stay calm and efficient. Good choices cut replacements and keep bees steady through seasons.
Frames and foundation shape comb strength and inspection speed; invest here to protect brood and easing honey handling. Pick suppliers with clear specs and parts availability like Betterbee, Mann Lake Ltd., Dadant & Sons, and Kelley for dependable support.
Start with a starter kit, add harvesting gear later, and adapt boxes, suits, and feeders to local weather and feeding needs. Choose sustainable materials and reusable items to lower long‑term cost and impact.
Document purchases, fit notes, and performance each season. Thoughtful gear choices empower beekeepers to protect the hive, manage bees well, and enjoy reliable honey harvests.
Apply the guide’s checklists and finalize buys that match your goals and local conditions.
FAQ
What protective gear should a new beekeeper prioritize?
Start with a well-fitting veil, a ventilated bee suit or jacket, and durable gloves. A round veil with a firm brim gives clear sightlines, while a fencing-style veil offers more airflow for hot climates. Choose goatskin or cowhide gloves for heavy handling and long-cuff nitrile for dexterity during inspections. Prioritize breathable materials and reinforced seams to reduce sting risk and extend wear.
Which hive tool is best for inspections and propolis scraping?
A J-hook hive tool combines levering power with a flat edge for scraping propolis. Many beekeepers keep a second flat-style tool for delicate frame work. Look for stainless steel or heat-treated carbon steel for longevity and a comfortable non-slip grip for frequent use.
How do I choose a smoker and what fuel works well?
Choose a smoker with a heat guard and a bellows that delivers steady puffs. Stainless steel or lacquered steel bodies resist rust. Natural fuels like burlap, pine needles, or untreated wood pellets produce cool, lasting smoke. Avoid chemical-treated materials to protect hive health and honey flavor.
What type of hive should I start with: Langstroth or top bar?
Langstroth hives are the industry standard, offering modular boxes, easy frame management, and compatibility with many tools and extractors. Top bar hives suit those wanting simpler construction and lower-cost setup, but they require different management and make mechanical extraction harder. Choose based on honey goals, site access, and comfort with inspections.
How many frames and what foundation should I buy for a Langstroth hive?
Use standard deep brood boxes with 10 frames per box for balanced brood rearing. For honey supers, medium or shallow frames are easier to lift when full. Choose plastic or wax-coated foundation for consistent cell size; foundationless frames work for natural comb but need attentive management to keep comb straight.
When should I add feeders and which type is best?
Use feeders during spring buildup, fall feeding, or dearth periods. Entrance (Boardman) feeders are simple and reduce robbing risk; top/internal feeders feed directly where bees work but can spill. For winter stores, a top feeder with gravity or division board feeder works well. Match feeder choice to hive configuration and season.
What tools are essential beyond the basics for year two and beyond?
Add uncapping knives or forks, a manual or electric extractor, and quality filters for honey processing. A hive scale, frame grip, and queen excluder help with management. Invest gradually as you scale production and store gear properly between seasons.
How do I inspect used equipment before buying it?
Check for live pests, wax moth damage, and foul brood signs. Smell for lingering disease odors and test wood for rot. Sand and repaint bare timber, replace cracked frames and foundation, and sterilize metal tools. Avoid used brood frames unless thoroughly sanitized or melted down.
What should I consider about materials and construction quality?
Prioritize rot-resistant wood, tight-fit joints, stainless hardware, and durable fabrics for suits and veils. Heavy-duty zippers and reinforced stitching extend suit life. For smokers and extractors, look for stainless steel and reliable motors or hand crank designs to reduce long-term maintenance.
How do I size a bee suit and veil for comfort and safety?
Measure chest, waist, and sleeve length and try suits with the gear you’ll wear underneath. Suits should allow movement without excess material that bees can enter. Veils must fit snugly to the suit or jacket, and cuffs or elastic closures at wrists and ankles reduce sting risks.
What is the realistic starter kit cost and when should I upgrade?
Basic starter kits range widely; expect to invest more for higher-quality suits, stainless smokers, and solid hive bodies. Upgrade when you outgrow simple tools—when you harvest significant honey, expand colonies, or need more durable gear to reduce replacement costs. Investing in quality saves money over time.
Where are reliable places to buy supplies in the United States?
National suppliers like Mann Lake, Kelley Beekeeping, and Betterbee offer broad selections and warranties. Local beekeeping clubs and farm stores allow you to try on suits and inspect hive build quality. Compare reviews, shipping costs, and return policies before buying online.
How can I make my apiary more sustainable?
Choose eco-friendly materials, reuse frames and equipment when safe, and apply non-toxic paints and coatings. Rotate and sanitize frames to reduce disease, support diverse forage near your apiary, and favor beekeeping practices that promote bee health over short-term yield.
What maintenance routines keep tools and suits working for years?
Clean smokers and remove soot after each season, launder suits in gentle detergent and air dry, oil metal tools lightly to prevent rust, and store wooden boxes off the ground under cover. Inspect seals and fabric for wear before each season and repair zippers and seams promptly.
How does regional climate affect gear choices across the U.S.?
Hot, humid regions favor ventilated suits and lighter materials; cold climates need insulated hive wraps, inner covers, and heavier suits for brief inspections. Dry, arid areas require dust-tolerant feeders and sun-resilient hive paints. Match gear to your local weather and seasonal needs.
Can beginners safely buy used suits and boxes to save money?
Yes, if you inspect carefully. Wash suits thoroughly and check for holes or weak fabric. Examine boxes for warping, pest damage, and contamination. Replace or renew foundation and avoid used brood frames unless fully sterilized to prevent disease spread.