This guide walks you through the full sequence, from collecting the thin, fresh seals left after honey extraction to making clean, molded beeswax blocks ready for crafts and practical products.
Cappings are prized because they are the newest and cleanest wax in the hive. That makes them faster to handle and ideal for high-quality results with less time spent on cleaning and filtering.
Typical yield is about one to two pounds of beeswax per 100 pounds of honey, which adds a useful revenue stream for small apiaries and larger operations. A professional workflow uses indirect heat, steady temperature control, and dedicated gear to protect color and aroma.
Key Takeaways
- Collect cappings during honey extraction and let honey drain before rinsing.
- Use warm water and air-dry fully before rendering via indirect heat.
- Filter and re-melt for smooth, uniform blocks and minimal waste.
- Keep temperatures steady and avoid overheating above about 185°F.
- Recovered beeswax works well for candles, wraps, cosmetics, and polish.
Why Processing Wax Cappings Matters for Beekeepers in the United States
Many beekeepers find that the thin seals trimmed from frames become a high-value commodity when cleaned and refined. These light seals are the cleanest output of honey extraction and need far less cleaning than older comb.
From byproduct to premium material
Wax cappings often fetch strong per-pound prices and add a steady revenue stream at farmers’ markets and online. Processed beeswax supports candles, lip balms, salves, and food-contact wraps where purity matters.
Quality differences: cappings versus brood comb
Brood comb darkens over the years as cocoons, propolis, and residues build up. Many U.S. keepers rotate out old comb every few years to protect colony health and reduce contaminants.
- Cleanest yield first: Prioritizing cappings saves time and energy compared with deep-cleaning dark comb.
- Better end uses: Light beeswax burns cleaner in candles and keeps a pleasant scent for cosmetic products.
- Beginner tip: Start with cappings to learn the workflow before attempting heavy-duty comb recovery.
Essential Equipment and Supplies for Clean, Safe Results
Good gear makes small batches run smoothly and protects quality during every melt. Start with dedicated tools and a simple staging area to separate wet and dry steps. Label containers and keep consumables apart.
Melting and containment
Use a dedicated set of pots and pans that never return to kitchen service. Residue and slumgum cling permanently, so separation from food cookware is essential.
- Choose a double boiler or low-heat crockpot for steady, indirect warming; a solar melter works well in sunny regions.
- Keep at least one extra pot for water baths and rinsing. A reliable thermometer—probe or infrared—helps prevent overheating.
Filtration and handling
Progressive filtering yields a polished block. Start with coarse strainers, then use fine mesh bags or cheesecloth and finish with paper filter sheets.
- Heat-resistant spatulas, skimmers, and tongs let you remove debris safely during melts.
- Flexible silicone molds or metal muffin tins make demolding straightforward; a quick chill helps release bars.
Storage and safety
Keep labeled, sealable plastic containers for dried material and finished beeswax. Set up clean water for rinses and a separate sink area.
Wear gloves and eye protection, and lay down drop cloths for easy cleanup. For more recommended tools, see bee wax extraction equipment.
Safety First: Temperature Control, Heat Sources, and Workspace Setup
A careful setup and steady temperatures protect the natural aroma and color of beeswax. Set your workspace with clear zones: a warm area for melting, a cool area for settling, and a separate cleanup space.
Know the numbers: beeswax melts at about 145°F, begins to discolor near 185°F, and has a flash point close to 400°F. Aim to melt near the melting point and avoid sustained exposure above the discoloration point to keep a clean wax and preserve scent.
Indirect heat only
Use indirect warming—water baths, a double boiler, or a solar melter—rather than direct flame. Indirect setups give gentler, even heat and reduce rapid spikes that can darken or scorch the wax.
Ventilation and PPE
Work in a well-ventilated area and wear heat-resistant gloves and eye protection. Stay with your batch at all times; never leave heated beeswax unattended.
Fire safety and disposal
Keep a grease-rated extinguisher nearby and never use water on a wax fire. Do not pour any melted material down sinks or drains—cooled residue clogs plumbing. Stage a cool-down spot for containers to rest so clean layers can form and separate from sediment.
Label and isolate equipment reserved for beeswax. For additional safety guidance, see recommended safety practices.
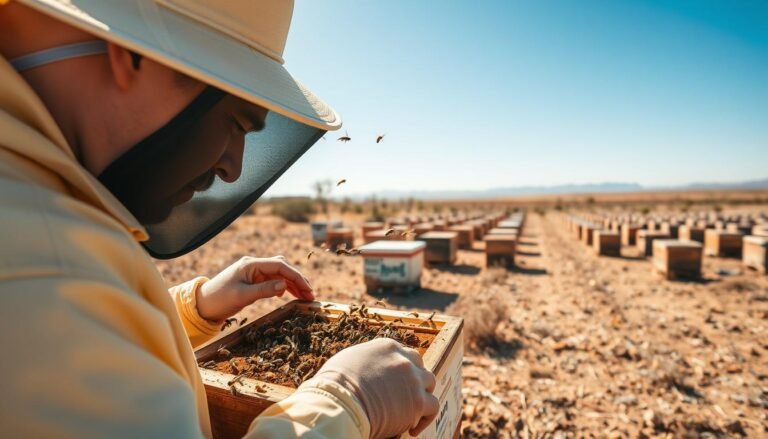
Collecting Wax Cappings During Honey Extraction
A disciplined collection routine at the extractor saves time and raises final product clarity. Use an electric hot knife or a warmed cold knife to slice seals cleanly from frames. This creates uniform pieces and limits damage to comb so bees rebuild faster.

Uncapping technique and immediate recovery
Work over a tray or bucket fitted with a coarse strainer so honey begins to drain at once. Let the material sit and gravity-drain up to 24 hours; that captures valuable honey and keeps the collected wax cleaner for later filtering.
Freezing and storage for delayed work
If you cannot render the seals right away, freeze them promptly in sealed, labeled containers. Freezing halts fermentation and deters moths, preserving color and scent until you have time to render and refine.
- Keep brood-comb seals separate so you can render the cleanest beeswax first and reduce filtering effort.
- Stage by season: match collection cadence to your honey flow and schedule rendering soon after harvest.
- Consistent collection practices over the years produce predictable yields and simplify workspace planning.
Separating Honey from Wax Before Cleaning
Remove free honey before any washing or heating. That single step preserves flavor and reduces stickiness in later stages.
Gravity draining is the simplest approach: suspend collected seals in a fine mesh or strainer over a clean bucket and let honey drip for 12–24 hours. This gentle step recovers high-quality honey with minimal agitation and keeps solids out of the main container.
Gravity draining with fine mesh or strainer systems
Set the mesh low so gravity pulls the liquid away. Label the jar with the date and note that this honey never touched extra water.
Flotation in water: what to expect and recover
Submerge the seals in cool water and watch the lighter material float while honey dissolves. This method is faster but often needs more downstream cleaning.
- Recovery rates: flotation typically yields about 60–70% recovered beeswax.
- Heavier debris and granules settle toward the bottom, making initial separation easier before a warm-water rinse and filter pass.
- Always use food-safe containers and label any water-exposed liquid separately to protect honey quality.
Measure batch sizes so you have space for draining and drying. Avoid pouring any wax-laden water down sinks—let solids settle, then discard responsibly. For an expanded guide on separating liquid honey from collected material, see separating beeswax and honey.
How to Process Wax Cappings: Washing and Drying for a Clean Start
Rinsing seals in warm water removes most sticky honey while keeping color and aroma intact. This first cleaning step saves time later and lowers the chance of filter clogs during rendering.
Warm—not hot—water dissolves residual sugars without approaching temperatures where wax might soften. Use a fine sieve or a single layer of cheesecloth so small fragments stay contained while liquid clears away.
Warm-water rinse and gentle handling
Agitate gently by hand; do not compress the material. That avoids embedding debris and makes later filtration easier.
Air-drying for long-term quality
Shake off excess water and spread a thin layer on absorbent towels. Rotate or fluff the layer occasionally to speed evaporation without added heat.
- Allow adequate time: incomplete drying invites fermentation or mildew.
- If rendering will wait, freeze fully dried seals in sealed containers for storage.
- Keep pets and pests away during drying to protect the batch.
Careful washing and full drying pay dividends by reducing clogs and improving final clarity. For practical DIY methods, see DIY methods.
Melting and Filtering Methods to Produce Clean Beeswax
Choosing the right melting route makes the difference between a cloudy block and a clear, usable product. Size of the batch, local climate, and available gear guide the selection. Below are practical, low-risk options that fit small apiaries and home hobbyists.
Water-bath with cheesecloth bags
Place the cappings inside a cheesecloth sack and set it in a pot of clean water. Heat gently until the wax rises to the top, then cool until the surface hardens.
Lift the disc, scrape the bottom sediment, and re-melt that recovered top layer for a finer filtration pass.
Double boiler refinement
Use a double boiler or an insulated boiler pot for the second melt. Keep temperatures steady and pour through cloth or paper filters while the beeswax is fully liquid.
This method yields a noticeably cleaner output and preps material for final molding into candles or blocks.
Solar wax melter
Low-energy and effective, a solar melter places seals on a perforated tray under glass so liquid flows into a water catch pan. In strong sun it often reaches high internal temps and delivers very clear wax with most impurities left on the tray.
Crockpot and oven-assisted options
For small batches, a crockpot set near 155°F with a water cover gives gentle, hands-off melting. Cool slowly overnight, then remove the hardened cake and scrape slumgum from the bottom.
For up to about five pounds, an oven method stretches cloth over a water-filled dish; low oven heat lets melted material pass into the water below. Cool fully and pop out the cake for scraping.
- Tip: Always scrape the bottom of hardened cakes before re-melting to remove stuck sediment.
- Capture hot flows in heat-safe containers that are easy to clean as wax sets.
- Match method to batch size, season, and equipment; combine approaches when needed for the clean wax target.
Re-melting, Refining, and Achieving Crystal-Clear Wax
Final refinement is the moment your material becomes a usable product. Gentle reheats and staged filtration remove haze and preserve scent. Use indirect heat and steady temperatures for best results.

Target temperatures and avoiding discoloration
Aim low: re-melt in a double boiler and keep the batch below about 185°F whenever possible. Briefly raising the batch to 180–190°F can help flow during pours, but avoid long exposure near the discoloration point.
Filtering progression: from coarse to fine
Start with a coarse strainer or layered cloth. Follow with cheesecloth, then use paper towels or coffee filters for fine particulates.
| Step | Tool | Purpose |
|---|---|---|
| 1 | Coarse strainer | Remove large debris |
| 2 | Cheesecloth | Catch medium particles |
| 3 | Coffee filter | Polish clarity |
Test a small volume first so a slow filter doesn’t clog. Pre-warm receiving containers so the melted wax flows and sets evenly. Skim any surface films rather than stirring them back in.
Label each cycle and keep tools dry; water droplets can cause spatter or cloudiness. With patience and careful heat control, each re-melt step yields clearer beeswax and fewer off-notes.
Molding, Cooling, and Storing Your Beeswax
Final shaping begins when liquid beeswax moves from the pot into its mold. Pour slowly into flexible silicone molds, metal tins, or reusable containers. Aim for consistent block sizes so future melts match your project needs.
Pouring and surface finish
Let wax flow with minimal disturbance so the top stays smooth and even. Pouring slowly reduces trapped air and prevents bubbles from marring finishes.
Cooling, scraping, and demolding
Allow complete cooling before demolding; rushing will warp forms and harm clarity at the bottom. Hardened cakes often show a thin dirty layer on the bottom—scrape this away gently without gouging the clean beeswax.
Wrapping and long-term storage
Wrap finished blocks in unbleached paper or muslin. Store in a cool, dry place away from direct sun and heat sources. Beeswax can last for years and may develop a harmless white bloom; buff it off with a cloth or gentle warmth.
“Careful cooling, gentle scraping, and breathable wrapping deliver professional, long-lasting blocks.”
- Use sturdy, flexible molds for easy release and uniform sizes.
- Label blocks with date, batch notes, and intended use.
- Dispose of cooling water and rinse water outdoors; do not pour down sinks to avoid clogs.
| Task | Tip | Why it matters |
|---|---|---|
| Pouring | Slow, steady pour from the pot | Minimizes bubbles and ensures smooth top |
| Cooling | Let cool fully before demold | Prevents warping and sediment disturbance |
| Finishing | Scrape bottom sediment; wrap breathable | Improves clarity and protects for years |
Troubleshooting and Pro Tips from the Apiary
When a batch looks off—darker, crumbly, or tacky—start with a simple diagnosis. Check for excessive heat exposure, trapped moisture, or coarse filtration as the likely culprits. These small checks save time and improve final clarity.
- Dark or brittle beeswax: Likely heat-related. Keep melts under about 185°F and use indirect heat. A gentle re-filter often lightens color.
- Soft or tacky blocks: Residual honey or water causes this. Re-melt in a water bath, let the top harden, then scrape and re-filter.
- Debris and slumgum: Minimize by careful collection and staged filtration. Reserve slumgum for bait or kindling rather than discarding.
For brood comb, steam-based rendering separates beeswax from cocoons with less scraping and cleaner yields. When scaling across multiple hives, use tall tanks, controlled heat sources, and solar melters to boost throughput while reducing mess.
Plan work in clear steps, label brood-derived batches, and schedule sessions after major harvests. Patience at each step—from rinsing to final scraping—prevents rework and yields consistently better beeswax. For related cost planning, see extraction costs.
Using Your Clean Beeswax: Candles, Wraps, Cosmetics, and More
From pantry wraps to premium candles, refined beeswax performs across many household uses. Clean blocks yield predictable melt behavior and a gentle scent that improves finished products.
Beeswax candles and wick selection
Match wick size to candle diameter so the flame burns evenly without sooting. For tall pillars use stiffer braided cotton; for containers choose a flat cotton wick sized to the jar. Test one sample for five hours before scaling production.
Lip balms, salves, and lotions
Beeswax gives structure—it binds oils and butters into a stable balm that spreads well on skin. Keep simple recipes scalable so you use blocks efficiently and avoid frequent reheats.
Wraps, furniture care, and hive equipment
Reusable food wraps mix beeswax with jojoba oil and resin as a durable plastic alternative for home kitchens. Simple polish recipes with beeswax and oil restore wood grain and resist fingerprints.
Coating frames lightly encourages faster comb drawing and better acceptance by the colony. Bundle candles, balms, and wraps into gift sets for added value.
| Product | Key ingredient role | Quick tip |
|---|---|---|
| Candles | Long burn, pleasant aroma | Wick selection by diameter |
| Balms & Salves | Stability and barrier | Test small batches; label clearly |
| Wraps & Polish | Plastic-reducing coating; wood nourishment | Blend with oils; cool flat for even finish |
For guidance on small-batch formulations and labeling best practices, see beeswax products.
Conclusion
Method and patience are the real refiners—each careful cycle raises clarity and scent.
Follow a clear sequence: collect clean material, separate honey, wash and dry, render with indirect heat, filter in stages, then mold and cool. This stepwise approach produces consistently clean wax and predictable results.
Use gentle heat when you re-melt and keep record of temps and filters. Let wax solidify fully before scraping, polishing, and wrapping. A final polishing pour often lifts clarity with little extra work.
Beeswax lasts for years when stored cool and dry, and it suits candles, wraps, cosmetics, and polish. For a practical candle-focused guide, see render cappings into beeswax candles.
FAQ
What is the best first step after collecting cappings during honey extraction?
Remove excess honey by gravity draining or by placing cappings in a fine mesh strainer. Let them sit over a container for several hours so honey drips free. Freezing cappings briefly can prevent fermentation and insect activity before further cleaning.
Which equipment gives the cleanest results for rendering comb into high-grade beeswax?
Use an indirect heat setup such as a double boiler or a solar wax melter for gentle, even melting. Combine with a cheesecloth or fine mesh bag and layered filters to separate debris and slumgum. A thermometer and heat-resistant tools help control temperatures and protect quality.
At what temperature should I melt beeswax to avoid discoloration or burning?
Keep the wax under about 175–185°F for standard rendering and re-melting. Use a water bath or double boiler so the wax never sees direct flame. Higher temps risk darkening and volatile loss that dulls aroma and color.
How do I separate honey from cappings without losing beeswax?
Start with gravity draining through a fine strainer, then rinse gently with warm water if needed. For heavier contamination, flotation in water helps liberate honey; skim wax off the surface once it floats, then dry and render.
What’s the safe method for filtering melted wax to remove slumgum and debris?
Pour melted wax through a layered filter system: coarse mesh or paint strainer first, then cheesecloth, then a very fine filter if you want cosmetic-grade clarity. Do this while the wax is hot and fluid so impurities settle or are caught in the cloth.
Can I use a crockpot for small-batch wax rendering?
Yes. A crockpot on low with a water layer or inside a double-boiler arrangement works well for small batches. Monitor temperature, stir occasionally, and filter through cloth while warm. Avoid boiling and never leave unattended.
How long does it take for melted wax to solidify in molds?
Small molds often firm up within 30–60 minutes at room temperature, while larger blocks can take several hours to overnight. Cooling speed depends on volume and ambient temperature; refrigerating can speed setting but may encourage bloom later.
What is slumgum and how do I remove it after pouring?
Slumgum is the dark residue of impurities and organic matter that sinks during solidification. After the wax cools, it usually shrinks slightly and the slumgum separates. Scrape it away with a knife or chisel, then re-melt and filter the clean wax again if needed.
Is solar wax melter effective for producing clear beeswax?
Solar melters work well in sunny climates and save energy. They gently melt wax and allow impurities to settle. However, they may be slower and less controlled than heated water baths, so expect longer processing times and variable clarity depending on design.
What precautions should I take to keep rendered wax food-safe for wraps and cosmetics?
Start with cappings free of brood comb and heavy contaminants. Use clean equipment, layered filtration, and avoid solvents. Store finished blocks in airtight, cool, dry containers. Test small batches in your product formulations before scaling up.
How should I store finished beeswax to prevent bloom or degradation?
Store in airtight containers away from heat and direct sunlight. Keep temperature stable and avoid moisture. If a white bloom appears, it’s usually natural recrystallization; re-melting and re-filtering restores appearance and performance.
What’s the recommended method for cleaning brood-comb wax compared with cappings-only wax?
Brood comb often contains more debris, brood residues, and darker pigments. Use repeated re-melts and progressive filtration — coarse to fine — and consider boiling with water baths to remove heavier solids. In some cases, chemical bleaching is used commercially, but it’s not recommended for small-scale, food-use wax.
Can melted wax go down household drains or be disposed of with liquid waste?
Never pour melted wax down drains. It solidifies and clogs pipes. Collect solidified slumgum and excess wax in containers or bags and dispose of them with solid waste or take them to recycling facilities that accept wax.
How do I scale rendering for multiple hives while maintaining safety?
Increase batch size gradually and use larger, indirect-heat vessels with proper ventilation. Assign stable work surfaces, wear PPE, and keep water sources, fire extinguishers, and first-aid accessible. Schedule regular cleaning to prevent buildup of flammable residue.
What products can I make from clean beeswax and basic guidelines for each?
Popular items include candles (choose proper wicks), lip balms and salves (blend with oils and butters), food wraps (combine with cotton fabric and jojoba or oils for pliability), and furniture polish (mix with oil). Test recipes for texture and melting point before selling or gifting.