Keep your extractor in top condition to protect flavor, reduce contamination risks, and extend the life of the stainless-steel drum and moving parts.
This short guide lays out a clear, staged process for safe extraction work. Start by draining leftover product, disassembling removable parts, and managing wax with cool water first to avoid smears.
Next steps cover rinsing, food-grade sanitizing that fits HACCP programs, and full drying to stop mold or corrosion. Electric units need special care: unplug before any work and keep motors dry at all times.
Follow minimal soap use and thorough rinsing so aroma and quality remain intact. This workflow scales from a single hive to multiple sites and helps you avoid common mistakes like hot water smearing wax or leaving equipment outdoors.
For tool options and wax handling gear, see a recommended list at bee wax extraction equipment.
Key Takeaways
- Remove residues first, then rinse with cool then warm water to manage wax.
- Use food-safe sanitizers aligned with HACCP to protect product quality.
- Dry completely to prevent mold, corrosion, and pests.
- Keep motors unplugged and dry on electric models.
- Limit soap use and rinse well to avoid aroma tainting.
- Follow these repeatable steps for consistent, safe extraction results.
Why a clean honey extractor matters for honey quality, safety, and equipment life
Clean interior surfaces preserve flavor and aroma. Residual wax, propolis, or detergent films can add off-notes that ruin a batch. Keeping parts free of sticky deposits helps produce clean honey with consistent taste.
Hygiene reduces food-safety risks. Leftover honey crystallizes fast, draws ants and flies, and lets bacteria or yeasts grow inside the drum. Removing films and bio-load lowers contamination risk and fits American beekeeping food-safe practices.
Preventing buildup also cuts friction on moving parts. That reduces wear, lengthens equipment life, and lowers maintenance costs over time.
Start rinses with cool water because hot water melts wax and smears it across surfaces. Clean surfaces lead to smoother spins and clearer flow through the gate, improving honey extraction efficiency.
- Benefit: Better product quality and stronger consumer trust.
- Benefit: Easier future upkeep for hobbyists and small commercial operators.
Pre-clean setup: remove leftover honey and prep parts before washing
Start prep by recovering any remaining product so waste is minimal and the main wash goes faster.
Drain and capture residual honey: Close the honey gate, tilt the unit so liquid pools at one side, and leave the drum overnight in a warm room to lower viscosity. Next morning, collect the flow into a clean container and pass it through a fine mesh or sieve for clarification.
Disassemble removable parts
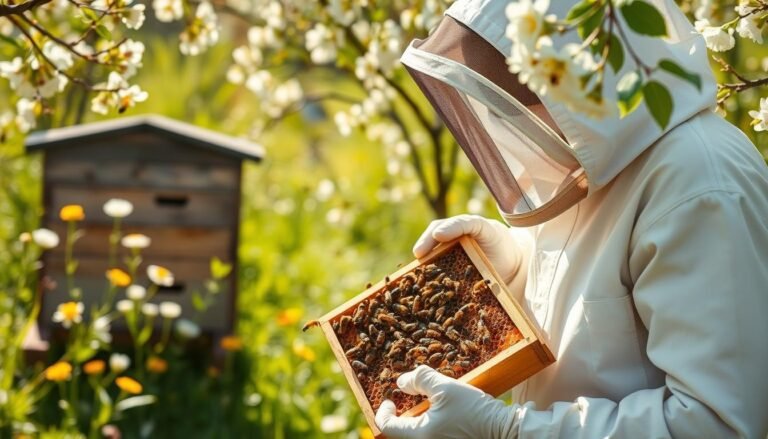
Remove frames, the basket, and gate components to expose joints where sticky deposits hide. Place small parts in labeled containers to avoid misplacement during reassembly.
Tools and contamination control
Use a long-handle spatula or bamboo skewer to loosen stubborn deposits while protecting the stainless steel interior from scratches. Avoid soap where possible; if you must use soap, use a small amount and plan a thorough rinse with clean water to prevent flavor taint.
“Stage the extractor under a clean cover to keep dust and insects away while you work.”
| Action | Why it helps | Tool |
|---|---|---|
| Tilt-and-drain | Recovers leftover honey with little waste | Container, sieve |
| Disassemble parts | Exposes seams that trap residues | Labels, tray |
| Loosen deposits | Prepares stainless steel surfaces for main wash | Soft spatula, skewer |
Note: Proper staging of beekeeping equipment shortens the full service time and improves final results for both manual and electric units.
How to clean a honey extractor step by step for a spotless, stainless steel drum
A stepwise routine keeps the stainless steel drum bright and reduces rework. Level the unit, close the honey gate, then fill the drum with cool or cold water. Let it sit to loosen sugars without melting wax.

Initial cool rinse to control wax
Fill the drum, let the water sit for 20–30 minutes, then drain. Repeat until visible sticky residue falls away. This low‑temperature soak prevents wax from smearing across surfaces.
Scrape residual wax and propolis safely
Use a soft rubber spatula or a spatula scraper to lift films of residual wax and propolis. Avoid metal brushes or abrasive pads that can score the finish.
Warm water soak and rinse
For crystallized or stubborn deposits, soak with warm water — not hot — to dissolve sugars while protecting wax. Rinse thoroughly to remove loosened debris.
Sanitize, final rinse, and dry
Apply a food‑grade, HACCP‑friendly sanitizer to contact surfaces, then perform a clear water rinse. Air dry or hang a low‑heat hair dryer inside the drum to speed drying. Keep motor housings and wiring dry at all times.
Inspect seams, the honey gate seat, and moving parts before reassembly to ensure smooth action.
Cleaning an electric honey extractor vs a manual honey extractor
Electric and manual units need different care steps to protect sensitive parts and keep results consistent. Follow a safety-first routine for powered models, and use fuller soaks for hand-operated units to remove residues without risk to motors.
Electric model safety and routine
Unplug before any work. Always disconnect power, shield the motor, and never spray or immerse electrical components. Wipe the motor housing with a damp cloth only.
Step: rinse and soak the drum and basket while keeping splashes away from controls. Check seals, bearings, and fasteners after reassembly to avoid vibration during extraction.
Manual model routine
Manual units allow fuller drum fills and warm‑water soaks without electrical risk. Perform a full-drum rinse, gently scrub the basket with a soft brush, then drain completely before final rinses and drying.
Confirm the gate is closed before fills and that the honey gate opens smoothly without leaks afterward. Small hobby setups often prefer manual units; multi-hive operators usually benefit from electric performance when processing honeycomb.
- Electric safety: always unplug, shield the motor, and avoid soaking controls.
- Workflow tip: rinse the drum carefully; wipe the motor housing separately.
- Manual step: soak, scrub gently, drain fully, then dry.
- Both models: use soft tools, inspect parts, and preserve finishes to extend equipment life.
For more on types and care, consult a detailed honey extractors guide and read about wax extraction safety.
Sanitizing, drying, and storing your beekeeping equipment after honey extraction
After washing, follow a clear final routine: sanitize contact surfaces, remove all moisture, then store the unit where dust and pests cannot reach it.
Food‑grade sanitizers: choose products compatible with stainless steel and approved for food-contact surfaces. For a simple, compliant option, use a diluted bleach mix—about 1 cup household bleach per 5 gallons of water—with 10–15 minutes contact time. After contact time, thoroughly rinse with clean water to avoid chemical residues that may affect flavor.

Drying to protect quality
Avoid using hot water that can re-mobilize wax; rely on cool or warm rinses earlier in the process. Let parts air dry until fully moisture‑free. If time is short, use a low‑heat hair dryer hung inside the drum and reposition it to reach corners and seams.
Storage and final checks
Store the honey extractor and spare parts in a clean, dry area. Cover the unit to block dust, insects, and rodents. If storage is humid or dusty, re-sanitize before the next season as an extra precaution.
Final step: rinse extractor after sanitizing so no chemical traces remain. This completes the repeatable process that protects product quality and extends equipment life.
Cleaning and maintaining honey extractors: best practices and timeline
A short timeline tied to each run prevents small issues from becoming major repairs. Follow a quick post‑run rinse and dry, and plan deeper extractor cleaning at the season start and finish.
Routine: perform a cool rinse immediately after each extraction, then air dry. Schedule a warm soak and sanitization before long storage.
- Maintenance checklist: inspect bearings, gate seals, basket alignment, and fasteners to spot wear or leaks.
- Lubrication: apply oil only to manufacturer‑approved points. Avoid any lubricant near contact areas to protect product quality.
- Timeline: immediate post‑run rinse; same‑day dry; weekly checks during heavy use; full service at season start and end.
- Signs for service: sticking gate, noisy bearings, or basket wobble — address these before the next run.
“Document each step so the process is repeatable and efficient for every extraction cycle.”
Finish with careful reassembly and a short test spin to confirm smooth operation. Consistent care extends equipment life and protects product from batch to batch. For more on tools and setup, see this production equipment overview.
Common mistakes to avoid when you clean a honey extractor
Avoiding a handful of predictable errors keeps your unit working and your product pure.
Do not start with hot water. Heat melts wax and forces films into seams, which makes the next step harder and can hide contamination.
Never leave the unit outside for bees to finish. This invites robbing behavior and raises the risk of disease spread across colonies.
Use soap sparingly. If you must use soap, apply a small amount and rinse thoroughly with clean water to avoid residues that alter aroma and taste.
- Avoid abrasive tools that scratch the drum; scratches trap residue.
- Drain residual product quickly; crystallized deposits take far more effort to remove.
- Always close the gate before a rinse to prevent spills and wasted water.
- Keep motors and control boxes dry—never spray or soak electric parts.
Plan each step and stage frames and parts ahead of time to limit cross-contamination and speed the whole process.
Conclusion
Set a simple post‑extraction ritual, and the rest becomes routine. Start with a cool rinse to control wax, lift residues gently, follow with a warm soak for stubborn films, apply a food‑safe sanitizer, then dry fully for storage.
Consistent care yields a clean honey extractor, steady performance, and easier next runs. Electric models must stay unplugged and dry near motors; manual units allow fuller soaks with less risk.
Inspect the drum, honeycomb‑contact areas, and gate before storage. For a detailed reference on types and service, see this honey extractors guide.
Summary: a brief, regular routine protects product integrity and extends equipment life with minimal extra effort.
FAQ
Why does a clean extractor matter for honey quality and equipment life?
A spotless extractor prevents spoilage, off-flavors, and contamination from debris, wax, or old syrup. Clean interiors and a well-sealed honey gate extend equipment life by stopping corrosion and sticky buildup. Consistent cleaning protects your product, reduces rework, and keeps stainless steel drums and parts performing longer.
How do I remove leftover honey from the drum without wasting it?
Tilt the extractor to one side and open the honey gate over a clean container to catch residual flow. For small amounts, allow the extractor to sit in a warm room overnight so honey drains slowly. Capture runoff with food-grade buckets or jars and return it to your bee-house filtration for reuse.
Which parts should I disassemble before washing?
Remove baskets, frames, the honey gate, splash guards, and any removable fittings. Take off seals and lightweight items for separate gentle washing. Keep motors, bearings, and electrical housings connected unless the manufacturer directs full removal.
What water temperature is best for the first rinse to control wax smear?
Start with cool or cold water. Cold rinse firms wax and propolis so they don’t smear across surfaces, making them easier to scrape away before any warm soak or soap step.
How do I scrape off residual wax and propolis safely?
Use a soft spatula or dedicated spatula scraper. Avoid abrasive tools that scratch stainless steel. Work gently along seams and welds to lift debris without damaging the drum finish.
When should I use warm water or soap during cleaning?
After removing loose wax and debris with a cold rinse and scraping, use warm water to dissolve crystallized or stubborn honey. Use minimal food-safe soap only when needed, then rinse thoroughly to prevent residue that can attract pests or affect flavor.
How do I sanitize extractor surfaces in a HACCP-friendly way?
Use food-grade sanitizers such as diluted sodium hypochlorite (bleach) at recommended USDA ratios or commercial food-safe sanitizers. Follow label directions, rinse if required, and allow contact time specified to ensure microbial control without harming stainless steel.
What’s the best method to dry an extractor to protect quality?
Air dry in a clean, dust-free area or use a low-heat hair dryer to speed drying. Ensure all parts, including the honey gate and seals, are fully dry before reassembly to prevent mold and corrosion.
How do cleaning steps differ for electric vs manual extractors?
For electric extractors, unplug and keep motors and electrical housings dry; wipe motor casings only and avoid submerging electrical components. Manual extractors allow more thorough drum immersion, full soaking, and easier basket removal for scrubbing.
Can I use bleach to sanitize stainless steel extractors?
Yes, in proper diluted ratios. Use a fresh, food-safe bleach solution following USDA or EPA guidance. Rinse well after sanitizing and dry promptly to avoid long-term exposure that can dull stainless finishes.
How often should I perform a full deep clean and maintenance timeline?
Deep clean after each major extraction session. Perform a quick rinse between uses during the same day. Inspect seals, the honey gate, and bearings monthly in active season; lubricate and replace parts as needed to prevent failures.
What common mistakes should I avoid when cleaning an extractor?
Don’t use hot water first (it smears wax), avoid abrasive scrubbers that scratch metal, never soak motors or electrical parts, and don’t leave soap residue. Also avoid storing the extractor wet or in dusty areas that invite pests.
How should I store equipment after cleaning to keep it sanitary?
Store in a clean, dry room away from dust, pests, and chemicals. Reassemble only when dry. Cover the drum with a breathable cloth or lid, and keep replacement seals and small parts in labeled, sealed containers.
What tools and supplies make the process easier?
Keep a soft spatula scraper, food-grade brushes, buckets, low-foaming dish soap, food-safe sanitizer, a hair dryer or air blower, and replacement seals on hand. Stainless-friendly cleaners and spare gaskets speed maintenance and reduce downtime.