Preventing loss starts with clear priorities. New and experienced beekeepers both face risks: queen failure, starvation, and varroa top the list. This short guide sets realistic first-year goals and shows how planning lowers your risk.
Start with two hives when possible. A second hive gives you brood, frames, and a comparison if one colony shows stress. It also raises your chance of overwintering success.
Prioritize survival over harvest in year one. Leave recommended winter stores—about 40–50 lb in warm areas, 90–100 lb in cold zones—and feed early if stores lag.
Act on a schedule: monitor regularly, manage varroa proactively, and have equipment ready before growth accelerates. Use local clubs and mentors for region-specific information.
Key Takeaways
- Expect some losses; prevention and quick action matter most.
- Starting with two hives provides a practical safety net.
- Save first-year honey to secure winter stores by climate.
- Focus varroa, queen, and starvation monitoring across seasons.
- Prepare equipment and treatments before you need them.
- Tap local resources and classes; don’t go it alone—see a helpful primer for beginners.
Why colonies die: understanding risks, seasons, and beekeeper influence
Many hive failures come from a mix of weather swings, food gaps, and human choices. New beekeepers face a steep learning curve: beginner loss rates can reach about 60% versus roughly 30% for all keepers in a year. That gap shows where targeted care pays off.
Backyard loss rates vs. experienced averages
Reality check: higher beginner losses are common. Track inspections, record stores, and compare hive growth to set realistic goals. Discipline in checks and timely feeding narrows the survival gap.
How weather, forage, and local conditions shape outcomes
Late cold snaps, drought, and short nectar flows create time-sensitive risks. March often ranks high for starvation because bees can’t reach isolated stores.
“Blooms do not always equal nectar — verify actual stores before relying on the calendar.”
| Risk | When | Keeper action |
|---|---|---|
| Starvation | Late winter / March | Inspect stores; feed if below thresholds |
| Forage gap | Summer dearth | Provide syrup or patties; monitor brood |
| Understrength after swarm | Post-swarm weeks | Add frames of brood or delay harvest |
- Place hives away from high-traffic yards to reduce defensive issues as stores grow.
- Use local mentors and test ideas for your area to match management to microclimate.
- Keep concise records and thresholds so you can act quickly when weather or queen performance changes.
For a focused review on seasonal forage and health, see a seasonal forage and health review. Good information and a simple plan often prevent the worst outcomes for your bees.
Beekeeping mistakes that kill colonies: what they are and how to prevent them
Quick, decisive action is the single habit that separates surviving hives from failing ones. Three high-impact errors—queen loss, starvation, and varroa—each erode a colony fast if ignored.
From queen loss to starvation and mites: the big three fatal errors
Recognize queen failure early by checking for eggs and uniform brood. No eggs for a week signals urgent action: requeen or add open eggs quickly.
New colonies need continuous feeding until comb and stores are built. Stop too soon and the hive can run out of food during a dearth.
Monthly mite checks are essential. Use sugar shake or alcohol wash and apply season-appropriate treatment when thresholds are crossed.
Action-first mindset: detect fast, correct faster
Document every visit—notes on stores, brood pattern, and mite counts let you see trends and act before a slump becomes terminal.
| Risk | Fast sign | Immediate action |
|---|---|---|
| Queen failure | No eggs, spotty brood | Add eggs/open brood or requeen |
| Starvation | Low stores, light weight | Feed syrup or patties until stores secure |
| Varroa | Rising mite counts | Monthly testing; treat by season |
Pre-stage frames and boxes and watch for a swarm event; if a hive swarms, support the mother hive with brood and food to prevent collapse. For seasonal task guidance, see seasonal beekeeping tasks.
Wishy-washy varroa control: monitoring, thresholds, and timely treatment
A monthly testing routine turns guesswork about mites into actionable numbers for every hive. Mite loads can double each month, so establish a steady schedule and consistent sampling method.

Monthly mite checks and sampling methods
Use a sugar shake or alcohol wash on a scant 1/2 cup of nurse bees taken from a brood frame. These quantitative methods give a mites-to-bees ratio and a reliable infestation percentage.
Avoid sticky boards for threshold decisions. Drop counts lack a bee denominator and can mislead timing for treatment.
Seasonal timing and treatment choices
Apply the 2% action threshold (about 6 mites per 1/2 cup). Treat all hives in the apiary when one exceeds that level to prevent reinfestation.
Complete major summer treatments by August to protect winter bees. Use formic acid (MAQS) in warm months when it reaches brood under caps. Use oxalic acid vaporization in late fall when brood is minimal.
After-treatment verification
Retest 14–21 days after treatment to catch mites emerging from capped brood. Document product, date, conditions, counts, and next steps.
“Every day at high mite loads increases virus spread—test monthly and act fast.”
| Method | Sample | Accuracy | Best use |
|---|---|---|---|
| Sugar shake | ~1/2 cup nurse bees | High | Routine monthly checks |
| Alcohol wash | ~1/2 cup nurse bees | Very high | Confirmation before treatment |
| Sticky board | Hive drop over 24–72 hours | Low for thresholds | Long-term trend only |
Train helpers and document each step. Minimize opening hive stress while you gather reliable data and keep your bees healthy. This article provides practical information for beekeepers ready to act.
Feeding failures that lead to starvation in spring, summer dearth, and winter
Poor timing and inconsistent feeding quickly weaken new hives and leave them vulnerable to seasonal dearths.
New colonies: feed packages and nucs until comb is drawn and honey is being stored. Intermittent feeding stalls comb building and produces light reserves by fall.
Fall nutrition and overwinter targets
Aim for roughly 60–80 lb of honey and several solid frames of pollen before winter. Protein shortages impede spring build-up; studies link low pollen to high collapse rates.
Tip: use syrup earlier in fall to build carbohydrate stores, then switch to dry sugar in late fall to reduce moisture and robbing risk.
Spring build-up without swarming
Feed light syrup and pollen patties conservatively in early spring. Controlled feeding boosts population without triggering swarming.
March is a common starvation month—check stores on a safe, dry day and top up hive-by-hive as needed.
- Match feeders to weather: top feeders or dry sugar for cold snaps.
- Record dates, amounts, and hive responses to refine timing each season.
- Prioritize leaving honey in year one—harvest later to secure survival.
Queen status blind spots: recognizing queenless hives and failing brood patterns
A sudden drop in brood pattern is one of the clearest signals a queen is underperforming. Hives with queen events face a much higher risk of loss, so spot checks matter.
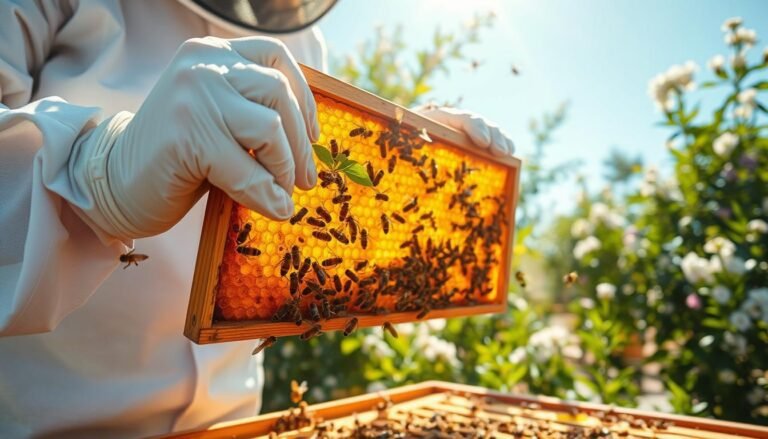
Train your eye for the basics: look for eggs in cells, C-shaped larvae, and uniform capped brood. A solid patch of same-aged brood shows a healthy laying queen.
If you see spotty patches or scattered brood, act fast. Each week without a laying queen compounds population loss and reduces winter readiness.

Reading brood: eggs, larvae, capped brood, and spotty patterns
Check frames methodically: inspect central brood frames first, then move outward. Fresh eggs on multiple frames confirm current laying.
Spotty or inconsistent brood suggests a failing queen or intermittent laying. Note age and source of your queen so you can judge when decline is likely.
Rescue options: add open brood/eggs, requeen, or combine
Quick remedies: add a frame of open brood and eggs to calm workers and prevent laying workers from developing.
Introducing a mated queen can restore laying within days; after a swarm, requeening often shortens the broodless interval to about three weeks.
- Requeen proactively in late summer or early fall to stabilize the hive and reduce swarm risk.
- Verify success on the next inspection—look for fresh eggs and a tightening brood pattern.
- Keep notes on queen age, source, and any interventions so future decisions match past outcomes.
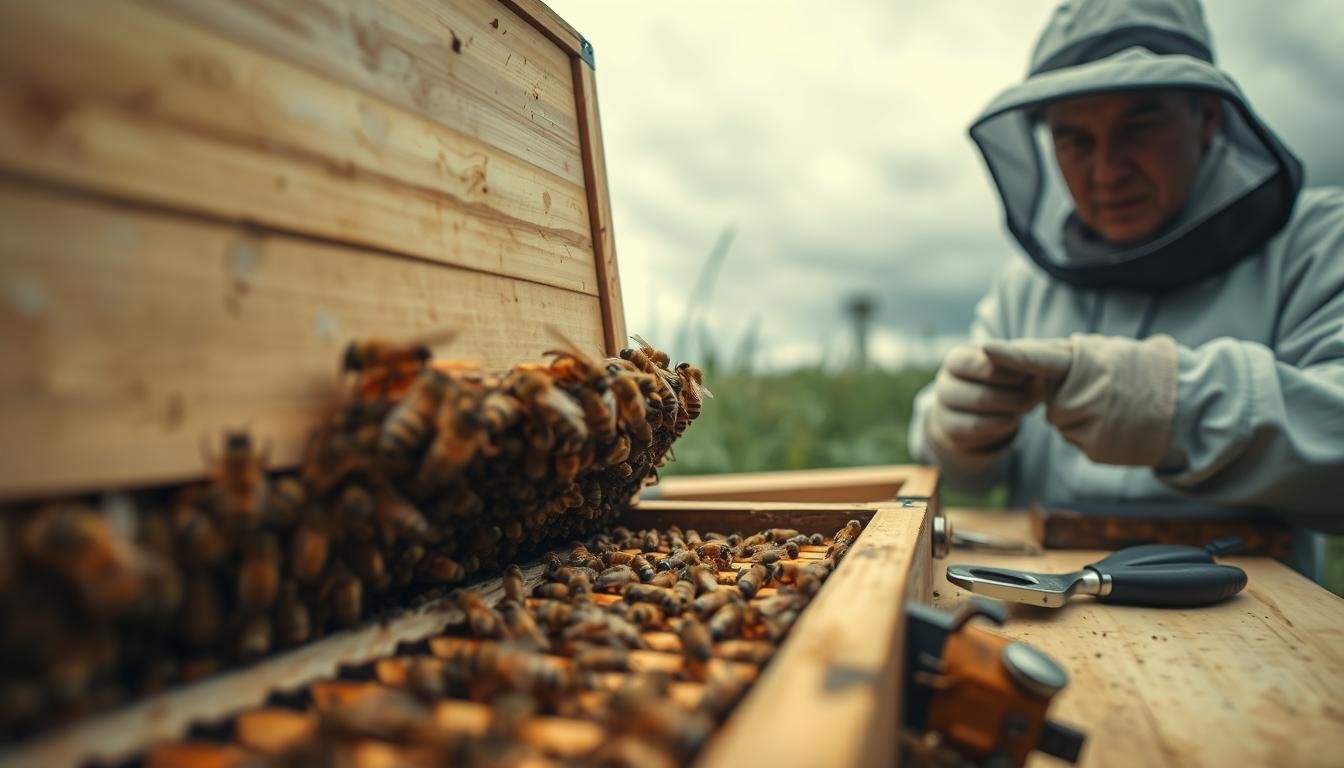
Inspections, smoker use, and hive disruptions: when “looking” harms the hive
Knowing when to look and when to leave a hive alone is one of the most effective skills a beekeeper can learn. New hives benefit from checks every 7–10 days. Once frames and stores stabilize, move to purpose-driven visits only.
Set an inspection cadence and stick to it. Avoid peeking every day; frequent opening costs the bees time, risks queen injury, and can trigger absconding.
Good smoker and handling practice
Light cool white smoke and puff at the entrance, then under the lid. This calms bees and interrupts alarm pheromones without harming them.
Always wear protective gear. A calmer beekeeper handles frames deliberately, which reduces crushed bees and brood damage.
- Prepare a checklist and tools before opening a hive so you limit time inside.
- Plan which frames you need to see; avoid unnecessary handling that can roll or crush bees.
- Teach helpers proper smoker use and smooth movements to protect the colony and speed inspections.
“Close the hive once you have the answers—more time open rarely gives better information.”
For expansion and staging tips related to hive management, see a helpful guide on apiary expansion.
Equipment, placement, and bee space: hidden killers in setup and storage
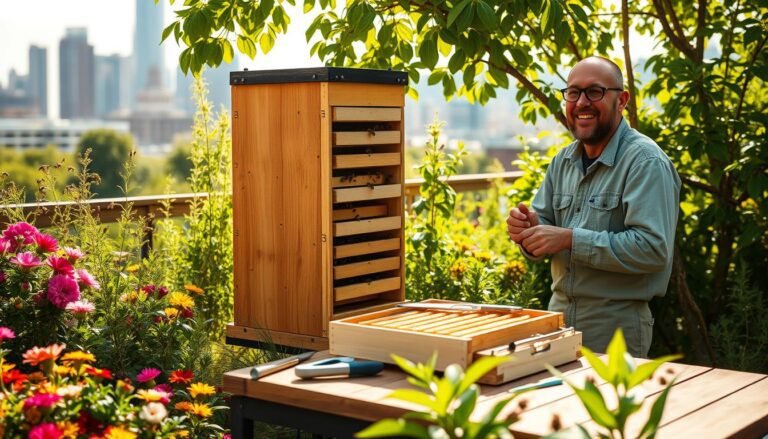
Proper site layout and ready equipment make inspections faster and safer. A well-planned area and spare parts prevent rushed fixes during peak flows. New kits often lack enough supers and frames for fast growth; plan to add boxes before hives hit about 70% capacity.
Have extra boxes and frames ready
Keep extra equipment—supers, frames, and foundation—clean and staged near the apiary. This lets you expand quickly to reduce swarm pressure and to create splits without delay.
Respect bee space
Always fill a box with the correct number of frames. Missing frames invite burr comb and cross comb that complicate inspections and risk crushing the queen.
Site safety and hive stands
Use sturdy stands to lift boxes off the ground, improve drainage, and deter pests. Place hives away from doors and high-traffic walkways and give them sun exposure with wind break where needed.
- Stage tools and resources near the apiary for quick response.
- Store spares in a dry place so frames and foundation are ready when required.
- Document inventory so you know what each hive uses and what’s in reserve.
“A modest investment in readiness prevents preventable disruptions.”
| Problem | Action | Benefit |
|---|---|---|
| Running out of space | Add a super at ~70% capacity | Reduces swarm pressure; keeps comb orderly |
| Missing frames | Fill each box with correct frames | Prevents burr comb and dangerous inspections |
| Poor site choice | Use stand, choose sun/wind-protected area | Less rot, fewer pests, safer flight paths |
For a full library of tools and reading, see a helpful beekeeping resources guide to stock your apiary properly.
Honey harvest, bears, and going it alone: costly mistakes new beekeepers make
Plan your first harvest around colony strength, not the calendar. In the first year, prioritize survival. Leave the recommended winter stores: roughly 40–50 lb in warm zones and 90–100 lb in colder areas.
If you are unsure, leave more honey on the hive. You can supplement later with dry sugar rather than risk starvation. A weak hive late in the season should not be robbed for jars.
Predators and prevention
In bear country, install an electric fence before the first visit. Bears learn quickly; one successful raid often means repeat attacks.
Prevention costs far less than recovery. A single attack can destroy queens, brood, and gear. Protect your apiary early to keep your hives safe.
Records, mentors, and local guidance
Keep written notes for every hive: inspections, queen age, feeding, and mite treatments. Good records make future choices easier and faster.
Seek local classes and an experienced mentor. Local mentors translate general advice to your area’s weather, forage, and pest pressures.
“A second hive and good records give you a margin of safety and clear data for each decision.”
| Issue | Action | Benefit |
|---|---|---|
| Harvest too early | Leave recommended stores by climate | Higher winter survival chance |
| Bear pressure | Install electric fence immediately | Prevents repeat destruction of hives and equipment |
| No local guidance | Join club; find a mentor | Faster, area-appropriate solutions |
- Prepare spare equipment for swarm catches and emergency feeding.
- Accept a small chance of setbacks and plan redundancies (fence, spare gear, a second hive).
- Choose reliable resources and avoid following every online tip without local context.
Conclusion
Small, steady routines protect hives more than occasional heroics. Plan feeding by season, monitor mites monthly, and act on thresholds so bees enter winter strong.
Keep queen performance central: spotty brood or long broodless periods demand requeening or a brood rescue to stabilize a colony fast.
Respect hive architecture—fill frames, preserve bee space, and stage a spare box and equipment so you can expand or feed without delay.
Match treatments to season and verify results; winter bees are made in late summer, so timely varroa control is essential. Use records and local mentors to refine your calendar and choices.
Share this article and compare notes with neighbors. Small, consistent actions prevent big mistakes and keep honey bee colonies thriving. See a practical beekeeping calendar to time tasks for your area.
FAQ
Why do colonies die and how much does the beekeeper influence outcomes?
Colonies fail from a mix of environmental stress, pests, nutrition shortfalls, and management errors. Weather extremes, poor forage, and Varroa mites are major biological drivers, but beekeeper choices—timely inspections, mite monitoring, feeding, and queen management—often determine whether a hive survives a bad season. Good site selection and equipment upkeep also reduce risks.
How do backyard loss rates compare with experienced apiaries?
New or casual keepers typically see higher loss rates than seasoned operators. Experienced apiaries use regular monitoring, documented schedules, and targeted treatments, which lowers winter losses. Local extension services and state survey data show that consistent practices cut losses appreciably versus ad-hoc approaches.
How do weather and local forage in the United States affect colony survival?
Regional climate and bloom cycles shape nectar and pollen availability. Drought, late frosts, or a gap between blooms create dearths that weaken colonies. Urban areas can provide steady forage, while some agricultural zones offer boom-and-bust resources. Match colony numbers and feeding plans to your local calendar.
What are the most common fatal errors with queens, starvation, and mites?
Queen loss or poor queen quality causes brood gaps and colony decline. Starvation happens when stores are removed or misjudged at the wrong time. Varroa overload devastates brood and transmits viruses. Each of these can be prevented by routine checks for a laying queen, accurate store assessments, and scheduled mite control based on monitoring results.
How often should I check for Varroa and which methods work best?
Perform monthly mite checks during active seasons. Sugar shake or alcohol wash give reliable counts; sticky boards can guide trends but often under- or overestimate immediate pressure. Use thresholds based on counts to decide treatment rather than guessing.
When is the best time to treat for Varroa to protect winter bees?
Target mite control in mid-to-late summer to reduce viral loads during winter bee rearing, and again in late fall if counts exceed thresholds. Timing depends on local nectar flows, treatment type, and label instructions. Always recheck after treatment to confirm efficacy.
How should I verify a treatment worked?
Re-test 14–21 days after treatment using the same monitoring method you used initially. Look for a significant drop in mite counts and continue follow-up tests as needed. Some treatments require a second application or an integrated approach combining chemical and mechanical controls.
How do feeding failures lead to starvation across seasons?
Mistimed or inadequate feeding leaves colonies vulnerable in spring build-up, during summer dearths, and through winter. New splits need syrup or pollen substitutes until comb is drawn and foragers collect stores. In fall, ensure adequate honey or provide dry sugar or heavy syrup based on local winter needs.
What feeding strategy helps new colonies establish quickly?
Feed new colonies until they draw comb and create sealed brood and stores. Light syrup promotes brood rearing in spring; pollen patties support brood production when pollen is scarce. Monitor weight and frames to avoid overfeeding or robbing risks.
How can I assess queen status and recognize a failing brood pattern?
A healthy queen leaves a consistent pattern of eggs, young larvae, and capped brood. Spotty brood, many empty cells, or absence of eggs indicate queen problems. Mark and track the queen if possible; if you can’t find eggs after two thorough checks, assume queenless and act.
What are quick rescue options for queenless or failing colonies?
Add frames of open brood with nurse bees, introduce a mated queen, or combine the weak colony with a stronger hive using the newspaper method. Each option has pros and cons; choose based on season, queen availability, and disease risk.
How often should I inspect my hives without causing harm?
Inspect weekly for the first year to learn your colonies’ rhythms, then reduce frequency to every 10–14 days when things stabilize. Keep inspections focused and calm to limit stress. Excessive disturbance during nectar flows or cold snaps can harm colony health.
What is proper smoker use to minimize hive disruption?
Use cool, white smoke in short bursts to flood the entrance and top bars; give bees a minute to settle before opening. Over-smoking or continuous smoke increases stress and drives bees to consume stores. Choose fuel that burns clean and produces steady, cool smoke.
What equipment and placement errors quietly harm hives?
Missing bee space, damaged frames, and poor storage can lead to burr comb, reduced air flow, and pests. Improper hive stands, exposure to prevailing winds, or too-close placement to homes increase stress and conflict. Keep spare boxes and frames ready to prevent overcrowding and uncontrolled swarming.
How should I respect bee space when arranging frames and boxes?
Maintain consistent spacer gaps and avoid leaving frames out where bees build burr comb. Use frames and spacers designed for your system and inspect for propolis or irregular comb that reduces effective space. Proper bee space reduces comb damage and labor during inspections.
What harvest errors should new keepers avoid in year one?
Taking honey in the first year risks winter survival. Leave ample stores and only harvest surplus nectar if the colony shows strong population and reserves. Record yields and forage patterns so you don’t repeat risky timing.
How do I protect hives from bears and other predators?
Install electric fencing before predators find your apiary. Elevate hives on sturdy stands, remove attractants, and place hives away from dense cover when possible. Once a predator discovers a food source, losses and damage escalate quickly.
How important are records, training, and mentors for preventing losses?
Keeping simple records—inspections, weights, treatment dates, and queen changes—lets you spot trends and avoid repeat errors. Local clubs, extension agents, and experienced mentors provide region-specific guidance that reduces costly trial-and-error.