Manage your apiary by cues, not dates. This guide lays out a concise, season-by-season plan that matches actions to temperature, forage, and colony strength. Readily check entrances, lift lids briefly, and heft hives to gauge stores and brood growth.
Plan gear and records ahead of the big flows. Have extra honey supers ready before nectar peaks to reduce crowding and swarming. Apply long-withdrawal treatments before supering and keep monthly mite checks with thresholds in mind.
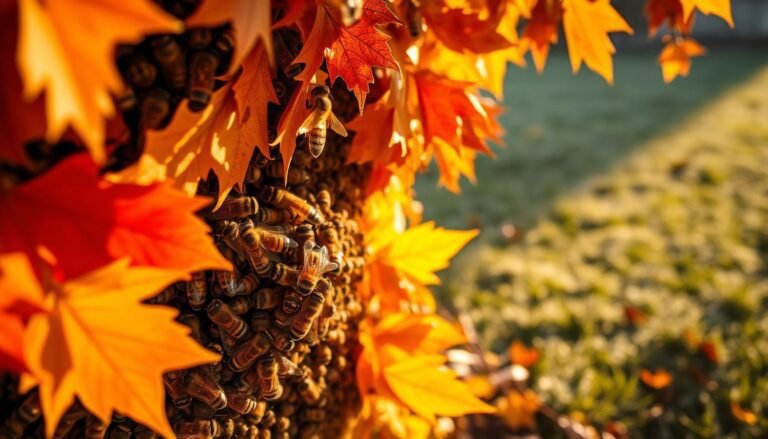
Harvest when frames reach roughly 70% capped and swap in empty supers so bees can keep processing nectar. In cold months, ensure dry interiors, good ventilation, and ample honey so the winter cluster stays healthy and safe.
Key Takeaways
- Work by environmental cues: temperature, forage, and colony buildup determine actions.
- Prepare supers and treatments before major nectar flows to capture more honey and reduce stress.
- Use quick spring checks—entrance view, lid pop, and heft—to prevent starvation.
- Monitor mites monthly and follow threshold-based treatment to protect brood.
- Keep records and adapt timing to local bloom and weather to sustain colonies year-round.
How to use this seasonal checklist for a thriving colony
Match hive tasks to local bloom timing and weather cues so colony health leads your schedule.
Plan activities by forage and bloom in your area rather than strict calendar dates. This keeps bees productive and reduces stress during dearths.
Schedule disease inspection on warm, calm days during strong flows (March–June, September–October). Those months let you open colonies with minimal disruption.
Severe drought or heavy rain shifts nectar and pollen. When forage drops, shorten inspections and focus on quick checks to avoid robbing.
Use entrance observations first to read traffic and mood. That helps you decide if a full inspection is needed or if leaving the hive alone is wiser.
- Stage frames, supers, and feeders before peak flow to prevent congestion.
- Keep simple records of each inspection so trends across months are clear.
- Adapt frequency and depth of checks by local bloom progress and colony strength.
Late winter readiness: records, goals, and equipment planning
Use the quiet weeks before brood expansion to align records, goals, and gear.
Administrative tasks: registration, vet-client relationships, and local regulations
Audit prior-year records to spot trends in brood, honey yields, and losses. Set clear goals for each colony—production, splits, or queen improvement—so daily activities match long-term plans.
Confirm registrations, permits, and veterinary contacts now. This avoids delays when medications or treatments become necessary and helps access antibiotics where legal.
Stocking gear early: honey supers, miticides, feeders, nuc equipment
Build a prioritized procurement list and order early. Extra honey supers and drawn frames reduce crowding and buy extraction time. Stage miticides and verify withdrawal periods to prevent conflicts with spring supering.
- Service fences, stands, lids, and straps to protect hives from wildlife.
- Prepare a go-box with smoker fuel, hive tool, markers, and an alcohol-wash kit.
- Pre-order queens or a nuc if increases are planned; note ship dates and contingencies.
| Item | When to Procure | Priority | Notes |
|---|---|---|---|
| Honey supers / frames | Late winter | High | Reduces swarming risk and extraction lag |
| Miticides / monitors | Now | High | Check label withdrawal dates |
| Nuc / queens | Pre-order early | Medium | Plan arrival around weather windows |
| Feeders / sugar | Late winter | Medium | Keep supplies for emergency feeding |
Early spring checklist: survival check, feeding, and first medications
Begin early-season checks with a quick entrance watch to read flight, pollen return, and hive mood. This tells you if colonies are active enough to risk an opening on a cool day.
Entrance observations, lid pop, and weight checks
Start at the entrance. Note pollen loads, guard posture, and dead-bee removal before lifting a lid.
Heft the hive from the back; a healthy double should feel near 70 lb. If light, feed immediately to avoid starvation.
Open the lid briefly on the warmest midday to check cluster position and stores. Keep the exposure short so brood stays warm.
Feeding 1:1 syrup and when to continue
Feed 1:1 sucrose syrup to stimulate brood rearing and comb repair when reserves run low. Continue until a reliable nectar flow starts locally.
Use sealed feeders and check for leaks to reduce robbing risk. Record the date and volume of syrup or sugar placed.
Applying long-withdrawal treatments before supers
Apply treatments with long withdrawal periods before you add honey supers. Follow label directions and the temperature ranges required for efficacy.
Monitor mites with regular checks and document any treatment so legal withdrawal windows align with honey production.
Mid to late spring checklist: inspections, queen status, and varroa monitoring
When temperatures reach about 59°F or higher, plan a full inspection to assess brood and colony strength.

Start with a focused brood inspection. Look for eggs and a uniform brood pattern. Note areas of spotty brood or broodless frames. Count frames covered with bees to judge whether a colony is strong or weak.
Comb rotation and hive cleanup
Remove 1–3 dark, old combs from the core nest to lower pathogen load. Scrape excess burr wax from bars and clean bottom boards, lids, and entrances.
After diagnosing a deadout, remove it promptly. Salvage solid comb and store equipment to avoid robbing pressure in the apiary.
Varroa thresholds and IPM steps
Monitor mites with an alcohol wash or sticky board. Ontario thresholds: 2% alcohol wash equals about 6 mites per 300 bees, or 9 mites/day on sticky boards. Record counts and treatment days.
| Action | When | Notes |
|---|---|---|
| Full inspection | ≥59°F, calm day | Confirm eggs to verify queen; note frames covered by bees |
| Comb rotation | Mid–late spring | Rotate 1–3 dark combs to improve brood rearing |
| Mite monitoring | Before/after treatment | Use alcohol wash or sticky board; reassess 10–14 days post-treatment |
Favor integrated pest management by rotating treatments and timing interventions between peak brood and supering windows. Keep concise notes on temperatures, inspection length, and outcomes, and refer to a local management calendar when scheduling follow-ups.
Swarm management and population balancing during spring build-up
As colony numbers surge in early build-up, prompt space and population moves keep swarming pressure low.
Weekly checks let you spot congestion early. Reverse double brood chambers on strong hives to move the brood nest and relieve pressure. Add drawn comb or foundation to give bees room to expand as the main flow ramps up.
Creating splits and balancing colonies
Make a nuc or split from a vigorous colony when drone availability supports mating. This reduces the swarm impulse and meets goals for increases or queen replacement.
Equalize by swapping hive locations or donating healthy brood frames after a disease screen. Monitor donor brood patterns after a split to ensure the queen remains productive.
Entrance and airflow adjustments
Remove entrance reducers in strong colonies to improve ventilation and reduce backpressure during heavy forager traffic. Better airflow lowers stress and helps bees process incoming nectar.
| Action | When | Purpose |
|---|---|---|
| Reverse brood boxes | Early spring build-up | Relieve brood nest congestion |
| Add drawn comb / foundation | Before main flow | Provide room to expand comb quickly |
| Make splits / nucs | During rapid population growth | Reduce swarm impulse; raise queens or increase colonies |
| Equalize by moving frames | Weekly checks | Balance brood and resources across apiary |
Keep clear records of moves and outcomes. For a broader seasonal plan and task timing, see seasonal beekeeping tasks.
Early summer honey flow: supers, queen excluders, and harvesting readiness
Get honey boxes ready before the main flow to avoid crowding the brood nest.
Install honey supers early and only add them once spring treatment withdrawal periods are satisfied. Confirm labels and dates so no residue conflicts with honey production.
Installing supers and observing withdrawal periods
Stage honey supers in advance and place them on warm, calm days to limit bee agitation. Decide whether to use a queen excluder based on your management style; it keeps brood out of top boxes while letting foragers work efficiently.
Harvest timing and swap strategy
Watch capping and moisture. Plan harvests when comb is about 70% capped to preserve honey quality.
Swap in empty supers immediately after pulling full boxes to keep bees collecting during peak flow. Pair monthly mite monitoring with harvest day to cut down repeated heavy lifts.
- Keep supers stacked and covered during transport to prevent robbing.
- Track which hive filled supers fastest to guide future queen selection and equalization.
- Inspect and remove minimal burr comb at the top of frames to maintain bee space.
Prepare extraction and storage gear before you pull boxes so honey quality and workflow stay high through the season.
Late summer checklist: mite thresholds, reducers, and post-harvest tasks
Use late summer to measure varroa pressure, tighten entrances, and finish post-harvest work.
Monthly monitoring now guides timely fall interventions. Sample mites after harvest with an alcohol wash or sticky board and log counts with weather and days noted. In Ontario, treat as a planning cue: about 3% by alcohol wash or roughly 12 mites/day on a sticky board signals action.
Stage fall treatments and confirm label details — temperature ranges and required durations — so you can start before mite populations spike. Repair damaged equipment now so the hive enters fall sealed and sound.
Reinstall entrance reducers and protect stores
When the main nectar flow ends, put entrance reducers back in to reduce robbing and wasp pressure. Tight entrances help guard colonies conserve heat and defend resources as foraging slows.
“Sample accurately and act early — a few well-timed treatments beat emergency measures in cold months.”
- Return wet supers briefly so bees clean residual honey, then remove and store against wax moths.
- Tighten apiary hygiene: avoid spills and exposed sticky frames to prevent triggering robbing.
- Inspect brood patterns and queen performance after harvest; requeen early if decline appears.
- Log days and weather when sampling mites so treatment timing matches local pressure.
| Task | When | Purpose |
|---|---|---|
| Mite sampling (alcohol wash / sticky board) | Monthly; post-harvest | Guide fall treatments using regional thresholds |
| Reinstall entrance reducers | After main flow ends | Reduce robbing, wasp entry, and improve defense |
| Return wet supers briefly; store properly | Immediately post-harvest | Allow bees to clean; protect against wax moths |
| Stage and verify treatments | Late summer | Align dosing with label and fall timing |
Final note: keep records concise, act on measured mite levels, and secure honey and hardware now. These steps save time and protect colonies as fall approaches.
Fall prep for winter: feeding 2:1 syrup, stores, and brood positioning
“Set clear store targets and arrange frames so the colony can move naturally into its reserves.”
Aim for roughly 60–75 lb of honey per hive going into winter, with colder areas leaning high. In a two-deep plus medium layout, the medium and the top deep should be mainly honey.
Target honey stores and where to place them
Position heavy stores at the sides and above the brood nest. The top box should be predominantly honey so the cluster can move up as space and temperatures change.
Feeding strategy: when to stop syrup and avoid robbing
Feed a 2:1 sugar syrup in late August–September to bulk reserves. Heat water to dissolve sugar but do not boil; boiling risks caramelization that may harm bees.
- Stop feeding when syrup freezes or when bees refuse it.
- Remove feeders promptly to reduce robbing risk and limit hive openings while feeding.
- Use careful hefts and spot checks to confirm weight without long inspections.
Record dates, volumes, and outcomes so you refine timing next season and protect colonies through cold months.
Wintering the hive: ventilation, cluster protection, and minimal disturbance
Preventing condensation and conserving heat are the two pillars of safe cold-month hive management. A compact cluster centers near 90–93°F; trapped moisture can condense and drip onto bees, chilling them.
Ventilation techniques to prevent condensation on the cluster
Create a small air gap under the inner cover or add a thin shim so moist air can rise and escape. Keep a top notch or exit open to give an upper outlet rather than sealing the hive tight.
Avoid over-sealing. Balanced ventilation keeps the interior dry without pulling too much heat from the cluster. Consider an IPM board or insulated top that still allows a controlled vent above the cluster.
When to combine weak colonies and how to inspect in cold spells
Combine very weak colonies with stronger ones during a warm day so bees can move and reorient. Inspect only on mild days and lift the lid briefly to confirm cluster position and emergency feed.
| Action | Timing | Goal | Notes |
|---|---|---|---|
| Top vent / shim | Before cold months | Reduce condensation | Keep small, continuous gap |
| Check cluster | Mild day, one short day check | Verify position & stores | Note date and temperatures |
| Combine colonies | Warm spell | Save weak colony | Move frames gently; avoid disturbing cluster |
| Ensure honey above cluster | Late fall setup | Allow upward movement | Secure wet supers and protect against wax moths |
Keep entrances clear of ice so bees can clear debris and take brief flights. Log each cold-month check by date, temperatures, and observations to minimize disturbance next season. These steps keep colonies dry, fed, and ready for spring beekeeping.
Beekeeper’s checklist for spring / summer / autumn / winter
Align hive tasks with temperature triggers and bloom stages in your area to act when colonies are ready.

Seasonal timing by temperature ranges and bloom-driven activities
Late winter: use cold days (
Early–mid season: do survival checks near 5°C/40°F and remove wraps once nights stay above 10°C/50°F. Schedule full inspections on calm days ≥15°C/59°F.
Harvest and post-flow: take honey when combs are ~70% capped and immediately swap empty boxes to keep nectar processing steady.
Adjusting to extreme weather and local forage availability
Monitor monthly for mites and disease during strong bloom periods. Escalate to fall treatments if counts approach regional thresholds.
Modify timing when drought, heat, or extended rain shifts forage. Reinstall entrance reducers when dearths start to limit robbing and wasp pressure.
| Temperature range | Primary actions | Why it matters |
|---|---|---|
| Plan, repair, order supplies | Low disturbance; prepare before brood rise | |
| ~5–10°C / 40–50°F | Survival checks; remove wraps if sustained warm | Protect cluster; reduce moisture risk |
| ≥15°C / 59°F | Full inspections; queen checks; add supers | Safe brood handling; limit chill injuries |
Keep a compact monthly log of temperatures, bloom cues, and outcomes so time and local signs guide future actions more than calendar months.
Integrated varroa management: monitoring, treatments, and drone trapping
Set a clear monitoring rhythm so treatments target real thresholds and show results.
Sampling cadence, seasonal thresholds, and rotation
Establish paired samples before and after any action so you measure impact. In Ontario, act at ~2% by alcohol wash (about 6/300 bees) or ~9 mites/day in spring, and at ~3% or ~12/day in fall.
Use alcohol washes or sticky boards and re-check 10–14 days after a treatment. Rotate miticides between seasons to limit resistance and avoid applying products during supering windows to protect honey.
Non-chemical control: drone brood trapping
Exploit mites’ attraction to drone brood by inserting frames for drone comb during peak drone rearing. Remove capped drone comb before emergence to lower mite population and repeat aligned with brood cycles.
| Action | When | Purpose |
|---|---|---|
| Pre/post sampling | Before and 10–14 days after treatment | Measure efficacy and guide follow-ups |
| Treatment rotation | Spring and fall cycles | Reduce resistance; protect stores |
| Drone comb trapping | Peak drone rearing | Remove mites with capped brood |
Record per-hive infestation history so you can spot chronic hotspots and pair selective requeening with trapping. Use data to keep colonies healthy and guide smarter beekeeping; consult a local beekeeping calendar when aligning actions with bloom and weather.
Robbing prevention and response: keeping colonies safe in dearths
Simple yard habits stop most theft: no drips, no exposed frames, and no community feeders nearby.
Preventive housekeeping keeps bees calm and reduces raid triggers. Never spill honey or syrup in the apiary. Don’t toss burr wax or wet comb on the ground; that scent recruits robbers fast.
Best practices: keep the area spotless and move feeders
If community troughs are unavoidable, locate them at least 150 yards away near a fixed landmark so waggle dances point foragers elsewhere.
Store wet supers covered and away from hives. Use robbing screens and tight-fitting lids to reduce airborne attraction.
Emergency measures: quick response to stop a raid
Watch for frantic flights, fighting at the entrance, or torn cappings on the ground. If you see these signs, close entrances immediately and wipe up all spills.
Reduce each hive entrance to a small slot or stuff temporarily to give resident bees a defendable opening. Keep inspections short and do them during lower-traffic parts of the day.
- Prevent robbing by keeping the apiary clean and removing attractants.
- Respond fast: close entrances, clean drips, and isolate wet equipment.
- Aftercare includes moving or redistributing frames to rebalance the colony and logging the time, weather, and triggers.
Record events and patterns so you can avoid similar risks next time. For broader timing and climate advice that affects robbing risk, see regional beekeeping guidance.
Feeding and nutrition strategies by season
Tailor nutrition to the hive’s life stage so bees gain weight and comb forms fast.
Spring build-up: light syrup to stimulate brood and comb
Use 1:1 syrup to boost brood rearing and comb repair until natural nectar returns. Offer syrup in sealed feeders and watch hive traffic to avoid robbing.
Heat water only enough to dissolve sugar; do not boil. This preserves gut health and lowers dysentery risk.
Late summer and fall: denser feed to bulk stores
Switch to a 2:1 ratio to speed storage as the main flow ends. Place boxes so heavy stores sit near the top and above the cluster.
Winter options: solids during cold spells
When cold weather prevents liquid feeding, use dry sugar, hard candy, or fondant just above the cluster so bees can eat without breaking cohesion.
- Match feed ratios to goals: 1:1 in spring, 2:1 later.
- Check feeders daily for leaks and minimize external attractants.
- Transition off feed as honey flow ramps up to protect honey quality.
- Monitor weekly during active months and record weight gains.
Practical note: place supplemental calories close to the cluster during cold snaps and keep records so beekeepers refine timing across months and day-to-day needs.
Equipment, comb, and hive configuration: from bottom boards to supers
Thoughtful equipment layout from screened bottoms to honey supers cuts inspections time and improves colony health. Configure boxes so airflow, access, and stores work together rather than against the cluster.
Screened bottom boards, IPM inserts, and thermal efficiency
Fit screened bottom boards with removable inserts to switch between ventilation and insulation quickly. Use the insert in cold spells to retain warmth and pull it for mite monitoring in active months.
A small upper vent at the top lets moisture escape without chilling the cluster. Replace warped lids and cracked boxes to stop leaks that cause dampness and cold stress in winter.
Rotating dark comb and storing supers against wax moths
Remove one to three dark combs in early buildup to lower pathogen load and improve brood conditions in the hive core. Label frames and boxes by year so rotation is systematic and traceable across the area.
After extracting, return wet supers briefly to let bees tidy frames, then store them cool, dry, and sealed to deter wax moths and mice. Standardize box and frame styles across hives to simplify swaps and even out equipment during management tasks.
- Keep frames square and bee space correct to reduce burr comb and improve airflow.
- Inspect top edges and runners for propolis buildup and clean selectively to keep assembly smooth.
- Match equipment choices to your goals—high honey production, queen rearing, or IPM—so the layout supports outcomes.
| Item | When | Purpose |
|---|---|---|
| Screened bottom with insert | Seasonal | Mite monitoring / thermal control |
| Dark comb rotation | Spring | Reduce pathogens; improve brood |
| Wet supers storage | Post-harvest | Protect from wax moths and mice |
For a broader seasonal plan, align these equipment choices with inspection timing and local forage so hive configuration stays aligned with on-the-ground beekeeping needs.
Queen and brood health: evaluation, requeening, and disease signs
Look at the brood first—it reveals queen strength, nurse care, and early disease signs. A quick scan of contiguous capped frames gives a clear signal of colony vigor.
Reading patterns and spotting larval disease
Healthy brood shows solid, uniform cappings and consistent rows of eggs and very young larvae. Spotty brood, sunken or perforated caps, and foul odors are red flags for AFB or EFB.
Inspect larval color: pearly white is normal; yellowing or brown larvae need immediate attention. Isolate suspect frames and avoid moving them between colonies to limit spread.
When to requeen and field verification
Confirm a queen-right hive by finding eggs or multiple very young larvae across frames. If eggs are absent without weather causes, requeen early to avoid late-season shortages.
Coordinate requeening with strong nectar flows when possible so the new queen gains acceptance and egg laying recovers. Record the day requeened and check for fresh eggs within two weeks.
- Watch adults for deformed wings or hairless black bodies—these point to viral issues tied to mite loads.
- Keep disease charts, consult labs, and use sanitation best practices.
Regional timing and climate considerations across the United States
A few years of local observation will teach you when your area truly starts and ends major flows.
Northern and southern zones follow different bloom curves. In the south, many trees and early wildflowers open weeks sooner than in northern states. That shifts when you add supers, split colonies, or set honey targets.
Northern versus southern timing, bloom progression, and adaptations
Calibrate tasks to local phenology. Build a simple log of bloom dates across months and years to map when bees ramp up and when population peaks.
- Expect earlier spring in southern areas; plan supering and splits earlier in time.
- Some fall plants may peak sooner in northern locales; adjust harvest and feeding accordingly.
- During drought or heavy rain, pause major moves and re-evaluate feeding and requeening.
- Prepare for winter earlier in the north; in milder southern winters, keep periodic checks and protect stores.
Share notes with nearby clubs to benchmark responses and refine timing that matches local hives and honey goals.
Conclusion
Small, timely moves across the season add up to healthier colonies and better honey yields.
Adapt actions to local forage and weather cues, not just calendar dates. Set realistic honey goals, monitor brood patterns, and protect the queen’s laying area to keep the hive productive.
Use consistent IPM: monitor mites, treat at thresholds, rotate treatments, and verify results. Plan supers, feed, and equipment ahead so time and supply never bottleneck activity.
Prioritize fall preparations: target stores, brood positioning, and thoughtful ventilation to help the colony survive winter. Keep apiary hygiene tight to limit robbing and disease.
Review records each year and build a simple monthly plan that changes with local bloom. Small actions across days and weeks make stronger bees and more resilient colonies.
FAQ
What records should I prepare in late winter to get ready for the season?
Keep colony inventories, treatment history, queen age, and honey store estimates. Note local bloom dates and apiary goals. Use this to plan miticide purchases, honey supers, feeders, and nuc equipment before demand spikes.
How do I judge if a hive needs emergency feeding in early spring?
Check entrance activity, listen for the “lid pop,” and weigh the hive if possible. Sparse foraging, a thin cluster, or weight loss indicate starvation risk. Start 1:1 sugar syrup and continue until natural nectar flow establishes.
When should long-withdrawal treatments be applied relative to supers?
Apply treatments that have long honey withdrawal periods before you add honey supers. Follow label instructions for timing and temperature limits to avoid residue in harvested honey.
What should I look for during a full colony inspection in mid to late spring?
Inspect for eggs, consistent brood pattern, queen presence, and signs of disease. Compare population strength between colonies and mark weak hives for feeding or combining. Check for emerging swarms and sufficient space for brood expansion.
How often and how should I monitor varroa mites during peak season?
Sample monthly during buildup and weekly during intense brood periods if mites are present. Use alcohol or sugar rolls and compare counts to seasonal thresholds. Rotate treatments and include IPM steps like powdered sugar dusting, drone brood trapping, and screened bottom boards.
What actions reduce swarming during spring population growth?
Manage space by reversing brood boxes, adding drawn comb, and creating splits or nucs when congestion appears. Replacing old comb and ensuring good ventilation also helps. Remove entrance reducers only when increased airflow is needed.
How do I time supers and harvest in early summer for optimal honey quality?
Add supers as nectar flow increases and frames are at least 50–60% drawn. Harvest when cappings reach your target (often 80%+). Always respect treatment withdrawal periods and rotate in empty supers to prevent robbing and build-up of pests.
What are the late summer priorities after the main honey flow?
Conduct monthly mite checks and plan fall treatments based on those results. Reinstall entrance reducers once the main flow ends to protect against robbing and to moderate hive climate as brood rearing slows.
How much honey should I leave for winter and where should I place it in the hive?
Target stores based on regional needs—often 60–90 pounds in colder zones. Place the bulk of stores over the brood nest so the cluster can move upward into food. Avoid leaving all honey in outer frames where cold prevents access.
When and how should I transition from 1:1 to 2:1 syrup feeding in the fall?
Switch to 2:1 syrup in late summer or early fall to build winter stores. Stop feeding before cool weather and during nectar dearths to prevent robbing. If robbing risk is high, use frame feeders or internal feeders rather than open-top feeders.
What ventilation measures help prevent winter condensation damage?
Provide an upper entrance or small ventilation hole and use moisture-absorbing materials if needed. Avoid sealing hives completely; allow some airflow while protecting the cluster from prevailing winds and wet snow.
How and when should I combine weak colonies before winter?
Combine weak colonies during mild weather when daytime temps allow a quick check. Use newspaper or entrance blocking to reduce fighting. Combine if the weak hive lacks enough bees or stores to survive the season.
Which non-chemical varroa controls are effective during the season?
Drone brood trapping during peak drone production, screened bottom boards, powdered sugar dusting, and small-cell comb management can reduce mite pressure. Use these alongside monitoring and rotate chemical options when thresholds exceed safe levels.
How can I prevent robbing during dearths and after harvest?
Avoid spills and open syrup, close unused entrances, reduce entrance size, and remove heavily damaged or open honey frames. Clean up any sugary residues and move frames indoors if practical to eliminate triggers.
What are best winter feeding options during cold snaps?
Use dry sugar, fondant, or hard candy placed on top of the frames to avoid chilling the cluster. Ensure the cluster can access the feed and minimize inspections that force bees to move in cold weather.
How often should I rotate comb and store supers to avoid wax moth and disease buildup?
Replace dark brood comb every 3–5 years and freeze or heat-treat stored supers to kill wax moths. Store equipment in dry, cool areas and use tight lids or sealed containers to keep pests out.
What signs in brood pattern indicate queen failure or disease?
Spotty or inconsistent brood, excessive uncapped brood, or foul odors can signal queen issues, European foulbrood, or American foulbrood. Isolate suspect frames and follow APHIS or state guidelines for confirmation and action.
How should I adjust timing and techniques between northern and southern regions?
Shift inspections, treatments, and feeding according to local bloom and temperature trends. Northern areas need earlier fall preparations; southern areas may have extended brood cycles and require year-round varroa vigilance.