Becoming a beekeeper is a rewarding journey that connects you with nature in a profound way. Whether you’re drawn to beekeeping for honey production, pollination benefits, or simply the fascinating world of these remarkable insects, this guide will walk you through everything you need to know to start your beekeeping adventure. From essential equipment to seasonal care, we’ll cover the practical steps while being realistic about the challenges and commitments involved.
Beekeeping requires patience, learning, and dedication—but the rewards of harvesting your own honey, watching your colonies thrive, and contributing to local pollination make it all worthwhile. Let’s explore how to begin your beekeeping journey with confidence and proper preparation.
The Benefits of Beekeeping: Why Start This Rewarding Hobby?
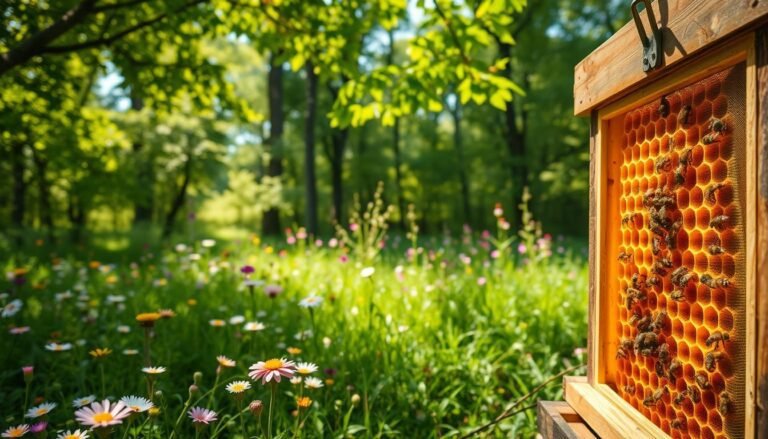
Beekeeping connects you with nature while providing valuable pollination services
Before diving into the how-to aspects, let’s consider why beekeeping might be right for you. Understanding the benefits and challenges will help you make an informed decision about this fascinating hobby.
Environmental Benefits
- Support local pollination for gardens and agriculture
- Contribute to honey bee population sustainability
- Increase biodiversity in your local ecosystem
- Create awareness about pollinator conservation
Personal Benefits
- Harvest your own raw, local honey
- Develop a deeper connection with nature
- Join a supportive community of beekeepers
- Enjoy a hobby with both physical and mental rewards
Reality Check: Beekeeping requires time, money, and commitment. Most beginners don’t recoup their investment in the first year, and there’s a learning curve to master. Be prepared for occasional stings and the possibility of colony loss, especially in your first seasons.
Before You Start: Important Considerations
Successful beekeeping begins with proper preparation and understanding. Before purchasing any equipment or bees, take time to consider these important factors:
Are You Allergic to Bee Stings?
No matter how careful you are or how much protective gear you wear, you will eventually get stung. Before investing in beekeeping, make sure you’re not severely allergic to bee stings. If you’ve never been stung before, consider getting an allergy test from your doctor.
Signs of severe bee sting allergy include difficulty breathing, throat swelling, dizziness, and hives away from the sting site. If you experience these symptoms after a sting, seek immediate medical attention.
Local Regulations and Restrictions
Many municipalities have specific regulations regarding beekeeping. Before setting up hives, research your local laws:
- Check zoning regulations for keeping bees in your area
- Determine if there are limits on the number of hives allowed
- Find out if registration with local agricultural authorities is required
- Consider HOA restrictions if you live in a managed community
Time and Financial Commitment
Beekeeping requires both time and financial investment:
| Expense Category | Estimated Cost (First Year) | Time Commitment |
| Basic Equipment | $300-500 | Setup: 1-2 days |
| Protective Gear | $80-200 | N/A |
| Bees (Package or Nuc) | $150-250 | Installation: 1-2 hours |
| Tools and Accessories | $50-100 | N/A |
| Ongoing Management | $50-100 | Weekly inspections: 30-60 min |
| Total First Year | $630-1,150 | ~40-50 hours annually |
Educate Yourself: Learning About Honeybees
Before you buy anything, take time to learn about honey bees and how the hive works. Understanding bee biology and behavior will make you a more successful beekeeper.

Learning to identify the queen (often marked with a colored dot) and understanding bee behavior is essential for new beekeepers
Essential Learning Resources
Recommended Books
- The Beekeeper’s Handbook by Diana Sammataro
- Beekeeping For Dummies by Howland Blackiston
- First Lessons in Beekeeping by Keith Delaplane
- The Backyard Beekeeper by Kim Flottum
Online Resources
- Scientific Beekeeping website
- Honey Bee Suite blog
- University extension beekeeping programs
- YouTube channels dedicated to beekeeping
Hands-On Learning
- Local beekeeping association workshops
- Beekeeping courses at community colleges
- Mentorship programs with experienced beekeepers
- Beekeeping “taster days” or demonstrations
Ready to take the next step in your beekeeping journey?
Download our free comprehensive guide to honey bee biology and behavior. Understanding how bees live and work is the foundation of successful beekeeping.
Join Your Local Beekeeping Association
One of the most valuable steps you can take as a new beekeeper is to join your local beekeeping association. These organizations offer invaluable support, education, and mentorship opportunities that can dramatically improve your chances of success.

Local beekeeping associations provide hands-on learning opportunities and valuable mentorship
Benefits of Association Membership
- Mentorship programs that pair beginners with experienced beekeepers
- Regular meetings with educational presentations and Q&A sessions
- Hands-on workshops where you can gain practical experience
- Equipment sharing or group purchasing to reduce costs
- Local knowledge about regional nectar flows, weather patterns, and pest management
- Swarm collection lists that may provide you with free bees
- Community support when you encounter challenges
“Beekeeping is an essentially local activity. The bees forage within a radius of 2-3 km of the apiary. Local beekeepers know about these things and are best placed to provide help and advice.”
Find a Beekeeping Association Near You
Enter your location to find local beekeeping associations in your area. Most associations welcome beginners and offer introductory courses.
Gain Practical Experience Before Getting Your Own Hives
Before investing in your own equipment and bees, it’s highly beneficial to gain some hands-on experience. This will help you determine if beekeeping is right for you and build confidence in handling bees.
Ways to Gain Practical Experience
Find a Mentor
Working alongside an experienced beekeeper is invaluable. You’ll learn practical skills that can’t be taught in books or videos, including how to handle frames, identify different parts of the hive, and recognize signs of healthy or troubled colonies.
Many local associations offer formal mentorship programs, or you can reach out to beekeepers in your area who might welcome an extra pair of hands during inspections.
Take a Hands-On Course
Many beekeeping associations, agricultural extensions, and even some beekeeping supply companies offer practical courses where you can work with live bees under supervision.
These courses typically cover basic hive inspection, identifying the queen and different castes of bees, recognizing brood patterns, and understanding colony health indicators.

Learning from an experienced mentor is the best way to develop proper beekeeping techniques
Beekeeping “Taster Days”
Many beekeeping associations offer “taster days” or introductory sessions where you can experience beekeeping firsthand before committing. These sessions typically include:
- An introductory talk about beekeeping basics
- Trying on protective gear
- Observing and participating in a hive inspection
- Handling frames under supervision
- Sometimes a honey tasting session
Tip: Pay attention to how you feel when surrounded by thousands of bees. Some people discover that despite their interest in beekeeping, they’re uncomfortable with the “sheer weight of numbers” when opening a full hive. Better to learn this before investing in equipment!
Essential Beekeeping Equipment: What You’ll Need to Start
Proper equipment is crucial for successful beekeeping. Here’s a comprehensive guide to the essential items you’ll need to get started.

Basic beekeeping equipment: hive components, protective gear, and tools
Hive Components
Most beginners in the United States start with Langstroth hives, which are the most common and have interchangeable parts.
| Component | Description | Quantity Needed |
| Bottom Board | Base of the hive with entrance for bees | 1 per hive |
| Deep Boxes (Brood Chambers) | Boxes where the queen lays eggs and brood develops | 2 per hive |
| Medium/Shallow Supers | Boxes where bees store honey for harvest | 2-3 per hive |
| Frames | Wooden frames that hold foundation or comb | 10 per box |
| Foundation | Wax or plastic sheets with hexagonal pattern | 1 per frame |
| Queen Excluder | Prevents queen from laying eggs in honey supers | 1 per hive |
| Inner Cover | Creates air space and proper bee space | 1 per hive |
| Outer Cover | Protects hive from weather | 1 per hive |
Protective Gear
While experienced beekeepers may work with minimal protection, beginners should use full protective gear until they gain confidence and experience.
Essential Protective Items
- Bee Suit or Jacket with Veil – Protects your body and face from stings
- Gloves – Leather or nitrile gloves protect your hands
- Boots – High-top boots prevent bees from crawling up your legs
Beekeeping Tools
- Smoker – Calms bees during hive inspections
- Hive Tool – For prying apart hive components and frames
- Bee Brush – Gently removes bees from frames during honey harvest
- Frame Grip – Helps lift frames out of the hive
Plan Your Beekeeping Setup
Download our comprehensive equipment checklist with recommended quantities and estimated costs to help plan your beekeeping investment.
Choosing the Right Hive Type for Your Needs
While Langstroth hives are the most common, there are several hive designs to consider. Each has advantages and disadvantages depending on your goals and physical capabilities.
 displayed side by side for comparison")
Common hive types: Langstroth (left), Top Bar (center), and Warre (right)
- Pros: Standard equipment, interchangeable parts, widely available
- Pros: Maximizes honey production
- Pros: Easier to find mentors familiar with this system
- Cons: Heavy boxes when full of honey (35+ pounds)
- Cons: Requires more equipment and storage space
- Best for: Traditional beekeeping, maximum honey production
Langstroth Hive
- Pros: Single-level design, no heavy lifting
- Pros: More natural comb building
- Pros: Easier on the back (no bending)
- Cons: Less honey production
- Cons: Comb is more fragile without frames
- Best for: Hobbyists interested in natural beekeeping
Top Bar Hive
- Pros: Mimics natural tree cavity
- Pros: Less management required
- Pros: Smaller boxes are lighter
- Cons: Less common, harder to find support
- Cons: Difficult to inspect brood nest
- Best for: Those interested in minimal intervention
Warre Hive
Beginner Recommendation: Most beekeeping experts recommend starting with a standard Langstroth hive. This gives you the opportunity to learn traditional beekeeping methods first, with the option to explore alternative hive designs later as you gain experience.
Choosing the Perfect Location for Your Beehive
The location of your hive significantly impacts colony health and productivity. Take time to find the optimal spot before setting up your hives.

An ideal hive location with morning sun, nearby water, and protection from harsh elements
Key Factors for an Ideal Hive Location
Essential Location Requirements
- Morning Sun – Helps bees start foraging early
- Afternoon Shade – Prevents overheating in summer
- Wind Protection – Shield from prevailing winds
- Good Air Drainage – Avoid damp, low-lying areas
- Level Ground – Or ability to level the hive stand
- Accessible Year-Round – For inspections and maintenance
Practical Considerations
- Water Source – Within 1/4 mile (or provide one)
- Foraging Area – Diverse flowering plants nearby
- Entrance Direction – South/southeast facing ideal
- Distance from Activity – Away from high-traffic areas
- Accessibility – Consider equipment transport needs
- Neighbor Considerations – Respect property lines
Urban and Suburban Considerations
If you’re keeping bees in a residential area, additional considerations apply:
- Flight Path Management – Use fencing or hedges to direct bee flight paths upward
- Visibility – Consider placing hives where they’re not immediately visible to passersby
- Water Sources – Provide a dedicated water source to prevent bees from visiting neighbors’ pools
- Swarm Management – Be diligent about swarm prevention in populated areas
- Neighbor Relations – Consider informing neighbors and sharing honey as goodwill
Important: If you live in an area with bears, you MUST protect your hives with an electric fence. Bears can destroy hives completely and will return repeatedly once they discover this food source.
How to Source Your Bees: Packages, Nucs, and Swarms
Once you have your equipment ready and location selected, it’s time to source your bees. There are several options, each with advantages and considerations.

Installing a package of bees into a new hive requires careful handling
Package Bees
A package typically contains 3 pounds of worker bees (about 10,000 bees) and a newly-mated queen in a separate cage.
Package Advantages
- Generally less expensive ($150-200)
- Widely available in spring
- Less risk of bringing in diseases
- All bees are the same age
Package Disadvantages
- Slower to build up than nucs
- Queen may not be accepted
- Less likely to produce honey in first year
- Higher risk of failure for beginners
Nucleus Colonies (Nucs)
A nucleus colony or “nuc” is a small, functioning colony with 4-5 frames containing a laying queen, worker bees, brood in all stages, and food stores.
Nuc Advantages
- Already functioning as a colony
- Contains brood of all ages
- Queen is already accepted and laying
- Faster buildup, better first-year success
Nuc Disadvantages
- More expensive ($200-300)
- May contain pests or diseases
- Limited availability, often sell out early
- Can grow quickly and swarm if not managed
Capturing Swarms
A swarm is a natural colony division where the old queen and about half the worker bees leave to establish a new colony.
Swarm Advantages
- Free bees!
- Often locally adapted genetics
- Natural process, strong instinct to build
- Typically gentle during swarming
Swarm Disadvantages
- Unpredictable availability
- Unknown genetics and temperament
- May have older queen
- Requires quick response and experience
Local Bees Are Best: Whenever possible, source bees from local suppliers. Local bees are often better adapted to your climate and seasonal patterns. Research shows that local bees generally perform better than those imported from different regions.
Find Reputable Bee Suppliers
Our directory of bee suppliers includes reviews, availability information, and contact details for package and nuc providers across the country.
Installing Your Bees: Step-by-Step Guide
The day has arrived to install your bees! This exciting milestone requires careful preparation and execution. Follow these steps for a successful installation.

Installing bees requires careful handling and proper technique
Before Installation Day
- Prepare your hive – Assemble all components and place in your chosen location
- Gather supplies – Have your protective gear, tools, and sugar syrup ready
- Check the weather – Plan for a warm, calm day, preferably late afternoon
- Prepare sugar syrup – Mix 1:1 sugar to water for spring feeding
- Install entrance reducer – Use the smallest opening to help the new colony defend itself
Installing a Package
- Spray the package lightly with sugar water to calm the bees
- Remove several frames from the center of your hive to create space
- Remove the queen cage from the package and inspect to ensure the queen is alive
- Remove the cork from the candy end of the queen cage (not the end with the queen)
- Hang the queen cage between frames with the candy end up
- Shake the bees from the package into the open space in the hive
- Replace the frames carefully to avoid crushing bees
- Add a feeder with 1:1 sugar syrup
- Close up the hive and reduce the entrance
- Check after 3-4 days to ensure the queen has been released
Installing a Nuc
- Prepare your hive with 5-6 frames removed to make space for the nuc frames
- Open the nuc and use light smoke if necessary
- Transfer frames one by one, maintaining the same order and orientation
- Be extremely careful not to crush the queen during transfer
- Add the remaining empty frames to fill the box
- Add a feeder with 1:1 sugar syrup
- Close up the hive and reduce the entrance
- Check after 5-7 days to ensure the colony is adjusting well
Feeding is Critical: New colonies need consistent feeding until they have drawn out comb on all frames or until a strong nectar flow begins. A new colony can consume a gallon of sugar syrup every 2-3 days during peak building periods.
First-Year Beekeeping: Month-by-Month Guide
Your first year of beekeeping follows a seasonal rhythm. This monthly guide will help you understand what to expect and what tasks to perform throughout the year.

Regular hive inspections are essential for monitoring colony health and development
| Month | Colony Development | Beekeeper Tasks |
| April-May | Installation and establishment, beginning brood rearing | Install bees, feed sugar syrup, check queen acceptance, ensure proper drawing of comb |
| June | Rapid population growth, nectar flow begins in many areas | Weekly inspections, add second brood box when first is 70% full, monitor for pests |
| July | Peak population, main honey flow in many regions | Add honey supers if needed, begin varroa monitoring, ensure adequate ventilation |
| August | Continued foraging, beginning to prepare for fall | Harvest any honey surplus, treat for varroa if needed, ensure adequate food stores |
| September | Reduced brood rearing, focus on winter stores | Feed if necessary, reduce entrance size, continue pest monitoring |
| October | Winter bee production, cluster beginning to form | Final feeding, install mouse guards, prepare windbreaks if needed |
| November-February | Winter cluster, minimal activity | Periodic checks for hive integrity, clear entrance of dead bees if needed |
| March | Beginning spring buildup, early pollen collection | Quick inspection on warm day, emergency feeding if needed, prepare for year two |
Hive Inspection Basics
Regular inspections are essential for monitoring colony health and development. Here’s how to conduct an effective inspection:
What to Look For
- Queen presence – Eggs or the queen herself
- Brood pattern – Should be solid and compact
- Food stores – Honey and pollen reserves
- Population growth – Increasing bee numbers
- Signs of disease – Abnormal brood or adult bees
- Pest presence – Varroa mites, hive beetles, etc.
- Space needs – Room for colony expansion
Inspection Tips
- Work on calm, warm days (60°F+)
- Avoid inspections during rain or high winds
- Use smoke sparingly but effectively
- Move deliberately and smoothly
- Keep inspections under 20 minutes
- Keep good records of each inspection
- Take photos to track progress
Track Your Beekeeping Journey
Download our printable hive inspection sheets to keep detailed records of your colony’s development throughout the season.
Managing Varroa Mites: The Beekeeper’s Biggest Challenge
The parasitic varroa mite (Varroa destructor) is the single biggest threat to honey bee colonies worldwide. Understanding and managing this pest is essential for successful beekeeping.

The varroa mite is a parasitic pest that weakens bees and transmits viruses
Why Varroa Management Is Critical
Varroa mites feed on bee hemolymph (blood) and transmit viruses that can devastate colonies. Without management, most colonies will collapse within 1-2 years of infestation.
“The number one feedback that I get from first-year beekeepers is that they did not realize how important it was to monitor and control varroa in their hive — most beginners lose their first hive to the mite.”
Monitoring Varroa Levels
Regular monitoring is essential to determine when treatment is necessary. The most common monitoring methods are:
Alcohol Wash
The most accurate method, involving collecting approximately 300 bees in alcohol to dislodge and count mites. Treatment threshold is typically 2-3% infestation (6-9 mites per 300 bees).
Sugar Roll
A non-lethal alternative using powdered sugar to dislodge mites from bees. Slightly less accurate than alcohol wash but preserves the bee sample.
Treatment Options
Several treatment options are available, ranging from “natural” to synthetic chemicals. Always follow label instructions precisely.
| Treatment Type | Examples | Considerations |
| Organic Acids | Oxalic acid, Formic acid (MAQS, Formic Pro) | Temperature sensitive, can be hard on queens, effective when used correctly |
| Essential Oils | Apiguard, ApiLife Var (thymol) | Temperature sensitive, can affect honey flavor, variable efficacy |
| Synthetic Miticides | Apivar (amitraz) | Highly effective, potential for resistance, residue concerns |
| Mechanical Methods | Drone brood removal, screened bottom boards | Labor intensive, supplemental rather than primary control |
Important: Colonies that collapse from varroa infestation often spread mites to neighboring hives, creating a domino effect. Responsible beekeeping includes diligent varroa management to protect not only your bees but those of other beekeepers in your area.
Common First-Year Beekeeping Challenges and Solutions
Every new beekeeper faces challenges. Being prepared for these common issues will help you navigate your first year successfully.

Recognizing and addressing problems early is key to successful beekeeping
Queen Problems
Signs of Queen Issues
- No eggs or young larvae present
- Spotty or irregular brood pattern
- Multiple eggs per cell (laying workers)
- Increased aggression in the colony
- Reduced population over time
Solutions
- Wait and verify – sometimes queens temporarily stop laying
- Check for queen cells – the colony may be replacing her
- Requeen if necessary – introduce a new mated queen
- For laying workers, combining with a queenright colony is often best
Swarming
Signs of Swarming Preparation
- Multiple queen cells, especially on frame bottoms
- Congestion in the brood nest
- Reduced egg laying by the queen
- Bees “bearding” on the front of the hive
Prevention Strategies
- Add space before the bees need it
- Ensure proper ventilation
- Create artificial swarms (splits)
- Remove queen cells if other measures are taken
Common Diseases and Pests
| Issue | Signs | Management |
| Chalkbrood | White/gray “mummies” in cells and on bottom board | Improve ventilation, requeen with resistant stock |
| European Foulbrood (EFB) | Twisted, yellowed larvae, spotty brood pattern | Antibiotics (with veterinary prescription), requeen |
| American Foulbrood (AFB) | Sunken cappings, ropey dead brood, foul odor | Report to authorities, destroy infected equipment |
| Small Hive Beetles | Small black beetles in hive, slimed frames | Beetle traps, maintain strong colonies |
| Wax Moths | Webbing, tunnels in comb, destroyed frames | Maintain strong colonies, protect stored equipment |
Feeding Issues
Signs of Nutritional Stress
- Reduced brood rearing
- Bees cannibalizing brood
- Little to no stored honey or pollen
- Slow colony growth
Solutions
- Feed 1:1 sugar syrup in spring and summer
- Feed 2:1 sugar syrup in fall
- Provide pollen substitute when natural pollen is scarce
- Ensure continuous food supply until natural forage is abundant
Record Keeping Tip: Maintain detailed records of all observations, treatments, and interventions. Photos of frames can help you track colony development and identify problems. Good records are invaluable for improving your beekeeping skills year after year.
Harvesting Honey: When and How for First-Year Beekeepers
While many first-year colonies don’t produce surplus honey, some in favorable locations with good management may yield a small harvest. Here’s what you need to know about harvesting your first honey crop.

Uncapping honey frames is the first step in the extraction process
When to Harvest
Timing is critical for a successful honey harvest. Consider these factors:
- Honey is fully capped – At least 80% of cells should be capped with wax
- Moisture content is appropriate – Uncapped honey may ferment if moisture is too high
- Sufficient stores remain for the bees – Never harvest honey the bees need for winter
- Nectar flow has ended – Harvesting during a flow can trigger robbing
- Weather is warm and dry – Ideal conditions for handling honey
First-Year Expectations: Many beekeepers don’t harvest any honey in their first year, allowing the colony to use all resources to build up strength for winter. Consider any first-year honey a bonus, not an expectation.
Harvesting Equipment
For your first small harvest, you can start with minimal equipment:
Essential Harvesting Tools
- Uncapping knife or fork to remove wax cappings
- Uncapping container to catch wax and honey
- Honey extractor (can often be borrowed from local associations)
- Food-grade strainer to remove wax particles
- Food-grade buckets for collecting honey
Harvesting Alternatives
- Crush and strain method – No extractor needed
- Cut comb honey – Sold in the comb, no extraction
- Rent equipment from local beekeeping association
- Cooperative extraction with other beekeepers
Basic Harvesting Steps
- Remove honey supers from the hive (using bee escape board, brush, or gentle blowing)
- Transport frames to a bee-free extraction area
- Uncap the honey cells using an uncapping knife or fork
- Place frames in extractor and spin to remove honey
- Strain the honey to remove wax particles
- Allow honey to settle for a day to let air bubbles rise
- Bottle in clean, dry containers with tight-fitting lids
- Label with harvest date and floral source if known
Never Feed During Honey Production: Never feed sugar syrup to colonies while honey supers are on for harvest. This can contaminate your honey with sugar syrup, which is considered adulteration.
Preparing Your Bees for Winter: Essential First-Year Steps
Successfully overwintering your colony is perhaps the most important achievement of your first beekeeping year. Proper preparation can make the difference between spring growth and winter loss.

A properly winterized hive with insulation, reduced entrance, and wind protection
Winter Preparation Timeline
Start preparing for winter well before cold weather arrives:
| Timing | Task | Purpose |
| Late Summer (August) | Final varroa treatment | Ensure winter bees are healthy and free of mites |
| Early Fall (September) | Assess and feed if needed | Ensure adequate winter stores (40-60 lbs honey) |
| Mid-Fall (October) | Reduce entrance, install mouse guards | Prevent pest entry while maintaining ventilation |
| Late Fall (November) | Add insulation, windbreaks | Conserve heat, protect from elements |
| Winter (December-February) | Periodic checks, clear entrances of dead bees | Maintain ventilation, monitor hive status |
Winter Food Requirements
Adequate food stores are critical for winter survival:
- Honey stores: 40-60 pounds minimum (varies by region)
- Store pattern: Honey should be positioned above and around the winter cluster
- Emergency feeding: Consider adding candy boards or fondant as insurance
- Pollen reserves: Essential for late winter brood rearing
Winter Hive Configuration
Physical Preparations
- Reduce entrance size to prevent mice and robbing
- Ensure proper ventilation to prevent moisture buildup
- Consider adding insulation around and above the hive
- Tilt hive slightly forward for moisture drainage
- Secure against strong winds and heavy snow
Regional Considerations
- Cold regions: More insulation, wind protection critical
- Moderate regions: Focus on moisture control, adequate food
- Warm regions: Ensure continued ventilation, monitor food
- All regions: Protect from precipitation and wind
Winter Success Metric: Your primary goal as a first-year beekeeper should be getting your colony through winter alive. This achievement means you’ve mastered the basics of bee husbandry and can truly call yourself a beekeeper.
Continuing Your Beekeeping Education: Essential Resources
Beekeeping is a lifelong learning journey. These resources will help you continue to develop your skills and knowledge beyond your first year.

Continuing education through books, journals, and online resources is essential for beekeeping success
Advanced Beekeeping Books
Technical and Scientific
- The Hive and the Honey Bee (Dadant & Sons)
- Honey Bee Biology and Beekeeping (Dewey Caron)
- The Biology of the Honey Bee (Mark Winston)
- Honey Bee Democracy (Thomas Seeley)
Practical Management
- The Backyard Beekeeper’s Honey Handbook (Kim Flottum)
- Natural Beekeeping (Ross Conrad)
- Increase Essentials (Lawrence Connor)
- Queen Rearing Essentials (Lawrence Connor)
Online Learning Resources
- Scientific Beekeeping – Research-based articles and information
- Honey Bee Suite – Practical beekeeping advice and problem-solving
- University Extension Programs – Many offer online courses and resources
- American Bee Journal – Articles from the monthly publication
- Bee Culture Magazine – Online articles and resources
- The Apiarist – Evidence-based beekeeping information
Advanced Training Opportunities
- Master Beekeeper Programs – Offered by various universities and organizations
- Queen Rearing Courses – Learn to raise your own queens
- Specialized Workshops – Topics like honey judging, mead making, etc.
- Beekeeping Conferences – Regional and national events with expert speakers
- Mentoring Programs – Many associations need mentors once you have experience
Continue Your Beekeeping Journey
Subscribe to our monthly newsletter for seasonal beekeeping tips, the latest research, and exclusive resources for growing beekeepers.
Conclusion: Your Beekeeping Journey Begins
Starting beekeeping is an adventure that connects you with a fascinating insect society and a supportive community of fellow beekeepers. While there’s much to learn and occasional challenges to overcome, the rewards of working with bees are immense.
Remember that your primary goal in your first year should be learning and successfully overwintering your colony. Any honey harvest is a bonus. Be patient with yourself and your bees as you develop your skills and knowledge.

With experience comes confidence and a deeper connection with your bees
“Beekeeping offers one a ‘tangible connection to the wild.’ If you’re willing to make the effort, the honey bee can help to connect you to Nature, and to the joy of experiencing how this fascinating social insect manages to eke out a living.”
As you progress in your beekeeping journey, you’ll develop an intuitive understanding of your colonies and the seasonal rhythms that guide them. You’ll learn to read the frames, anticipate your bees’ needs, and take pride in their success.
Welcome to the wonderful world of beekeeping. May your smoker stay lit, your queens be prolific, and your honey jars overflow!
Ready to Begin Your Beekeeping Journey?
Download our comprehensive beginner’s guide with checklists, seasonal calendars, and step-by-step instructions to help you start with confidence.