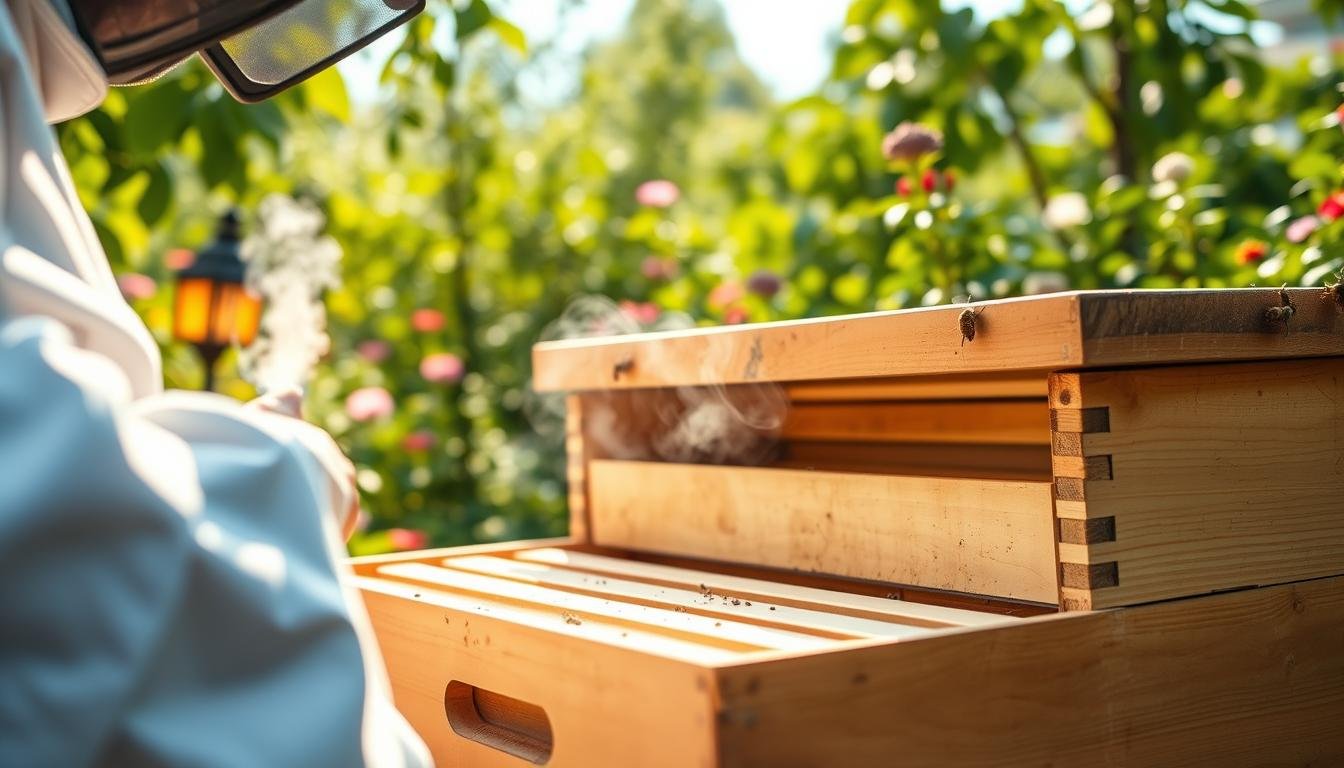
Keeping bees healthy starts with dry, well-ventilated hives. Moisture builds fast in busy spring colonies. Rusty at Honey Bee Suite found one-inch upper holes were not enough during cool, rainy weeks. She fixed that with screen covers and half-inch shims on the short ends so damp air can escape while wasps stay out.
Betsy and Pete from Vegas Bees warn that leaky covers, condensation, and high-water nectar raise humidity and risk. PerfectBee contributors add that site choice, strong clusters, and minimal disturbance in cold spells help colonies manage moisture and protect honey and pollen.
This guide sets clear expectations for U.S. readers seeking prevention-first advice. It previews core pillars: reliable ventilation year-round, smart site and equipment choices, colony strength, and calm winter practices. Field-tested tactics include screen covers with shims, moisture boards, quilt boxes with wood chips and vigilant entrance management after snow.
Key Takeaways
- Ventilation that works in all seasons is the first line of control.
- Strong clusters and good site selection reduce excess moisture and risk.
- Use screen covers, shims, moisture boards, and quilt boxes as practical fixes.
- Cold plus wet conditions chill brood and harm honey and pollen stores.
- Document local results across the year and adjust equipment and practices.
User intent and why moisture control matters now
Modern U.S. beekeepers are shifting from cleanup plans toward actions that stop moisture before it harms stores and brood. This reflects a preference for prevention over reactive fixes.
What U.S. caretakers want: prevention over remediation
Beekeepers now ask for simple, reliable steps that keep bees focused on colony growth. Preventing moisture saves time, reduces labor, and limits lost honey and chilled brood.
Present-day conditions that raise hive humidity
Recent cool, rainy springs and busy populations often produce wet inner covers, as Honey Bee Suite notes. Small upper holes can fail during peak bloom and leave top equipment dripping.
“Poor ventilation, leaky covers, condensation, and high-water nectar are common causes of wet gear and stressed colonies.”
- Nectar processing and heavy respiration from dense clusters add daily moisture.
- Poor ventilation design traps damp air and raises humidity inside the hive.
- Hives in humid regions face higher baseline humidity and need stronger airflow than arid yards.
Addressing ventilation, microclimate, and colony strength now reduces excess moisture year-round and helps colonies avoid energy-draining cleanup later.
How to Prevent Mold Inside a Beehive
Practical gear tweaks and colony care form the fastest route to a dry, stable hive environment. Field work shows three core pillars stop most problems: moving moist air out, capturing condensation, and keeping strong, active colonies that can manage internal climate.
Core prevention pillars
Ventilation: Screened bottoms, upper vents, and small top shims promote upward convection and exhaust damp air.
Dryness: Top insulation and quilt or Vivaldi boxes with absorbent layers intercept condensation before it drips on brood and honey.
Colony strength: Healthy bees fan and thermoregulate better. Weak colonies struggle to control humidity and growth of microbes.
Quick-start actions for busy beekeepers
- Add an upper entrance or a half-inch shim under the inner cover.
- Verify a clear lower entrance and use a screened bottom board for airflow.
- Insulate the top and add a moisture-absorbing layer in a quilt or Vivaldi box.
- Repair leaky covers and seal gaps that admit rain or wind-driven moisture.
- Consider uniting weak colonies and favoring local queens that support strong populations.
Schedule inspections before wet spells and focus on airflow paths and drainage. These small steps help bees maintain control of the hive environment and preserve honey stores and brood growth.
Recognizing causes of mold: moisture, ventilation, and nectar water
When damp air lingers and honey frames stay sticky, fungal growth can begin on comb and wood. Read the signs early and trace sources before damage spreads.
Excess moisture sources
Condensation forms when warm, moist air meets the first cold surface, often the underside of the top cover. That wet surface is a common starting point for mold.
Leaky covers, driving rain, and foggy climates add water that compounds interior dampness. Weak colonies and poor vents let damp pockets form where growth gets started.
High-water nectar and messy frames
Strong nectar flows raise humidity as bees dry incoming sugar water. High-water nectar increases the drying load and creates excess moisture across the hive.
Messy frames, burr comb, or fermenting honey give fungi food and surface area for growth. Outer frames in small winter clusters often stay damp and vulnerable.
- Trace sticky spots and dark wood back to cracked covers or poor seals.
- Check after storms and during shoulder seasons when condensation spikes.
- A dry, well-sealed cover and clear airflow paths break repeated wetting cycles.
Recognizing these drivers helps you cut risk for bees and people exposed to damp, moldy conditions.
Risks of mold for bees and beekeepers
Mold growth in a hive can undermine colony nutrition and trigger broader health problems for bees and caretakers.

Mycotoxins and food supply impacts
Fungal growth can produce mycotoxins that contaminate pollen stores and bee bread. Contaminated food weakens the brood and reduces usable honey and pollen that sustain colonies.
Bees forced to clean and reject spoiled stores expend energy that would otherwise support growth.
Interactions with brood disease
High humidity and heavy spore loads can aggravate brood disease like chalkbrood and compound colony stress.
When disease and fungal growth occur together, colonies struggle more to thermoregulate and rear healthy young.
Human health and safe handling
For beekeepers, airborne spores may aggravate asthma and allergies. Use a rated respirator, gloves, and eye protection during cleanup.
Work outdoors or in well-ventilated areas, detect problems early, and discard badly affected comb conservatively to protect long-term colony health.
A sustained dry interior and careful site and ventilation choices remain the best defense against toxic fungal growth.
Site selection and microclimate: avoiding frost pockets and damp areas
Placement matters as much as gear. One PerfectBee contributor found much of his property sat in a frost pocket. He moved hives to a south-facing slope, raised stands about two feet, and used trees to block cold north winds.
Sun, air circulation, and elevation off ground
Select sunny, breezy areas that warm quickly after cold nights. Elevate the hive so air flows under the bottom and reduces dampness wicking from soil.
Identifying and mitigating frost pockets on your property
Frost pockets are low spots where cool, moist air pools. Map dew, fog, and frost patterns and avoid sites that stay wet longer than the surrounding area.
- Choose south-facing slopes when possible; they warm earlier and shed moisture.
- Use natural windbreaks that block prevailing winds without trapping cold air.
- Buy sturdy stands that keep hives level for proper drainage and stability.
Good location choices lower chronic dampness and cut later remediation work. For site planning and shade guidance see the apiary site selection guide. Pair placement with proven ventilation practices from this ventilation guide to improve the baseline environment for honey bees.
Ventilation solutions that work year-round
Year-round ventilation needs steady, measured airflow rather than one-size-fits-all fixes. Simple, low-cost changes help keep moist air moving upward and out of the hive without chilling the cluster.
Screened bottom boards and upward flow
Screened bottom boards promote vertical airflow so warm, damp air rises and leaves through the top. Honey Bee Suite found replacing inner covers with screen covers and half-inch shims created reliable exit paths for vapor.
Ensure the screened bottom drains and stays clear of debris. A blocked screen defeats the purpose and traps moisture near the brood.
Controlled top gaps, upper entrances, and small holes
Create a narrow, sheltered top gap with shims or a vented board. This gives moist air an escape without inviting rain or pests.
Upper entrances and small holes exhaust humid air while helping the colony keep cluster warmth. Vegas Bees recommends propping the outer cover slightly and checking for water pooling at the top edges.
Balance airflow; avoid chilling the cluster
Excessive airflow can chill brood. PerfectBee notes that ventilation sizing matters: increase venting during heavy nectar flows and cool nights, then moderate it in extreme cold.
Seasonal testing works best. Adjust gaps, inspect bottom boards, and use screened components rather than wide-open vents for controlled exchange.
| Component | Benefit | Seasonal note |
|---|---|---|
| Screened bottom | Supports upward convection, keeps debris out | Clear in spring/nectar flow; check often |
| Vented top / shims | Provides sheltered exhaust without rain entry | Open slightly during wet spells; reduce in deep cold |
| Upper entrance / small holes | Targets humid exhaust while preserving warmth | Use small openings; monitor cluster temperature |
Moisture management in winter
Winter brings steady vapor loads that condense on cold surfaces and threaten cluster warmth.
Insulating the top stops warm, humid air from hitting a cold cover and shedding water onto frames. A warm top surface reduces condensation and keeps the cluster drier during freeze–thaw cycles.
Vivaldi and moisture boards, quilt boxes, wood chips, burlap
Vivaldi or moisture boards and quilt boxes packed with wood chips and covered with burlap absorb vapor and let it vent away safely. PerfectBee contributors report this combo works well when paired with a vented spacer.
Replace or refresh the burlap and chips if they become saturated. Saturated media lose drying power and should be swapped before heavy thaw periods.
Layered winter setup and entrance care
Build a winter stack: spacer with an upper entrance, a moisture-absorbing layer or board, an insulating board, then a snug telescoping cover. This sequence intercepts water above the cluster and channels vapor out without chilling the bees.
Keep the lower entrance clear after snow and debris. Use a hooked wire to remove dead bees and restore airflow without opening the hive in frigid weather.
Balance matters: too much venting in deep cold can chill the cluster. Tune upper vents and gaps to local winter conditions and prefer small, sheltered exhaust paths.
| Item | Function | Care note |
|---|---|---|
| Insulating board (top) | Warms cover, reduces condensation | Check after thaws for pooling water |
| Vivaldi/moisture board | Absorbs and vents vapor | Replace wood chips or burlap when wet |
| Quilt box with wood chips | Long-term wicking and airflow buffer | Monitor saturation monthly in shoulder seasons |
| Spacer with upper entrance | Provides controlled exhaust path | Adjust opening size per local cold snap severity |
Regular external checks using sound or thermal tools help spot problems without opening the hive. Verify no water pools under the cover during thaws.
Consistent winter moisture control reduces chilling, lowers disease risk, and protects frames and wood parts—supporting a healthy spring buildup.
Spring and shoulder-season moisture spikes
Rapid population growth in spring raises respiration rates and sends extra moisture into the upper hive.
Large colonies breathe more at night. Warm, humid breath meets cool covers and condenses. That condensation can soak frames and wood within hours after a wet day.
Large populations, respiration, and cool nights
When bees swell during peak build-up, overnight respiration and nectar processing load the cavity with vapor. Cool nights turn vapor into drips on the inner surface.
Watch crowded boxes after rain; they show wet inner covers first.
Screen covers with shims to let damp air escape
Use a screen cover with half‑inch shims under the outer cover to create a controlled exhaust path. This setup lets moist air rise and leave while blocking wasps and rain.
- Small upper holes may fail during heavy nectar flows and cool nights; widen exhaust paths gently rather than opening wide vents.
- Temporarily increase venting during cool, rainy spells and monitor brood temperature and bee behavior.
- Strategic drone frame removal or trapping can ease crowding and reduce internal humidity load.
- Inspect after storms for wet inner surfaces and adjust shims or holes as needed.
| Action | Why it helps | When to apply |
|---|---|---|
| Screen cover + 1/2″ shims | Creates sheltered exhaust without rain entry | Spring and wet shoulder seasons |
| Increase small upper holes | Expels excess moisture during nectar flows | Short-term during cool, rainy nights |
| Drone frame reduction | Reduces colony crowding and vapor load | During peak build-up |
| Post-rain inspections | Detect wet covers early and adjust vents | After heavy rain or persistent drizzle |
Keep a rain-shedding outer cover while allowing a gentle, continuous release of humid air. Acting quickly in spring prevents excess moisture from gaining ground and lowers the seasonal risk of fungal growth.
Colony strength and population management
A robust population gives honey bees the workforce they need for steady ventilation and nest care.
Why stronger clusters control humidity better
Large clusters regulate temperature well and actively fan to push moist air upward. This movement prevents damp pockets on outer frames where fungal growth often begins.
Smaller colonies often cannot reach the perimeter. Outer frames stay cool and wet through cool nights, raising humidity and risk.
Combining weak colonies and using local genetics
Combine weak units before winter so populations can cover more comb and dry stored honey and pollen. Do this early enough for the merged colony to organize brood and stores.
- Source local queens adapted to region moisture and temperature patterns for better environmental control.
- Monitor coverage on all frames; gaps indicate higher risk and call for intervention.
- Plan contingencies in beekeeping schedules for building strength ahead of long, wet winters.
| Action | Benefit | Timing |
|---|---|---|
| Combine weak colonies | Expanded coverage, improved ventilation | Before winter or wet seasons |
| Install vents and shims | Works with cluster fanning | Year-round, adjusted seasonally |
| Use local queens | Better humidity and temperature control | During requeening windows |
Strong populations, matched equipment, and measured ventilation form the best defense against excess humidity and frame dampness.
Feeding strategy, honey frames, and condensation
Late-season syrup can add significant vapor load that harms winter clusters. Feeding sugary liquids when nights cool forces bees to evaporate large amounts of water to reach stable stores. That evaporation raises interior moisture and can create condensation on the top and on comb.

Why late-fall syrup can backfire
PerfectBee cautions that syrup given late in fall increases humidity because bees must reduce water content down to about 14–21%.
This extra water spikes condensation under the cover and can drip onto frames, chilling bees and wetting stored honey.
Use of capped honey frames and freezer reserves
Prioritize capped honey frames as winter food. Ready frames require no processing and add almost no extra moisture. Keep a small freezer reserve of full frames so you can add stores without forcing evaporation inside the hive.
Managing nectar flow to limit excess moisture
During heavy flows pull surplus honey promptly to limit ferment and excess humidity. Assess stores by mid-fall and plan so you avoid emergency syrup feeding when temperatures drop.
Think in terms of moisture budgeting: minimize added water, avoid breaking the cluster, and watch for sweating under the cover. For practical notes on colony moisture management see how bees manage temperature and moisture.
Equipment choices: wood, sealing, and replacements
Choose durable materials and tight joinery so gear sheds water and resists decay.
Replace parts that stay damp, feel soft, or warp and allow rain entry. Persistent mold, rotted frames, or warped boards that admit water deserve retirement rather than repeated repair.
When to retire damaged components
Retire any element with soft wood, recurring fungal spots, or gaps at mating surfaces. If drying and sanitation do not stop growth, replace the piece and inspect adjoining parts for leaks.
Sealed wood versus plastic and crevice control
Sealed wood offers good insulation and can be renewed with safe exterior finishes. Plastic or polystyrene resists moisture and needs less upkeep but may change thermal behavior.
| Material | Moisture resistance | Maintenance note |
|---|---|---|
| Sealed wood | Moderate | Recoat exterior, repair joints |
| Plastic / polystyrene | High | Low maintenance, watch fit |
| Replacement board | Depends on material | Choose fit and finish for water shedding |
Eliminate unnecessary holes and crevices that trap debris and spores while keeping planned vents clear. Inspect the cover, rims, and mating surfaces regularly and document a maintenance schedule. Durable, well‑fitted hives need less work, reduce mold growth, and support healthier colonies through the season.
Hands-on remediation when mold appears
Act quickly but carefully when fungal growth shows on comb or wood. Prompt action limits spread and preserves usable honey and frames. Work outdoors and protect yourself with a respirator, gloves, and eye protection before touching affected parts.
Removing affected frames and safe disposal
Pull affected frames promptly. Discard any frame with heavy fungal coverage. Salvage only lightly stained comb after cleaning and full drying.
Brush loose spores off outdoors, downwind of other equipment. Place discarded frames in sealed bags and remove from the apiary for disposal.
Vinegar treatments: concentrations, contact time, cautions
Vinegar offers a low‑risk cleaning option for lightly affected wood and comb supports. Mist a 50/50 white vinegar and water solution over the area, let it sit about an hour, then wipe and air dry. Test a small wood area first; repeated sprays can darken or soften some wood finishes.
Bleach (1:4) or hydrogen peroxide for severe cases
For heavy contamination, scrub hive interiors and boards with a 1:4 bleach:water solution, rinse thoroughly, and air out completely before reuse. Hydrogen peroxide is a gentler alternative for surfaces contacting honey. Follow label safety and avoid returning any item that retains odor or dampness.
Drying, aeration, and reintroducing bees
Complete drying is essential. Lay cleaned frames and top parts flat in sun and wind until fully dry. Ensure all boards and the top have no trapped water and no lingering chemical smell before placing them near or back in the hive.
After remediation, improve ventilation and fix leaks immediately so the problem does not recur. Monitor cleaned honey-contact areas closely; do not reintroduce frames that remain damp or smell of treatment.
| Step | Recommended action | Note |
|---|---|---|
| Pull affected frames | Remove promptly; destroy heavily affected comb | Work outdoors; bag and remove waste |
| Vinegar mist (50/50) | Spray, 1 hour contact, wipe, dry | Test on wood first; repeat if light staining persists |
| Bleach 1:4 or H2O2 | Scrub surfaces, rinse, air out fully | Use for severe cases; H2O2 less harsh on honey-contact areas |
| Drying & aeration | Sun and wind until no moisture remains | Ensure boards and top are odor-free before reuse |
For larger remediation projects or structural concerns, consult a regional specialist or this residential bee remediation guide — residential bee remediation.
Minimal disturbance philosophy in cold weather
A restrained approach in winter preserves the bees’ hard-won warmth and stabilizes the hive environment. Avoid routine openings after mid-fall unless colony welfare demands it. Each break in insulation lowers internal temperature and forces heater bees to respond.
Listen and observe before you act
Use sound and remote tools first. A stethoscope, simple knock test, or thermal camera gives a clear read on cluster activity without destroying warmth.
“Avoid opening hives after mid-fall unless an emergency requires intervention.” — PerfectBee
Practical restraint and quick exterior checks
- Do no harm: skip full inspections when possible and preserve dry, steady conditions.
- Check entrances and tops from the outside for blockages, water intrusion, or snow at warmer daylight hours.
- Limit any necessary opening to the shortest safe duration to reduce added moisture from respiration.
- Record observations, note trends, and defer manipulations until warmer weather or clear need.
Control comes from planning, not frequent fiddling. For regional tips on placing and sheltering colonies, see beekeeping in different climates.
Vent holes, screened bottoms, and drainage details
Drainage and airflow must work together. Good ventilation at the top and a clear base let humid air escape before it soaks frames and weakens stores.
Place a few small vent holes near the top to complement a screened bottom. Vegas Bees recommends modest openings that exhaust damp air without creating strong drafts across the cluster.
Use a screened bottom board to promote upward convection and let debris fall away. Honey Bee Suite found that half‑inch shims under a screen cover create a protected exhaust gap that blocks insects while allowing vapor out.
- Pitch bottom boards slightly so water runs out and does not pool after rain or snowmelt.
- Keep the landing and bottom clear of leaves, wax flakes, and dead bees that trap moisture and block airflow.
- Prop the outer cover or add a small shim in wet periods for a sheltered exhaust path without opening the hive fully.
| Feature | Benefit | Seasonal note |
|---|---|---|
| Small top holes | Targets humid exhaust | Open during wet spells; reduce in deep cold |
| Screened bottom boards | Vertical airflow, debris exit | Check and clear in spring and after storms |
| Pitched bottom | Prevents water pooling at base | Ensure run‑off path and stable stand |
Simple drills and a screened bottom are low‑cost, high‑impact fixes. Balance openings to avoid robbing or pest entry and schedule quick post‑storm checks so vents and drain paths keep doing their job across seasons.
A seasonal beekeeping checklist for mold prevention
A concise seasonal routine helps beekeepers keep humidity under control and protect stores and brood.
Follow these timed steps across the year to reduce wet frames and lessen cleanup later.
Placement, equipment, feeding, and inspection cadence
Pre-season: Pick sunny, airy sites that avoid frost pockets. Elevate stands and fit screened bottoms. Prep shims and moisture or quilt boards for the top hive position.
Equipment: Inspect covers, rims, and joints for leaks. Seal or replace decayed parts and standardize gear for tight fits that shed water.
Feeding and frames: Prioritize capped honey frames for winter stores and keep a freezer reserve. Avoid late-fall syrup that raises humidity in cold nights.
Population: Combine weak hives early and favor local queens. Confirm adequate coverage across frames before first hard freezes.
Ventilation & winter ops: Set upper entrances or small vents and adjust shims to balance exhaust with cluster warmth. Insulate the top and use quilt or Vivaldi boards with fresh burlap or wood chips. Replace saturated materials and keep lower entrances clear after snow.
Inspections: Use a cadence of frequent quick exterior checks and infrequent interior checks. Use a stethoscope or thermal tool during cold periods to limit disturbance.
Remediation & sanitation: If fungal growth appears, remove affected frames, sanitize with a 50/50 vinegar mist or 1:4 bleach slurry when needed, dry thoroughly, and correct moisture sources. Discard unsalvageable items and log issues by hive.
| Season | Main actions | Key items | Checkpoint |
|---|---|---|---|
| Pre-season / Spring | Site, screened bottoms, shims | Stands, shims, moisture boards | Before first nectar flow |
| Summer / Shoulder | Adjust vents, watch frames, remove surplus | Upper entrance, screen cover | After storms and peak flows |
| Fall | Confirm stores, combine weak colonies | Capped frames, freezer reserve | Before first hard freeze |
| Winter | Insulate top, use quilt boxes, limit openings | Burlap, wood chips, shims | Monthly external checks |
Review outcomes at season’s end. Assess humidity control results and refine plans for the next year so each hive environment improves over time.
Conclusion
Practical, repeatable steps—vented tops, screened bottoms, and timely inspections—build resilient hive environments.
Prevention-first means balancing ventilation with top insulation, intercepting moisture before it wets frames, and favoring capped honey as winter stores. Strengthen colonies and use local genetics so bees can manage internal climate and support spring growth.
When fungal spots appear, remove and clean or replace affected parts, then fix leaks and vents so the issue does not return. Field-tested solutions—proper covers, shims, and screened components—deliver outsized benefits across conditions.
For beekeepers: monitor seasonal patterns, document results, and tune each solution to local weather. Consistent moisture management yields healthier colonies, cleaner comb, and better honey quality.
FAQ
What are the core ways beekeepers control excess moisture that leads to mold?
Focus on three pillars: reliable airflow, drying materials, and a strong colony. Use screened bottom boards, vented top covers or shims, and quilt boxes or moisture boards with wood chips or burlap. Keep equipment sealed against leaks and position hives to get sun and wind without chilling the cluster.
Which hive ventilation options work year‑round without chilling bees?
Use screened bottoms for passive airflow, a small upper entrance or shim under the inner cover, and propped top covers with an insulated moisture trap above the brood. Balance openings so damp air exits but the winter cluster retains heat. Close large gaps in frigid weather and rely on controlled upper vents instead of wide lower openings.
How should I manage moisture during winter specifically?
Insulate the top to intercept condensation before it drips on frames. Add a moisture or Vivaldi board filled with absorbent material like wood chips or burlap under the top cover. Ensure the top has a vent to let humid air escape. Check entrances for snow or debris that can trap damp air.
What immediate actions reduce condensation and surface growth on frames?
Remove wet, unsealed feeders and poorly capped syrup frames when possible. Increase ventilation slightly, add an absorbent moisture board, and replace any leaky covers. When removing frames, do so quickly and in warm conditions to limit cluster disturbance.
Can colony strength affect internal humidity and fungal growth?
Yes. Larger, healthier clusters produce heat and better regulate internal humidity through fanning and brood rearing. Weak colonies struggle to maintain stable temperatures and humidity, making frames more prone to mold. Combine weak colonies or replace queens to improve regulation.
Is late‑fall syrup feeding risky for moisture control?
Heavy late‑fall syrup can add free water in frames and increase fermentation or mold risk if not properly stored or capped. Prefer feeding earlier so bees can cure and cap stores, or provide sealed honey frames or frozen reserves as safer winter food.
Which parts should I replace when decay or mold appear on equipment?
Replace frames with extensive fungal growth, brood boxes with rot, and badly warped covers. Light surface mold on external boxes can be sanded and sealed with food‑safe finishes. Use durable materials—properly sealed wood, quality plywood, or polystyrene where appropriate—and repair crevices that trap moisture.
What safe treatments remove visible mold on hive components?
Scrape affected areas, then scrub with a 5–10% white vinegar solution or a diluted hydrogen peroxide rinse for persistent patches. For severe, entrenched contamination, a bleach solution (one part household bleach to four parts water) can be used on nonmetal parts, followed by thorough drying and airing. Always rinse, dry completely, and avoid residue that could harm bees.
How can site selection lower humidity risks around colonies?
Place hives on slightly elevated stands in sunlit, well‑drained locations with good air circulation. Avoid frost pockets, low wetlands, and spots behind dense hedgerows where cold, damp air settles. Even small elevation and exposure changes can reduce condensation inside boxes.
What seasonal checks help catch moisture issues early?
Inspect in late fall, after major nectar flows, and following long cool spells. Check for blocked entrances, damp comb, condensation on lids, and musty odors. Add or adjust ventilation, replace wet components, and monitor colony strength to prevent growth before it spreads.
Are screened bottom boards always recommended, and when should they be closed?
Screened bottoms improve drainage and lower humidity for much of the year, but you may partially close them in extreme cold if they cause chilling. Use a removable board or sliding cover so you can open screens in spring and fall and close them during bitter winter nights if needed.
Do moldy frames pose health risks to people handling hives?
Some hive molds can produce spores or mycotoxins that irritate sensitive people. Wear gloves and a mask when handling moldy frames, dispose of heavily contaminated combs away from apiary, and wash tools and hands thoroughly. Avoid inhaling dust from scraping or sanding moldy wood.
How effective are vinegar and natural treatments versus bleach for remediation?
Vinegar (5–10%) is a safe, effective first step for surface mold and quick remediation with minimal residue. Hydrogen peroxide is stronger for stubborn spots. Bleach is effective but harsh; use it only on salvageable nonporous parts, rinse well, and fully dry before reuse to protect bees and equipment longevity.
When should I disturb the hive in cold weather to address moisture concerns?
Minimize cold‑season inspections. Use noninvasive checks—listen with a stethoscope, observe entrance activity, and assess weight or thermal imaging if available. Only open boxes in mild conditions and for urgent problems like heavy internal dripping or blocked ventilators that threaten colony survival.
What practical measures limit nectar‑related moisture during major flows?
Provide adequate honey supers and space so bees can cap nectar quickly. Ensure good ventilation in supers and use shims or screened covers to let humid air escape. Harvest promptly and avoid over‑filling stores that remain uncapped through cool, wet nights.


