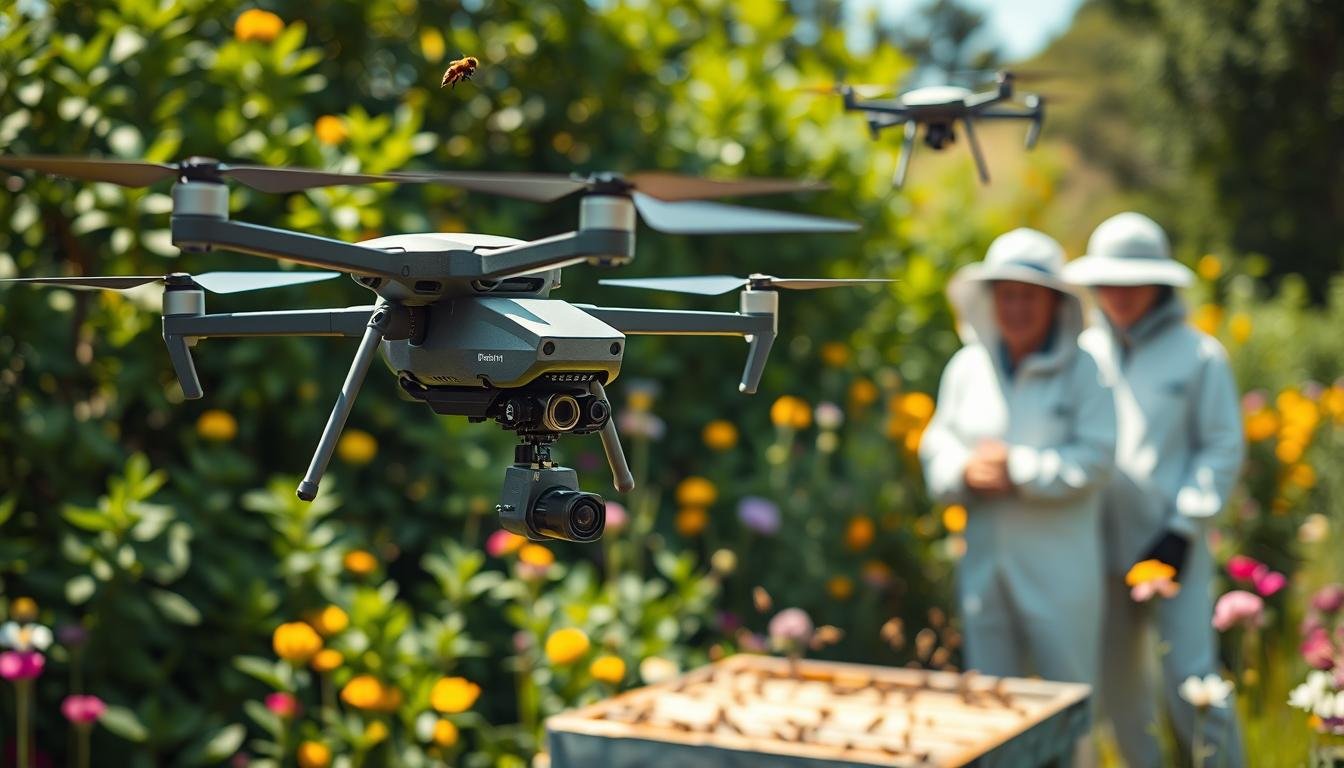
Modern beekeeping pairs old-school frame checks with aerial scouting to give a clearer, faster view of colony health.
Using lightweight craft before opening a box lets you scope entrances, flight traffic, and ventilation. This reduces disturbance and helps plan a focused inside check.
What to look for once inside includes eggs placed like tiny grains of rice, flat-capped worker brood, and bulged caps where drone brood is present. Darkened comb signals time to cycle frames to keep the colony healthy.
Combine aerial footage with classic frame signs—pollen return, nectar inflow, and bearding on hot evenings—to decide where to act. For practical safety, apply cool smoke at the entrance and stage tools so each frame lift is calm and efficient.
For more on tech and smart apiary tools, see this guide to modern monitoring and data-driven choices: smart beekeeping and hive tech.
Key Takeaways
- Pair aerial visuals with frame-level checks to save time and reduce bee stress.
- Confirm queen status by finding neatly placed eggs in cells.
- Distinguish worker and drone brood by cap shape to assess colony balance.
- Cycle dark brood comb periodically to maintain hive hygiene.
- Use cool smoke at the entrance and prepare tools for calm, efficient checks.
Search intent and why hive inspection drones matter for modern beekeeping
Beekeepers searching for safer, faster checks want clear reasons to add aerial scouting to routine care.
What they want is a way to pre-assess entrances, flight traffic, ventilation, and bearding before any tool touches a frame. That pre-check reduces disturbance and helps you plan targeted hands-on work.
- Primary reasons: save time inside, reduce stress on bees, and build repeatable footage for trend analysis.
- Visuals point you to things to look at first: crowded landing boards, heavy forager lines, or odd clustering at the back hive area.
- Open every one to two weeks to catch cross-comb early, confirm brood continuity, and act before swarms form.
Strong returning pollen and long forager lines usually mean active brood rearing. Bearding on hot evenings often signals ventilation needs, not always an imminent swarm.
Inside checks still matter: neat single eggs, solid brood patterns, and stores framing the brood area confirm queen health. Use aerial footage to find where and when to check first.
Prep practical things—light the smoker, stage tools, and pick the right day and time. Consistent, repeatable passes over multiple hives give comparable data so decisions follow trends, not one-off impressions.
Beginner hives guide is a good resource for hands-on steps once footage flags an issue.
Hive inspection drones
Pre-programmed overflights produce consistent footage that points you to boxes needing hands-on work. Brief visual and thermal passes let you see bearding, entrance flow, and heat near brood without opening the lid. This saves time and reduces disturbance while creating a repeatable record.
Core capabilities: visual, thermal, and repeatable flight paths
Stabilized 4K visuals show traffic and bearding. Optional thermal imagery highlights warm zones near brood and uneven comb temperature. Pre-set routes deliver comparable clips over time so you can track change.
When to fly: every one to two weeks aligned with brood cycles
Cadence matters: flying every one to two weeks lines up with brood development. That timing helps you spot trends in pollen return, nectar intake, and shifts in colony behavior between full checks.
How airborne scouting complements hands-on checks
Use footage to triage which hive to open first. Aerial views can’t confirm neat single eggs in cells, but they point you to frames likely to show eggs, larval glisten, or bulged drone caps once inside.
- Flag hives with low traffic or odd clustering for a close frame review.
- If you saw lots of drones weeks ago, schedule an in-box check in three weeks to confirm worker brood.
- Keep smoke minimal and work fast at the frame level to protect brood temperature and honey stores.
Safety, legality, and setup in the United States
Start with site and airspace basics before any flight. Pick a calm day and a clear launch area well away from the front of your apiary. Keep people and pets out of the immediate zone.

Airspace and site safety around apiaries
Operate well below restricted airspace and follow local US rules. Give roads and neighbors a wide berth. Designate takeoff and landing points away from the hive entrance so bees’ flight lanes stay clear.
Weather, wind, and flight planning over hives
Choose low wind and good visibility. Avoid rain and gusts that push the craft toward hives. Keep passes short and predictable; fly at a height that shows entrance activity but does not blow wash across the landing board.
- Minimize disturbance: brief passes, no low hovers over bees or open frames.
- Use cool smoke sparingly at the entrance and on hands if you will open the box after the flight.
- Mind obstacles—trees, wires, and reflective surfaces—and map safe waypoints.
- Choose lighter craft with prop guards if you must get close to comb or cells; keep line of sight at all times.
“Plan flights that protect bees first and gather useful footage second.”
Pre-inspection checklist: gear, smoker, and flight plan
A focused pre-check—gear ready, smoker lit, and a short flight mapped—cuts time at the hive and stress for bees.
Stage gear first. Pack charged batteries, a memory card, fresh fuel for the smoker, suit and gloves, a hive tool, brush, spare frames, and a clean container or knife for comb work.
Smoker use and calm handling before opening the hive
Light the smoker early so it produces cool smoke. Give two short puffs at the front entrance, then crack the outer cover. After lifting the first bar, apply two more puffs inside and wait about a minute for bees to settle.
Keep a small working gap and remove a frame at the back first. Check the first accessible frame for white new comb, darker brood comb, and eggs that look like tiny grains of rice in cells.
- Run a quick flight plan: a pass across the front, a perimeter orbit for bearding and ventilation, then a high-angle yard view.
- Choose a warm, low-wind day and log things you will confirm: eggs, brood continuity, stores, comb alignment, and repairs.
- Pre-label containers for honey drips and reseat frames in order when finished to close gaps and reduce robbing risk.
Step-by-step: conducting a drone-assisted hive inspection
Start each combined aerial and ground check with a calm, planned pass. Map entrance traffic, bearding, and ventilation before touching frames. Record short, consistent clips so you can compare the same scenes over time.

Overflight mapping: entrances, bearding, traffic, ventilation
Film the front to capture landing activity. Pan along the back hive line to note bearding on warm days.
Add a high-angle pass to reveal clusters and ventilation spots. Flag hives with low traffic or a lot of bees outside for priority review.
Close-up passes: locating pollen, nectar stores, and comb condition
Use conservative altitude and angle to see nectar glisten and comb health without disturbing the air column. Note frames that show pollen or capped honey near the brood area.
Coordinated ground work: removing lids, frame order, and minimal disruption
Crack the lid, give minimal cool smoke with your smoker, and remove one frame to create a working gap. Move methodically so brood temperature and bees stay stable.
Inspect frames in order. Look for white new comb, darker used comb, and cells with eggs like grains of rice. Worker brood will have flat caps; drone caps bulge.
Documenting frames for change-over-time analysis
Capture photos and short clips of representative frames and note location (front, back hive, frame number). Log which frames hold pollen, nectar, or brood so you can track change between visits.
| Step | What to record | Action | Why it matters |
|---|---|---|---|
| Overflight | Entrance traffic, bearding, ventilation | Flag priority hives | Shows where to spend time during ground work |
| Close pass | Nectar glisten, comb condition | Note frames with stores | Helps plan feeding and super placement |
| Ground work | Frame sequence, cells, brood caps | Inspect and realign comb | Protects wax, brood, and keeps frames straight |
| Documentation | Photos/videos of frames | Log positions and changes | Creates repeatable records for long-term care |
For techniques on brood sampling and removal that pair with aerial checks, see brood sampling and removal.
What healthy looks like: eggs, brood, drones, pollen, and honey
Good colonies show tidy cells, steady brood patterns, and nearby stores that support growth. Start by checking for single, neatly placed eggs like tiny grains of rice at the bottom of each cell. These eggs confirm a laying queen and a growing brood nest.
Eggs like grains of rice and neat single placements
Look for one egg per cell, centered on the cell floor. If eggs are scattered or missing, flag the frame for a closer follow-up.
Worker vs drone brood: flat caps vs bulged drone cells
Capped brood from worker bees shows uniform, flat caps. Bulged, elevated cappings indicate drone brood and should appear in patches, not across the entire brood area.
Pollen and bee bread around brood; stores needed per brood frame
Expect a ring of pollen and honey around the brood. Bees typically need about a frame of pollen and a frame of honey to rear one frame of brood. Pollen is packed and mixed into fermented bee food called bee bread.
Reading comb color: white to brown to black
New comb is white and soft; it browns with use and darkens to black after many brood cycles. Plan to cycle out very dark brood comb to keep wax and the nest healthier.
- Note shiny, glistening larvae and intact caps—sunken or perforated caps need a deeper disease check.
- Document frame photos and notes so healthy patterns persist and small changes are easy to spot.
- For more on practical reading and resources, see this beekeeping resources guide.
Diagnosing queen status and drone patterns from your footage
Short aerial and frame clips give early clues about queen health and brood trends before lengthy ground checks.
Watch for patchy brood and signs of two egg-laying centers. Two queens can appear briefly during a changeover. If footage suggests multiple laying areas, plan a follow-up in about three weeks to confirm new worker brood.
Lots of drone brood deserves careful timing. Consistent drone-only sections may mean the queen has run low on sperm, or that laying workers are active in a queenless colony.
Egg placement tells a clear story. Multiple eggs per cell or eggs on side walls point to laying workers or a young queen. Neat, single eggs at the cell bottom are the target sign of a healthy queen.
Distinguishing castes on video
On clips, drones look stout with large eyes. The queen is longer and tapered. Workers are smaller and cluster around brood.
“Combine footage with targeted frame checks to turn a timed observation into a confident diagnosis.”
| Signal seen | Likely cause | Action | When to recheck |
|---|---|---|---|
| Patchy brood | Changeover or queen stress | Mark frames; monitor | ~3 weeks |
| Drone-only brood | Spent sperm or laying workers | Confirm with frame check; plan re-queening | 1–2 weeks |
| Multiple eggs per cell | Laying workers or new queen | Inspect cells; consider consolidation | 7–14 days |
| Good capped brood | Queen-right colony | Continue routine monitoring | Regular cadence |
Swarm season signals and proactive moves
Spring brings clear cues that let you act before swarms start. A rise in male numbers often shows the colony is building toward a split pressure point.
Watch for more drones on frames and more traffic at the landing board as flowers open and nectar runs begin. Brisk forager lines and shiny nectar in top cells mean blooms are fueling growth.
Use footage and quick checks to decide when to split. If you see entrance congestion or a lot of bees clustering outside at warm times, prepare boxes and frames that same day.
Drones and spring swarms: timing your split
Act before capped swarm cells appear. Move strong brood frames with adhering bees plus stores so both units keep pollen, honey, and brood.
- Plan follow-ups in a few weeks to confirm both units are queen-right and converting nectar to honey.
- Compare before/after traffic on video; a good split lowers congestion and steadies patterns.
- Stage extra frames and boxes so you can split quickly during peak flowers and protect honey yield.
“Split early, preserve momentum, and log results to refine timing for future seasons.”
Managing comb: straight lines, cross-comb fixes, and foundation choices
Straight combs let you read cells and brood at a glance, saving time and stress.
Identifying cross-comb starts with a quick back line check. Look for curved bridges that run from one bar to another. A careful pry and gentle bend brings combs back in line without tearing wax.
Nudging combs back into place
Work slowly and support the comb when you lift. Keep frames straight so future checks and data collection stay consistent. When you take honey during a correction, contain drips and clean tools to avoid robbing.
Foundationless pros and cons
Foundationless frames reduce foreign wax and let bees size cells naturally. Fresh wax is fragile and can go wonky; expect mixed cells near edges where bees store nectar or drone brood.
Cycling dark brood comb safely
Move dark comb toward the edge, wait for brood to emerge, then remove and take wax away from the yard. This method cuts disease build-up and lowers the chance of robbing.
“Keep corrections small and documented so combs stay aligned and usable over seasons.”
| Issue | Sign | Action | Why it matters |
|---|---|---|---|
| Cross-comb | Curve between bars | Pry gently; realign frame | Prevents tearing and speeds future checks |
| Fragile wax | Thin new comb | Support when lifting; add foundation if needed | Reduces breakage and lost stores |
| Dark brood comb | Blackened cells | Edge out, remove after emergence | Limits pathogens and robbing risk |
Turning observations into actions: data logs, timelines, and seasonal workflows
Turn short clips and quick frame checks into a management rhythm you can rely on each season. Capture one clear note per hive and tag the exact frame or cells you want to re-check. Set reminders so time between visits becomes a tool, not guesswork.
Three-week brood checks and follow-ups from flagged issues
Revisit in about three weeks when you see changeovers or excess drones to confirm worker brood. If eggs weren’t present, schedule a timed re-check and mark that hive for priority work.
Super and excluder placement choices
Align placement with goals: put an excluder above a medium to allow brood expansion into it. Place the excluder between the brood box and medium if you want to take honey from the upper boxes only.
- Workflow: tag frames of interest, chart traffic and stores, and set three-week calendar checks.
- Resource rule: expect roughly one frame of pollen and one frame of honey to support each frame of brood.
- When to take honey: base the decision on store depth and season; document how you took honey and any effect on later visits.
- Log comb corrections and note if the back hive area stayed aligned on subsequent checks.
“Close the loop: tie aerial cues to in-box results so your seasonal workflow becomes repeatable and measurable.”
For monitoring methods and expansion workflows see monitoring abstracts and practical expansion tips.
Conclusion
Close the day by turning quick footage into a short to-do list that saves time at the frames. Use aerial scouting to flag which hive to open, then verify queen-right signals, brood continuity, and stores inside with calm, efficient handling. A little cool smoke, steady hands, and planned frame order protect cells and brood while you work.
Healthy hive markers are simple: neat single eggs, flat-capped worker brood, reasonable drone numbers in spring, and steady nectar conversion into honey. Rotate very dark brood comb and keep comb straight so checks take less time. Repeatable flights and clear notes build reliable comparisons from weeks ago to today and make beekeeping decisions easier.
By blending aerial cues with in-hive checks, you help bees thrive, support the queen’s lay, and steward stores into quality honey.
FAQ
What are the main benefits of using hive inspection drones for beekeepers?
Drones deliver fast, repeatable visual and thermal data that help spot problems like low stores, abnormal clustering, and heat loss without opening boxes every time. They reduce disturbance to colonies, speed up monitoring across multiple yards, and create image records for trend analysis.
How often should I fly a drone over my colonies?
Fly every one to two weeks during active seasons to match brood development cycles. This cadence helps track queen performance, nectar flow, and seasonal changes while giving time to act on any flagged issues before they escalate.
Can aerial inspections replace hands-on checks?
No. Aerial footage complements physical checks by highlighting where to focus. You still need periodic frame-level inspections for queen health, brood pattern, mite sampling, and hive manipulations like requeening or honey harvesting.
What visual and thermal capabilities should I look for in a drone?
Choose a drone with high-resolution RGB imaging, a thermal camera for detecting cold spots or brood heat, and programmable flight paths for repeatability. Stable gimbal mounting and good low-light performance improve comb-level detail.
Are there legal or safety concerns when flying over apiaries in the United States?
Yes. Follow FAA rules for small unmanned aircraft, respect no-fly zones, and maintain line of sight. Secure landowner permission, avoid crowding neighbors, and plan flights during calm weather to limit bee agitation and drone loss.
How should I prepare an apiary before a drone flight?
Clear the takeoff area, remove loose equipment, and avoid open feeders or honey supers that attract bees. Use a smoker and calm ground handling if you must open a hive after aerial scouting. Also check battery charge, GPS lock, and wind conditions.
What key behaviors and signs can I spot from the air?
Look for bearding, heavy entrance traffic, forager return rates, ventilation plumes, and unusual clustering. Thermal imaging can reveal brood heat patterns and cold or hot spots that indicate insulation or disease issues.
How do I identify brood health and queen status from footage?
Healthy brood appears as uniform cappings with compact patterning. Patchy or spotty brood can signal a failing queen, disease, or brood rhythm disruption. Regular imaging over weeks reveals whether patterns improve after interventions.
Can I detect swarming intent with aerial monitoring?
Yes. Increased bearding, pre-swarm clustering outside the entrance, and reduced forager return can be early signals. Combine visuals with calendar knowledge of spring cycles and take proactive steps like splits or super adjustments.
What issues do I need to watch for regarding drones and male bee populations?
Large numbers of males near entrances may indicate a seasonal spike or a weakened queen with poor sperm use. Persistent drone overabundance warrants a hands-on check for laying workers or queen problems and possible requeening.
How do aerial inspections help with comb and frame management?
Overflights show comb alignment through entrance patterns and top-cover visuals. Repeated imagery helps track cross-comb development and foundation needs so you can plan gentle nudges, foundation replacement, or controlled comb cycling at low-risk times.
What data practices turn footage into useful colony actions?
Log timestamps, flight path IDs, and hive coordinates with each capture. Compare images across three-week brood intervals to spot trends. Flag frames or boxes that need follow-up and prioritize ground checks based on severity and season.
How should weather and wind influence flight plans?
Avoid flights in winds above the drone’s rated limits, in rain, or during extreme heat. Calm mornings or late afternoons with stable air give best imaging and reduce bee agitation. Always check forecasts and have a rapid-recall plan for sudden gusts.
Is thermal imaging useful for detecting pests or diseases?
Thermal cameras can highlight unusual brood temperature variability that suggests stress or brood loss, but they cannot diagnose specific pests. Use thermal clues to prioritize physical sampling for Varroa, Nosema, or brood diseases.
What are best practices for documenting frames and changes over time?
Capture consistent angles and altitudes, label images with hive ID and date, and store files in a sortable archive. Use simple logs that note brood stage, stores, and flagged concerns so you can measure the impact of treatments or management actions.
How do I balance minimal disruption when coordinating drone work with ground inspections?
Fly first to identify targets, then approach those colonies calmly. Use a smoker sparingly and keep frame handling efficient. Limit open-hive time and restore frames in original order to reduce stress and maintain productivity.
Are foundationless frames compatible with aerial monitoring and data quality?
Foundationless frames offer natural comb but can vary in straightness and reflectivity, which affects visual interpretation. They work with aerial monitoring but may require closer ground verification for comb alignment and cell pattern assessments.
What immediate actions should follow if footage shows poor food stores?
Feed sugar syrup or fondant depending on season, reduce entrances if robbing risk exists, and plan a hands-on check for queen status and frame-level stores. Document responses and recheck in one to two weeks to confirm recovery.
How can I distinguish drones from workers and the queen in video footage?
Drones are bulkier with larger eyes and rounder abdomens; workers are smaller and more active. The queen moves with a distinct stride and longer abdomen; repeated imaging and slow-motion playback help confirm identities before any intervention.