This practical guide lays out field-tested tips for turning lawn into a resilient meadow that supports pollinators and wildlife.
Expect continuous blooms, habitat for bees, butterflies and beneficial insects, and long-term gains such as better stormwater handling and carbon storage. Dense native plants and warm-season grasses cut maintenance once the stand is established.
Designed for homeowners, land stewards, and designers, the steps de-risk projects from small garden plots to larger sites. Success begins with matching seed and plant choices to sun, soil, and drainage so plantings establish quickly and outcompete weeds.
Start small if needed, but aim for roughly 400 sq ft for good diversity and visual impact. A structure-first approach using grasses gives the meadow coherence in every season. The process spans years: strong first-year prep, a careful planting window, and light-touch management by season as the site matures.
Key Takeaways
- Field-tested tips will guide site prep, plant selection, and staging.
- Native species and grasses create seasonal structure and resilience.
- Start with realistic plot sizes; 400 sq ft is a practical target.
- Expect a multi-year arc with focused first-year actions.
- Light, timely management preserves benefits and lowers work long term.
Why Pollinator Meadows Matter for Habitat, Wildlife, and Your Land
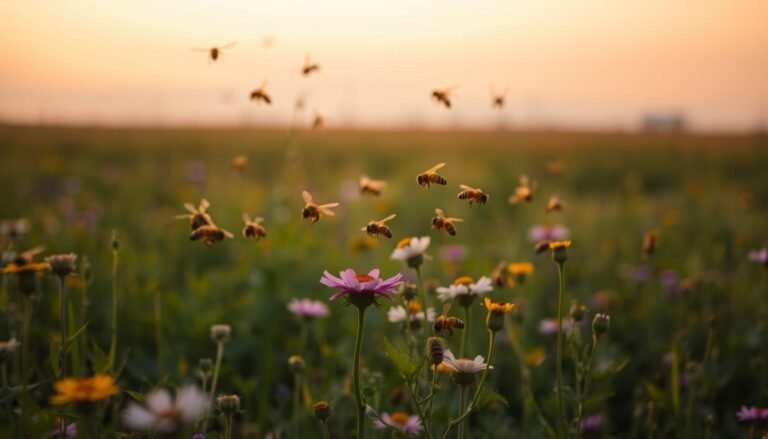
Dense native plantings knit together food, shelter, and nesting sites that sustain pollinators and broader wildlife throughout the year.
Flowers supply nectar and pollen, while stems and leaf litter offer nesting pockets and overwintering cover for insects and small animals. This layered habitat supports bees, butterflies, birds, bats, and even amphibians across the area.
Ecosystem services are tangible on residential land. Meadows improve stormwater infiltration and filter runoff, add organic matter that boosts soil and incremental carbon storage, and recycle nutrients as roots deepen over the year.
Once established, native grasses and plants form a dense sward that suppresses weeds. That reduces mowing, chemical inputs, and fuel use under simple management practices.
Meadows also strengthen food webs: seasonal blooms feed insects that then sustain birds, bats, and small mammals beyond the immediate plot. Even modest areas can connect across properties and amplify neighborhood biodiversity.
For regional planting suggestions and further resources, see this guide on native bee-friendly plants.
Define Your Meadow’s Purpose, Size, and Placement
Start by naming the primary function of the site. Clarify whether you want to boost pollinators, frame a view, add privacy, or cut mowing across the land. That choice shapes size, plant palette, and first-year management.
Choosing the right area and place
- Set the patch back from walkways and seating so tall stems won’t intrude.
- Reserve the sunniest, well-drained area for the densest flower-and-grass mix.
- Use transplants or plugs along visible edges for a neater look in a garden setting.
Balance beauty, biodiversity, and ease of care
Make the area at least 400 sq ft when possible; that size supports better species mix and reduces surprise weeds in the first year. Add framed edges—mown borders, low hedges, or paths—to signal care around an informal core.
Plan for access: water in dry time, mowing routes for early management, and sightlines toward neighbors. These practices cut maintenance and help pollinators thrive year after year.
Assess Site Conditions: Sun, Soil, Drainage, and Microclimates
Good plant choices begin with clear observation. Walk the area through a full day and note sun patterns, damp hollows, and spots that warm early in spring. These simple notes guide species and seed placement and set realistic management practices for the first years.
Simple soil checks that matter
Do a basic soil test for pH and organic matter. Many native wildflowers and grasses do best on lean soils, so low fertility can be an advantage. Resist adding heavy compost or nitrogen, which favors fast weeds over flowering species.
Reading wet, dry, sun, and shade
Map drainage and categorize zones as wet, medium, or dry. Note where water ponds after rain and where the ground stays dry. Check slope and wind exposure.
“Observe existing plants—grasses that colonize dry patches and sedges in wet areas tell the real story of the soil.”
| Site Feature | What to check | Planting guidance |
|---|---|---|
| Sun exposure | Hours of full sun; morning vs. afternoon shade | Full-sun species in longest-light zones; partial-shade mixes in filtered light |
| Soil fertility | pH and organic matter from test kit | Lean soils: wildflowers thrive; amend only when essential |
| Drainage | Infiltration test or test pit depth | Assign wet, medium, dry species to matching zones |
| Microclimates | Early spring warmth, frost pockets, wind | Use warm slopes for early bloomers; avoid frost pockets for tender plugs |
Plan seed and plug placement to match each micro-site. Document findings and note access for first-year management equipment. This makes later mowing and weed control predictable and protects pollinators during establishment.
Design First: Seeds, Plugs, or a Hybrid Planting Strategy
Choosing your installation method shapes cost, timing, and what pollinators see in year one. Decide early so ordering, staging, and management align with goals.

When plugs make sense
Use plugs for small garden plots where quick cover and precise spacing matter. Plugs speed visible growth and let you place individual plants for edges and paths.
Benefits: faster top growth, controlled patterns, and reduced uncertainty in the first year. Plan watering access and careful placement during dry time.
When seeds are best
Favor seeds for larger areas to cut cost and let plants sort themselves by micro-site. Seed mixes adapt to moisture and soil differences and yield more diverse stands over time.
Expect the seed process to show roots first; blooms often increase in year two and year three as plants establish.
Hybrid strategies and practical steps
Combine plugs and seeds: use transplants along entries and seed the bulk. This gives instant structure while stretching your budget and benefiting pollinators across the site.
“Match your installation choice to scale and management style; early planning reduces surprise work later.”
| Scale | Recommended method | Species count | Result timing |
|---|---|---|---|
| Small garden | Plugs or mix | 7–15 species | Visible in year one |
| Large area | Seeds | 15–25 species | Flowering ramps in years 2–3 |
| High-visibility edges | Plugs + seed backing | Mixed | Immediate structure, long-term diversity |
Document zones, mixes, and timelines so you can adapt management practices each year. Use regional native plants and trusted information sources when selecting seed and plug suppliers.
Grasses First: Building Structure with the Right Type and Ratio
Start by choosing grasses that act as the spine of the site. Grasses give year-round form, nesting cover, and shelter for pollinators. Their growth habit sets the pattern for plant diversity and management across each year.
Warm-season versus cool-season choices
Warm-season grasses (little bluestem, switchgrass, side-oats grama, prairie dropseed) bulk up in summer and form clumps that leave room for flowers. Cool-season types such as Virginia wild rye or nodding fescue green up early and add spring presence in colder regions.
Recommended species and placement
Favor clump-formers over mat-makers. Place taller, assertive species toward interior zones or edges that can take height. Keep shorter grasses near paths and borders.
Preventing grasses from overwhelming flowers
- Target 35–75% grasses in your mix to balance structure and floral abundance.
- Avoid aggressive, mat-forming cool-season types that smother forbs.
- Monitor composition each year and use timed mowing or selective thinning if grasses dominate.
| Topic | Recommendation | Why it matters |
|---|---|---|
| Warm-season species | Little bluestem, switchgrass, side-oats grama, prairie dropseed | Clump growth leaves space for flowering plants during summer peaks |
| Cool-season species | Virginia wild rye, nodding fescue | Early green-up and spring cover in colder climates |
| Mix ratio | 35%–75% grasses | Balances structure with floral diversity and pollinator resources |
| Management | Group heights, monitor, mow or thin as needed | Prevents dominance and maintains long-term diversity |
“Let grasses provide the scaffold; then use management practices to preserve flower-rich patches for pollinators.”
Choose Regional Native Flowering Species for Continuous Bloom
Choose a coordinated palette of local bloomers so nectar and larvae resources are steady from early spring through late fall.
Start by listing species that peak in different months. Aim for at least one or two plants in flower during each season so bees, butterflies, and other insects never face a forage gap.
Include varied flower shapes—composites, spikes, and umbels—to serve diverse pollinators and insect mouthparts.
Right-height mixes and placement
For suburban meadows, favor mid-height plants to prevent flopping and keep sightlines tidy.
Place taller species at borders or corners so they frame the site without overwhelming the core.
- Design for diversity: include larval host plants for butterflies as well as nectar sources.
- Check site fit: confirm sun, soil moisture, and drainage before finalizing species.
- Document bloom times and tweak mixes or add plugs where gaps appear in future years.
“Sustained bloom density matters more than single showy plants; continuous forage supports healthy pollinator populations.”
For regional guides and planting lists, consult this resource on native planting guides.
Seed Mixes and Species Selection for New England and Beyond
Choose seed and species that match your soil and sun for reliable establishment and seasonal flowers. Use regionally tested mixes in New England for predictable results on medium to dry soils with pH ≥5.5.
Key perennials for medium–dry sunny sites include common milkweed, coneflowers (purple and pale), black-eyed Susan, New England aster, smooth blue aster, stiff and showy goldenrod, wild bergamot, oxeye sunflower, foxglove beardtongue, and red columbine.
Include grasses for structure: Canada wild rye for early presence, little bluestem and Indian grass for summer form. Keep grass and wildflower seed packaged separately to control ratios at sowing.
Adjusting mixes for wet versus dry areas
For wetter pockets, swap in swamp-tolerant species: cardinal flower, blue vervain, Culver’s root, golden Alexanders, boneset, swamp milkweed, and Joe-Pye weed. These plants sustain pollinators late into the season.
“Combine asters, milkweeds, coneflowers, and goldenrods to ensure late-season forage critical to pollinators.”
| Condition | Recommended species | Role | Notes |
|---|---|---|---|
| Medium–dry, pH ≥5.5 | Milkweed, coneflowers, bergamot, asters | Continuous bloom, larval hosts | Seed rate ~0.5 lb/1000 sq ft; budget $60–$80 /1000 sq ft |
| Dry sunny zones | Little bluestem, Indian grass, coreopsis | Structure and drought resilience | Place clump-formers interior for shelter |
| Wet pockets | Cardinal flower, blue vervain, swamp milkweed | Moist-soil forage and habitat | Match species to drainage; avoid dry-site plants here |
| Seeding logistics | Separate grass & wildflower bags | Controlled distribution | Store seed cool if delaying spring planting |
Practical notes: seed mixes suggested by UNH perform well when matched to soil and drainage. Validate soil conditions before ordering and lean on regional information and suppliers for species proven across the region. For lists focused on honeybee-friendly choices, see this best plants guide.
Sourcing, Storing, and Budgeting Seeds and Plugs
Secure quality seed early to avoid substitutions and shortages. Order high-demand species well before planting time so suppliers don’t swap varieties. Ask for separate packaging of native grass and tiny wildflower seeds to control your blend at sowing.

Ordering and cold storage
Store wildflower seed refrigerated and keep grass seed cool and dry. Label containers with the receipt date and germination data. Use vendor resources and technical sheets to confirm provenance, germination rates, and species suitability for your site.
Budgeting and mix strategy
Expect custom mixes around $60–$80 per 1000 sq ft at ~0.5 lb/1000 sq ft. Balance plugs and seed spend by visibility zones: use plugs where immediate color and structure matter, seed for larger stretches.
| Need | What to check | Why it matters |
|---|---|---|
| Supplier info | Provenance, germination % | Ensures species perform in your area |
| Storage | Refrigerated for wildflowers | Maintains viability through the planting year |
| Budget | Cost per 1000 sq ft | Plan for reseed or plug infill in year one |
Management practices matter: keep an inventory, compare suppliers, and set aside funds for reseeding. These steps protect pollinators and improve long-term success.
Site Preparation Options: A Three-Year Success Mindset
Begin with a clear multi-year plan. The first year is about eliminating competing vegetation so later plantings can establish with less work and fewer surprises.
Smothering turf without tillage
For lawns, cover the area with 4–6 mil black plastic from mid-June through mid-September. This starves roots and rhizomes and often reveals a clean seedbed when removed.
Avoid tillage after smothering. Turning soil can bring buried weed seeds up where they will germinate and create extra management needs later in the year.
Cover crop tactics
Use summer buckwheat to outcompete weeds and give bees a quick forage source. Mow or roll buckwheat before it sets seed so residues break down and won’t add to the weed bank.
Plant oats for late-season cover; oats usually winter-kill, protecting soil and reducing spring work.
Herbicide cautions and solarization
If you choose herbicides, follow label directions, apply to actively growing plants, and never spray during bloom or when bees are present. Systemic, nonselective products work best on persistent growth.
Solarization with clear UV-resistant plastic can help in warm, sunny summers. Bury edges, repair tears promptly, and note that this method is less reliable in cool or cloudy climates.
Adopt careful scheduling and record results: note which practices give the cleanest seedbed with the least disturbance each year.
Practical checklist:
- Adopt a multi-year mindset and prioritize first-year weed control.
- Smother turf in summer, avoid tillage, and use cover crops tactically.
- Keep a clean perimeter around project areas to limit reinvasion.
- Plan timing for each step to fit your regional summer window and document progress.
For a field-tested lawn-replacement approach, see this guide on rip out your lawn for practical timing and methods.
Starting Conditions Guide: Turf, Cultivated Soil, Forest Edge, and Disturbed Areas
Not all sites are equal; an honest diagnosis of soil and weeds guides the right management steps. Take time to map sun, drainage, and recent disturbance for each area before any prep work. Clear records cut surprises during the first year and beyond.
Rough lawn conversion
Scalp turf and smother with black plastic mid‑June through mid‑September to kill persistent grasses. Sod removal is an option where access is good.
Avoid tilling after smothering. Turning soil brings buried seed up and invites fresh weed flushes.
Cultivated ground and seed banks
Cultivated fields hold large weed seed banks. Use repeated shallow cultivation, competitive cover crops, or timely herbicide cycles to exhaust seedlings.
Do not re‑till after herbicide application. Leaving dormant seed buried reduces new outbreaks and lowers management work next year.
Woodland edges and low pH soils
Forest soils often read acidic. Test pH and consider lime only if below 5.5. Keep disturbance minimal to limit weed recruitment and protect woodland ecology.
Disturbed or fill areas
Test texture, pH, nutrients, and organic matter before selecting plants. Run trial pots with site soil to preview weed pressure and drainage issues.
Match species to observed conditions and sequence steps so each area moves into a firm, clean seedbed for broadcasting or plugs.
“Diagnose starting conditions and match preparation to the site; it saves time and improves survival.”
| Starting area | Primary risk | Prep tactic | Key note |
|---|---|---|---|
| Rough lawn | Persistent grass | Scalp + smother or sod removal | Avoid tillage after smothering |
| Cultivated field | Large weed seed bank | Shallow cultivation cycles or cover crops | Keep records; avoid re‑till after herbicide |
| Forest edge | Low pH, shade | Test pH; minimal disturbance | Add lime only if pH <5.5 |
| Construction/fill | Unknown compaction, contaminants | Full soil testing, trial pots | Match species to observed drainage |
Practical checklist: diagnose each site, sequence work for a clean seedbed, protect perimeters from reinvasion, and keep clear notes. Good preparation reduces year‑one weeds and helps pollinators establish with less follow‑up.
Planting Windows and Methods: Fall Dormant Seeding or Early Spring
Plan a clear calendar so sowing happens when weather, soil, and seed biology line up. Proper timing cuts weed pressure and helps pollinators by year two and beyond.
Regional timing and storage
Choose fall dormant seeding for northern climates. In New England, seed between late September and early December, with mid- to late-October often best.
If you miss fall, refrigerate seeds and sow as early in spring as possible. Track time and local freeze dates so emergence matches the season.
Broadcasting and soil contact
Prepare a clean, firm seedbed. Avoid fluffy or freshly tilled soil that dries fast.
- Mix small amounts of vermiculite or sand as a carrier (0.5–1 gallon per 500 sq ft).
- Broadcast by hand in two perpendicular passes for even coverage.
- Press seed gently with a roller or foot traffic; do not bury most wildflower seed deeply.
| Window | Advantage | Action |
|---|---|---|
| Fall | Winter stratification | Target mid‑Oct in cold areas |
| Early spring | Workable soils, fewer rodents | Sow ASAP after thaw |
| Plugs | Immediate structure | Plant when soil is workable and water in |
Practical step: calibrate rates, wear gloves to avoid sticking, and plan first-year management to protect sprouts while limiting annual weeds.
Nest Sites, Bare Soil, and Meadow Edge Features for Bees and Butterflies
Small structural elements at the meadow edge make a big difference for nesting insects and seasonal shelter. Design nesting features at the same time you plan flower patches so resources sit close together.
Incorporating stems, dead wood, leaf litter, and safe bee access
Maintain small patches of bare soil for ground-nesting bees. Place them in warm, well-drained spots away from heavy foot traffic.
Keep some standing stems and dead wood. Many solitary bee species use pithy centers or cavities for nests.
Leave leaf litter in sheltered corners to shelter overwintering butterflies and pupae. Add shallow damp spots or a small water source for mineral sipping.
Avoid pesticide use near the meadow; if treatment is necessary, choose targeted methods when foraging is low.
- Enhance edges: brush piles, stone walls, and woodland margins expand nesting options.
- Mow in late winter so stems remain through fall and early winter for cover.
- Coordinate with neighbors to reduce chemical drift and protect local pollinators.
- Plant larval host plants so butterflies can complete life cycles on-site.
- Monitor nesting areas each year and adjust management to keep features productive without becoming a nuisance.
| Feature | Benefit | Placement |
|---|---|---|
| Bare soil patches | Ground-nesting bee nests | Sunny, compacted spots, 1–4 sq ft each |
| Standing stems & dead wood | Cavity nesting and shelter | Leave clusters along edges and less-mown zones |
| Leaf litter & brush | Overwintering insects and pupae | Sheltered corners or under hedgerows |
| Shallow water/damp soil | Mineral access for bees and butterflies | Near but not in heavy traffic; change water regularly |
Maintenance by Season and Year: From Establishment to Low-Input Care
Begin with focused first-year work, then ease into lower-input routines that favor native plants and pollinators. Early choices set the long-term trajectory for diversity and structure.
Year one: protect roots, mow high, suppress weeds
Mow at 6–8 inches when annual weeds threaten to shade seedlings. This keeps young perennials from being overwhelmed while they put energy into roots.
Expect modest flowering the first year; most growth is belowground. Prioritize weed suppression over immediate looks.
Years two to three: thin aggressive grasses and time the winter cut
Review composition in year two and three. If grasses begin to crowd forbs, thin clumps by clipping or selective removal.
Schedule a single late‑winter mow to clear dead stems and thatch. This preserves habitat through fall and retains structure for nesting insects.
Long-term practices: promote diversity and seasonal succession
Avoid fertilizing; low fertility favors natives over fast weeds. Spot-manage invasives by cutting or hand-pulling before seed set to limit disturbance.
Use selective plug additions to fill gaps and lengthen bloom across the season. Monitor across seasons and adjust management time and intensity based on observed shifts.
“Record what you do each year — timing, tools, and outcomes — so you build a predictable, low‑input routine.”
| Phase | Key action | Why it matters |
|---|---|---|
| Year 1 | Mow 6–8 in; suppress annual weeds | Protects slow roots and allows perennials to establish |
| Years 2–3 | Thin aggressive grasses; evaluate composition | Maintains balance between structure and flowers |
| Long term | Late‑winter mow; spot weed control; plug additions | Supports continuous blooms and pollinator habitat |
For deeper reading on planting and long-term care, see this collection of beekeeping resources that pairs well with habitat management guidance.
Troubleshooting Weeds, Flopping, and Imbalance Between Grasses and Forbs
A few tactical moves—spot plugs, timely cuts, and edge plantings—restore structure without heavy disturbance.
Decide quickly whether the stand needs intervention or more time. In year one, many annual weeds fade as perennials establish. Let some patches settle if seedlings look healthy.
When you intervene, act locally. Cut or pull aggressive weed growth before seed set. This limits spread and avoids broad disturbance that invites more weed pressure.
When to step in and when to wait
If tall stems flop near paths, increase density or move taller species to edges and interior zones. Dense planting suppresses many weeds and reduces flopping.
Strategic plug additions and edge plantings
Add plugs in thin areas after the main growing season. Use plugs at borders for instant structure and to protect pollinators by extending bloom windows.
- Distinguish transient annuals from persistent perennials; pull persistent weed roots early.
- Correct grass dominance by reducing thatch, clipping clumps, or adding forb plugs in the fall.
- Use mowing tactically to knock back annual waves without harming established natives.
| Issue | Quick action | Why it works |
|---|---|---|
| Annual weeds | Spot pull or cut before seed | Stops seed bank growth |
| Flopping tall plants | Increase density, relocate tall types | Improves stem support |
| Grass dominance | Thin thatch, clip, add forb plugs | Rebalances flowers and structure |
Watch the site across the season. Many imbalances settle by year two as perennials take hold. Keep brief notes on each intervention so future management choices improve with time.
“Treat problems in small patches; targeted work preserves habitat and keeps long-term maintenance efficient.”
35. how to build a pollinator meadow: Expert Tips, Resources, and Regional Guides
Lean on vetted regional guides and local networks to pick species and management practices that suit your climate and soil. This short step saves time, cuts trial-and-error, and improves outcomes by year one and beyond.
Pollinator Partnership garden cards and regional information
Consult the Pollinator Partnership garden cards for region-specific lists, design notes, and planting windows across major U.S. areas. These cards offer practical information for beginners and seasoned stewards alike.
Community connections: native plant societies and seed suppliers
Tap local groups for vetted seed sources, seasonal workshops, and peer-tested practices. Native plant societies and extension services help verify species choices and local management tactics.
- Consult garden cards and extension resources for New England and other regions.
- Join community seed swaps and reputable suppliers to source adapted seed and plugs.
- Share information with neighbors to expand corridors and support animals and insects across the land.
| Resource type | What it offers | Why it matters |
|---|---|---|
| Regional guides | Plant lists, timing, design tips | Reduces mistakes and speeds establishment |
| Local societies | Workshops, seed sources, advice | Practical experience for your area |
| Municipal programs | Tools, funding, volunteer help | Scale projects and coordinate management |
“Use credible sources and community experts to refine species mixes and management plans before you order or plant.”
Build a yearly resource list—nurseries, seed vendors, ecologists, and volunteer groups—and update it each year. Track which resources give the best, actionable information and lean on them as your site matures.
Conclusion
Small, consistent actions in the first year set the stage for a healthy, resilient plant community.
Define purpose and place, assess soil and sun, choose suitable species and seeds, prepare the site well, and plant in the right window. These steps form a clear process that rewards patience.
Success is cumulative: careful first-year work reduces long-term management and increases diversity and pollinators across seasons.
Use regional information and local groups when selecting mixes. Finalize your plan, order materials, schedule prep and planting, and set a simple management calendar for each year.
Start now—align actions with the coming planting time and watch soil, plants, and wildlife improve year after year.
FAQ
What size area works best for a meadow in a suburban yard?
Aim for at least 250–500 square feet for a visible, resilient planting, though pockets as small as 100 square feet support pollinators. Larger blocks allow more diverse mixes and reduce edge effects from lawns and weeds. Consider sightlines, mower access, and how the space fits walkways and views when choosing placement.
When is the best time to sow seed in New England?
Late fall dormant seeding is often best in the Northeast because freeze‑thaw cycles improve soil contact and stratify many native wildflower seeds. Early spring works for some species but may increase weed competition. Choose timing based on local frost dates and the species in your mix.
Should I use seed, plugs, or both?
Use plugs for quick cover, structured species, and small gardens. Seed is cost‑effective for large areas and lets plants sort by microclimate. A hybrid approach—seeding the bulk and planting plugs for key perennials—gives faster structure and diversity while controlling costs.
How do I prepare turf without tilling?
Smothering turf with layered cardboard and wood chips, repeated mowing and herbicide‑free solarization, or using a cover crop like buckwheat then killing it back can reduce grasses. Persistence over a season or two is often needed to lower the weed seed bank before planting.
What soil conditions favor native wildflowers over aggressive grasses?
Many native wildflowers thrive on lower‑fertility, well‑drained soils where grasses don’t outcompete them. Test pH and organic matter; avoid heavy fertilization. In wet or high‑nutrient soils, choose species adapted to those conditions or adjust drainage rather than adding fertilizer that favors grasses.
Which grasses provide good structure without overwhelming forbs?
Warm‑season and clumping native grasses like little bluestem, switchgrass, and prairie dropseed give vertical structure and seasonal rhythm without aggressive spread. Keep grass percentage moderate in mixes and thin dense grass stands during years two to three if they dominate flowers.
How do I ensure continuous bloom from spring through fall?
Combine early, mid, and late‑season native perennials and shrubs. Include spring bloomers like salvia and golden alexander, summer staples like coneflowers and milkweed, and fall asters and goldenrods. Planting a mix of heights and bloom times meets the needs of bees, butterflies, and other insects across seasons.
How much seed or plug stock will I need and what will it cost?
Seed rates vary: wildflower mixes often recommend 1–3 pounds per 1,000 square feet; grasses are usually higher. Plugs might be 10–20 per 10 square feet for focal areas. Costs depend on species and source; order early, separate grass and wildflower seed if requested, and budget for replacement plugs or overseeding in year two.
How do I deal with common weeds during establishment?
Mow or string‑trim tall annual weeds before they set seed, hand‑pull invasive perennials, and use targeted spot treatments if necessary—avoiding broad applications during bloom. Cover crops or mulch can suppress weeds pre‑planting. Patience matters: many weeds subside as the meadow matures over two to three years.
What maintenance is needed in year one versus year three and beyond?
Year one focuses on weed control, occasional mowing to 6–12 inches to reduce annuals, and patience with slow root development. Years two and three may require thinning aggressive grasses, strategic plug additions, and a late‑winter mow or burn where allowed. Long‑term care is low‑input: periodic mowing, leaving stems for winter habitat, and spot replacements.
How do I create nesting sites for bees and overwintering habitat for insects?
Leave patches of bare, well‑drained soil and south‑facing edges for ground‑nesting bees. Retain stems, dead wood, leaf litter, and brush piles for cavity nesters and overwintering butterflies. Avoid fall cleanups that remove stems and seedheads; they provide shelter and food for wildlife.
Can I include milkweed and asters without attracting too many pests?
Yes. Milkweed is essential for monarch butterflies, and asters support late‑season pollinators. Monitor for common pests like aphids on milkweed and use manual removal or biological controls when needed. Preserve beneficial insect habitat to sustain natural pest predators.
How should I adjust mixes for wet vs. dry micro‑sites?
Select moisture‑appropriate species: choose swamp milkweed, joe‑pye weed, and cardinal flower for wetter pockets; pick drought‑tolerant blazing star, coneflower, and coreopsis for dry, sunny spots. Mapping microclimates before planting helps you place species where they’ll thrive.
Where can I find reputable seed and regional planting guides?
Use trusted suppliers like Prairie Moon, Native Plant Trust, and American Meadows, and consult resources from Pollinator Partnership and local native plant societies. Regional extension services and university guides offer climate‑specific advice and planting calendars.
Is herbicide use ever acceptable when establishing a meadow?
Use herbicides cautiously. Spot‑treat persistent, invasive perennials before seeding, and avoid broad applications during bloom or when pollinators are active. Follow label directions and consider nonchemical alternatives first to protect bees and beneficial insects.
How long until the meadow reaches full diversity and supports abundant wildlife?
Expect two to five years for plant communities to establish and for insect and bird use to reach rich levels. Early years focus on establishing structure and reducing weeds. Diversity and resilience increase as roots deepen and plants self‑seed and natural succession occurs.