Good ventilation is the first step in protecting bee health and improving colony resilience. Targeted airflow reduces internal dampness that can encourage parasites and mold.
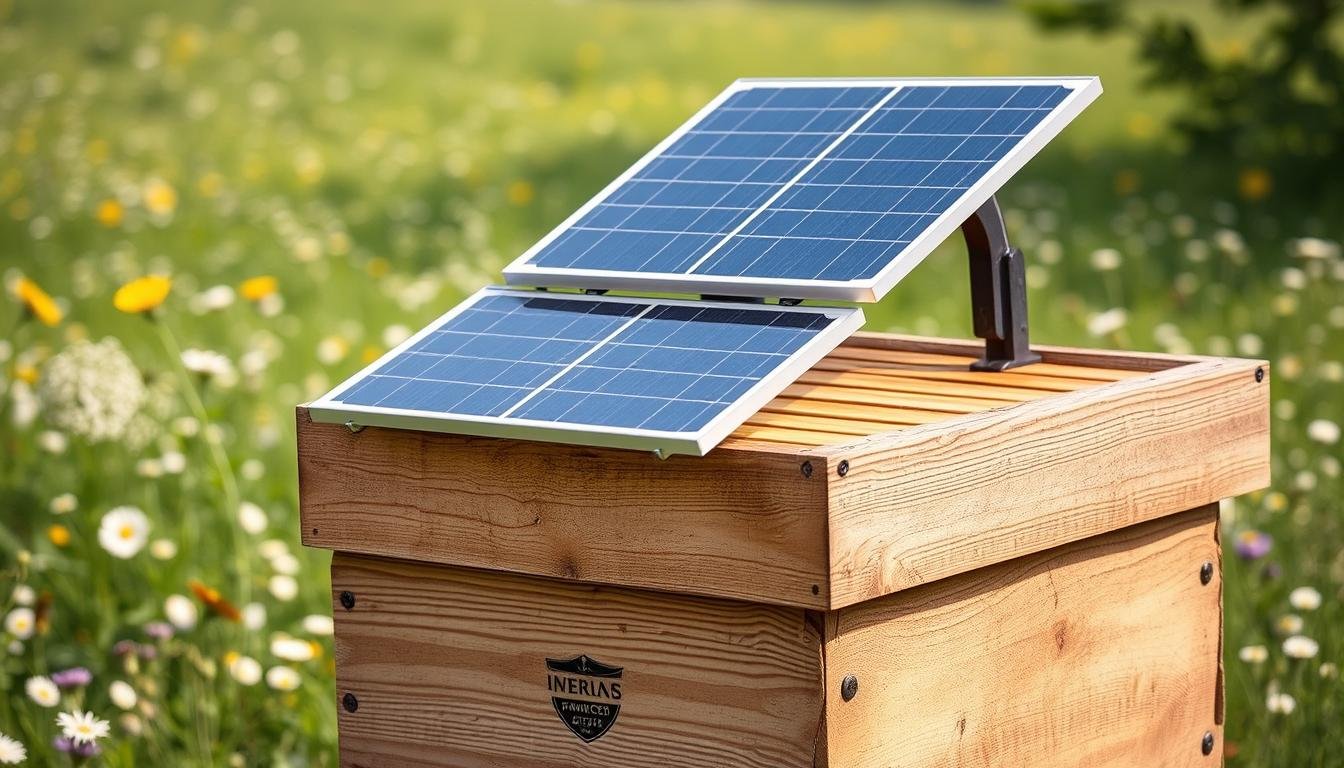
Small, low-draw fans run by solar power use the sun to refresh air without cords or fuel. At Little Creek Bee Ranch, open screened bottom boards run year-round to keep moisture low and air moving.
Better airflow frees mature workers from constant fanning so they can forage more. That shift supports stronger colonies and can increase honey production over time.
Practical management matters: place units in full sun, use screened spacers for protection, and seasonally install or remove equipment as local conditions dictate. For a detailed technical overview, see this comprehensive guide to beehive ventilation.
Key Takeaways
- Moisture control is vital to reduce parasite pressure and mold.
- Solar fans refresh air without fuel and support the environment.
- Increased airflow lets workers forage more, boosting honey and colony vitality.
- Full sun placement and seasonal timing improve results for U.S. beekeepers.
- Ventilation is a management tool that complements long-term colony care.
Understanding Solar-powered hive ventilators and why they matter now
A sun-driven fan system creates a steady, gentle draft that moves moist air up and out while drawing cooler air in through an open screened bottom. This continuous airflow stabilizes temperature and humidity so brood and stores face fewer sudden swings.
How solar ventilation moves moist air out and fresh air in
Solar-driven fans produce slight negative pressure that pulls damp air upward and exhausts it through the top outlet. Cooler, fresher air then enters through screened bottoms, creating a reliable upward column of exchange used 24/7/365 at Little Creek Bee Ranch.
Open screened bottom boards and airflow synergy
A 1.5-inch screened spacer beneath the fan protects bees from the case while letting the colony adjust flow with propolis. This pairing reduces chronic fanning duty for mature workers, freeing them to forage more—an important pathway to increased honey and colony momentum.
“Less moisture means fewer Varroa-related issues; these mites prefer damp conditions.”
- Continuous, gentle ventilation smooths humidity swings.
- Small panels and matched low-draw fans keep bees calm.
- The system supports, not replaces, good mite and nutrition management.
Key benefits for bee health, productivity, and the environment
Reducing internal dampness leads to measurable gains in colony resilience and overall bee health.

Lower moisture, fewer Varroa mite issues, and stronger colonies
Little Creek Bee Ranch reports that drier interiors correlate with fewer Varroa-related problems and stronger colony growth.
Lower humidity reduces the persistence of mites and pathogens. That helps protect brood and stored food from spoilage and mold.
Freeing workers from fanning to boost honey production
Extra airflow means fewer workers fanning. More foragers return with nectar, which raises honey production and seasonal momentum.
Continuous screened bottom board use supports this steady exchange and keeps the colony focused on growth.
Reducing energy consumption and supporting environmental conservation
Using small, sun-driven systems to power low-draw fans cuts reliance on external power sources. This lowers energy consumption at the apiary level.
Environmental gains include reduced grid use and a smaller carbon footprint while improving internal conditions that favor consistent brood development.
- Drier interiors reduce moisture-driven issues and support bee health.
- Less fanning labor reallocates effort to foraging and honey gains.
- Sustained airflow evens humidity near brood and stores, lowering stress.
- Solar energy limits fuel or grid dependence and trims energy consumption.
| Benefit | Colony Impact | Energy/Env. | Practical note |
|---|---|---|---|
| Lower moisture | Fewer mites, healthier brood | Minimal energy use | Track humidity after install |
| More foraging | Higher honey output | No extra grid load | Keep screened bottom in place |
| Stable humidity | Less brood stress | Reduced dehumidifier need | Monitor colony strength |
| Lower spoilage | Better food stores | Smaller carbon footprint | Combine with timely management |
To compare placement and system types, see our short guide on horizontal hive setups and how ventilation complements other management steps.
Solar-powered hive ventilators vs. solar hive heaters: when to use each
Deciding between airflow and warmth depends on your locale, season, and colony needs.
solar ventilation excels in damp, humid seasons by moving moist air and preventing condensation. Use it in rainy months or where colonies show recurring dampness. Ventilation also helps with summer cooling so bees can focus on foraging and honey production.
Moisture control and summer cooling versus winter warming
Solar-powered heating steps in for prolonged freezes or extreme cold. Passive collectors, heating pads, and small solar heaters provide steady, gentle warmth that sustains brood without heavy grid use.
Hybrid strategies for year-round hive temperature stability
Many beekeepers combine both approaches. Run airflow through warm months, then switch or supplement with solar-powered heating in winter to stabilize hive temperatures.
“Match heating elements and controls to colony size and climate to avoid overheating.”
| Approach | Best use | Practical note |
|---|---|---|
| Ventilation | Humidity, summer cooling | Tip panels back or pause fans in extreme heat |
| Heating pads | Cold snaps, winter | Use thermostats; monitor power draw |
| Hybrid | Year-round stability | Seasonal switch aligns with nectar flows |
How Solar-powered hive ventilators work: components and system design
A well-matched panel and fan pair delivers gentle, continuous exchange without startling the colony.

Solar panels, low-draw fans, and screened spacers
Core hardware is simple: compact solar panels feed a tested low-draw computer case fan mounted above a 1.5-inch screened spacer. The spacer keeps bees off the fan while letting the colony propolize the screen to fine-tune airflow.
Not just any fan will work; units must be airflow-tested so the colony stays calm and internal humidity moves down.
Panel placement, full sun exposure, and seasonal tilt
Place panels in full sun with minimal evening shade. Adjustable mounts and seasonal tilt improve daily output and match changing sun angles.
Optional battery storage and MPPT charge control
For cloudy stretches, add a small battery and an MPPT charge controller. MPPTs increase charging efficiency and protect battery health; common choices include lead-acid or LiFePO4 packs.
- Durable monocrystalline panels with tempered glass and aluminum frames last in the field.
- Good wire management and weatherproof connectors increase reliability.
- Simple checks—listen for fan spin, feel airflow, and monitor moisture—confirm operation.
| Component | Role | Best practice | Notes |
|---|---|---|---|
| Solar panels | Power source | Full sun, tilted mounts | Monocrystalline, durable frame |
| Low-draw fan | Move moist air | Use airflow-tested case fans | Match fan to panel output |
| Screened spacer | Protects bees | 1.5-inch spacer | Allows propolizing to regulate flow |
| Battery & MPPT | Extend run-time | Use MPPT and appropriate battery | Useful in low-sun periods |
“Component matching and durable mounts make the difference between a working unit and frequent repairs.”
Remember: ventilation systems complement nutrition, mite control, and population management—this hardware supports good husbandry, not replaces it.
Choosing the right ventilation system for your climate and apiary
Picking the correct system depends on local weather, hive layout, and how you plan to manage equipment through the seasons.
U.S. regional considerations: heat, humidity, and extreme cold
Humid Southeast sites usually benefit most from continuous airflow to cut interior moisture. Arid Southwest yards pair airflow with shade strategies to prevent overheating. In Northern states, a hybrid approach—airflow in warm months and heating systems in winter—handles extremes and protects hive temperatures.
Panel wattage, airflow rates, and hive configurations
Size panels and fans to match daily sun and hive count. Use adjustable mounts and south-facing tilt so panels deliver steady output. Add batteries (lead-acid or LiFePO4) when cloudy stretches threaten operation.
- Single brood boxes with queen excluders work well with ventilation if airflow paths don’t conflict with containment.
- Scale wattage to run tested low-draw fans for all running hours you expect during peak sun.
- Choose systems beekeepers maintain easily: simple mounts, accessible wiring, and clear airflow paths save time.
Start with a pilot on a few hives to validate airflow, monitor hive temperatures and honey production, and then scale. For suggested configurations and a technical diagram, see a practical setup guide at hive ventilation configuration.
Installation and management best practices
A reliable setup begins with site selection that maximizes uninterrupted sun and keeps equipment out of flight lanes. Choose spots with full sun from mid-morning to late afternoon and avoid evening shade that cuts panel output. Keep mounts away from hive entrances so bees have clear flight paths during inspections.
Spacer screens and mounting details
Install a 1.5-inch screened spacer between the fan housing and the hive to keep bees off the fan while letting colonies modulate flow with propolis. Use stainless mesh with frames sized to standard hive dimensions.
Secure mounts with corrosion-resistant fasteners, weatherproof wiring, and strain relief. Test fan spin and air movement after wiring to confirm reliable operation.
Seasonal operations and extreme heat protocol
Install units in spring (late April is common) and remove them mid-September in many U.S. operations. Adjust tilt for summer sun; tip panels back or unplug fans in extreme heat to avoid overheating the colony.
Use solar panels with adjustable mounts to capture peak sun and reduce the need for battery storage. Add MPPT controllers and a small battery when your site has frequent clouds or intermittent sun.
Monitoring and ongoing management
Track hive temperature and humidity with in-hive sensors to compare before-and-after baselines. Document simple checks each time you visit: fan sound, felt airflow, and debris removal.
Good management requires careful review: check data monthly, adjust tilt seasonally, and scale installations with repeatable spacer and mount angles to streamline work across multiple hives and colonies.
Costs, ROI, and sustainability of solar ventilation in the United States
Investing in small solar setups often pays back faster than many beekeepers expect.
Upfront versus long-term savings: Typical professional operations report payback in 3–5 years when moving key apiary loads to solar power. Federal tax credits and accelerated depreciation can lower net cost by 30–50%, shrinking effective energy costs and freeing budget for colony care.
Durability and low upkeep: Quality panels carry 25-year performance warranties and require minimal maintenance. Batteries (lead-acid or LiFePO4) add autonomy during cloudy stretches and smooth output for continuous airflow.
Leveraging incentives and building resilient systems
Solar systems help stabilize budgets by cutting generator hours and avoiding fuel spikes. They also reduce energy consumption and lower emissions—about 1.5 tons of CO2 saved per commercial yard annually.
| Item | Impact | Practical tip | Benefit |
|---|---|---|---|
| Panels & mounts | Long life, low upkeep | Choose durable monocrystalline | Lower ongoing costs |
| Battery storage | Autonomy in clouds | Right-size capacity | Reliable airflow |
| Incentives | Lower net cost | Check federal and state programs | Faster ROI |
| Modular design | Scale to yards | Add units as needed | Easy growth |
Practical note: Track performance and maintenance data to validate ROI, protect honey production, and support long-term environmental conservation goals.
Conclusion
Practical ventilation and targeted solar heating together keep internal conditions steady across seasons.
Use solar panels in full sun, add a 1.5-inch spacer screen, and run screened bottoms year-round. Turn units on late April and remove or pause by mid‑September; tip panels or pause fans in extreme heat.
Ventilation moves moist air out and brings fresh air in, freeing workers to forage and boost honey production. For winter, choose modest heating systems or heating methods to hold hive temperatures without relying on the grid.
These systems help reduce energy use and support environmental conservation. Properly sized panels and matched hardware require minimal checks and let beekeepers maintain steady, stable hive conditions year after year.
Takeaway: plan sites, pick components, and schedule installs before peak season to protect colonies and improve returns.
FAQ
What are the main benefits of using solar-powered ventilation for bee colonies?
Using solar-powered ventilation helps control moisture, stabilizes internal temperatures, and reduces stress on colonies. That leads to fewer mold and disease issues, can lower Varroa mite pressures indirectly by improving hive health, and frees worker bees from excessive fanning so they can focus on brood care and honey production. It also reduces reliance on grid electricity and supports environmental conservation.
How does a solar ventilation system move moist air out and bring fresh air in?
A small photovoltaic panel powers a low-draw fan that pulls humid air out of the top of the colony while drawing drier outside air through lower entrances or screened spacers. This continuous airflow reduces condensation and creates a more stable microclimate inside the colony without disturbing bee behavior.
Do screened bottom boards and spacer screens work with a solar system?
Yes. Open screened bottom boards complement powered ventilation by allowing incoming air to flow up through frames and exit at the top. Spacer screens protect bees from the fan inlet and create controlled gaps for airflow, improving effectiveness while keeping bees safe.
When should beekeepers choose ventilation over heating systems?
Ventilation best addresses moisture and summer heat issues, while heating systems target extreme cold and overwinter survival. In mild to moderate climates, ventilation often offers greater year-round benefits. In harsh winters, consider hybrid strategies that combine ventilation with insulated wraps or low-level supplemental heat when necessary.
What components make up a typical solar ventilation system?
A typical setup includes a small solar panel sized for your region, a low-current fan or blower, optional MPPT or PWM charge controller, and optional battery storage for extended cloudy periods. Spacer screens and mounting hardware complete the system to ensure safe, effective airflow.
How should panels be placed and angled for best performance?
Mount panels in full sun exposure, ideally on the hive roof or a nearby pole. In the U.S., tilt to match seasonal solar angles—steeper in winter, flatter in summer—to maximize output. Avoid evening shade from trees or structures to keep afternoon charging consistent.
Is battery storage required for reliable ventilation?
Not always. In sunny regions, panels can directly power fans during daylight. Battery storage or small capacitors become useful in high-latitude locations, during extended cloudy spells, or when night airflow is needed. Use MPPT charge control when adding batteries for efficiency.
How do I size panel wattage and airflow rates for different hive configurations?
Choose panel wattage based on regional insolation and desired fan runtime. Low-power fans (1–5 W) suffice for single brood boxes; larger or multiple boxes may need higher airflow or multiple fans. Match airflow rates to colony size and local humidity—start conservatively and monitor results.
What regional factors in the U.S. affect system choice?
Heat, humidity, and extreme cold determine needs. Southern humid regions benefit most from moisture control and higher airflow. Northern cold climates require careful balance to avoid chilling brood while preventing condensation. Local forage cycles and colony strength also affect system selection.
How do I install and manage a ventilation system safely?
Select a sunny site, secure panels, and protect fan inlets with spacer screens. Monitor hive temperature and humidity after installation and adjust panel angle or fan placement as needed. Remove or cover panels in severe weather if warranted and perform routine checks on wiring and fasteners.
When should I install or remove the system during the year?
Install in spring as colonies build and humidity rises, and keep systems active through summer. In fall, evaluate colony needs—reduce or remove active fans before deep winter if they risk chilling brood. In mixed climates, tilting panels or adding temporary insulation can extend useful periods.
What are typical costs and the expected return on investment?
Upfront costs vary by components and scale but remain modest compared with hive replacements or disease losses. Savings come from healthier colonies, higher honey yields, and lower energy use. Leveraging local solar incentives and choosing low-maintenance components improves ROI over several seasons.
Can powered ventilation reduce Varroa mite problems?
Indirectly. By lowering moisture and improving colony strength, ventilation creates conditions less favorable to secondary diseases that weaken bees. Stronger colonies tolerate Varroa better and respond more effectively to integrated mite-management practices, though ventilation is not a standalone Varroa control.
Will adding powered ventilation disturb bee behavior or robbing defenses?
Properly installed systems minimize disturbance. Use low-noise fans, shield inlets with spacer screens, and maintain normal entrance sizes. When mounted discreetly and run at gentle airflow rates, colonies typically acclimate without increased robbing risk or behavioral disruption.
Are there maintenance needs for panels and fans?
Maintenance is minimal: keep panels clean and free of debris, check electrical connections seasonally, and inspect fan housings and screens. Replace batteries per manufacturer guidance if used. Regular visual checks ensure long-term reliability with little time investment.