What if you could protect your home and help a swarm at the same time?
This friendly guide shows a humane method to move bees from walls, soffits, or chimneys without needless harm. A typical honey bees swarm can number 5,000 to 20,000 and is often calm when clustered.
Killing a colony in place can cause sticky leaks, bad odors, and hazardous waste when pesticides are used. Licensed, humane bee removal with a beekeeper and, when needed, contractor support is the safer path for your family and property.
You’ll get a clear process that covers timing, safety gear, access, collection, and cleanup in the area. Learn when to act at dawn or dusk, when to wait, and when to call professionals for structure work.
After relocation, the hive should move at least 3 miles and you should seal pencil-sized entry points to keep scouts from returning. This section sets the stage for step-by-step guidance that protects both your home and the colony.
Key Takeaways
- Humane removal protects your home and the colony.
- Swarms of 5,000–20,000 are often docile when clustered.
- Timing matters: dawn/dusk for calm, midday for hot colonies.
- Licensed professionals and beekeepers handle complex access and removal.
- Seal entry points and move the hive 3+ miles after relocation.
Understand Bee Behavior Before You Begin
Read the signs first — observation informs a safer, low‑stress removal process.
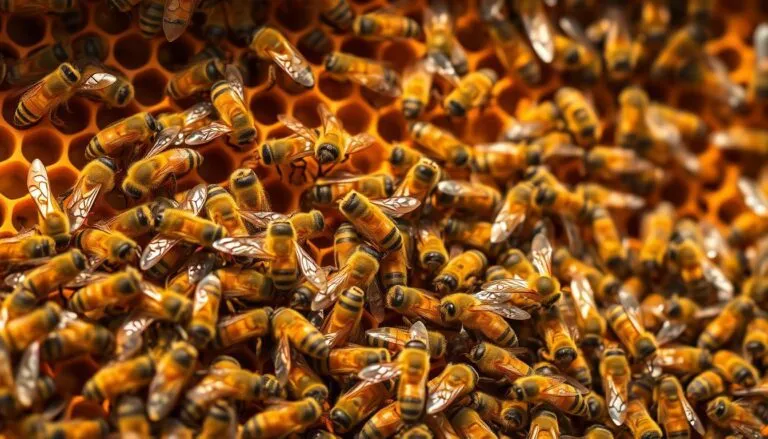
Start by telling a transient swarm from an established colony. A flying cloud that clusters on a branch is usually a temporary swarm. Those clusters are often calm and easier to move with fewer stings.
Swarm vs. established colony
An established hive with brood or limited food defends aggressively. Honey bees in a cavity with stored honey and young will guard their entrance.
When bees are calm — and when they are not
Scout activity tells you a lot: many scouts visiting one spot signals a nesting choice. During strong nectar flow or warm weather, bees tend to be gentler. Midday, hot colonies have many foragers out; mornings and evenings are best for calm clusters.
“Identify what you’re dealing with first — the right process starts with this decision.”
- Keep people and pets away from active areas to reduce risk.
- Call professionals if behavior seems unusually defensive or erratic.
Identify What You’re Dealing With: Honey Bees, Bumblebees, or Wasps
Before you act, learn the quick visual clues that separate harmless clusters from dangerous nests.
Key visual and behavior cues
Look for body shape and hair. Honey bees are golden-brown and slightly hairy with pollen baskets on their legs. Bumblebees are larger, rounder, and very fuzzy. Wasps and yellowjackets are sleek, less hairy, and often more aggressive.
Swarm cluster vs. cavity nesting
A clustered swarm looks like a “fuzzy glob” hanging from a branch or wall. These bee swarms are usually calm and easier to collect.
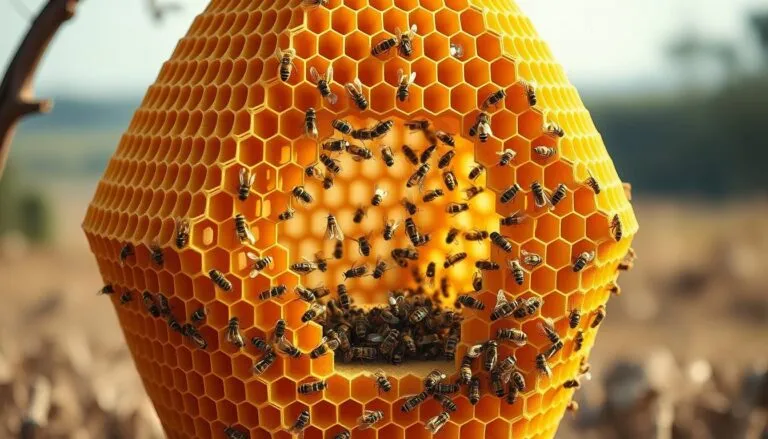
Repeated traffic into a small opening suggests a nest or hive inside walls, soffits, chimneys, or under decks. Long-standing colonies can cause more honey and comb that may leak and cause damage if removed poorly.
Red flags and safety notes
Tense, loud, or persistent head-butting and highly defensive behavior are signs of stressed or possibly Africanized colonies. Treat aggressive groups like a pest threat and avoid DIY fixes.
“Confirm species before action — photos and local beekeeper help can prevent needless harm.”
- Use quick ID cues: golden-brown and pollen-carrying vs. round and fuzzy vs. sleek and sharp.
- Distinguish temporary cluster from cavity nest to choose the correct removal approach.
- When unsure, document clear photos and contact local bee removal pros or beekeepers.
Safety First: Protective Gear, Site Control, and Sting Risk
Start with a safety plan: the right clothing, tools, and a secured perimeter make every operation safer.
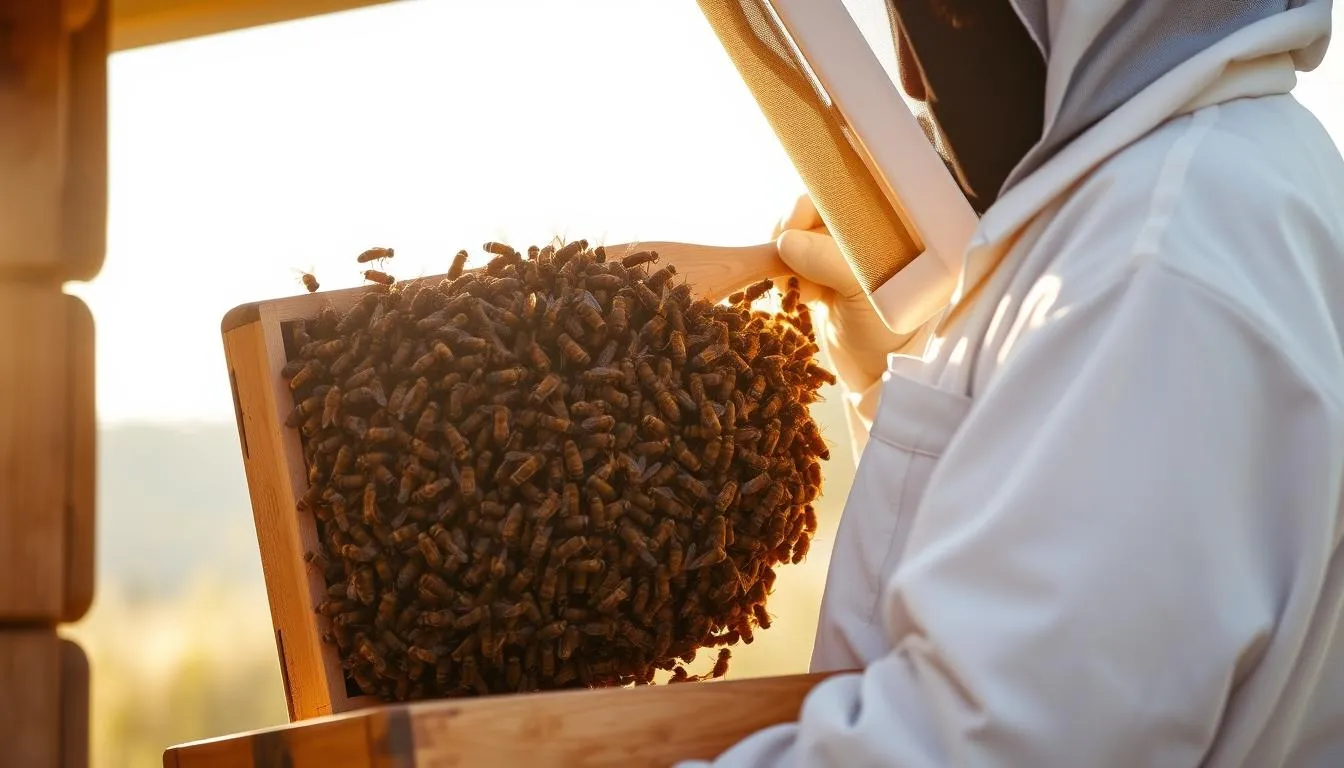
Proper equipment reduces risk. Wear a full suit or veil, thick PVC or beekeeper gloves, and closed footwear. Stage tools—smoker, bee brush, low‑pressure vacuum, and hive or nuc boxes—within easy reach so you can safely remove insects without delay.
Confirm ladder stability and safe roof access before you climb. Consider a helper or harness when working at height on a home to improve control and reduce falls.

Site control and people management
- Establish a clear perimeter and keep children and pets away from the active area until calm returns.
- Communicate with neighbors about timing so everyone knows to avoid the work zone.
- Work in mild temperatures (60–80°F) when possible; extremes stress colonies and complicate removal.
Sting response and when to call help
Use smoke sparingly to mask alarm pheromones without overheating the colony. Keep a first‑aid kit nearby and know signs of allergic reaction.
“If behavior becomes unpredictable, pause and bring in professionals—safety and proper control are worth the call.”
| Item | Purpose | Recommendation |
|---|---|---|
| Full suit / veil | Personal protection | Thick fabric, sealed cuffs |
| Gloves | Prevent stings to hands | PVC or leather beekeeping gloves |
| Low‑pressure vacuum | Gentle collection | Use soft intake and short bursts |
| Smoker & brush | Calm and move insects | Use sparingly; avoid overheating |
| Stable ladder | Safe access | Have a spotter and harness if needed |
For detailed safety around wax and structural work, see wax extraction safety. When risk rises, contact trained professionals or licensed pest control to safely remove colonies and protect your home.
Bee Rescue Techniques: Step‑by‑Step Humane Relocation
A calm, organized approach keeps everyone safe and improves the chance the colony will stay together after transfer.
Best timing: For docile honey bee clusters, work at dawn or dusk to retain most flyers. For hot or highly defensive groups, midday often lowers on‑site numbers and reduces risk.
Using smoke: Light the smoker properly and give short puffs at the entrance and over the beard. Smoke masks alarm pheromones and calms insects without overheating them.
Collecting a cluster: Brush or gently shake a hanging swarm into a ventilated box. Leave the entrance open so scouts can return, then seal and move after dark.
Vacuuming and transfer: Use a low‑pressure bee vac and proper equipment to protect fragile bees. Transfer quickly into frames in a hive or nuc so they can settle and orient.
“Prioritize finding the queen — she speeds regrouping and steadies the colony.”
- Watch for the queen and secure her in a queen clip or between frames.
- Keep water and a damp cloth nearby for cooling the smoker and wiping sticky honey.
- Work from the edges inward to avoid crushing and to guide bees toward the hive entrance.
If you can’t locate the queen or complications arise, pause and call professionals with field experience. After capture, move the hive at least 3 miles to prevent returning scouts and set it level with morning sun and good ventilation.
For seasonal follow‑up and care after a transfer, see seasonal beekeeping tasks to plan feeding and checks.
Removing Bees from Structures Without Causing Damage
Locate a hidden hive by watching flight lines, then confirm the footprint with thermal imaging and simple taps.

Locating the hive
Track flight lines to find the nest entrance on walls and eaves. Use a thermal camera to see the hive footprint through cavities.
Confirm hotspots by tapping and listening or by making a small probe hole to check activity.
Access with minimal visible impact
Plan access through soffits or rooflines so repairs stay discreet. Avoid cutting directly under the hive.
Remove panels along seams and roof joins for neat, repairable cuts that limit long‑term damage to property.
Comb removal and segregation
Work from the outer edge inward. Separate brood comb from honey comb as you go.
Keep light, clean comb for reuse. Discard dark, degraded sections to reduce odor and rot risk.
What not to do
Do not kill a colony in place. Pesticides can turn honey and wax into hazardous waste and cause leaking, fermenting honey, and persistent odors.
“Killing in place often creates bigger problems than the original nest.”
- Transfer bees promptly from a vacuum into a hive box to avoid overheating.
- Collect honey carefully to prevent pooled spills inside cavities.
- Seal temporary holes after cleanup, but wait on final sealing until activity stops.
- When unsure, call professionals to coordinate access, removal, and repairs.
| Step | Goal | Tip |
|---|---|---|
| Locate | Outline hive behind walls | Track flight lines, use thermal camera |
| Access | Open with minimal damage | Cut along seams in soffits or rooflines |
| Segregate comb | Save usable honey and comb | Keep light comb, discard dark comb |
| Cleanup | Prevent leaks and odors | Collect honey, ventilate, delay final sealing |
For step‑by‑step guidance on humane hive removal and follow‑up, see our ultimate guide to removal.
Aftercare and Prevention: Cleanouts, Repairs, and Bee‑Proofing
Proper aftercare seals the win: clean the site, remove attractants, and block future nesting.
Scrape every trace of wax and propolis from cavities. Rinse the area with water and a mild vinegar solution. Repaint interiors to mask lingering honey scent that draws scouts and can lead to new infestations.
Seal pencil‑sized holes and larger gaps with exterior‑grade caulk. Add 6‑mesh or finer screening and fill voids with expanding foam or insulation to stop nesting in wall cavities and eaves.
Walk the whole property and check around the old entrance for other openings. Bees readily exploit nearby voids, so a full perimeter check protects your home and property.
Relocation and follow‑up
Move the hive 3+ miles to prevent foragers from returning. Set it facing east, about two feet off the ground, and provide clean water nearby for colony health.
Feed with a 1:1 sugar syrup by weight; only heat enough to dissolve sugar—never boil. Check the colony a few days later for eggs to confirm a laying queen.
“A tidy cleanout and timely follow‑up cut re‑infestation risk and save repair costs.”
- Book professionals or experienced beekeepers for repair and bee‑proofing services when gaps are complex.
- Keep a short follow‑up schedule to ensure bees removed didn’t leave stragglers and seals hold.
- Save job notes and photos to improve future control and any warranty work on your home.
| Task | Goal | Recommendation |
|---|---|---|
| Clean cavity | Remove honey and scent | Scrape wax, rinse with vinegar, repaint |
| Seal openings | Prevent nesting | Caulk, 6‑mesh screen, foam/insulation |
| Relocate hive | Stop forager return | Move 3+ miles; place east, 2 ft off ground |
| Post‑care checks | Confirm colony health | Feed 1:1 syrup; look for eggs and steady brood |
Conclusion
Finish with practical follow‑up: clean, seal, and check so the colony and your home stay safe.
Humane relocation protects pollinators and prevents sticky honey leaks, odors, and structural harm. After a successful transfer, move the hive at least 3 miles and clean cavities with water before repainting.
Call local beekeepers or professionals if any step feels uncertain. They can coordinate access, help remove bees safely, and advise on pest control or repairs.
Seal pencil‑sized entries with 6‑mesh screen and foam to keep nests from returning. Keep an eye out for a few stragglers; they usually disperse as scent fades.
With calm handling, correct use of smoke, and smart closures, you can complete removal and aftercare that keeps people safe and avoids unnecessary harm to the colony.
FAQ
How do I tell a swarm cluster from an established nest in my wall or soffit?
A swarm cluster looks like a hanging mass of insects on a branch or under an eave and moves as a group. An established nest has steady flight lines to and from a specific hole in a wall, soffit, chimney, or roof. Use visual cues at dawn or dusk when activity slows to trace where insects enter and exit.
When is the best time of day to attempt a humane relocation?
Early morning and late evening are usually best for calmer colonies because foragers are at the hive. For unusually hot or aggressive groups, midmorning after warming can work. Always prioritize safety and, if unsure, call a professional beekeeper or pest control specialist with experience in live removal.
What protective gear and tools are essential for safe handling?
Wear a full protective suit with a veil, thick gloves, and closed-toe boots. Carry a smoker, a soft bee brush, a low-pressure bee vacuum, and wooden or cardboard nuc boxes. Ladders and proper lighting help when working on roofs or soffits. Keep children and pets well away from the work area.
How do I safely use smoke to calm a colony without harming them?
Use gentle, short puffs of cool smoke to mask alarm pheromones and encourage bees to gorge on honey. Avoid heavy, continuous smoke, which stresses the colony. Light a smoker with natural materials like burlap or untreated wood and keep it manageable so you only calm, not smother, the insects.
Can I vacuum a nest out of a wall without damaging the structure?
Yes, but only with a purpose-built low-pressure bee vacuum and careful technique. Create a small access point, use the vacuum to remove bees gently, and transfer them into a prepared hive or nuc. Larger comb removal requires cutting into the cavity and is best done by experienced technicians to minimize structural damage.
What should I do if I can’t find the queen during removal?
Locate and secure the queen to encourage the majority of the colony to follow. If you can’t find her, collect as many workers and brood as possible and set up a lure frame with brood and honey in a nuc. Follow up with frequent checks; honey-producing and brood frames help reunite the colony over time.
How do I identify wasps, yellowjackets, or hornets compared to honey-producing insects?
Honey-producing insects like Apis mellifera have a uniform, fuzzy appearance and steady flight patterns near flowers and hives. Bumblebees are rounder and slower. Yellowjackets and hornets are sleeker, more aggressive, and often nest in ground cavities or wall voids. Visual cues and behavior—nesting habits and flight paths—help distinguish them.
Are there signs that indicate an unusually defensive or Africanized colony?
Aggressive chasing, rapid alarm responses to small disturbances, and the colony defending a wide perimeter can be red flags. Africanized groups may show extreme defensiveness and mass attacks. If you observe this behavior, keep a safe distance and contact professionals who have experience with defensive colonies and appropriate protective gear.
What are the risks of killing a colony in place versus removing and relocating?
Killing insects in place can leave wax, honey, and brood in the structure, leading to leaks, foul odors, mold, and pest infestations. It also removes valuable pollinators from the environment. Removal and proper cleanout prevent structural damage and reduce the chance of re-infestation.
How do professionals locate a hidden nest inside walls or chimneys?
Experts use flight lines, listen for activity by tapping, and deploy thermal cameras or endoscopes to pinpoint cavities. Observing when insects return and marking the exact entry helps guide minimally invasive access, such as cutting a small inspection hole in a soffit or roofline.
What should be done after removing comb and bees to prevent re‑infestation?
Scrape out wax and propolis, clean and deodorize the cavity, and repaint or seal interior surfaces. Seal all pencil-sized holes and gaps with screening, foam, or caulk. Install permanent screens over vents and inspect periodically to prevent future nesting.
Can relocated hives be moved any distance, and what follow-up is necessary?
Relocated hives should be moved at least three miles to prevent foragers from returning to the original site. After moving, feed the colony if needed and check frames over several weeks for brood, food stores, and queen presence. Follow-up inspections ensure the colony establishes successfully.
What not to do if you find nesting in your home right now?
Don’t seal entry holes, pour pesticides into cavities, or try to burn out a nest. These actions can push insects deeper, cause more damage, and create hazardous waste. Avoid swatting or disturbing the colony. Instead, keep people and pets away and contact a beekeeper or licensed pest control service that handles live removal.